Tab Filters (or Item Type Filters) are used to limit specific content from being displayed to members of a particular Role. A Tab Filter is a collection of criteria (created similarly to Advanced Search queries) configured for a specific Item Tab. When enabled for a Role, any records matching the Tab Filter criteria are not visible to members of that Role.
Creating Tab Filters
-
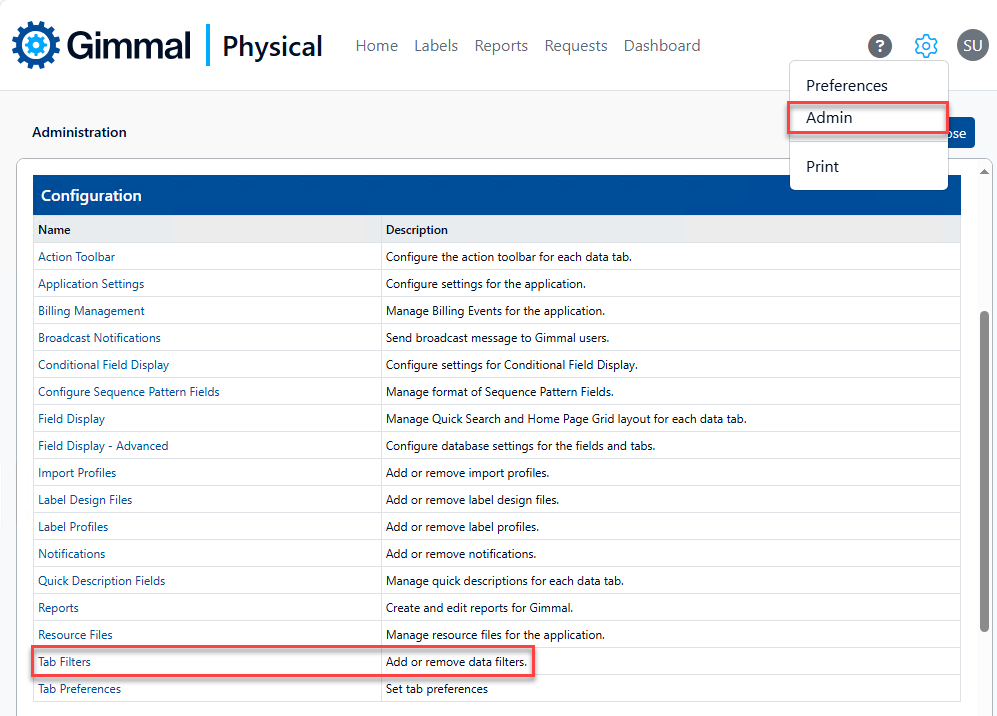
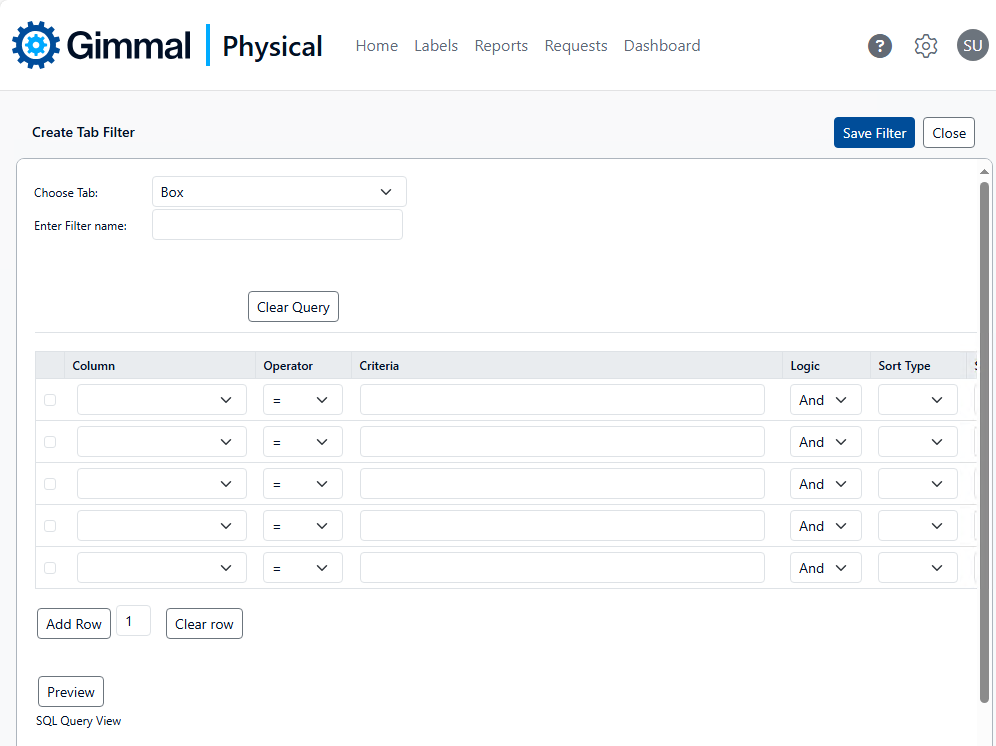
Browse to the Admin page via the gear icon. Then click Tab Filters in the Configuration section. This displays the Configure Tab Filters page.
-
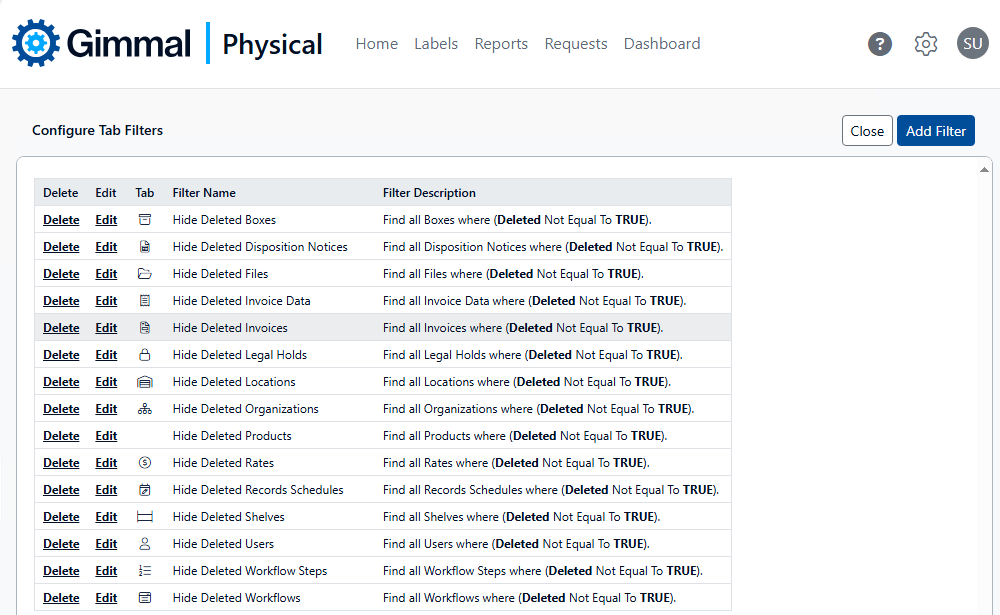
Click Add Filter to display the Create Tab Filter page. This page has the following options:
-
Choose Tab: Select the tab this filter is for from the drop-down choices.
-
Enter Filter name: Enter a meaningful name for this filter.
-
Clear Query: Remove all entries from the Query Grid to start over.
-
Query Grid: Use the Query Grid to provide the criteria of this Tab Filter.
-
Add Row: Used if additional rows are needed, for more complex queries, for example.
-
Clear Row: Used to clear selected rows (i.e. checked boxes).
-
Preview: The Preview button returns the number of records from the selected Tab that match the criteria provided so far.
-
Close: Return to the Configure Tab Filters page.
-
Save Filter: Saves the configured Tab Filter.
-
Enabling/Disabling Tab Filters
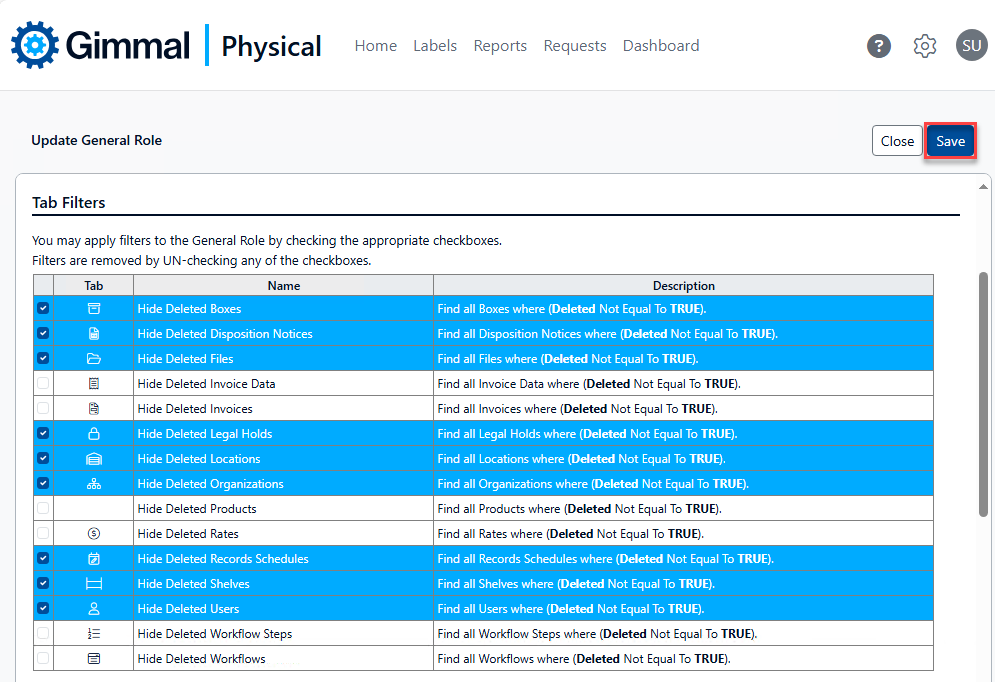
Tab Filters are enabled/disabled per Role in the application. To enable or disable a Tab Filter for a Role:
-
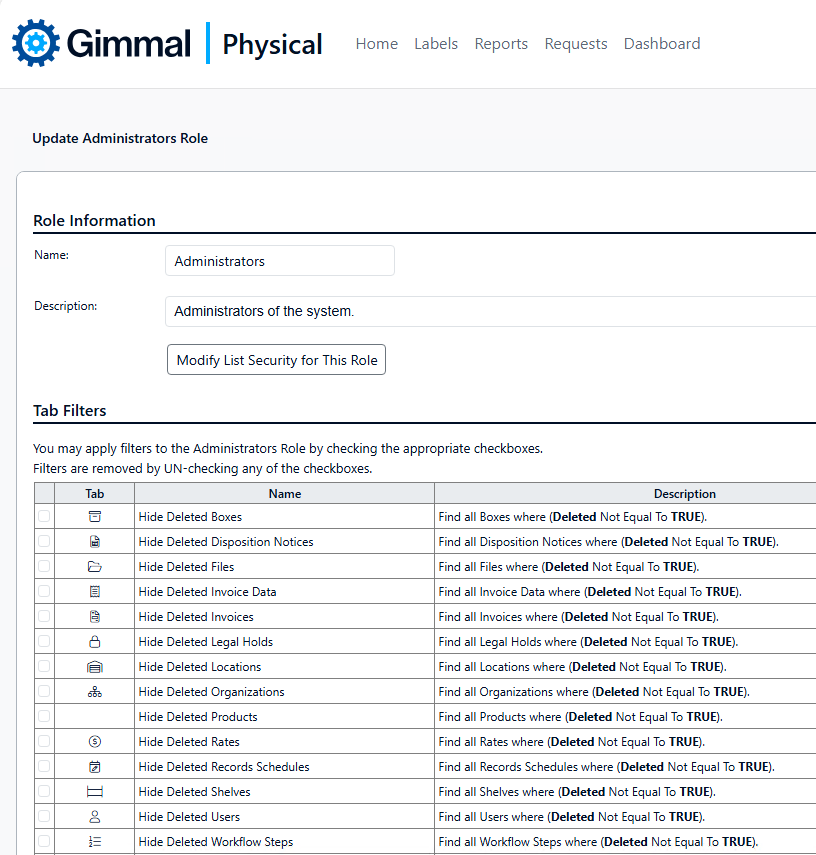
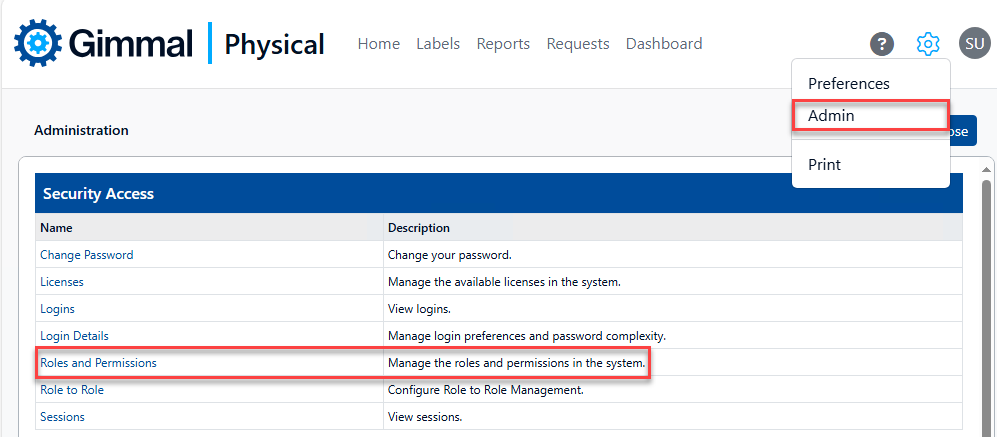
Browse to the Admin page via the gear icon. Then click Roles and Permissions in the Security Access section. This displays the Manage Roles page.

-
Click the Edit link in the Role Permissions column for the role you would like to apply the filer to. The Update Role page is displayed.
-
In the Tab Filters section, check the box next to the filter you wish to enable for this Role. Similarly, un-check the box next to the filter if you wish to remove the filter for this Role.
-
Click Save after enabling/disabling the Tab Filters.