In additional to Organizational Security (i.e. Users can only see content associated to the same Organizations as they are), security can also be configured based on the User’s role. To create a new Role in the application, perform the following steps:
-
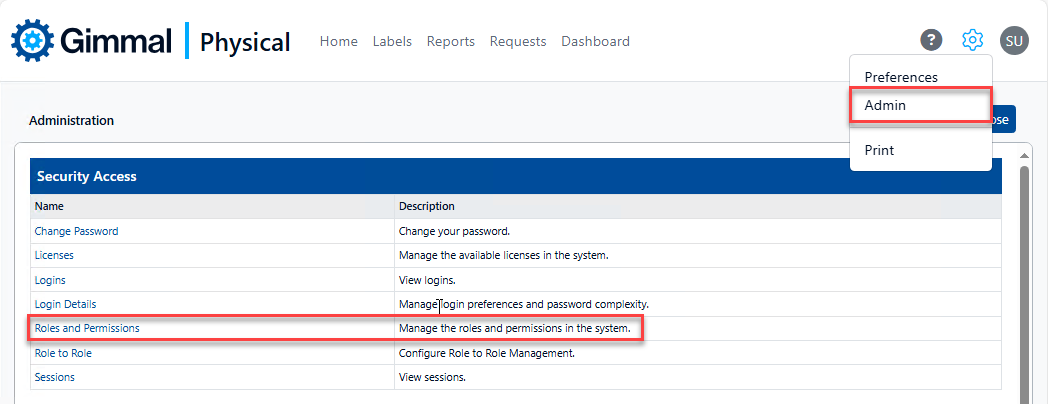
Browse to the Admin page via the gear icon, then click Roles and Permissions in the Security Access section. This displays the Manage Roles page.
-
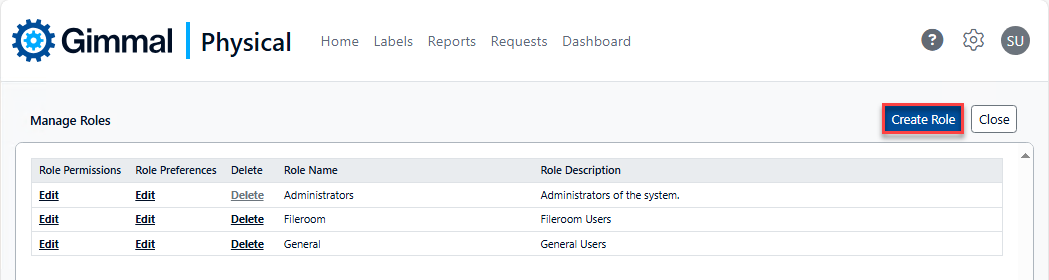
Click Create Role in the top right corner to display the Create A New Role page.

-
There are several options on this page:
-
Name: Name of the new role.
-
Email Address: Notifications sent to this role will be sent to this e-mail address(optional).
-
Description: Description of the new role, displayed on the Manage Roles page (optional).
-
Select Template Role: The newly created role will initially be a copy of the selected role. If no template role is selected, only very basic permissions are enabled for the new role.
-
Select Roles that can manage this role: Check the box(es) for any role(s) that can manage this new role (i.e. configured permissions, preferences, etc.). This can be changed via Role to Role Management.
-
Close: Click to return to the Manage Roles page.
-
Save: Click to create the new role.
-
-
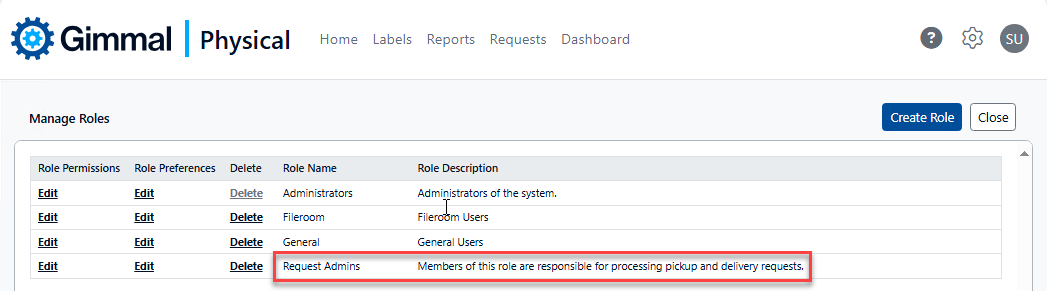
After entering the desired settings and clicking Save, the new role is displayed on the Manage Roles page. You can now adjust the role’s permissions and any role scoped preferences.