
Inbox Options
Overview
You have created Lifecycles, associated them with Record Classes, and created Event Occurrences. Now, you are ready to approve items that are waiting at the end of the retention period of a specific Lifecycle Phase, typically known as disposition.
Gimmal Records supports two methods of approving items for disposition:
Modern Disposition is built for a continuous approval process. It uses the Inbox to approve and submit items to either move to the next phase or go through final disposition. All items available for your approval are shown in a single view. Details are below.
Batch Disposition can be enabled to categorize applicable records into groups known as ‘Batches’ based on pre-defined rules. Further details can be found in Batch Disposition for the End User.
Batch Disposition functionality must be enabled by an Administrator.
When Batch Disposition is enabled, Records not included in batches, but which are eligible for disposition, will appear in the Inbox.
Permissions for approvers in both Modern and Batch disposition are configured at the Records Class level.
Accessing the Inbox
Items in the Inbox are available if there are records specifically for you to approve:
You have been added to one of the Approval Groups for the Record Class of a record.
There are no Approval Groups for the Record Class of the records, and you are either a Global Records Manager or you are a Record Manager and you are not prevented from seeing the record.
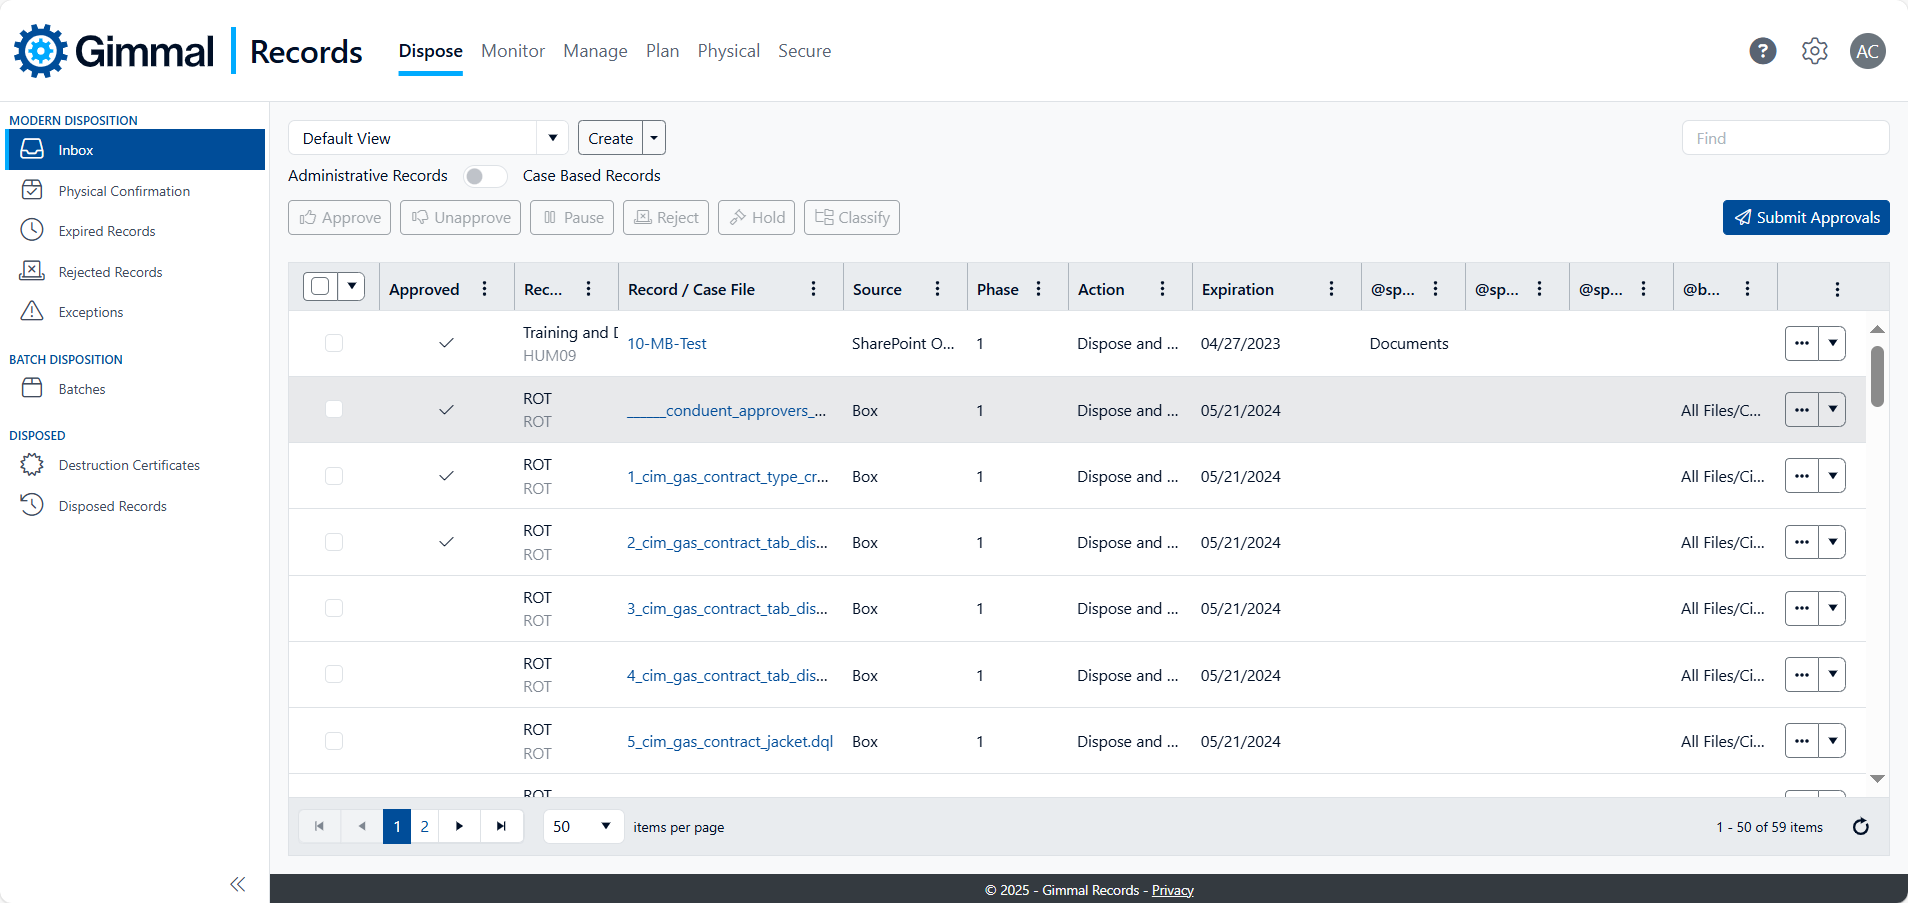
To access this section of the application, navigate to Dispose → Inbox.
Note: The navigation options in the left panel may vary based on permissions set up for your account.
Choosing View Type
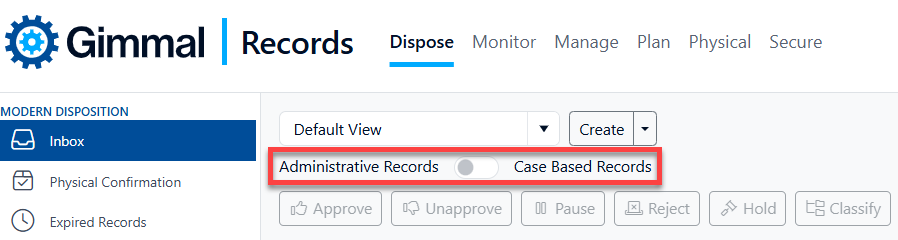
By default, the Inbox views show standard single item records known as Administrative records. Case Based Records can be shown by using the slider on the top left of the Inbox Screen.
Adding and Removing Columns
The visible columns shown in the various Inbox views can be changed by selecting the ellipsis to the right of any column header.
Turn the checkboxes on and off to make a column visible or to hide it in the current active view.
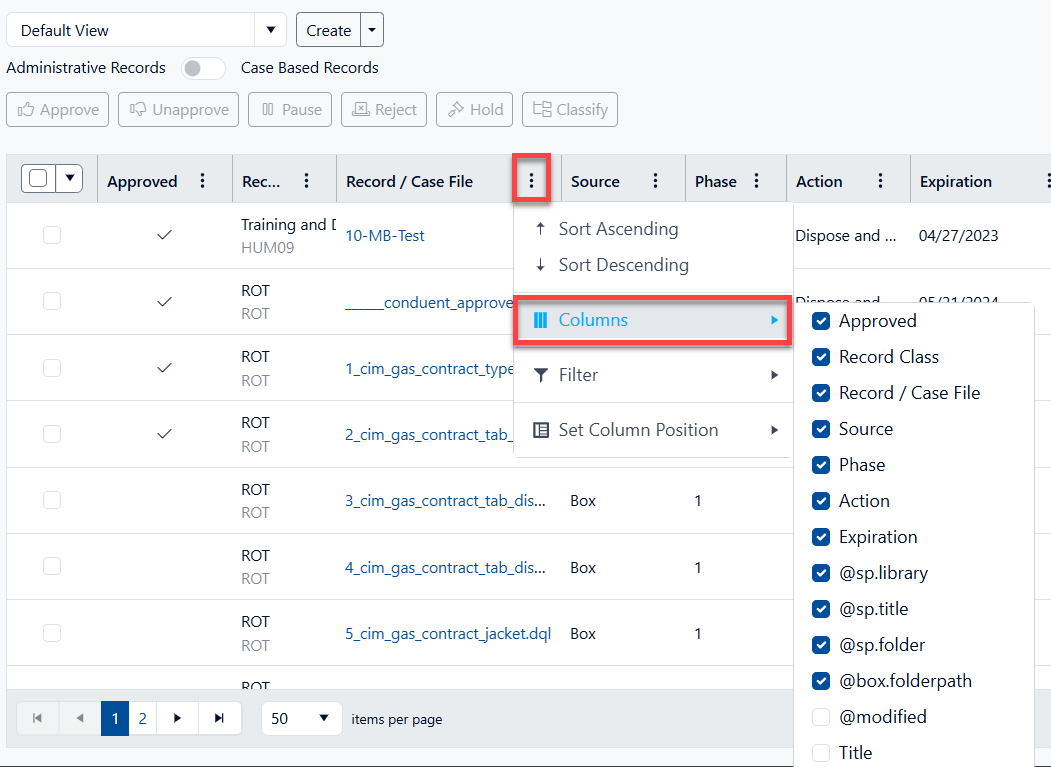
For information on how to make a new column available, view the (Cloud) Adding Columns to Your Inbox Views topic.
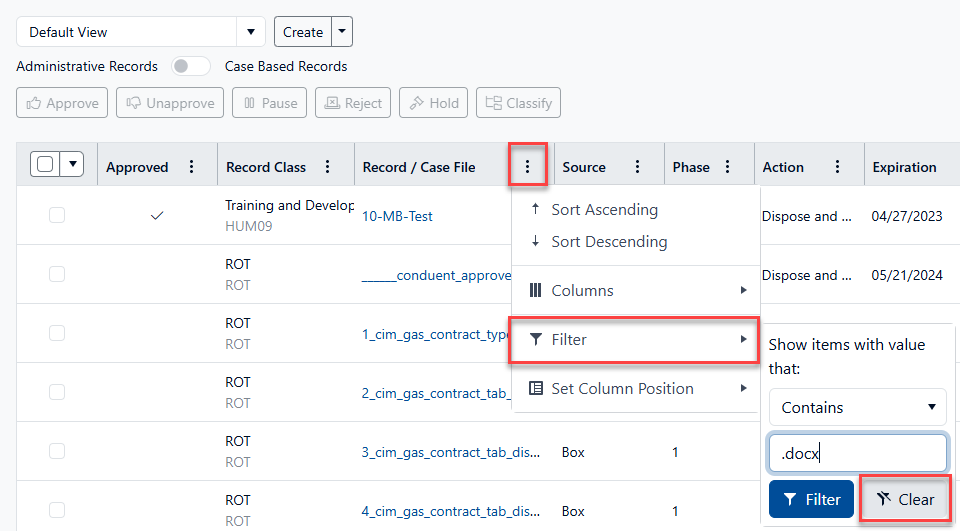
Filtering the Inbox
The Inbox can be filtered by any of the visible columns. To set a filter, select the ellipsis to the right in any column header, then choose the ‘Filter’ menu item. The filter options will be different depending on the data type of the specific column. Choose the drop-down box to choose between the various options available for the specified column. Enter the necessary values in the other fields, then select the Filter button to save the chosen filter for that column.
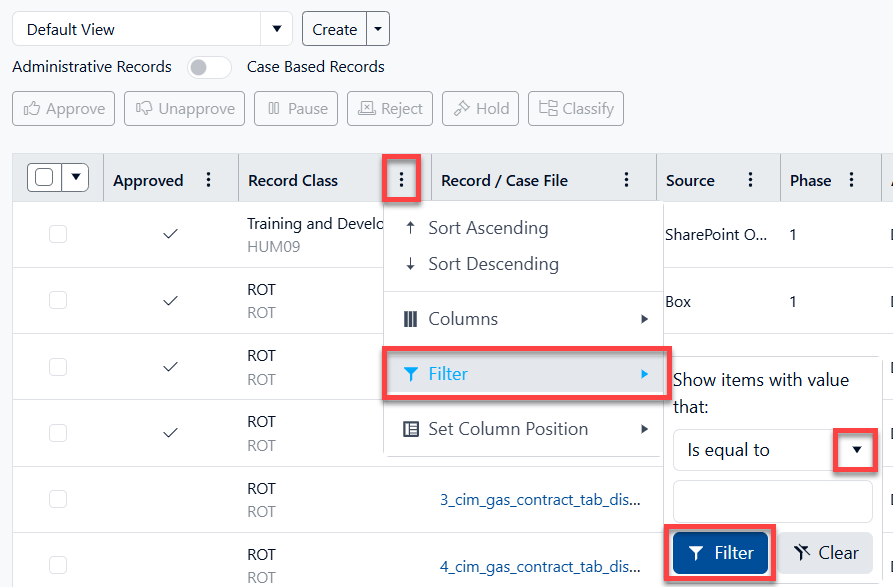
Extended fields that are not part of the default Inbox view can only be filtered as a text field.
Filters can be added to more than one column at a time. A column that is filtered will have the ellipses highlighted. In order to clear filters, you will need to remove the filter from each individual column by selecting the ellipses, choosing ‘Filter’ and then clicking the ‘Clear’ button.
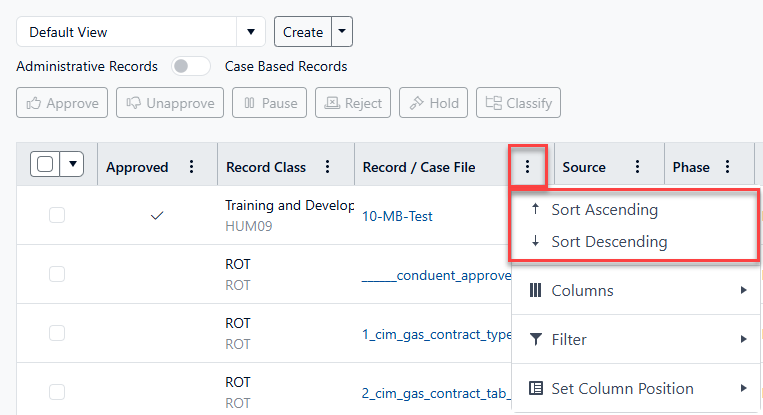
Sorting the Inbox
To sort the Inbox, select the ellipsis to the right the following column headers. Select whether you want to sort in ascending or descending order for that column.
A column can also be sorted by clicking on the column header. The first click sorts Ascending, the second will sort Descending and a third click will remove the sort from the column.
Saving and Using Views
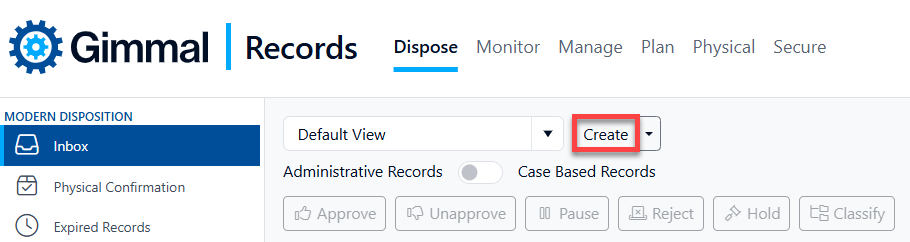
There are two types of possible views on the Inbox. Record Class views and personal views. Setting up Record Class views are covered in the Inbox View topic. Personal views are created by clicking the Create button next to the Inbox views list.
All your settings related to the current layout of the Inbox are saved including visible columns, column order, column width, filters, and any sorting.
Using a View
To use a saved view, simply select it from the list of views.
Saving existing View
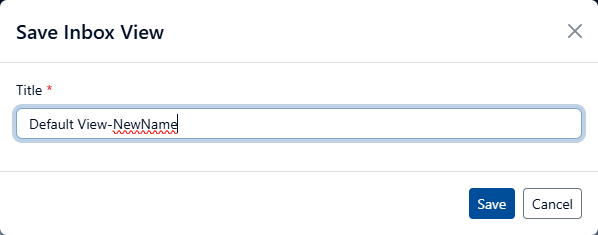
Existing views, including the Default view, can be overwritten by selecting the Save menu item on the dropdown next to Create.
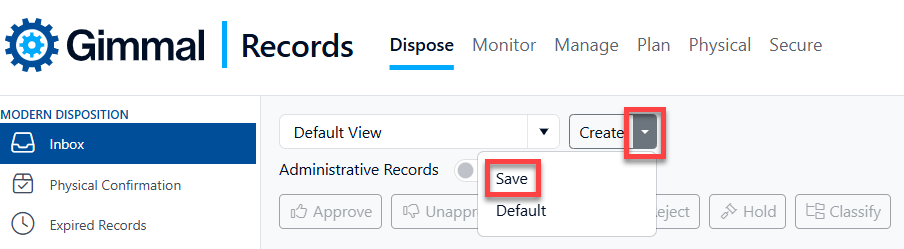
After selecting Save a window will be displayed allowing you to change the name of the view before saving it.
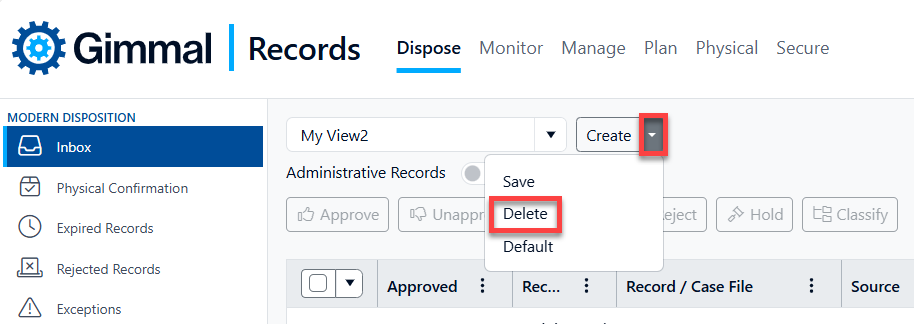
Deleting a View
Only personal views can be deleted. To delete a view, ensure a personal view is currently selected, click the dropdown menu on the right of the Create button, and select Delete.
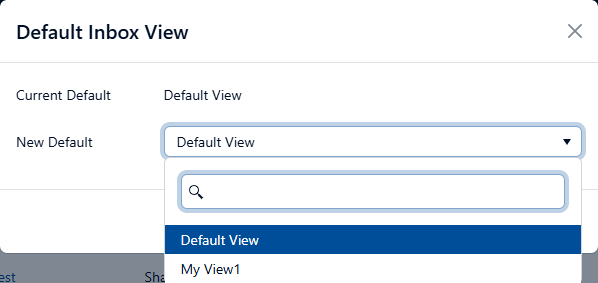
Changing the Default View
The first time you use the Inbox, a view called Default will be the only view (not including the Inbox Views setup for Record Classes) available. If more than one view exists you can change the view that is displayed when you open the Inbox. To do this select the dropdown next to Create, and then select Default.

Select the view you would like to use as default and then click Save.
Disposition Actions
There are several actions that can be taken on records in the Inbox. These actions can be executed on one record at a time, or on any number of selected records. Each action is detailed in the following topics:
Selecting Records
You can select individual or multiple records by:
Using the leftmost checkbox to select one or more records
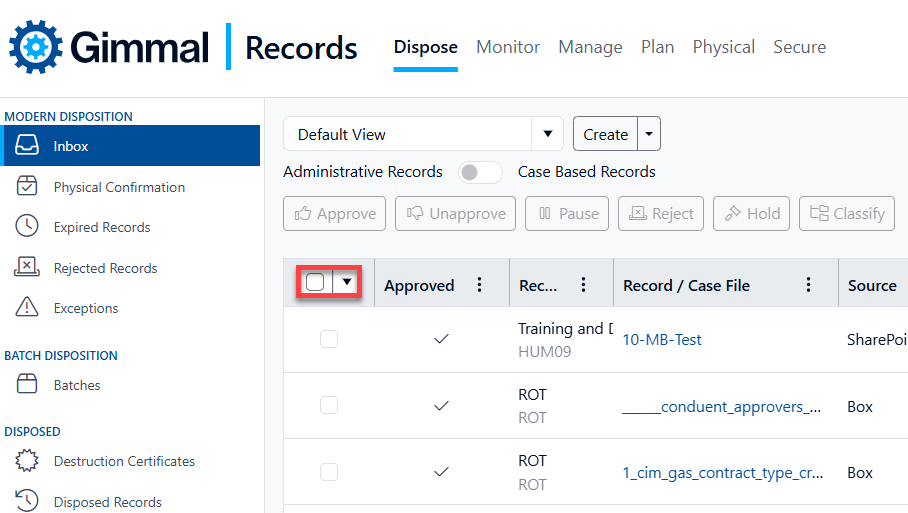
Use the checkbox control to select records on the current page, or the entire set of records on all pages. To select records on the current page, select the checkbox on the leftmost column header. This selection will apply to the current filtered view.
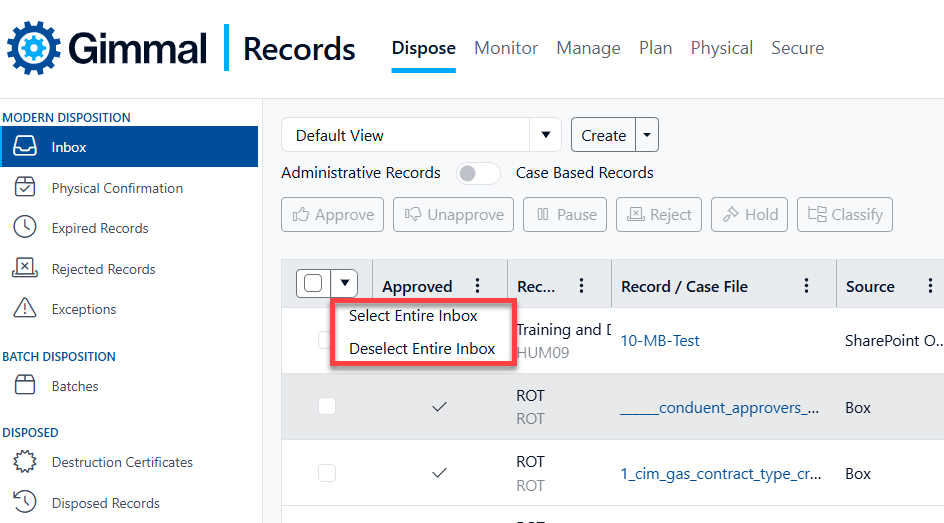
Records on all pages except the current page will also get deselected if you deselect any one item after selecting the entire Inbox.