
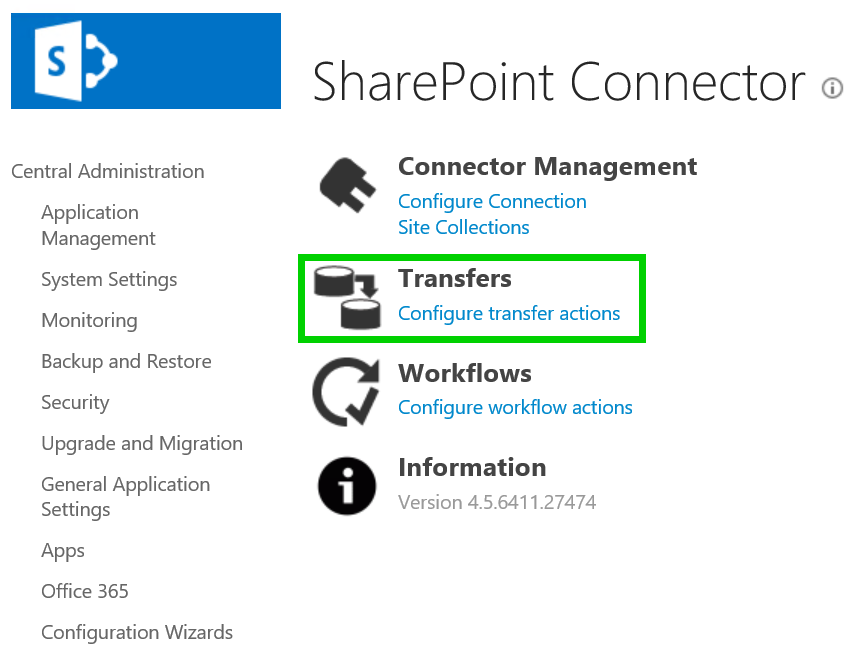
Configuring Transfer Actions
When a lifecycle in Records Management contains a Transfer Action, the Connector requires that an Administrator configure the repository-specific destination of the transfer for items contained within the repository. This tells the Connector where to put the files when it sees that it needs to execute a Transfer Action for an item. This step is optional unless you have configured a Transfer Action (Transfer or Dispose and Transfer) in your File Plan. To set up a transfer destination, perform the following steps:
-
Open SharePoint Central Administration.
-
From the Application Management section, click Manage Service Applications > Gimmal SharePoint Connector.
-
On the SharePoint Connector page, click Configure transfer actions from the Transfers section.
-
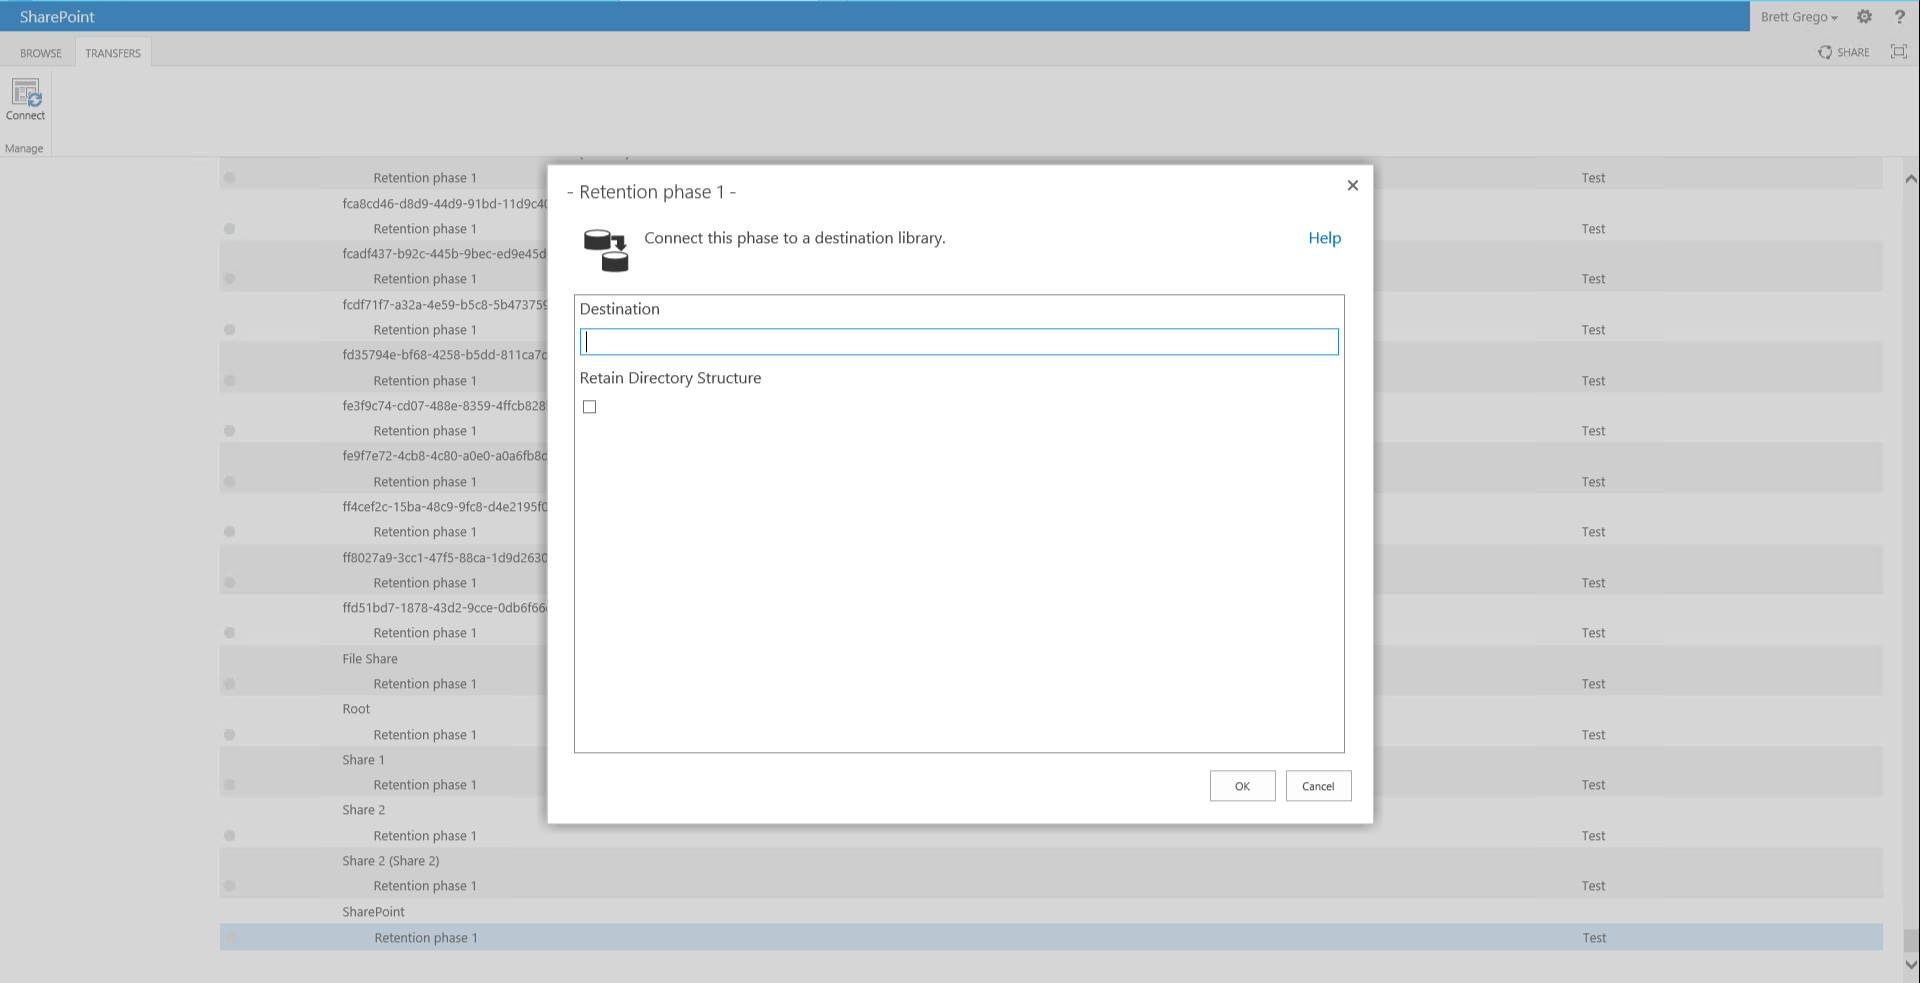
Select the Retention Phase for the Record Class in which you would like to configure the transfer destination.
-
Click Connect from the ribbon.
-
Provide the destination URL for Site Collection location in SharePoint.
-
Choose whether to "Retain Directory Structure".
-
Click OK
When configuring a transfer destination, in the rare circumstance that a Drop-Off Library is used as the destination and there are no matching Routing Rules for the document, the document will remain in the Drop-Off Library but will only be visible to the Farm Account due to the way that Drop-Off Libraries were designed.
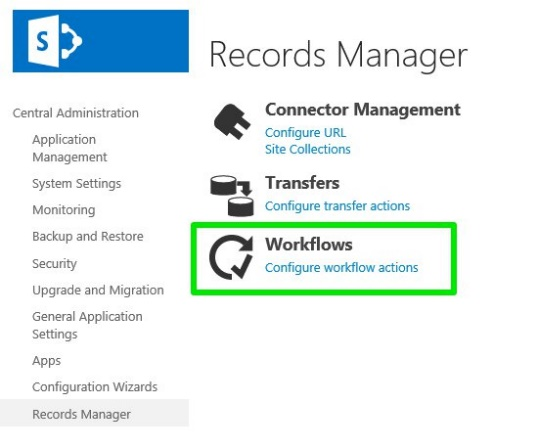
Configuring Workflow Actions
When a lifecycle in Records Management contains a Workflow Action, the Connector requires that an Administrator configure the repository-specific Workflow to initiate items contained within the repository. This tells the Connector which Workflow to initiate for files when it sees that it needs to execute a Workflow Action for an item.
Workflow Actions work in SharePoint on-premises only; they are not supported in SharePoint Online.
This step is optional unless you have configured a Workflow Action in your File Plan. To set up a Workflow to initiate, perform the following steps:
-
Open SharePoint Central Administration.
-
Select the Gimmal Records Management menu option.
-
Select Configure Workflow Actions from the Workflows section.
-
Select the Retention Phase for the Record Class in which you would like to configure the Workflow to initiate.
-
Click Connect from the Ribbon.
-
Choose the appropriate Workflow Association Type.
-
Enter the name of your SharePoint Workflow Association.
-
Click OK
To start a Workflow Action, the Connector must be able to find the SharePoint Workflow Association as configured. For example, if a SharePoint Web’s Workflow Association Collection does not have a Workflow Association matching the configured name, then no Workflow Action can be started.
Workflow Association Types
|
Association Type |
Description |
|---|---|
|
Web |
Workflow Name should refer to a Workflow associated with the File’s parent Web |
|
List |
Workflow Name should refer to a Workflow associated with the File’s parent Library |
|
Content Type |
Workflow Name should refer to a Workflow associated with the File’s assigned Content Type |
|
Custom |
Allows a custom Workflow Initiator to be selected. Workflow Name should refer to a Workflow that the Custom Workflow initiator understands |