
For this process to work correctly, Retention and Disposition features need to be enabled as part of the configuration when Gimmal Physical is enabled.
This guide focuses on the process for deleting records associated with Records Schedules with a Disposition Action of ‘Destroy’. Records associated with a Records Schedule with Disposition Action of ‘Permanent’ or on Legal Hold will never enter into a Disposition Batch.
-
To prevent Records associated with a Records Schedule with Disposition Action of ‘Transfer’ from entering the disposition process, the Schedule itself must be placed on Legal Hold. This will prevent the associated records from entering the disposition process.
-
This document refers to Gimmal Physical version 4.0 and above only. For questions on earlier versions, please at contact support or review the Legacy Help Disposition Guide.
Please review the articles describing disposition below. In the examples below, Boxes will be used.
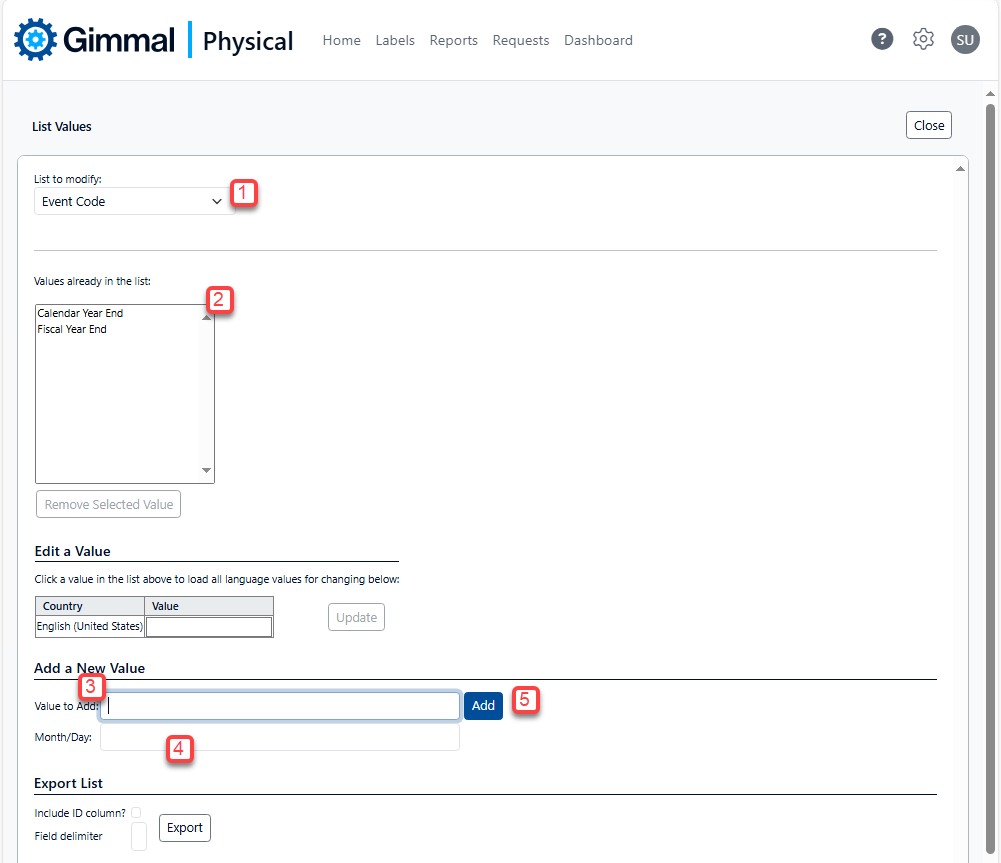
Adding List Values
Certain Event Codes require additional information which is stored as part of the list value entry. List Values are managed in Admin > Data > List Values.
-
To add values to the Event Code, select the appropriate ‘Event Code’ from the "List to modify" drop-down box.
-
To modify an existing value, select it from the ‘Values already in the list’ control.
-
Type the name of the value you wish to add in the 'Value to Add' text box.
-
If the Event Code value has an associated Month and Day, enter them into the Month/Day text column in a MM/DD format (where MM = the static month of the event and DD = the specific static day of the month for the event)
-
Finally, click the 'Add' button or press the enter key.
Questions
Please contact support with any questions.