
This topic has an interactive tutorial. To view this tutorial, click here.
There are many ways to create and update new records in Gimmal Physical. This article covers creating and updating individual records within the user interface. Before beginning, it may be helpful to review Preferences to help make data entry more efficient.
Please Note: If you do not see options to create or update data, please contact your administrator to ensure you have the correct permissions.
Creating New Records
Follow the steps below to create a new item in the Gimmal Physical User Interface:
-
Select the appropriate data tab from the Home Page. In our example, we will use Boxes.
-
Click the ‘Create’ button. This will open a ‘Create Box’ page.
Note: Action button captions and locations may vary based on configuration.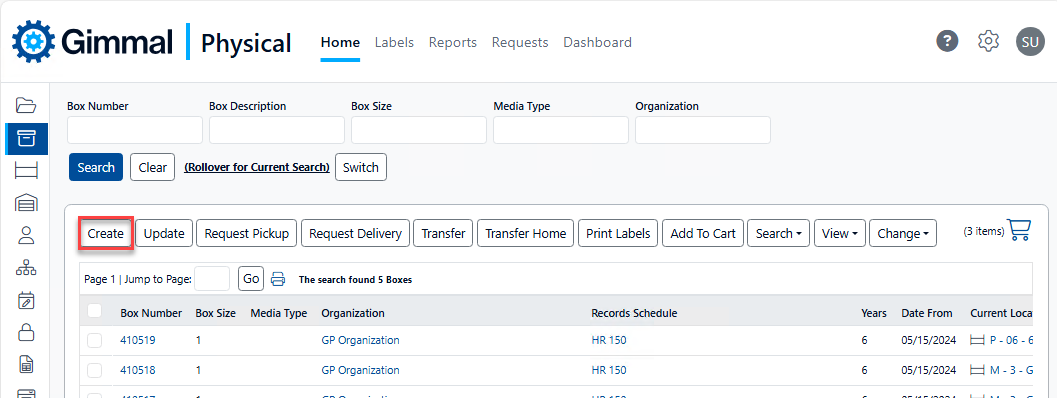
-
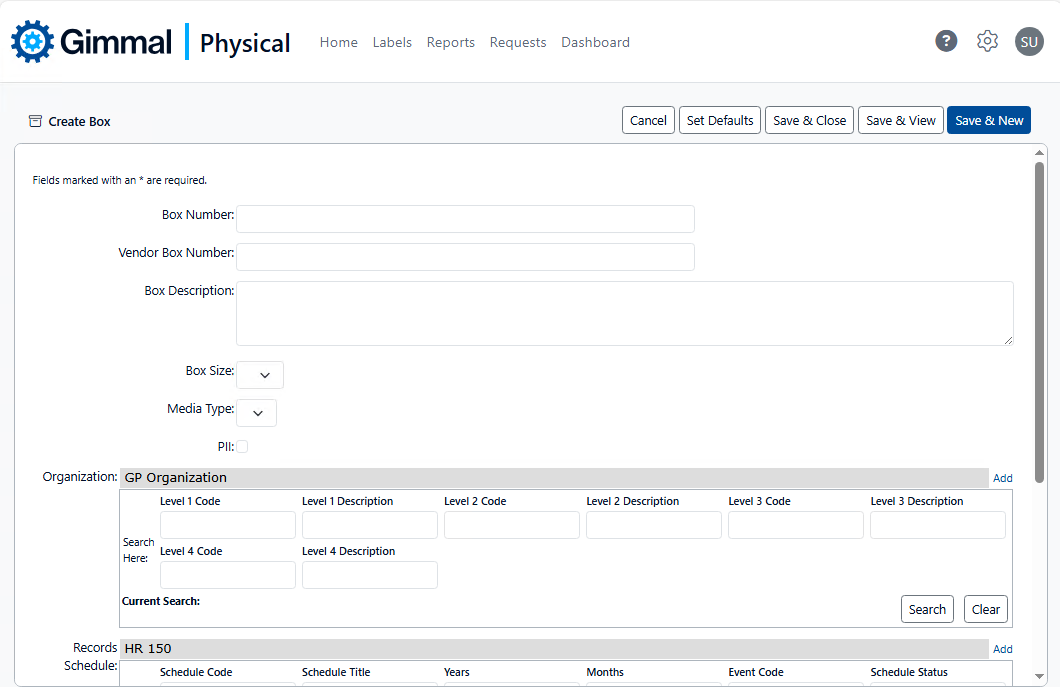
The Create Items page (in our example, ‘Create Box') has several useful buttons at the top of the form:
-
Cancel closes the form without saving changes.
-
Set Defaults saves the currently entered values as defaults for any new record of the same type.
-
Save & Close will save all fields and close the form, returning to the home page.
-
Save & View will save all fields and go to the View page for the item. This is useful if your next step is to take action on this item such as transferring it to another location or printing a label
-
Save & New will save all fields for this item and remain on the page to create a new item. This option also allows for the use of use of Carry Forward (configurable by your system administrators).
-
-
Fill in the necessary information by entering values on the Create Boxes page. There are several types of fields you may encounter on any creation screen:
-
Required fields can be of any type, but are delineated by an asterisk, i.e. '*'. You will not be able to save the record without populating data into these fields
-
Text fields like Box Description in our example take any text as an input. Some of these fields are restricted by size, others allow longer entries.
-
Numeric fields like Box Number in our example accept only numeric input.
-
Date Fields are restricted to date entries only.
Note: The format of the date entered may be controlled in the settings of the application. Please check with your administrator for the correct format in use for your organization. -
Range Fields are fields that accept entries for a start and end value (e.g. ‘24-45' or 'Apple-Orange’). These fields must have a delimiter. The benefit of these fields is that that values between the ranges can be found in an appropriately configured search.
-
Check Box fields allow users to click the field for a ‘Yes’ or otherwise positive value, or leave the value unchecked to indicate a ‘No’ or negative value for that field option.
-
Simple List shows as drop downs that contain specific values so that a single value can be selected from the list. Fields like Status or Box Size tend to be simple list controls.
-
Large List Controls have many entries from which a user can select one, or in some cases multiple options. These controls typically have a search function that allows users to filter the available values.

-
By default*, no values are listed. Clicking the ‘Search’ button (A) will show the list of available values. Selecting a record will update the field value. This, in turn, may filter additional controls.
*Note; Configured security may limit the available values to one item. In this case, the single value is listed by default.
-
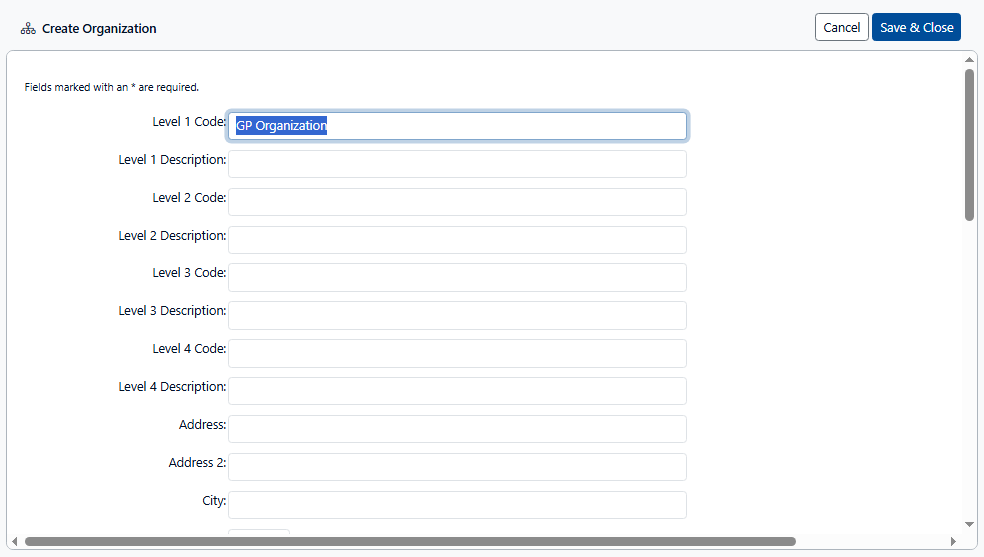
If the option you are seeking is not in the list, and your security profile allows it, you may want to add a value to the list. The ‘Add’ button (B) allows you to do this by opening a creation screen for the data type shown in the field (in this example, Organization).
-
-
-
Click the appropriate button to save your changes.
-
If any errors occur, a warning notification will be at the top of the screen.
-
Errors may also be listed at the field level if the entered values fail to pass a configured validation test.
-
Helpful Tips:
-
Users can turn on the preference for ‘Confirmation when creating records’ under ‘Application’ Preferences. That will show an alert box of successful item creation after creating every item in Gimmal Physical.
-
To quickly find the value in any drop down list, you can type some or all of the value.
-
Other methods of record creation include:
-
Additional options can be configured by system administrators to make the process of creating data more efficient:
-
Carry Forward fields
-
Updating Records
-
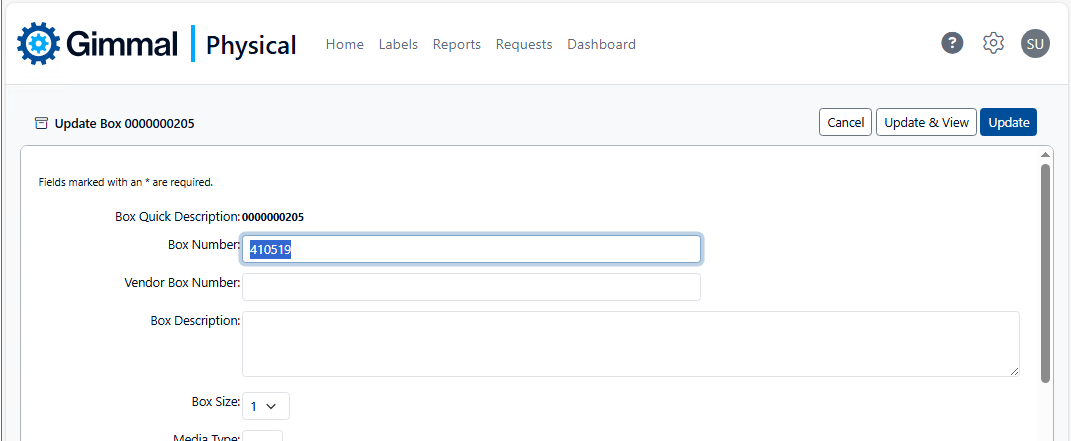
To update a record, you must first select the item you wish to update, then click the ‘Update’ button from the Action Menu.
Note: You can use the various Search options to help you find the record you need to update. Bulk Update or Search & Replace can be used to alter multiple records at one time.
-
The ‘Update’ page will open. It will be titled with the description of the item you selected.
-
Change the fields that need to be updated.
Note: The fields that are required for that item type will still be required on the update page. Required fields will be marked with an asterisk ‘*’. Your application may also be configured to require a reason for change. If this is the case, you must supply text for the ‘Reason for Change’ field. -
Choose the button to manage your changes
-
Update & View will save the changes and keep you in the view mode for the page. This is helpful if you need to perform an action (e.g. transfer) on the item after it has been updated.
-
Update will save your changes and take you back to the home page.
-
Cancel will return to the home page without saving your changes.
-
Helpful Tip:
To update multiple records at once, use the Bulk Update functionality.