
This topic has an interactive tutorial. To view this tutorial, click here.
There are several methods for transferring records via the Gimmal Physical interface.
Use the following option to transfer records in Gimmal Physical:
-
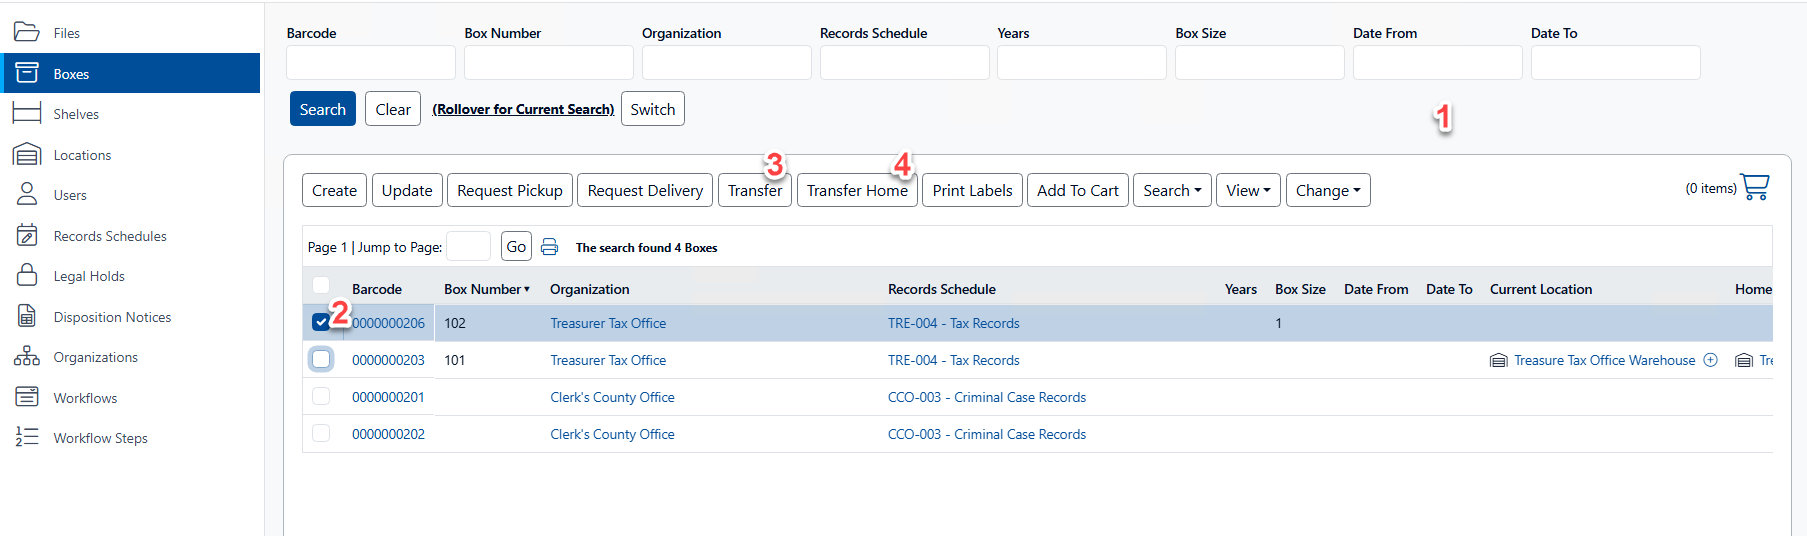
Locate the desired items using one of the integrated search options.
-
For each item you wish to transfer, click the associated checkbox.
-
Click the ‘Transfer’ button. This opens the ‘Transfer Items’ screen (see step 5 below)
Note: An alternative is to use the ‘Transfer Home’ option which will automatically use the home destination for the transfer. If used, skip to Step 6. -
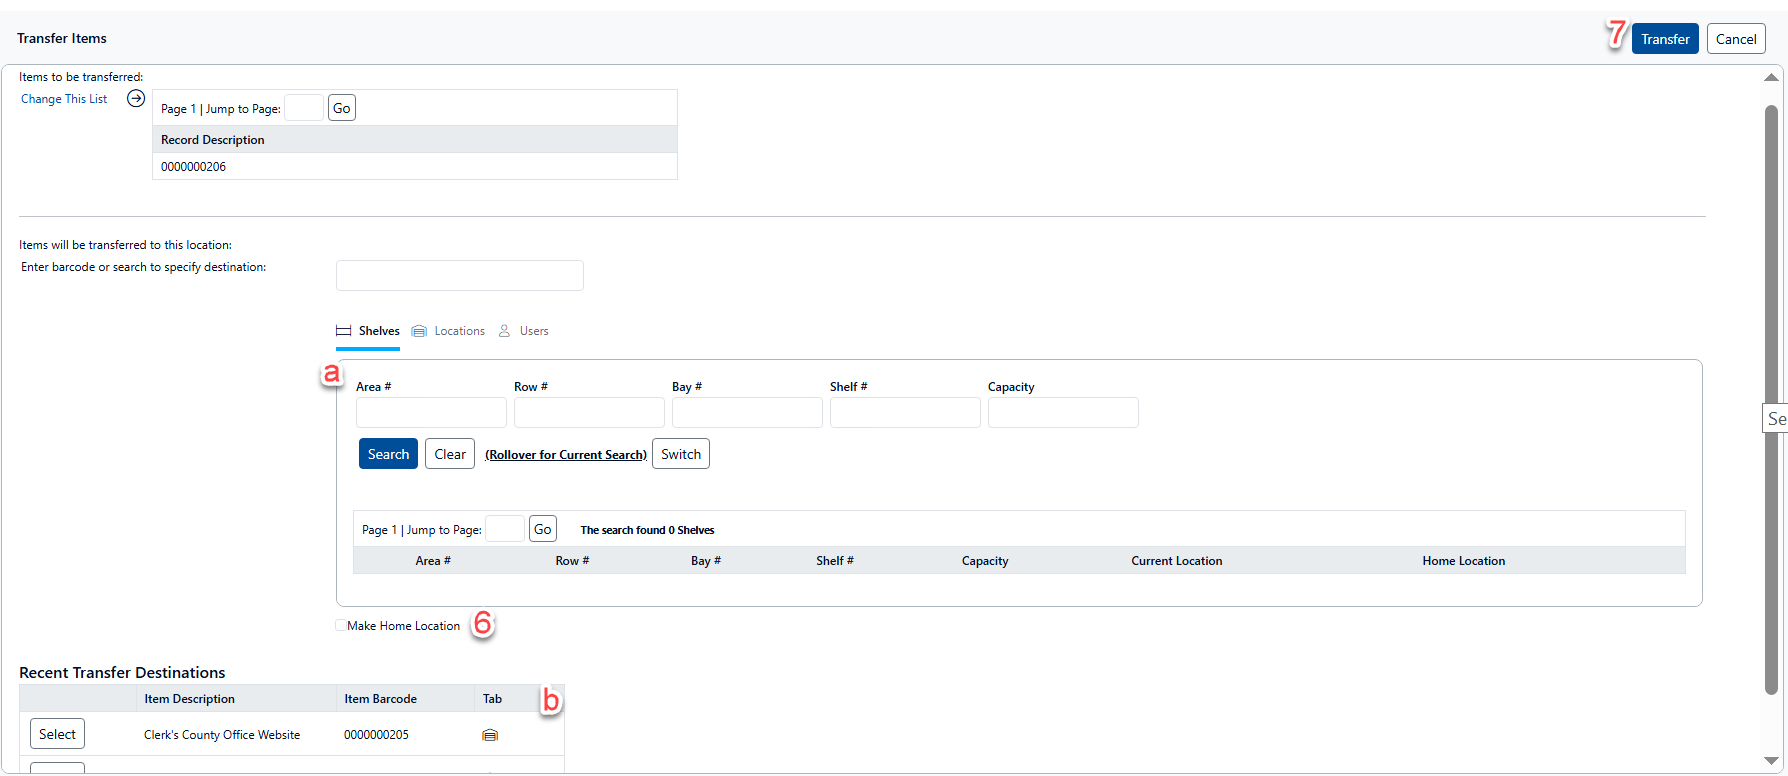
Specify the Transfer Destination. This may be done by:
-
Selecting the destination from the list of recently used destinations,
-
Clicking on the Search button and selecting the desired destination from an available list (e.g. Shelves, Locations, Users)
-
-
Clicking the ‘Make Home Location’ option will update the Home Location value for the selected items being transferred to the option chosen for the transfer location.
-
Click the Transfer button to process the transfer.
Circulation Routing & History
Users seeking to store and audit more granular details when transferring items can enable Circulation Routing. This can be helpful for recording additional steps taken between locations or adding extra notes for a given transfer.
-
This functionality is not available in versions of Gimmal Physical older than 3.15.
-
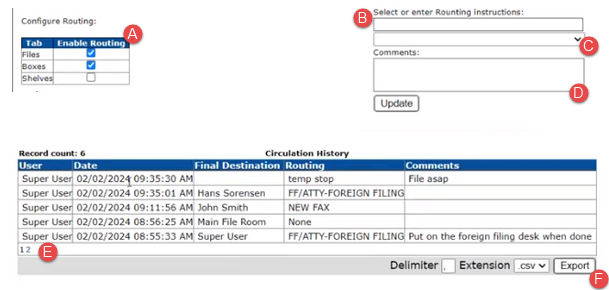
To enable this functionality, admins with the appropriate permissions must first navigate to the Admin | Field Display - Advanced and choose ‘Enable Routing’ (A) for the requisite Tabs. This option is limited to items that can be transferred (e.g. Files or Boxes).
Circulation Routing
Once enabled, the Circulation Routing control (B) will appear on the Tabs chosen in the Advanced Field display. The control consists of three parts:
-
Routing information. This can be manually entered, or chosen from the drop down list. The dropdown list values are controlled via the List Values option on the Administration page.
-
Free form Comments can be added to give further detail to this transfer.
-
An ‘Update’ button which will save the information to the Circulation History.
When the Transfer button is clicked, the routing information and comments entered on this page will be stored as part of the circulation history for this item.
The list values for the routing can be added at Admin | Data | List Values.
Circulation History
Circulation history reflects all the routing entries that have been assigned for a given record. It is visible only on the View page for that record (E). The Circulation History table is paginated showing five records on a screen. Click the page number links to move between pages. Records with the most recent transfer are shown at the top of the list.
The Circulation History for a given record can be exported using the ‘Export’ button (F). Users can choose a delimiter which will separate the fields in the exported file as well as the format for export (.csv or .txt)