
Gimmal Physical has several options to help manage and print labels.
This topic has an interactive tutorial. To view this tutorial, click here.
Administration Options
Before you can start using labels, you will need to design and designate the labels you will be using within Gimmal Physical. To do so, navigate to the Admin settings (via the gear icon) under the Configuration section.
Label Design Files
Existing label design files can be managed and new label designs added by lclickingthe Label Design Files link from the Admin page.
Labels are designed using Microsoft Report Builder, a separate download from Microsoft.
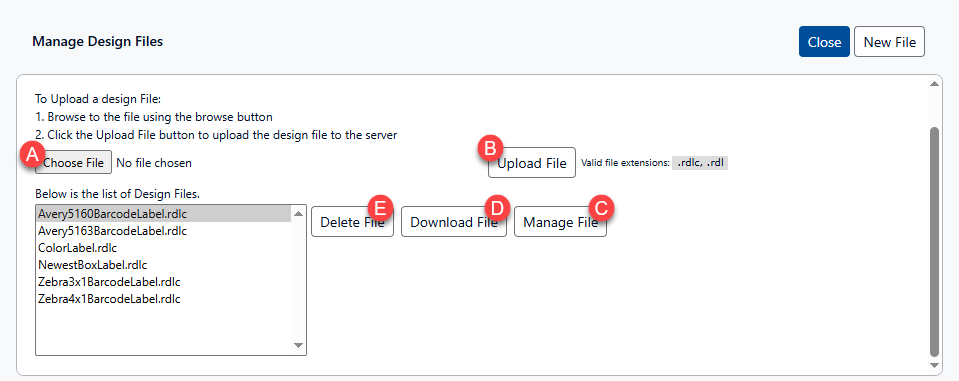
Upload a New Label Design File
-
Click the ‘Choose File’ button (A) to select the Label Design File from your desktop or server for use in Gimmal Physical. Once selected, the name of the file will appear to the right of the button, replacing the ‘No file chosen’ text.
-
Click the ‘Upload File’ button (B) to bring the file into Gimmal Physical. It will now appear on the list of Design files that can be managed.
Other Options
-
Click ‘Manage File’ (C) to open the ‘Manage Label File’ screen to manipulate the field assignments. You will use the Label Profile (see below) options to configure the data mapping between the fields in the label design files and the record data.
-
Click ‘Download File’(D) to download the selected Label Design File.
-
Click ‘Delete File’ (E) to remove the selected Label Design File from the list.
Label Profiles
To configure the data mapping between the fields in the label design files and the record data, Label Profiles must be created for each Label Design File. You can have multiple Label Profiles defined. Each profile sets the mapping of record data to fields on the label.
The fields available will allow you to choose the exact mapping for the fields.
-
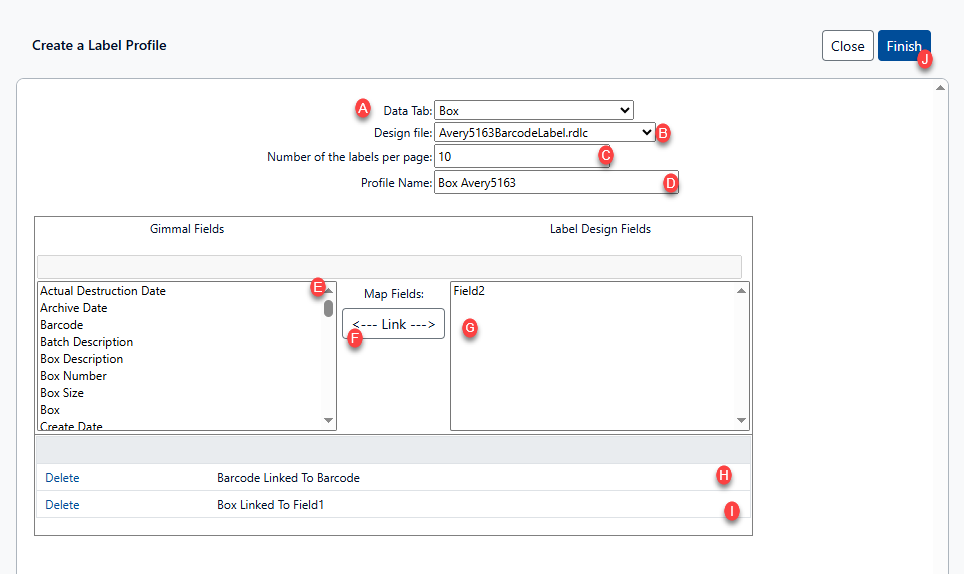
Choose the Tab (item type) whose fields will define the mapping. (A). Selecting the tab will populate the ‘Gimmal Fields’ list (E).
-
If not already selected, choose the design file from the list (B). This will populate the fields available for mapping from the Label Design (G).
-
Add the number of labels that should appear on the page (C).
-
Give this profile a unique name (D).
-
To link values
-
Select a field from the Gimmal Fields list (E)
-
Select the corresponding field from the Label Design Fields list (G).
-
Click the Link button (F)
-
The mapped value will disappear from the available fields in the Label design list (G).
-
-
The new mapping will appear below the field lists (H, I).
-
Use the ‘Delete’ link to remove a field mapping.
-
Click ‘Finish’ (J) to save the profile.
Label Printing Preferences
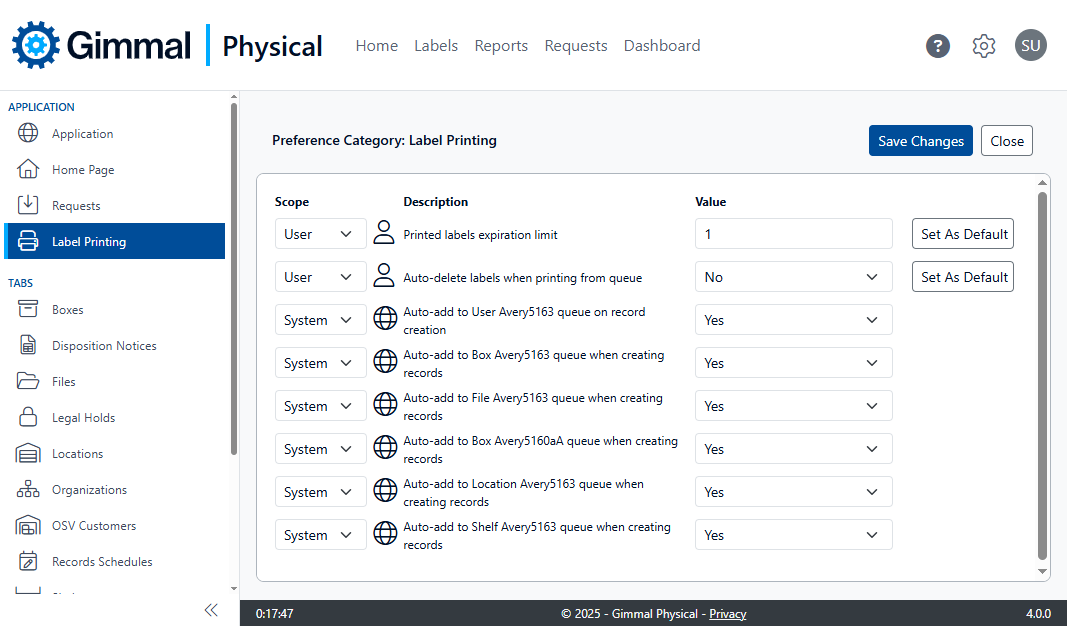
Preferences are found by clicking the gear icon and choosing ‘Preferences’. Label Printing options are found under the APPLICATION section on the left-hand navigation menu. As with most preferences, you can set the scope to which the selected preference will apply
-
User - affects only the logged in user
-
Role - enables separate setting for each Role
-
System - affects all Users of the system
Workstation is a deprecated option, and should not be used with newer versions of Gimmal Physical
-
Print labels expiration time limit
-
Auto-delete labels when printing from queue: Option to automatically remove records from the designated queue after they are printed.
-
The Auto-Add preferences can be set per label design type. This option determines whether a new record should be added to the corresponding label queue when it is created. The default is Yes.
For more detail about queues, please see Label Queues.