
The Gimmal Physical Dashboard is a view that centralizes a variety of data points and options of interest specific to the logged in user.
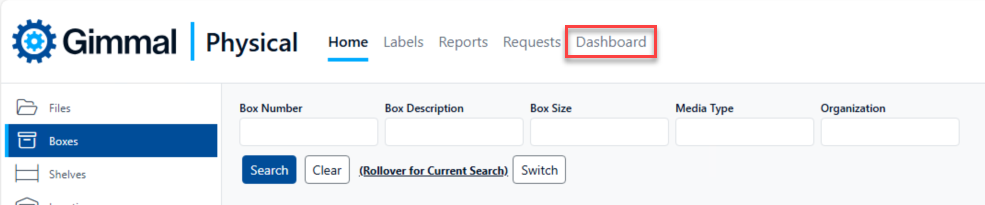
The Dashboard link is found on the Navigation Ribbon. Clicking on this link displays the 'Gimmal Physical Dashboard' screen in a separate browser window.
The Gimmal Physical Dashboard screen shows options available to the logged in user only. It contains five panels chosen by nodes on the left of the screen. They are detailed below:
Dispositions
The Dispositions panel provides convenient queries and links to aid the processing of dispositioning items.
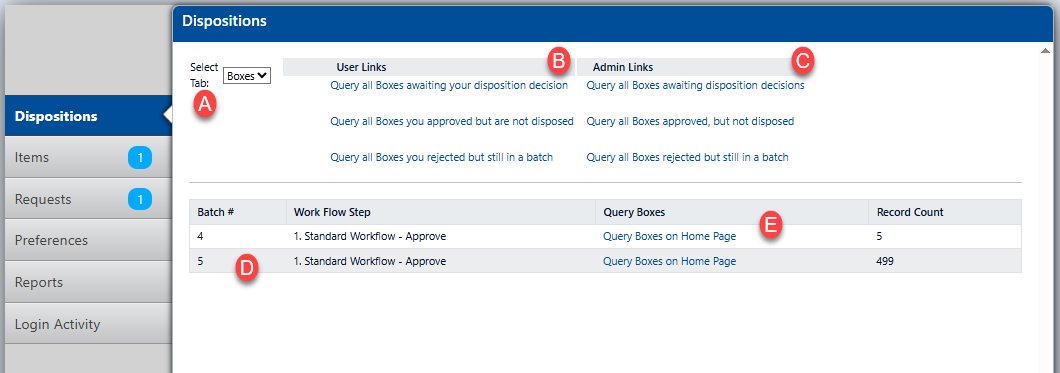
Users must first select the data type they wish to view from the ‘Select Tab’ drop down (A). The available queries will change based on the items available for disposition in the chosen tab. User links(B) are available for all users. Only users with administrator rights will be able to access the ‘Admin Links’ (C) which give a more detailed overview of all items in the disposition process.
Batch specific queries are available for view in the lower list. Use the links in the ‘Query [data type]’ column (E) to access the specific batch step awaiting your decision making.
All links will return users to the Home Page Grid where they can take further action including making Disposition Decisions.
Items
The Items panel shows the Items that Gimmal Physical has listed as currently in possession of the logged in user.
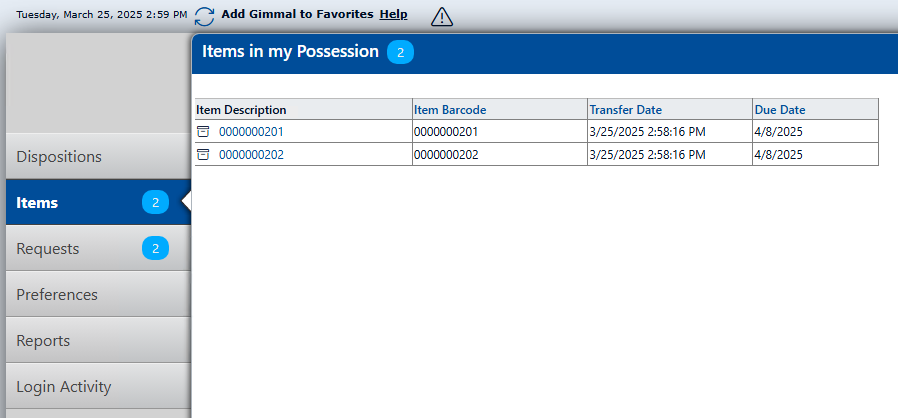
Note: Clicking on the link in the Item Description column will open the selected item in ‘View’ mode.
Requests
Selecting the Request panel will show all outstanding requests made by the logged in user. This list will include both available and waitlisted items.
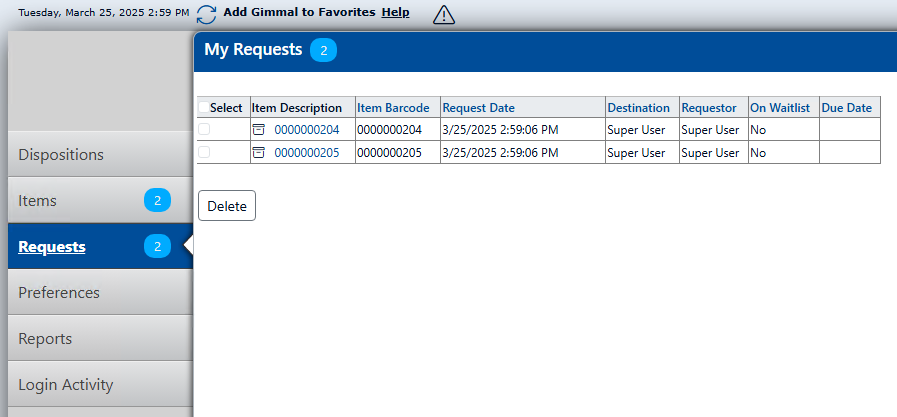
Note: Selecting one or more listed items and clicking the ‘Delete’ button will remove the selected request(s) from both the Dashboards and the Existing Requests queue.
Preferences
Clicking on the Preferences panel will show the preferences configurable by the logged in user. These preferences can be modified and saved on this screen.
Click the ‘Save’ button to store any changes to the values. Click ‘Cancel’ to restore the values before any changes were made.
Note: All of these options are also found by clicking on the ‘Preferences’ section of the Navigation Ribbon and looking for preferences which have a ‘Scope’ of User.

Reports
Choosing the Reports panel will show all the reports that the logged in user has added to their personal Dashboard. These reports will be grouped in the same sections by type of report as seen on the main Reports page accessed via the Navigation Ribbon.
Note: Reports are added to this Reports panel via the Reports View accessed via the ‘Add/Remove’ link at the top of the page or via the Reports button on the Navigation Ribbon.
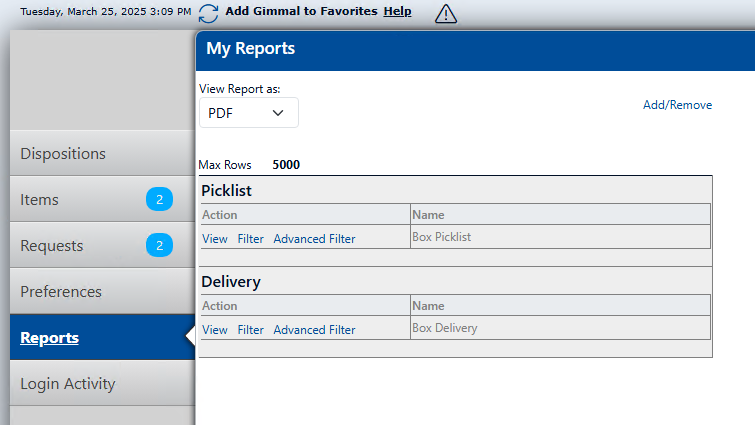
The Action column lists different actions that can be taken for the associated report. This list can change depending on the type of report. These options are mirrored on the Reports page.
-
View initiates execution of the associated report. The report will then be accessible by clicking the ‘Add/Remove’ button from this screen, or the ‘Reports’ page (accessible from the Navigation Ribbon).
-
Filter allows the user to enable a basic filter of the data for the associated report before it is executed.
-
Advanced Filter directs the user to the advanced query page which allows more complex options for filtering data before the reports can be executed.
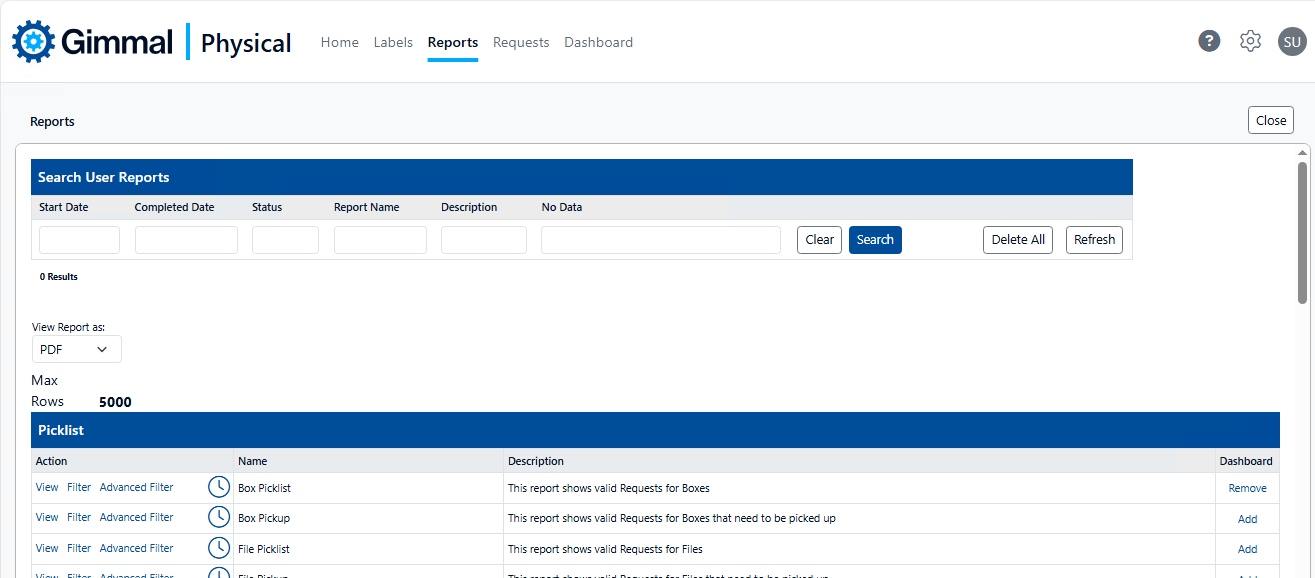
Clicking on the ‘Add/Remove’ link from the Reports panel will open the Reports view which features a listing of reports available to the logged in user.
-
The ‘Dashboard’ column on the far right will show a link that changes depending on the status of the report:
-
An ‘Add’ link will be shown if the associated report is available to include in the list of reports on the Dashboard. Clicking the ‘Add’ link will copy a link to the associated report to the Dashboard Reports panel.
-
A ‘Remove’ link will be shown to remove the associated report from the list of reports in the Dashboard. Clicking the ‘Remove’ link will remove the associated report shortcut from the Dashboard Reports panel.
-
Note: Clicking the ‘Close’ button closes the Reports screen, and returns the user to the Home Page. Choose the ‘Dashboard’ link from the Navigation Menu to return to the Dashboard view.
Login Activity
The last node is governed by a separate security right ‘Enable Administrator Dashboard’. It shows the Login Activity for the application.
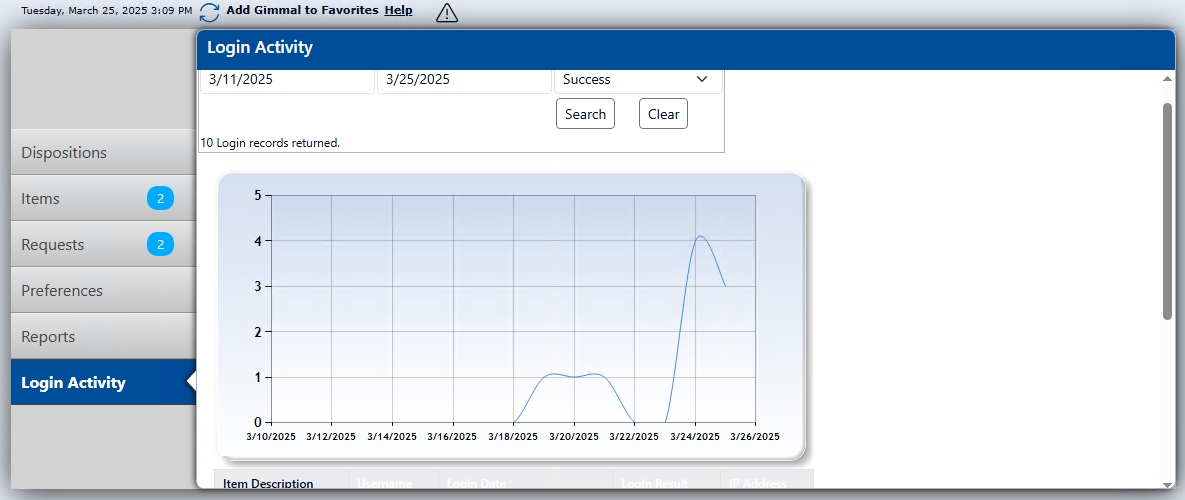
The ‘Result’ drop down box filters the chart accompanying table showing a paginated history of logins for the entire application. Select the option of choice, then click the ‘Search’ button. Click ‘Clear’ to return to the default view.