Skip table of contents

Administration Page

With the correct permissions, key administrator options are accessed by clicking the gear icon and choosing ‘Admin’. This opens the ‘Administration’ page where various options can be accessed.

Some of the visible options (e.g. Integrations) may depend on the components which are licensed for your organizations.

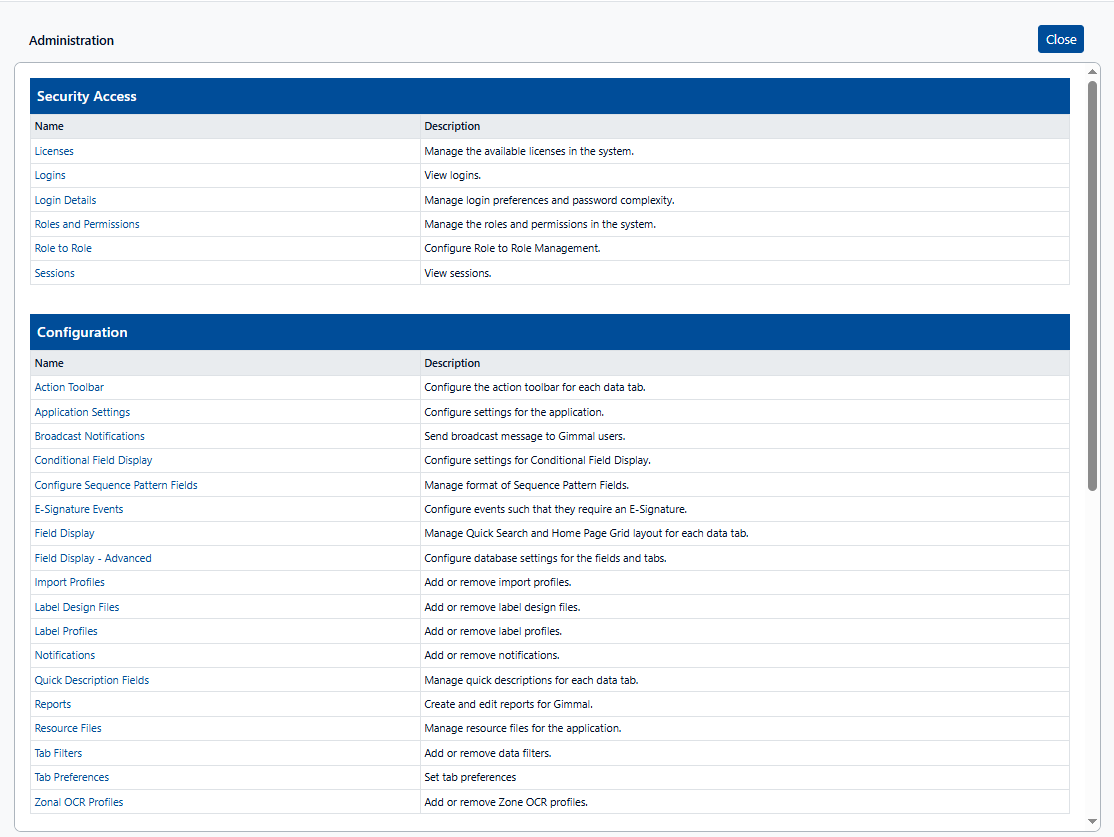
The options are grouped into five sections. Each option is accessed by clicking on the relevant link.

  • Security Access

  • Configuration

  • Data

  • Technical

  • Integrations

image-20250418-213014.png
image-20250418-213004.png

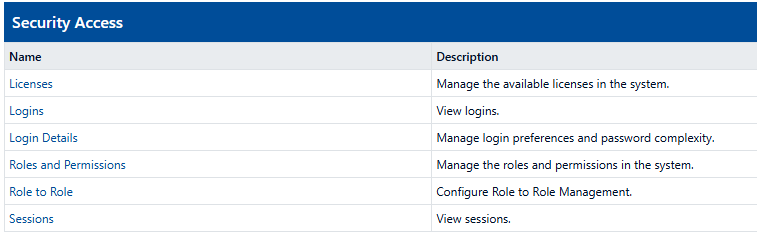
Security Access Options

This section helps administrators coordinate the access and security for Gimmal Physical.

image-20251017-192823.png

Option Name

Option Description

Licenses

Opens the 'License Management' screen. This option is helpful for viewing logged in users, or, managing new licenses. It can display current licenses including login licenses, currently logged in users, and extra features*.

image-20251017-193648.png

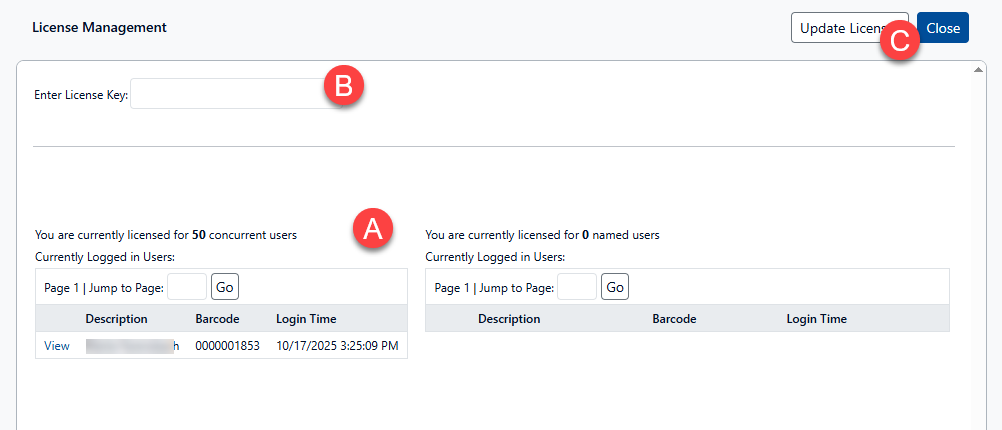
Viewing Logged In Users

This section (A) lists the currently logged in users for the named and concurrent licenses.

  • The text will indicate the quantity of users licensed for this application .

  • Clicking ‘View’ next to the name for concurrent or named licensed users will option the User Details screen for the selected user.

Managing New Licenses

These steps should only be performed with the aid of the Gimmal Support or Implementation Team.

  1. Enter the license key provided by Gimmal for the chosen option(B)

  2. Click on the Update License button. (C)

To view extra features, please contact support@gimmal.com.

Logins

Opens the ‘Login Tracking’ view which provides a searchable log for any logins tracked by the Gimmal Physical system.

image-20251017-195018.png

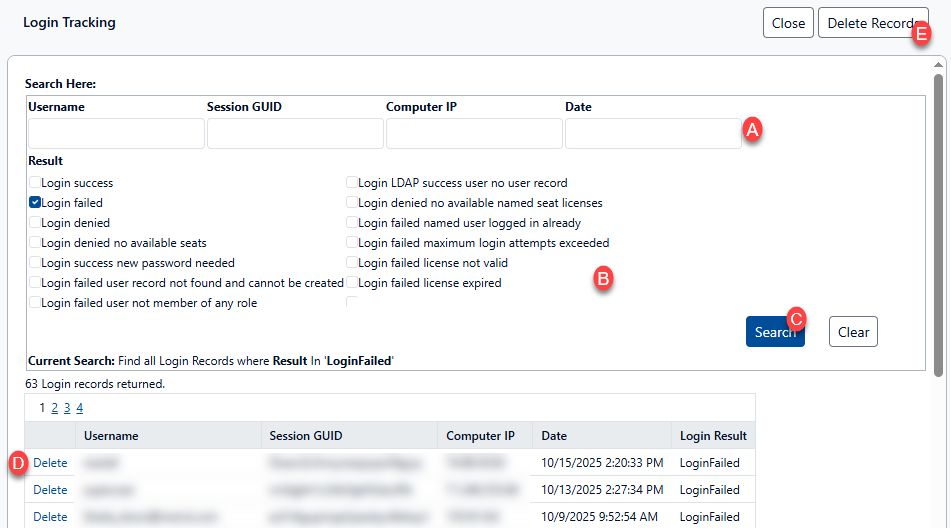
Searchable Tracking List

  1. Use the search grid to enter search criteria (A). Do not enter any criteria to view all the login tracking details

  2. Check a Result filters (B) to pinpoint exact options to help reduce the result set. Do not check any options to view all login tracking entries.

  3. Click the Search button (C) to show the login tracking matching the filter details.

Deleting Tracking Information

  • Single item tracking information can be deleted by clicking the Delete hyperlink (D) to the left of the entry to be deleted.

  • To Delete all records listed in the grid, click the ‘Delete Records’ button (E) on the upper right of the screen.

In both instances, you will be prompted for deletion verification.

Login Details

Opens the ‘Manage Login Details’ screen which allows the setting of password complexity and login configuration options.

image-20251017-200220.png

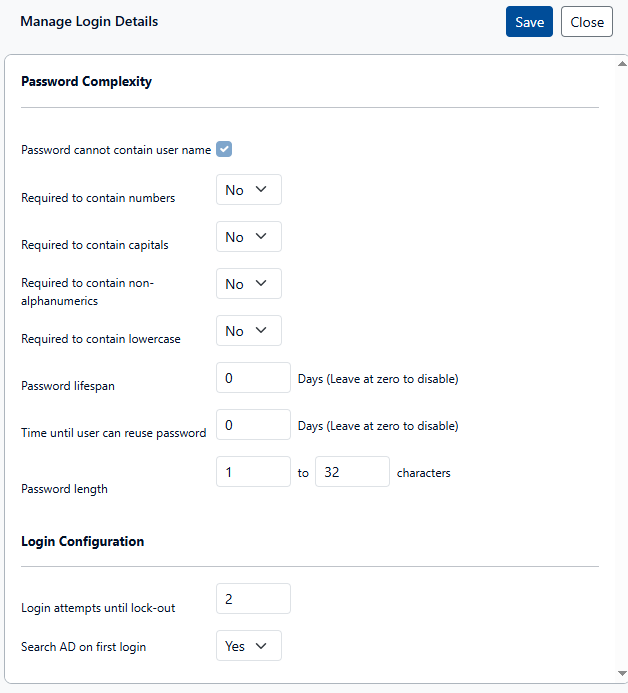
Password Complexity

Allows administrators to select options that must be followed for any new password.

  • Password cannot contain user name

  • Required to contain numbers

  • Required to contain capitals

  • Required to contain non-alphanumerics

  • Required to contain lowercase

  • Password lifespan

  • Time until user can reuse password

  • Password length

Login Configuration

Allows administrators to set login options:

  • Login attempts until lock-out

  • Search AD on first login

Roles and Permissions

Opens the ‘Manage Roles’ view which allows administrators to create and edit roles and the permissions associated with them. For additional information, please see the Security Model Overview or the interactive tutorial on this topic.

Role to Role

Opens the ‘Role to Role Management’ screen which controls the configuration of which roles can manage other roles in the system.

image-20251017-202938.png

  • Choose a role in the ‘Select Role to Mange’ dropdown (A) to see or adjust other roles the selected Role can manage

  • Selected roles the [selected role] can manage (B): Previously selected roles are listed here.

    • Click ‘Remove’ (C) to delete the role to role relationship.

  • Available roles in the system (D): List of Roles that can be added to the selected Role.

    • Click on one or more of the associated buttons (E) to add the role for management of the selected role.

  • Click ‘Save’ to update the options (F).

Sessions

Opens the ‘Session Tracking’ view which provides a searchable log for the sessions tracked by the Gimmal Physical system. This screen is generally used for troubleshooting.

image-20251017-203452.png

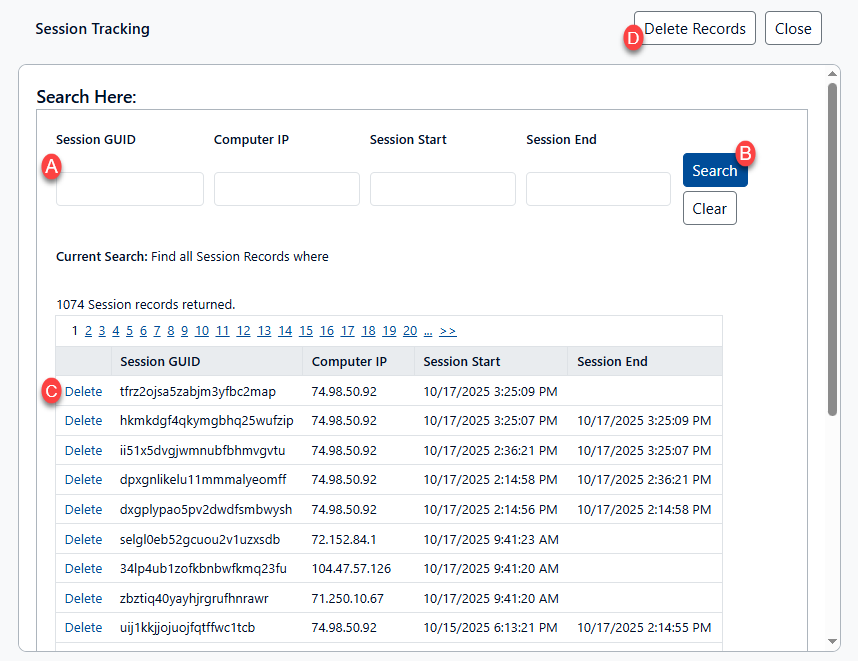
Showing Session List

  1. Use the search grid to enter search criteria (A). Do not enter any criteria to view all the session tracking details.

  2. Click the Search button (B) to show the login tracking matching the filter details.

Deleting Tracking Information

  1. Single session tracking information entries can be deleted by clicking the Delete hyperlink (C) to the right of the entry to be deleted.

  2. To Delete all session records listed in the grid, click the ‘Delete Records’ button (D) on the upper right of the screen.

In both instances, you will be prompted for deletion verification.

JavaScript errors detected

Please note, these errors can depend on your browser setup.

If this problem persists, please contact our support.