
This article describes the steps needed for configuring the SharePoint Online Connector (SPOC) after the installation has succeeded.
1. Configure Primary Account for SPOC (Web Interface Access)
The Administrator account must first be created before the SharePoint Online Connector can be configured.
-
Navigate to https://[your-server]:[port number]
-
Verify the interface loads correctly
-
-
Set up the Administrator user for SPOC
-
The Administrator password is set on the first login
-
Click on the Login drop-down button
-
Choose Login Locally
-
Enter Administrator for the Email field
-
Enter a password of your choosing. (Note: The password must be at least 12 characters)
-
Click Login
-
The Administrator account can be used to provision new Users as well as manage any aspect of the connector. This account information should be kept secure.
2. Configure Connection to Gimmal Records
This section configures the communication between the SharePoint Online Connector and Gimmal Records.
-
Access Web Interface: Navigate to https://your-server:8083 (Note: the port will depend on what was chosen during installation)
-
Connection Management: Go to Connection Configuration > Gimmal Records
-
Enter Configuration:
-
URL: URL for the Gimmal Records application
-
Username: Gimmal Records connector service account username
-
Password: Gimmal Records connector service account password
-
3. Configure Microsoft Graph API Connection in the SharePoint Online Connector
This section configures the connection to the Microsoft Graph API used to authenticate to SharePoint.
-
Click on ‘Microsoft Graph API’ in the left panel
-
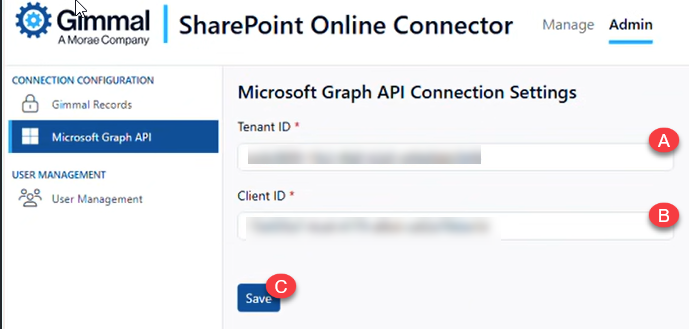
Enter the Tenant ID and Client ID from the App Registration step:
-
Tenant ID: Your Azure AD Directory (tenant) ID (A)
-
Client ID: Your Azure AD Application (client) ID (B)
-
-
Click the ‘Save’ button (C)
-
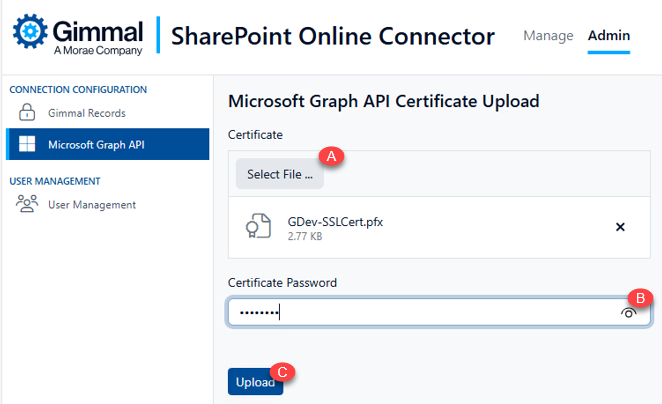
An Upload Certificate button will appear. Click it to upload the .PFX version of the certificate file used during App Registration.
-
Upload the .PFX certificate file created during App Registration using the ‘Select File’ button (A)
-
Enter the certificate password (B)
-
Click the ‘Upload’ button to complete the certificate upload (C). If you receive an error stating the password is invalid, refer to the troubleshooting section at the bottom of this document.
-
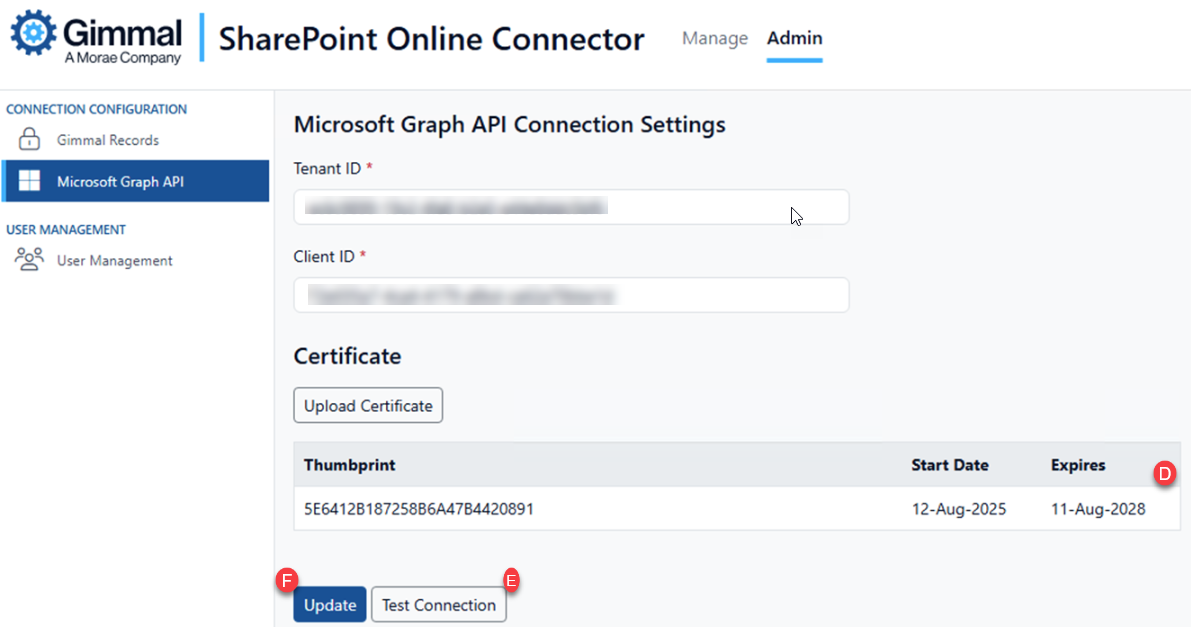
Verify the certificate thumbprint and expiration dates match the original (D)
-
-
Test Connection: Click “Test Connection” to validate authentication (E)
-
Save Configuration: Click ‘Update’ to save the settings (F)
Enabling Label-based Record Locking
SPOC v6.1.1 includes support for Label-based record locking using a Purview retention label. However, fully enabling this functionality requires additional configurations.
-
Enabling Label-based locking is a ‘one-way' configuration. Once Label-based configuration has been enabled, rolling back is not supported.
-
Ensure that a Gimmal-specific label has been created in Purview before proceeding further.
-
A direct database update is required to enable this feature. See below for the requisite query.
-
This option is only available to organizations that have E5 (or equivalent) Microsoft licensing.
If your organization is currently using Purview retention labels for any purpose, do not enable label-based retention without first speaking with our subject matter experts.
Enable Label-based Record Locking
-
Stop all Gimmal Records-related Windows services when updating this configuration
-
Use SQL Server Management Studio (SSMS) to connect to the SPOC Database
-
Log in to the database and open a new query window
-
Execute the following query against the SPOC Database:
 -- Enable retention labels for record locking (set flag to true)
MERGE INTO KeyValues AS target
USING (SELECT '{0A0B7A21-97C9-4BEF-B0F0-AB226E3E9536}' AS [Key]) AS source
ON target.[Key] = source.[Key]
WHEN MATCHED THEN
    UPDATE SET [Value] = 'true'
WHEN NOT MATCHED THEN
    INSERT ([Key], [Value]) VALUES ('{0A0B7A21-97C9-4BEF-B0F0-AB226E3E9536}', 'true');
-
Exit SSMS
Configure the Purview Label in SPOC
-
Log in to the SPOC Administrative Web
-
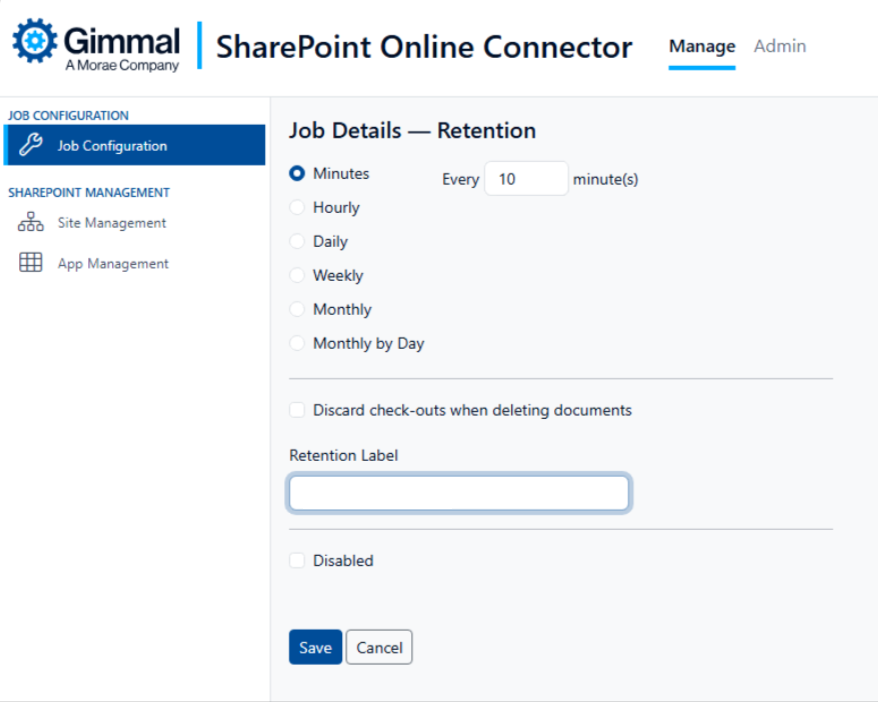
Go to Manage > Job Configuration
-
Edit the Job Details - Retention, if needed
-
On the Job Details page, enter the name of the Purview Label to use, then click Save
Troubleshooting
Common Installation Issues
SSL Certificate Errors:
-
Ensure the certificate is properly bound to the IIS site
-
Verify that the certificate is not expired and includes the server name
-
Check certificate chain and root CA trust
Service Account Permissions
-
Verify the service account has the ‘Log on as a Service’ right
-
Ensure the service account has database permissions
-
Check the IIS application pool identity permissions
Database Connection Issues
-
Test SQL Server connectivity from the server
-
Verify connection string format and credentials
-
Check SQL Server authentication mode (Windows/Mixed)
-
Ensure the database exists and is properly configured
-
Ensure the service account has database permissions
Azure AD Authentication Failures
-
Verify Tenant ID and Client ID are correct
-
Check that the certificate is properly uploaded and has not expired
-
Ensure Azure AD app has required Microsoft Graph permissions
Invalid Password Error When Uploading Certificate
An "incorrect password" error when importing an RSA or PFX (.pfx/.p12) certificate is often caused by encryption algorithm incompatibility with Windows, special characters in the password, or incorrect cipher suites used during file generation. [1, 2, 3]
Common Causes & Fixes
· Windows Encryption Mismatch: Older versions of Windows or legacy Java truststores sometimes cannot read PFX files encrypted with modern algorithms (like AES-256).
· Fix: Re-export the PFX file using a legacy cipher like 3DES. If using OpenSSL, run the following command:
openssl pkcs12 -export -in cert.crt -inkey cert.key -certpbe PBE-SHA1-3DES -keypbe PBE-SHA1-3DES -out new.pfx [1, 2, 3]
· Special Characters in Password: PowerShell and OpenSSL allow password characters (like !, $, &, or backticks) that can break the string when parsed by certain Web GUIs or Windows certificate stores.
· Fix: Generate a new PFX file using an alphanumeric-only password. [1, 2, 3]
It looks like MS's crypto on Server 2016 has issues with special characters in the password - it may be better to try a password without them.
-
More importantly, if the certs were created on a newer system, it may have used a newer algorithm that is not supported by Server 2016 https://learn.microsoft.com/en-us/answers/questions/1054881/windows-server-2016-2012r2-how-to-add-support-for - They may was to try running the creation script on the Server 2016 server and not copy it for importation from a newer system (Windows 11 or Server 2022+).
Log File Locations
-
Application Logs: C:\Program Files\Gimmal Records\Logs
-
Service Logs: Windows Event Log > Application
-
IIS Logs: C:\inetpub\logs\LogFiles
-
Installation Logs: MSI log files created during installation