
This article provides steps to follow to ensure a successful set-up of the SharePoint Online Connector (SPOC).
Important: You cannot configure the SharePoint Online Connector app to work with two different instances of Records Management. You must provide distinct Microsoft 365 tenants to accomplish this requirement.
For example,
-
https://test-company.sharepoint.com registered to https://records.gimmal.build
-
https://company.sharepoint.com registered to https://records.gimmal.cloud
Ensure a SharePoint App Catalog has been created
To enable the deployment of an App Package to SharePoint Online, an App Catalog must exist to host the App Packages. If an app catalog does not exist for your tenancy, follow the guidance from the Microsoft documentation.
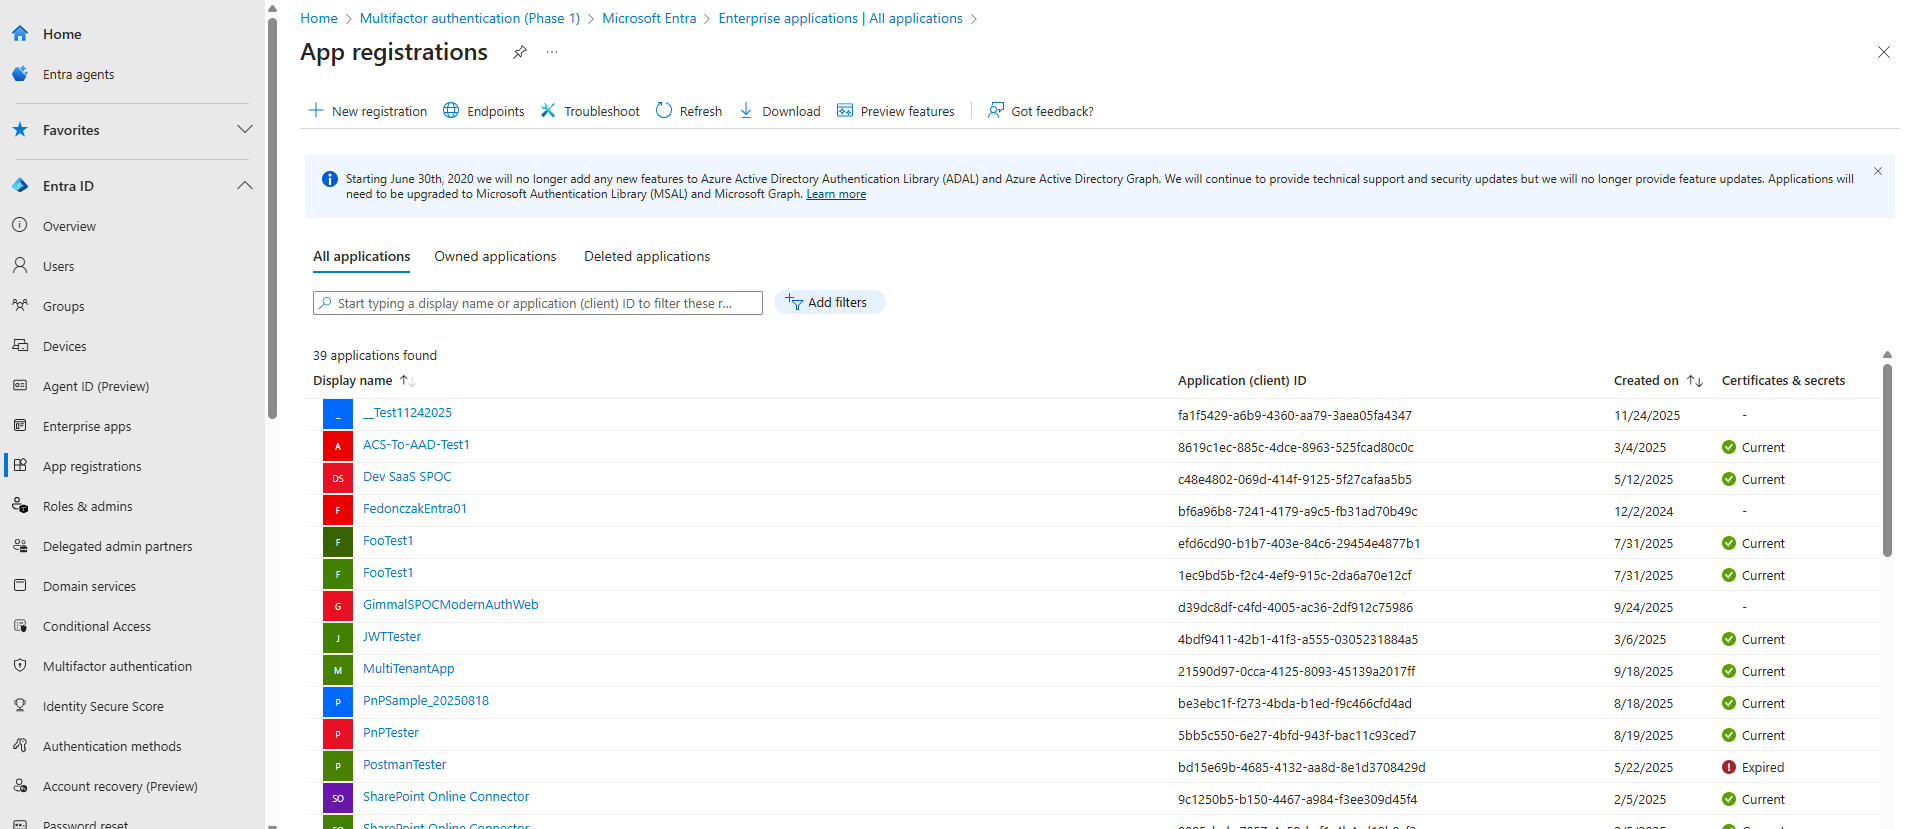
Configure the Azure AD (Entra ID) App Registration
Overview
To connect the SharePoint Online Connector to your Microsoft 365 environment, you need to create an application registration in Azure AD (Entra ID) and grant it permissions to access SharePoint sites.
-
These instructions are provided for convenience. Please contact your Microsoft 365 Azure Administrator or SharePoint Online administrator for assistance with completing these tasks.
-
The screenshots below are provided as a guide for your convenience. Microsoft may have made changes to the administrative portal since publication.
Prerequisites
-
Global Administrator or Application Administrator role in Azure AD
-
Access to the Azure Portal (https://portal.azure.com)
Step 1: Obtain an X.509 Certificate
Gimmal Records SharePoint Online Connector only supports certificate authentication. A valid x.509 certificate is required. The certificate must allow for an exportable private key.
Export the certificate in both .CER and .PFX formats, including the private key.
Step 2: Register the application in Microsoft Entra
An application registration for the Gimmal Records SharePoint Online Connector must be created in the Entra ID portal.
2.1 Open Entra (formerly Azure AD) Portal
-
Navigate to https://entra.microsoft.com
-
Sign in with your administrator account
-
Click App registrations in the left menu under Entra ID
-
Click + New registration at the top of the application list
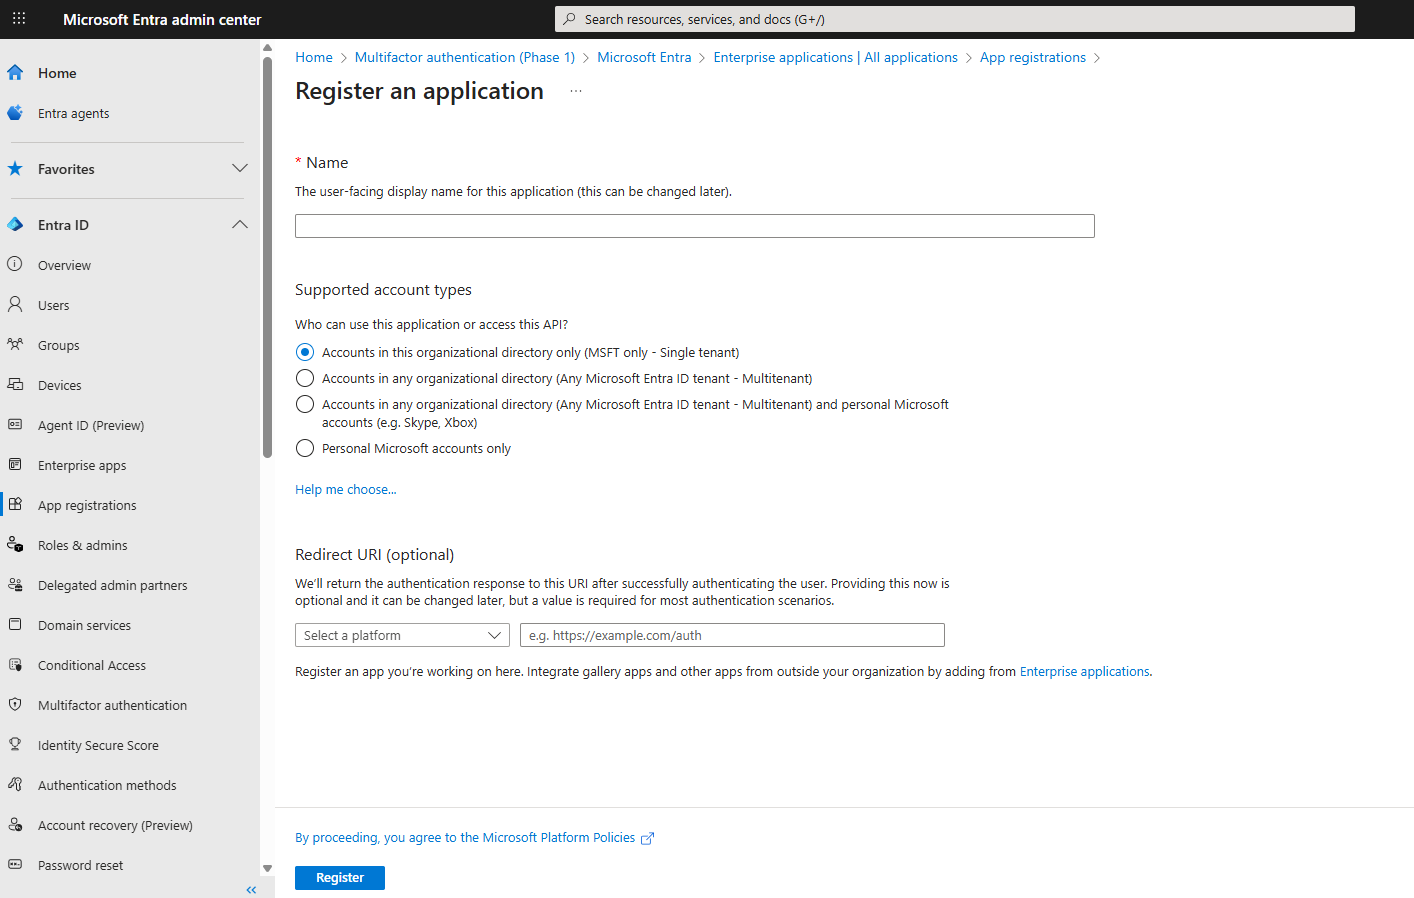
2.2 Create the application
Fill in the registration form:
|
Field |
Value |
|
Name |
SharePoint Online Connector |
|
Supported account types |
Accounts in this organizational directory only |
|
Redirect URI |
|
Click Register.
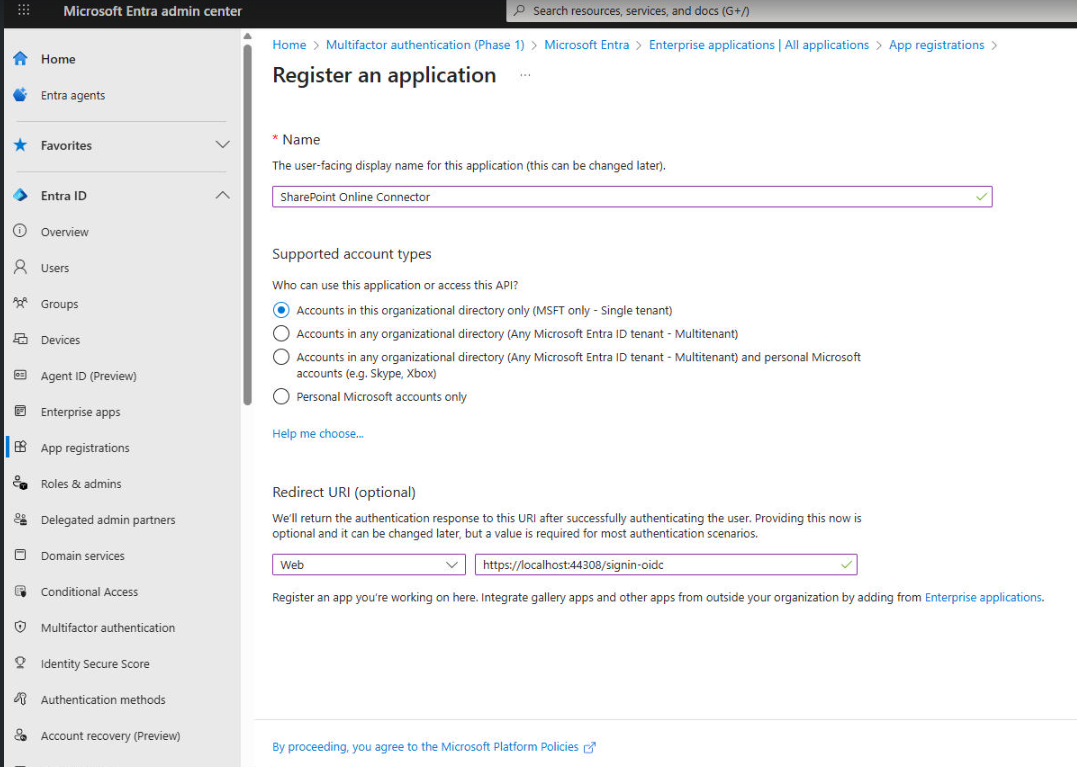
The App Registration Overview screen will appear.
2.3 Save application details
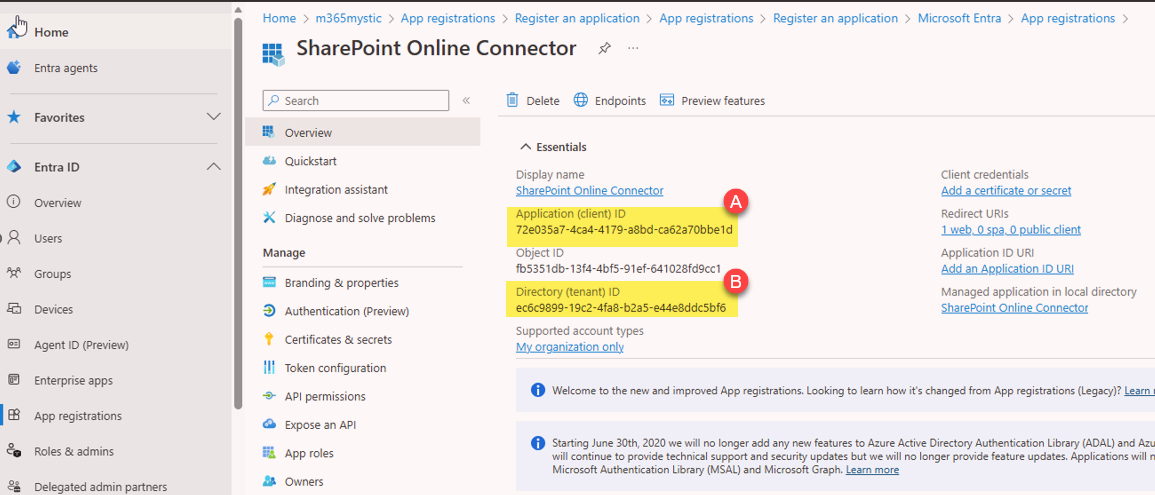
After registration, from the overview screen, copy and save the following values. They will be needed in future steps:
-
Application (client) ID (A)
-
Directory (tenant) ID (B)
Note: Keep these values in a secure location - you’ll enter them in the SharePoint Online Connector configuration.
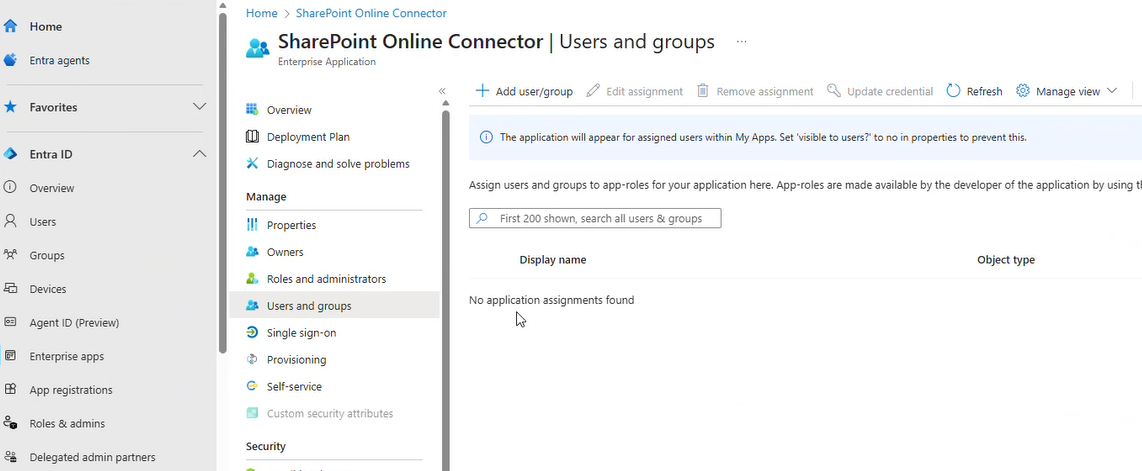
(Optional) Add Users to Manage SPOC (in Entra)
This section outlines how users who manage and configure the SharePoint Online Connector are added to the application registration in Entra.
This is an optional step and is only required if the ‘Assignment required’ property is set to ‘Yes’ for the enterprise application.
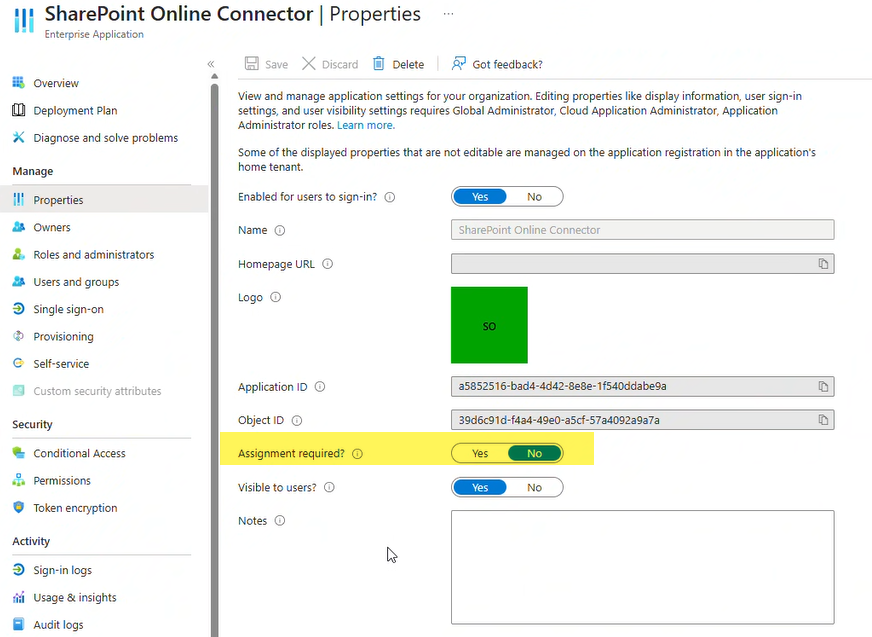
Note: These accounts should be administrative users or groups who are responsible for managing the connector and troubleshooting when needed, or users who click the ‘Manage Record’ button in SharePoint
-
Click the Enterprise Apps tab in the left-hand menu of the Entra Admin Center
-
Find your SharePoint Online Connector app and select it
-
Select Users and groups from the Manage menu
-
Select users or groups who will be administering the SharePoint Online Connector application
Step 3: Configure Permissions
Continuing in Entra Portal, this step will configure the permissions required by the application registration.
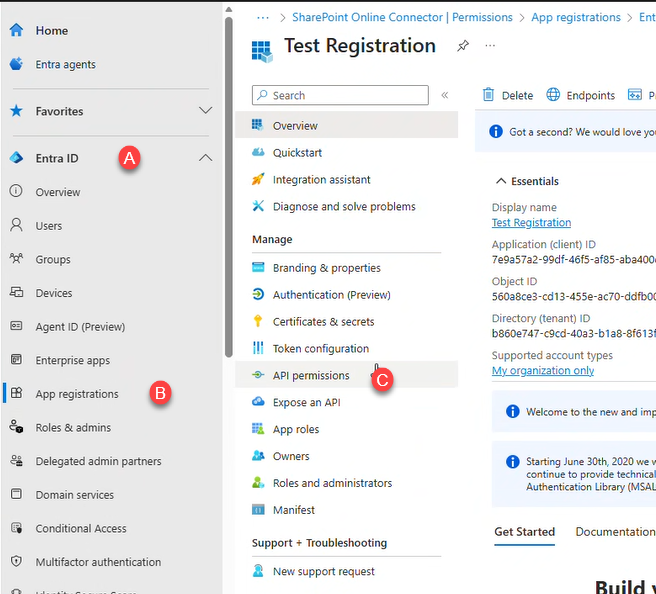
3.1 Add API permissions
-
Click API permissions under Manage (C)
-
Click + Add a permission
-
Select Microsoft Graph
-
Select Application permissions
3.2 Select required permissions
-
Search for and add each of these permissions:
-
✅ Sites.ReadWrite.All
-
✅ Files.ReadWrite.All
-
Click the Add permissions button after selecting both options
3.3 Add SharePoint permissions
-
Click API permissions under Manage
-
Click + Add a permission
-
Select SharePoint
-
Select Application permissions
3.4 Select required permissions
-
Search for and add each of these permissions:
-
✅ Sites.FullControl.All
-
Click Add permissions after selecting.
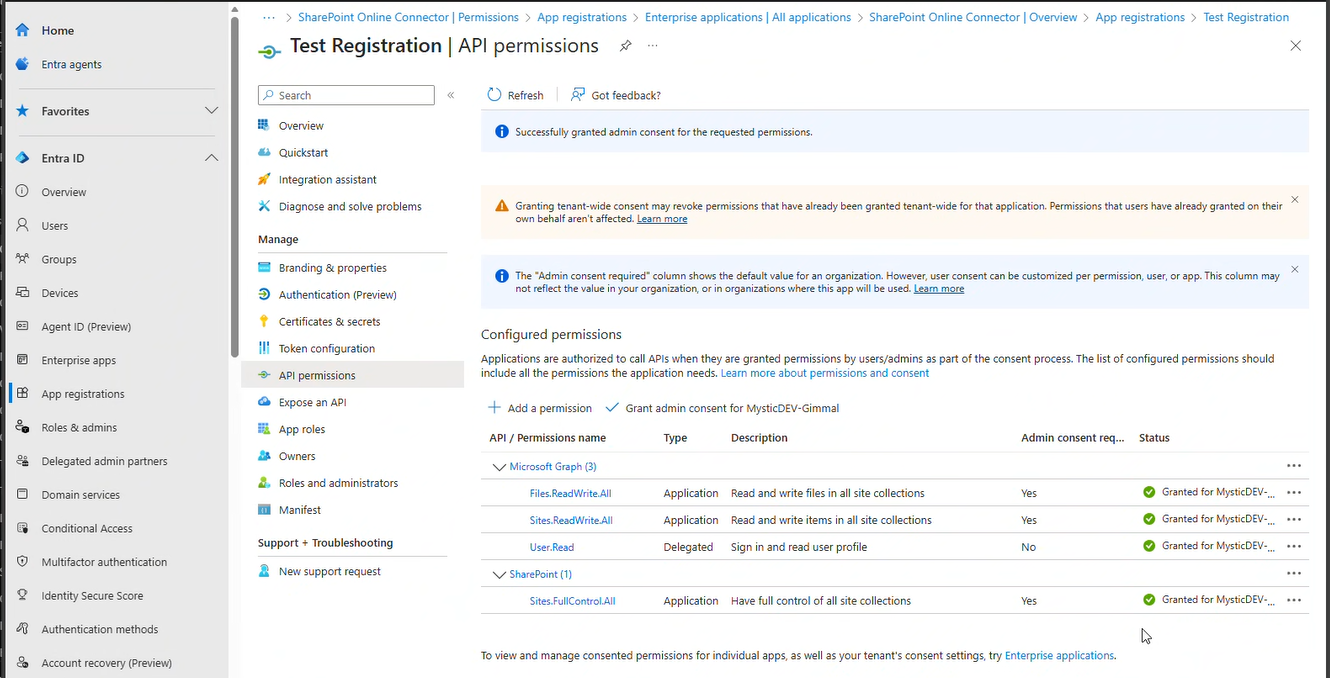
3.5 Grant admin consent
-
Click Grant admin consent for [Your Organization]
-
Click Yes to confirm
-
Verify: You should see green checkmarks in the Status column for the selected permissions.
3.6 Upload certificate
-
Click Certificates & secrets under Manage
-
Click the Certificates tab
-
Click Upload certificate.
-
In the right panel, click Select a file.
-
Select the .CER file that was obtained in Step 1.
-
Click Add.
-
Verify the Thumbprint, Start date, and Expires.
Note: If you receive an error stating “password is invalid” when attempting to upload the certificate, please refer to the details below:
An "incorrect password" error when importing an RSA or PFX (.pfx/.p12) certificate is often caused by encryption algorithm incompatibility with Windows, special characters in the password, or incorrect cipher suites used during file generation. [1, 2, 3]
Common Causes & Fixes
· Windows Encryption Mismatch: Older versions of Windows or legacy Java truststores sometimes cannot read PFX files encrypted with modern algorithms (like AES-256).
· Fix: Re-export the PFX file using a legacy cipher like 3DES. If using OpenSSL, run the following command:
openssl pkcs12 -export -in cert.crt -inkey cert.key -certpbe PBE-SHA1-3DES -keypbe PBE-SHA1-3DES -out new.pfx [1, 2, 3]
· Special Characters in Password: PowerShell and OpenSSL allow password characters (like !, $, &, or backticks) that can break the string when parsed by certain Web GUIs or Windows certificate stores.
· Fix: Generate a new PFX file using an alphanumeric-only password. [1, 2, 3]
It looks like MS's crypto on Server 2016 has issues with special characters in the password - it may be better to try a password without them.
-
More importantly, if the certs were created on a newer system, it may have used a newer algorithm that is not supported by Server 2016 https://learn.microsoft.com/en-us/answers/questions/1054881/windows-server-2016-2012r2-how-to-add-support-for - They may was to try running the creation script on the Server 2016 server and not copy it for importation from a newer system (Windows 11 or Server 2022+).
Security reminders
-
🔒 Keep your Client Certificate secure - treat it like a password
-
📅 Set a calendar reminder to renew the certificate before it expires
Need help?
Please contact Morae Support for assistance.