The installation media consists of a single ISO that contains everything necessary to install and set-up Gimmal Records and its components.
To begin:
-
Double-click the .iso file to view the contents. Alternatively, right-click and choose ‘Mount’.
-
Double-click the setup.hta file in the root folder of the .iso file.
Ensure that you run the installer as the Local Administrator.
-
If you are upgrading from version 5.0 or above, in addition to upgrading the Core components, the ‘Property Bag Migrate Utility’ must be run after the core components have been installed.
-
The '‘Property Bag Migrate Utility’ should not be run for a new installation.
-
-
If you are upgrading from a pre-5.0 version, you first need to upgrade to 5.0 before proceeding further.
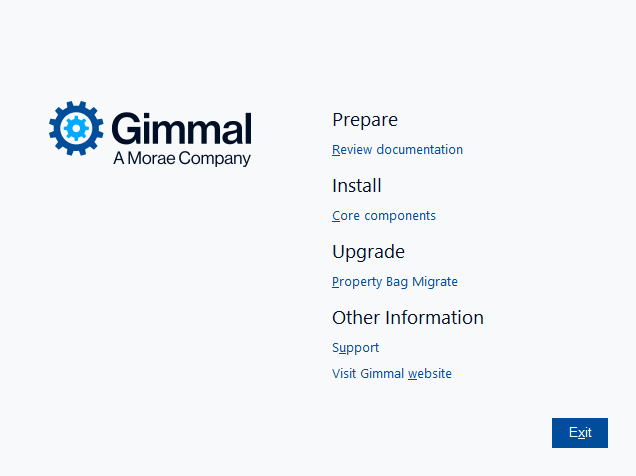
After the installation splash screen launches, components available for installation or upgrade will be displayed.
This screen presents each component that is a part of the Core Platform which can be upgraded or installed.
New Installation
Click Install next to the component that you want to install. This will launch the specific installation wizard for that component. View the articles below to walk through each component installation:
Upgrade
Pre-Upgrade Tasks
Before commencing any upgrade of Gimmal Records, ensure the following:
-
Gimmal Records is version 5.0 or above
-
Backup Configuration files are created and stored in an easily accessible location:
-
Manager web configuration file called web.config . This is typically found in the following installation directory:
-
C:\Program Files\Gimmal\Records\Web
-
-
STS configuration file called web.config . This is typically found in the following installation directory:
-
C:\Program Files\Gimmal\Records\Sts
-
-
Lifecycle processing service configuration file called RecordLion.RecordsManager.Core.Service.exe.config which is typically found in the following directory:
-
C:\Program Files\Gimmal\Records\Services\
-
-
-
Collect the following information:
-
Web Application Name
-
Web Application Port
-
STS Application Name
-
STS Application Port
-
Fully Qualified Domain Name
-
SSL Certificate
-
App Pool Credentials
-
Database Server and port (if non-standard)
-
Database Name
-
Type of database authentication currently in use
-
Gimmal Lifecycle Processing Service account
-
Upgrading the Application
-
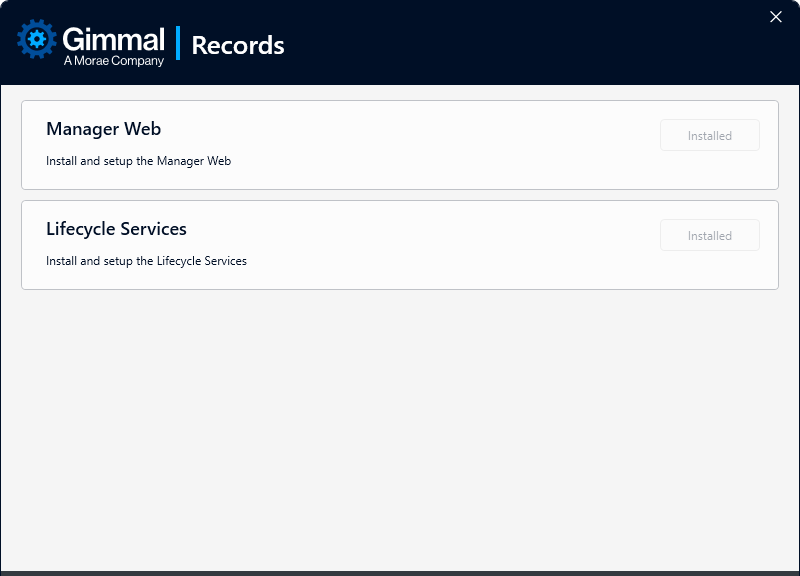
Upgrade the Manager Web
-
Click Upgrade next to the Manager Web entry
-
Click Next to navigate through the screens using the values collected above to populate the appropriate entries
-
On the Database Settings page, verify ‘Automatically Update Database’ is checked
-
Click Finish to complete the upgrade of the Manager Web
-
-
Upgrade the Lifecycle Service
-
Click Upgrade next to the Lifecycle Services entry
-
Click Next to navigate through the screens using the values collected above to populate the appropriate entries
-
On the Database Settings page, verify ‘Automatically Update Database’ is checked. The Database Server and Database Name should match the values used in the Manager Web update screen.
-
Click Finish to complete the upgrade of the Lifecycle Service
-
-
Close the installer splash screen and update the Property Bag values using the instructions below.
Updating the Property Bag (Required for Upgrades)
Upgrades to Gimmal Records 6.x require an upgrade script to be run from the setup splash screen after the core components (Manager Web and Lifecycle Services) have been updated. This step is not needed for new installations.
-
If you have a very large number of records, this utility may take a significant amount of time to run.
If it is interrupted, the utility will pick up where it left off.
-
Gimmal strongly recommends running your upgrade in a QA/Test environment before running it in production.
-
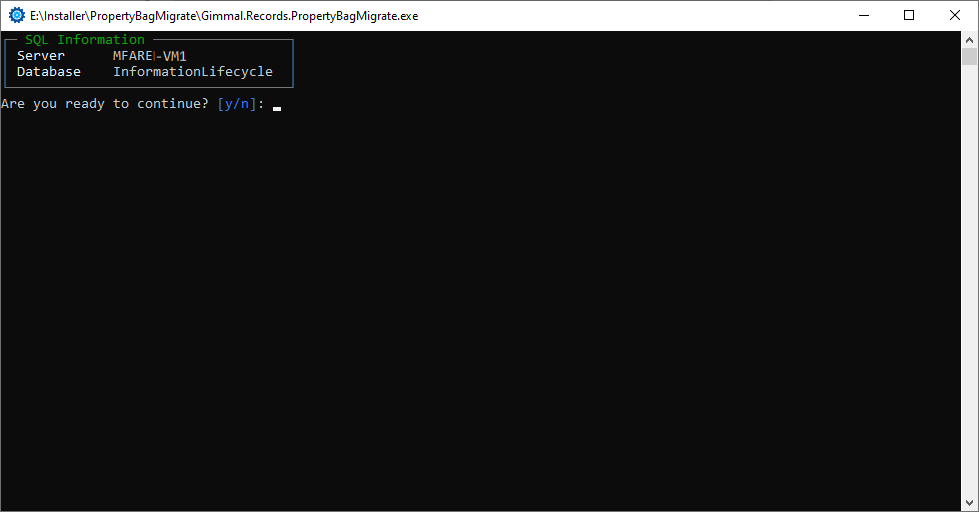
Choose ‘Property Bag Migrate’ from the Upgrade section to begin.
-
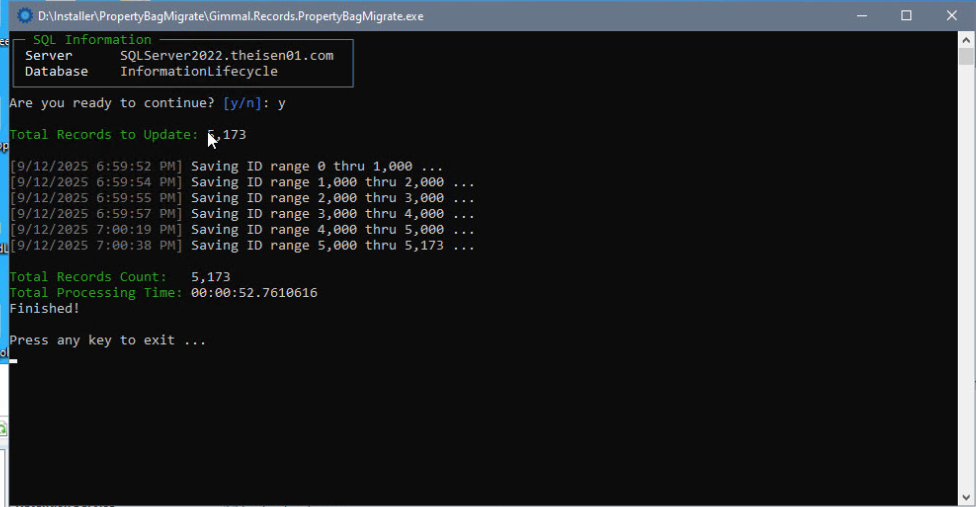
A command prompt will open, asking if you are ready to continue. Enter ‘Y' and click Enter to continue.
-
The utility will calculate the number of records to update, then continue with the update.
-
If there are no records to update, you can click any key to exit the prompt.
-
-
As the utility progresses, updates will be posted to the screen.
-
Upon completion, the total record count will be recorded along with the total processing time.
-
Click any key to exit.