Installing File Share Connector Web
Pre-Installation
Configure Windows Roles and Features as follows:
Role: Web Server
Role Services:
Static Content
Static Content Compression
HTTP Logging
Windows Authentication
ASP.NET 4.5
Management Tools
Installation
The File Share Connector Web is an optional component that is used to support the File Share Connector Shell Extension. This component consists of a web application that hosts a web service which relays the configured managed locations to each deployed File Share Connector.
If you would rather not use this component, you can always manually push the managed paths to each user through the registry or the file system. To install the File Share Connector Web, perform the following steps:
From the Records Management splash screen, click the Install File Share Connector link. The File Share Connector installation screen displays.
Click Install to the right of the File Share Connector Web option. The first screen that displays is the check for prerequisites. This screen validates the following information before allowing the installation to proceed:
Current User is Local Administrator
IIS 7+ is Installed
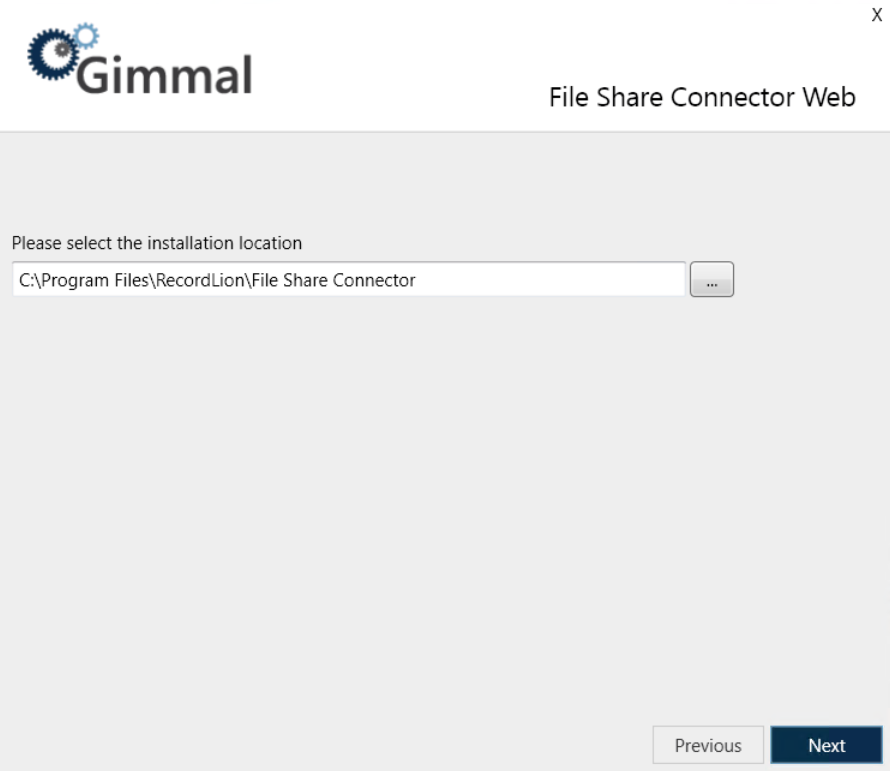
Click Next. The installation location screen displays, which determines where the connector will be installed.

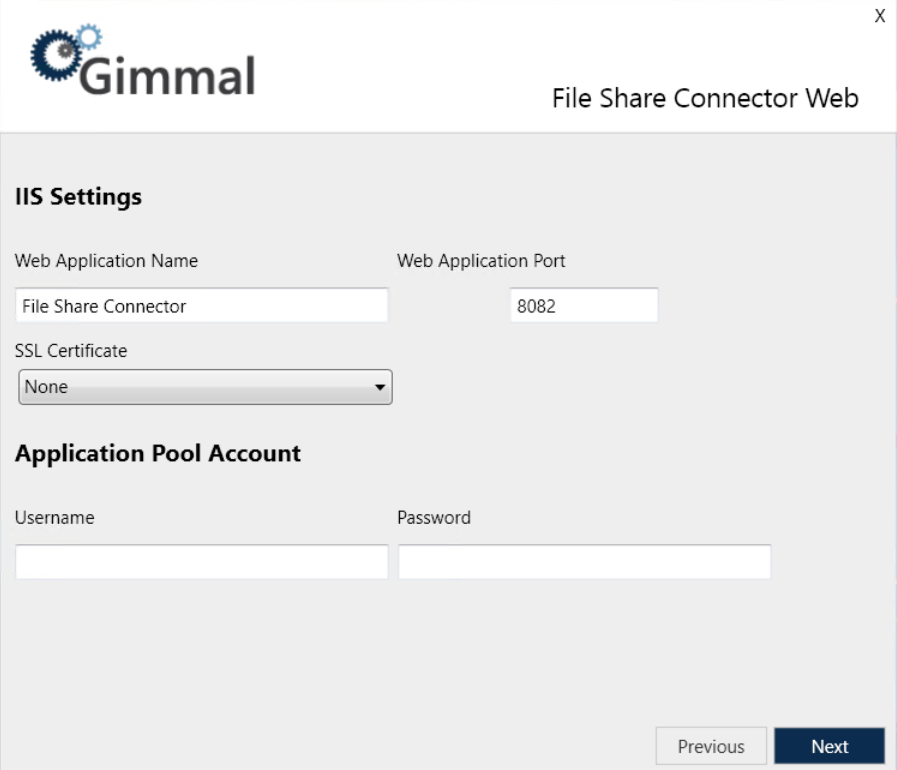
Leave the installation path as the default, or to change it, click the ... icon next to the installation location field, select the desired installation location, and then click Next. The IIS Settings screen displays, where you will configure the settings for the File Share Connector Web.

Enter the required information for the following settings:
Web Application Name: Determines what the respective site will be named in IIS
Web Application Port: Determines what port the respective site will use in IIS
SSL Certificate: If selected, this certificate will be used to create SSL bindings in IIS, otherwise, if not specified, SSL will not be used.
Application Pool Account: When you install Information Lifecycle, a new Application Pool is created that is used by each of the created web applications. The following options specify what user account to use for this Application Pool. This should be a domain account.
Username (ex. DOMAIN\Username)
Password
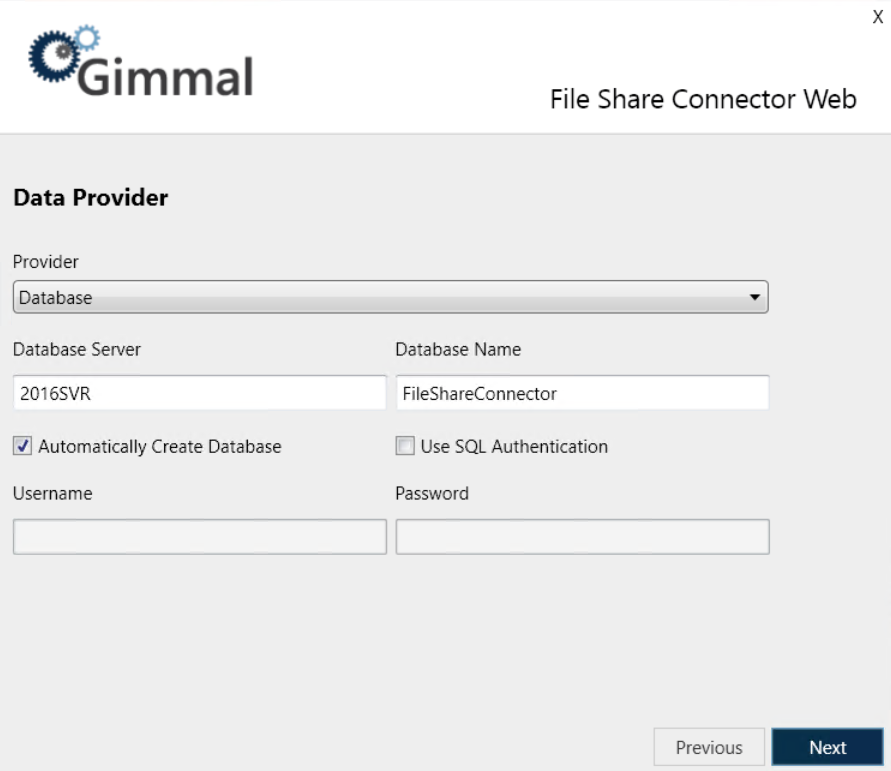
Click Next. The next screen is where you will configure the Data Provider used by the File Share Connector Web. There are two options: File or Database. Gimmal recommends that you use the same options you entered when you installed the File Share Connector component.

Click Next to perform the final installation using the settings you specified above. A progress bar indicates the state of the installation.
When the application finishes installing, click Next to continue to the Finish screen. This screen indicates that everything installed successfully.
Note: If you experience any errors during the installation process, refer to the installer log in your Windows Temp folder
Click Finish to close the installer window.
Ensuring Successful Authentication with NTLM
After you install the File Share Connector Web, it is configured to leverage Windows Authentication in IIS. If Kerberos Authentication is not enabled, many modern browsers may have an issue successfully authenticating users using NTLM, even though both providers exist in IIS configuration. To ensure successful authentication in this scenario, you should disable Kerberos authentication by performing the following steps:
Open IIS.
Select Information Lifecycle STS.
Click Authentication Feature.
Select Windows Authentication.
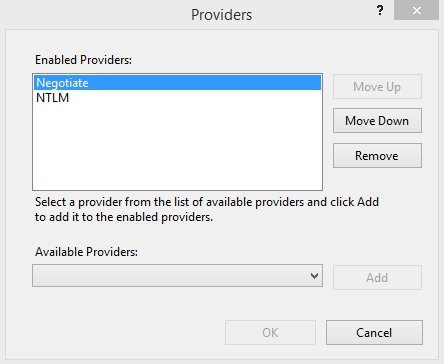
Click the Providers… option in the pane on the right.
Select the Negotiate option and click Remove.
Click OK to close the Providers window.

