Overview
The Laserfiche Integration allows for Gimmal records of various types to be linked with Laserfiche documents, making these records searchable within Laserfiche. When records are created, updated, deleted, or expunged in Gimmal, the same changes are made to the corresponding documents in Laserfiche.
Configuring the Laserfiche Integration
The Laserfiche CMIS Gateway must be installed and correctly configured for the Laserfiche
Integration to work. Please see documentation from Laserfiche for completing this step. Once the CMIS Gateway is in place, configure the following settings on the Application Settings page in Gimmal:
-
Laserfiche CMIS Gateway URL – The service URL of the CMIS Gateway browser binding service (e.g. https://example.domain/lfcmis/browser).
-
Laserfiche Repository – The name of the Laserfiche repository.
-
Laserfiche Username – The username of the dedicated account that Gimmal will use to connect to Laserfiche. At minimum, this account should possess sufficient rights to create, update, move, and delete documents.
-
Laserfiche Password – The password of the dedicated account that Gimmal will use to connect to Laserfiche.
To finish configuring the Laserfiche integration, go to the Admin menu and select Laserfiche Integration.
Access to this page is governed by role permissions, so the Configure Laserfiche Integration right must be granted to the role of the user doing the configuration.
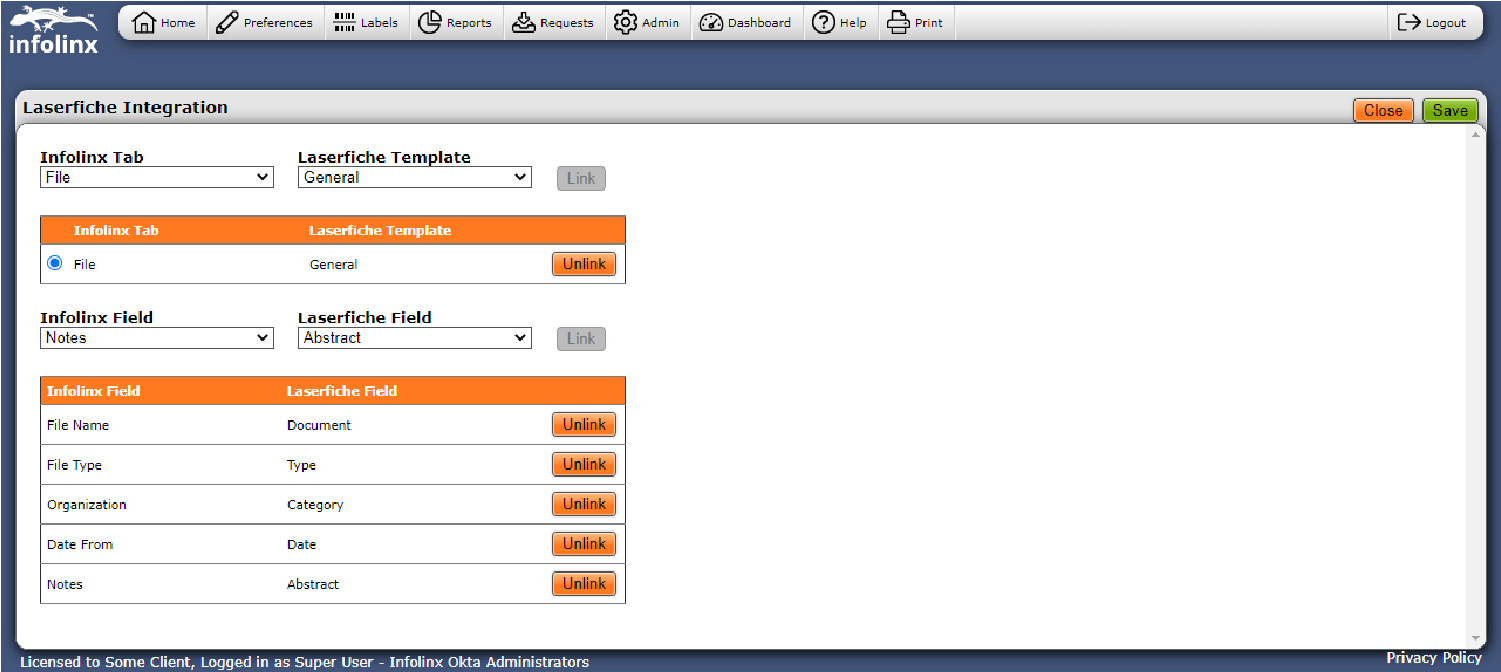
On the Laserfiche Integration page, select a Gimmal tab and a Laserfiche template, and click the Link button on the right to link the tab with the template.
Each tab may only be linked with one template, but multiple tabs may be linked to the same template.
To unlink a Gimmal tab from a Laserfiche template, click the Unlink button for the tab’s row in the linked tabs grid.
To link the fields of a Gimmal tab with the fields of a Laserfiche template, first select the tab in the linked tabs grid. Below, select a Gimmal field and a Laserfiche field, and click the Link button on the right to link the fields.
Each Gimmal field may only be linked with one Laserfiche field and vice versa. To unlink a Gimmal field from a Laserfiche field, click the Unlink button for the field’s row in the linked fields grid.
When the configuration is complete, click the Save button in the top right corner to save changes.
Alternatively, click the close button at any time to discard changes and return to the Admin menu.
To create a record that is linked to Laserfiche, go to the Create page, enter data for the record, select a Laserfiche folder at the bottom of the page, and save the record.
If a folder is selected, creating a Gimmal record will create a corresponding document in Laserfiche according to the settings configured on the Laserfiche integration page.
The Laserfiche document will be named with the tab and barcode of the Gimmal record (e.g. File – 0000000200) and placed in the folder that was selected on the Create page. Note that Laserfiche documents will not be added for Gimmal records that are created without a Laserfiche folder.

Updating Records Linked to Laserfiche
Updating the metadata of a Gimmal record will update the metadata of the corresponding document in Laserfiche according to the settings configured on the Laserfiche Integration page. If the Laserfiche folder is changed, the corresponding document will be moved to the new folder in Laserfiche. Assigning a Laserfiche folder to a Gimmal record will also create a corresponding document in Laserfiche if the record was not previously assigned a folder.
Deleting Records Linked to Laserfiche
Deleting or expunging a Gimmal record that is linked to a Laserfiche document will unlink the record and transfer the document to the Recycling Bin in Laserfiche. However, undeleting a Gimmal record that was previously linked to Laserfiche will not restore the link or move the corresponding Laserfiche document back to its original folder location.
Importing Records Linked to Laserfiche
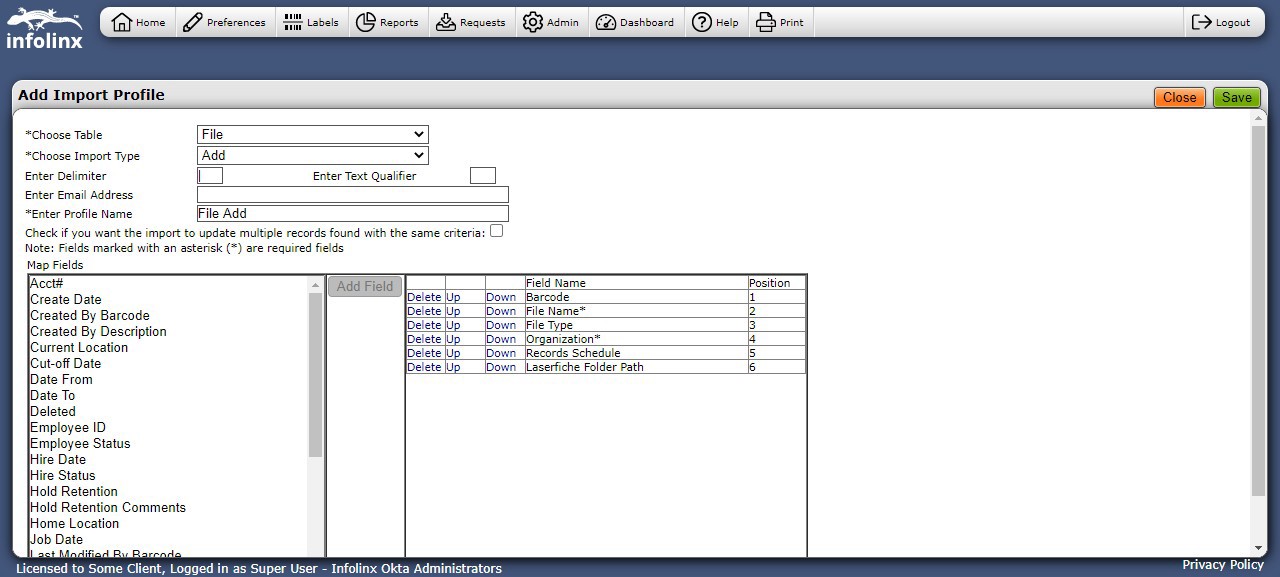
To import Gimmal records that are linked to Laserfiche, create an import profile for the linked tab, and select Laserfiche Folder Path as one of the fields. In the import data file, place the full path of the Laserfiche folder in which the documents will be created (e.g. IX37\A\Example) in the position of the Laserfiche Folder Path field. Then, execute the import.
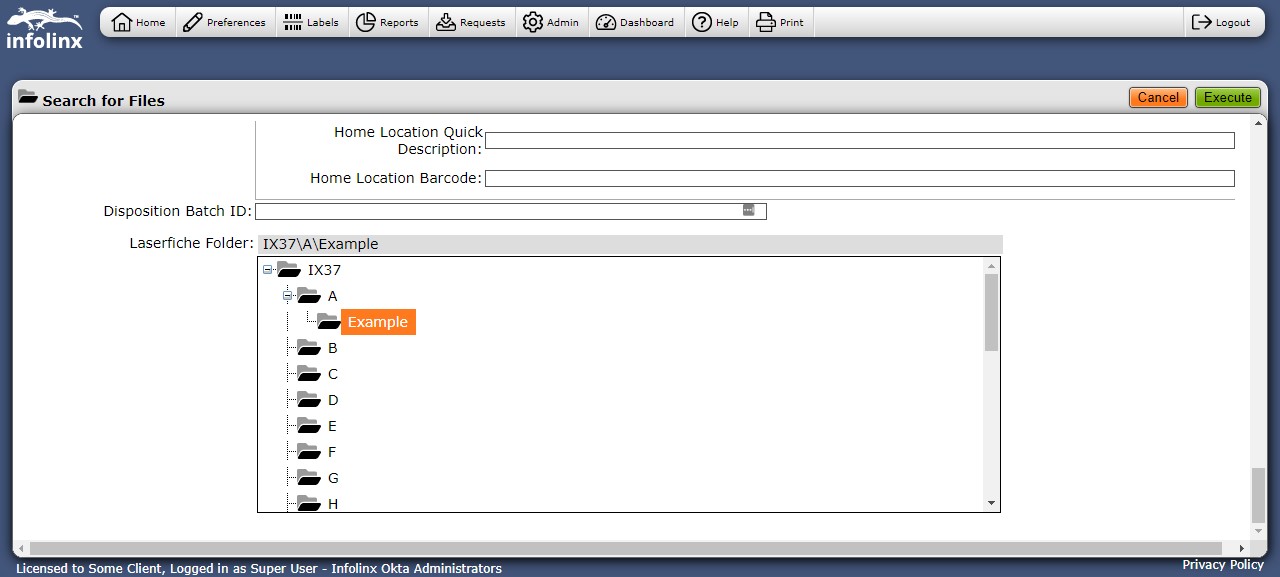
Searching by Laserfiche Folder
To search for Gimmal records linked to documents in a certain Laserfiche folder, go to the Detailed Search page and select the Laserfiche folder in addition to any other search criteria, then click the Execute button in the top right corner to execute the search.