
Gimmal Physical provides options for records displayed in any home page grid to be exported to an external file.
Not all features are available in older versions of Gimmal Physical. Please contact support with any questions related to exporting in versions 3.14 and below.
Create a New Export
-
Click on the ‘Export' Action Button after finding the items you would like to include in the file. This opens the 'Export Home Page Grid' screen for that tab.
-
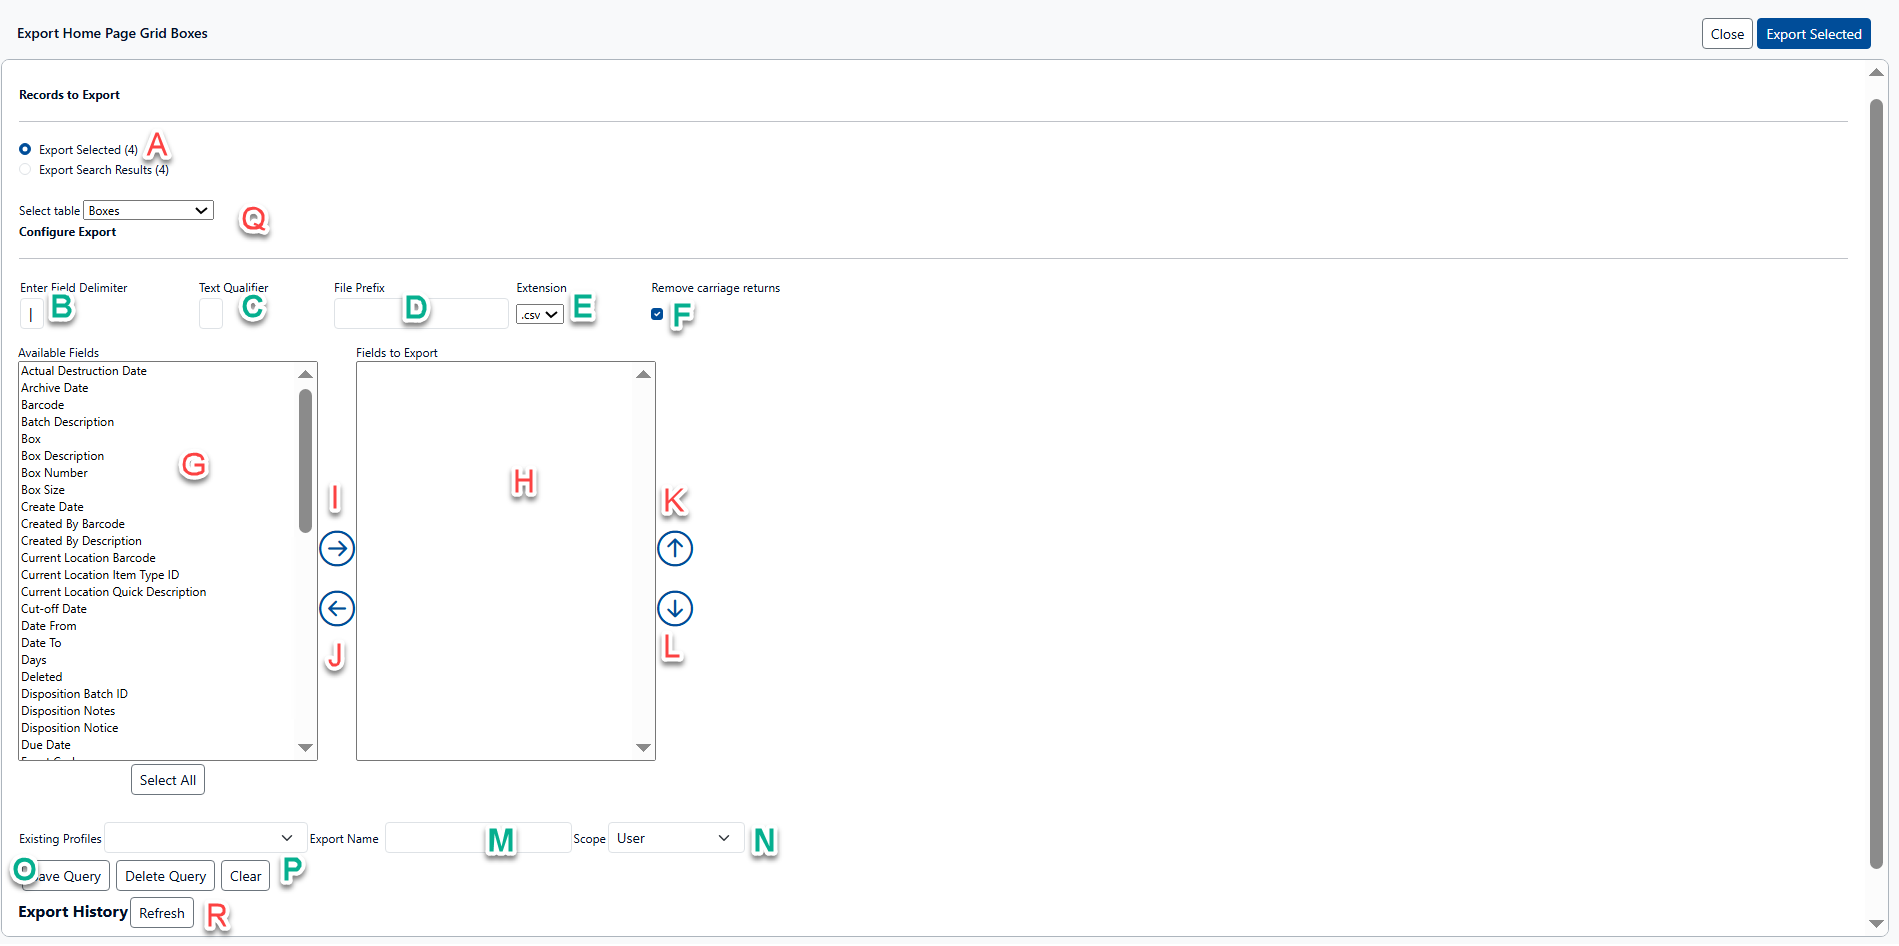
Choose which records you would like to export (A):
-
‘Export Selected’ will export only the items whose checkbox was selected on the Home Page grid.
-
‘Export Search Results’ will export all the results of the query, whether they are selected or not.
-
-
Configure the Export format:
-
Supply a field delimiter (B), this entry is required.
-
If needed, enter a text qualifier (C). Leave this field blank for system defaults (suggested).
-
The created file will be given a system-generated name; however, a prefix (D) can be added to the file name by entering text in this field.
-
Choose the file type (E) for export. Note: .CSV can be used with spreadsheet tools such as Excel
-
The ‘Remove carriage returns’ option (F) is on by default but may be disabled for troubleshooting.
-
-
Manage the fields to export:
-
Selecting the chosen field from the list of fields available for export (G) and clicking the > arrow (I). This will put the field name in the Export fields list (H).
-
To remove a field from the Export list (H), select the field and choose the < arrow (J) to move it back to the Available Fields list (G).
-
To change the order, select the field and use the up (K) and down (L) arrows to maneuver the selected field.
-
-
Click on the ‘Export Selected’ button.
-
It may take a few minutes for the new export file to appear in the ‘Available Exports' list (R).
-
The ‘Clear’ button (P) can be used at any time to reset all options.
-
The ‘Select table' drop-down (Q) is only used when exporting data from many-to-many controls. The default value is the name of the tab.
Exporting data from Many to Many controls
Items in a many-to-many relationship (e.g., Users/Organizations) require an extra step in choosing the correct table.
-
Follow the steps above; however, after choosing the configuration options (Step 3), you must select the required table from the ‘Select table’ dropdown (Q). This will add the available many-to-many relationship fields to the Available Fields list (G) for this export file.
-
Continue with the configuration as noted in the steps above.
An export which includes a many-to-many relationship will have one record per line for each many-to-many relationship, e.g.
-
Box 1 | Type A
-
Box 1 | Type B
-
Box 1 | Type C
-
Box 2 | Type A
-
Box 2 | Type D
Save an Export to a Profile
You can save the configuration of an export to a profile for future use.
-
Enter the export details as listed in the ‘Create a New Export’ section above.
-
Enter the 'Export Name' (M) by which this export profile will be known.
-
With the proper permissions, a Scope can be selected from the ‘Scope’ dropdown list (N) to determine who can see this profile.
-
User - only the logged-in user can see this export profile
-
Role - all members of the role of the logged-in user can see this export profile
-
System - all users can see this export profile
-
-
Click on the ‘Save Query’ option to save the profile (O).
Using an Existing Export Profile
To use a profile that has already been created:
-
Click on the ‘Export' Action Button from the Home Page Grid to open the Export Home Page Grid screen for that tab.
-
Choose the existing export profile from the ‘Existing Profile' dropdown list.
-
Verify the options selected.
-
Click on the ‘Save Query’ option to save the profile (O).
Removing an Existing Export Profile
With the proper permissions, you can remove an export profile from the list:
-
Click on the ‘Export' Action Button from the Home Page Grid to open the Export Home Page Grid screen for that tab.
-
Choose the existing export profile from the ‘Existing Profile' dropdown list.
-
Click on the ‘Delete Query’ button to remove the profile from the list.
-
Click ‘OK’ on the verification.
-
The profile will be removed from the list
Available Exports
The list of available exports (R) shows the files that have been exported for this particular grid.
-
The ‘Delete’ link will remove the file
-
The ‘Created Date’ is the date the export was created
-
The ‘File Name’ provides a clickable link to open or download the selected file.
Depending on the volume of records being exported, it may take a while for an export file to appear in this list. Clicking ‘Refresh’ will update the list with recent entries.