
This topic is part of the Printing Labels tutorial. Click here to view.
Label Profiles are templates that can be reused for custom label specifications. They are used to specify the following:
-
Data Tab: The item type/data tab the label is for. This is usually Files or Boxes but could be for other item types in your application.
-
Design File: The design file contains the overall dimensions, layout, and other design properties of the label.
-
Number of labels per page: The number of labels to be printed per page, corresponding to the label stock being used.
-
Profile Name: Name of the label profile to find and use later.
-
Which fields for the selected data tab are printed on the label
Basic Label Profiles
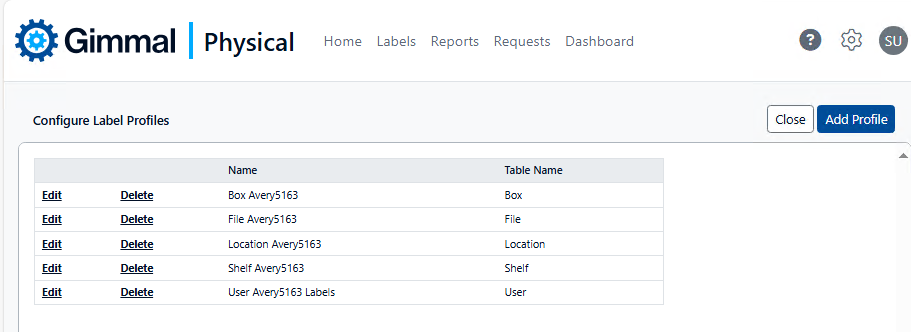
Out of the box, Gimmal Physical includes several basic black and white label profiles, based on the Avery 5163 label stock.
Custom Label Profiles
Gimmal Physical offers the option to create your own label templates using different stock or different layouts. To do so, you must first configure a new label profile.
-
Browse to Admin->Configuration->Label Profiles, this will take you to the Configure Label Profiles page (see image above).
-
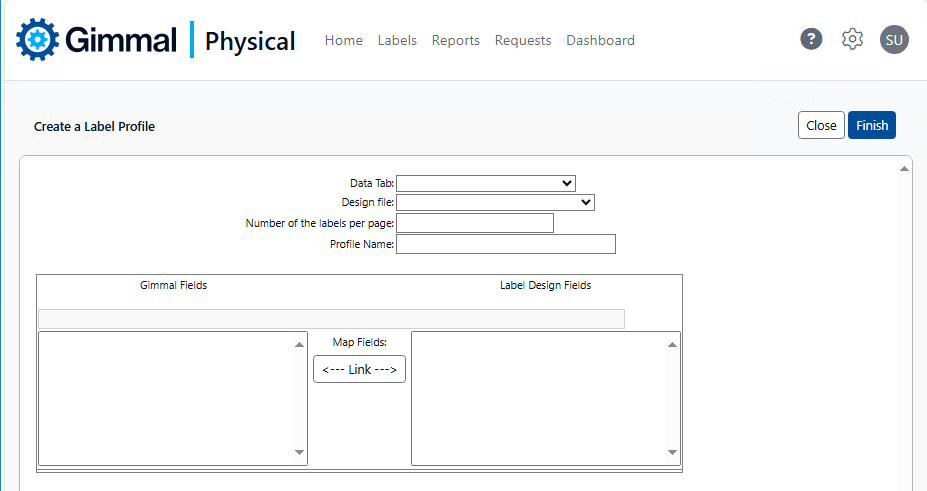
Click on the Add Profile link to open the Create a Label Profile screen.
-
Enter/select the information for the new profile as indicated below.
-
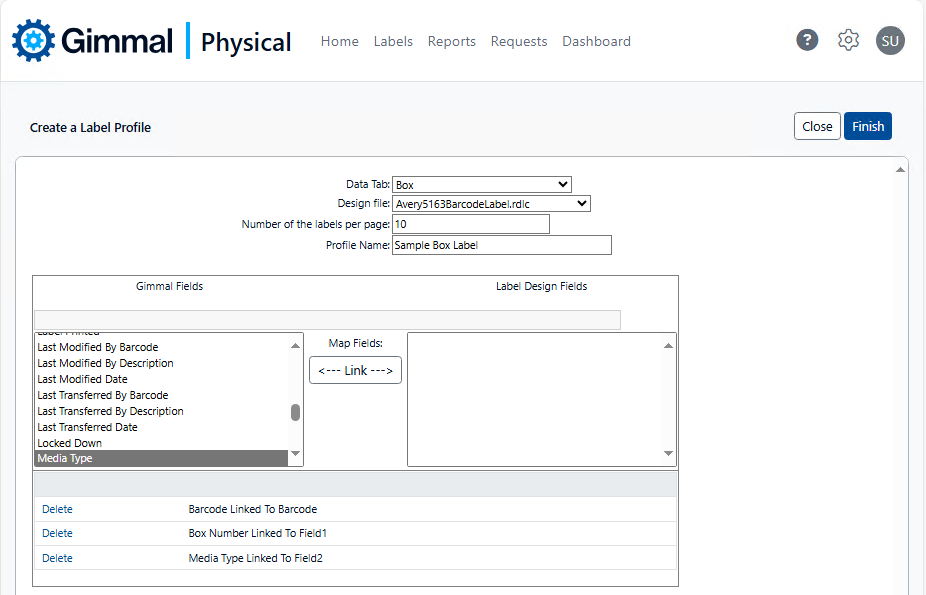
Data Tab: Choose the type of item you are creating a label profile for. The Gimmal Fields pane on the left will populate/update as you change Data Tab selections.
-
Design File: Select the appropriate design file to be used for this label profile. The list of design files presented reflects only what has already been uploaded to the application. The Label Design Fields pane on the right will populate/update as you change Design File selections.
To add a new design file:
-
Save the file (see note below) to your local computer.
-
Browse to Admin->Configuration->Label Design Files
-
Click Choose File and browse to the saved design file.
-
Click Upload File to add the design file to the list of available files.
-
A new label profile may now be created based on the uploaded design.
Creating new label design files is performed outside of the Gimmal Physical application and is beyond the scope of this documentation. If you require a new label design, please reach out to your Gimmal Account Manager or Gimmal Support.
-
Number of labels per page: Enter the number of labels per page, corresponding to the label stock you have procured. Note that even though the label size is the same, the labels per page might differ due to the format, i.e., a standard letter page size vs. a roll of labels.
-
Profile name: Enter a meaningful name. This is especially important if you have different labels for the same item type.
-
Label fields: Map the desired fields in Gimmal Physical to the appropriate field in the label design. Highlight matching fields in each pane and then click the <--Link--> button.
-
It does not matter in which order you create field mappings.
-
If you need to remove/redo a field mapping, simply click the Delete link at the left.
-
You can only map a single field from Gimmal Physical to each label field.
-
You can map a single field from Gimmal Physical to multiple label fields.
4. Click Finish to save the Label Profile configuration.