
This section contains instructions for configuring the Feature-Activated and Provider-Hosted versions of Governance Hub in a SharePoint 2013/2016 environment.
Existing Gimmal Product Configuration Support
Governance Hub provides a configuration data transfer mechanism for existing Gimmal products. If you currently have these products installed and wish to leverage the new HTML 5 or SharePoint Provider-Hosted app model versions, you can transfer your existing configuration data directly into the Governance Hub model.
Feature-Activated & Provider Hosted: Governance Hub
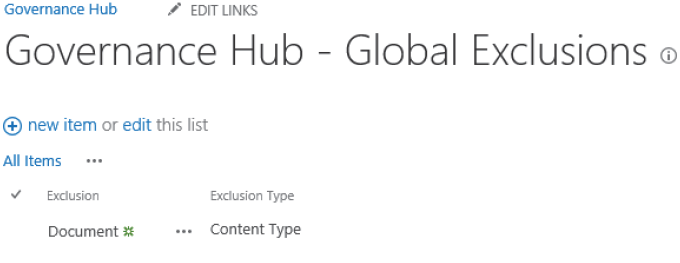
Global Exclusions
You can use the Global Exclusions list to identify content types and columns that you want Gimmal products to ignore. For example, you may not want Gimmal products to either display the Health Analyzer content type to users or to process it. Currently, Gimmal products voluntarily use and comply with this exclusions list. It is not enforced by the Governance Hub.
Governance Hub provides the Global Exclusions list as a reference. The app must enforce exclusion.
To create, edit, and delete a Global Exclusion navigate to the Global Exclusions Management List by selecting Global Exclusions from the Governance Hub Dashboard left navigation.
-
On the site where Governance Hub is deployed, navigate to Settings > Site Settings. The Site Settings page displays.
-
Under Site Administration, click Governance Hub. The Governance Hub Dashboard displays.
-
Select Global Exclusions from the left navigation. The Governance Hub – Global Exclusion page displays.
The following sections describe how to create, edit, and delete Global Exclusions starting with the steps above.
Creating a Global Exclusion
-
Click + new item. The Global Exclusion properties form displays. On the Global Exclusion properties form, enter the following values:
-
Exclusion – Required. Unique name of the item to be excluded. For example, you can enter the internal name of the excluded column or the content type name of an excluded content type.
-
Exclusion Type – Required. The type of item to be excluded. Choices are Content Type or Column.
-
-
Click Save. The Global Exclusion is created.
Editing a Global Exclusion
-
Open the Actions menu (…) next to the item you want to edit and select Edit Item. The Site Collection entry's properties page displays.
-
On the Global Exclusion properties page modify any of the following values as desired:
-
Exclusion – Required. The name of the item to be excluded. Unique name of the item to be excluded. For example, you can enter the internal name of the excluded column or the content type name of an excluded content type.
-
Exclusion Type – Required. The type of item to be excluded. Choices are Content Type or Column.
-
-
Click Save. The Global Exclusion is saved.
Deleting a Global Exclusion
-
Open the Actions menu (…) next to the item you want to delete and select Delete Item. A confirmation dialog displays.
-
Click OK. The Site Collection entry is deleted.
Site Collection Registry
Governance Hub uses the Site Collection Registry to maintain a current list of installed Gimmal products and to manage associated product configurations. The list is automatically populated by Governance Hub with sites from the current web application. If a user does not have access to all site collections to be managed in Governance Hub, they must manually add them. Also, if you are using Governance Hub in an on-premises environment and pushing configuration settings to apps in O365, you must manually add the O365 site collections. The following sections describe how to create and delete entries in the Site Collection Registry in Governance Hub.
Governance Hub automatically updates Site Collection Registry entries on the same environment each time you navigate to the Dashboard page.
The following sections describe how to create, edit, and delete Global Exclusions.
-
Navigate to the Governance Hub Dashboard.
-
Select Site Collection Registry from the left navigation. The Governance Hub – Site Collections page displays.
Creating a Site Collection Entry
-
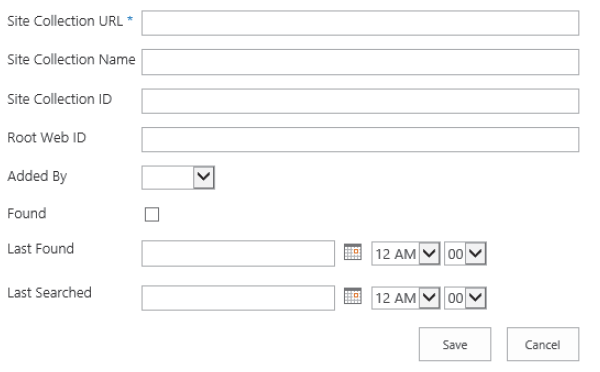
Click + new item. The Site Collections properties page displays:
-
On the Site Collection's properties page enter the following values:
-
Site Collection – URL Required. Fully qualified URL for the site collection.
-
Site Collection Name – Enter a name for this site collection.
-
Site Collection ID – Enter the globally unique identifier (GUID) for this site collection.
-
Root Web ID – Enter the root web ID for this site collection.
-
Added By{*} – Indicate if this site collection was added by a timer job or if it was added manually.
*If the Added By field is set to "Timer Job", then these Site Collection properties will be set automatically when the PopulateSiteCollectionsListJob runs.
-
Found – Indicate if this site collection can be found when performing a search.
-
Last Found – Indicate when this site collection was last found.
-
Last Searched – Indicate when this site collection was last searched for.
-
-
-
Click Save. The Site Collection entry is created.
Editing a Site Collection Entry
You should only edit Site Collection entries that you created.
-
Open the Actions menu (…) next to the item you want to edit and select Edit Item. The Site Collection entry's properties page displays.
-
On the Site Collection entry's properties form, edit the values as desired.
-
Click Save. The Site Collection entry is saved.
Deleting a Site Collection Entry
-
Open the Actions menu (…) next to the item you want to delete and select Delete Item. A confirmation dialog displays.
-
Click OK. The Site Collection entry is deleted.
Global Configuration Groups: Governance Hub
The Global Configuration Groups Management List contains list instances for each Global Settings Group with Title, Group ID, Priority, and Site Descriptor fields. Global Configuration Groups created here are available for configuration of all Governance Hub compatible products. Navigate to the Global Configuration Groups Management List by selecting Global Configuration Groups from the left pane of the Governance Hub Dashboard.
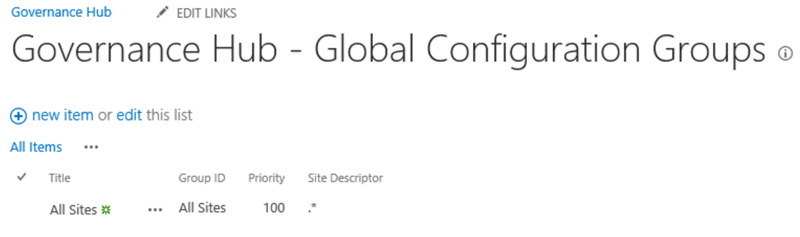
The default Global Configuration Group called All Sites is created when Governance Hub is installed. Do not delete this configuration group.
All Global Configuration Groups are available for product-specific configuration. Using a specific product's Global Configuration Actions (...) Menu, owners and administrators can edit global configurations, as well as aspects of product functionality that are product specific. The menu items vary from product to product, but the administrator can modify product settings on a per-product, per-global configuration group basis.
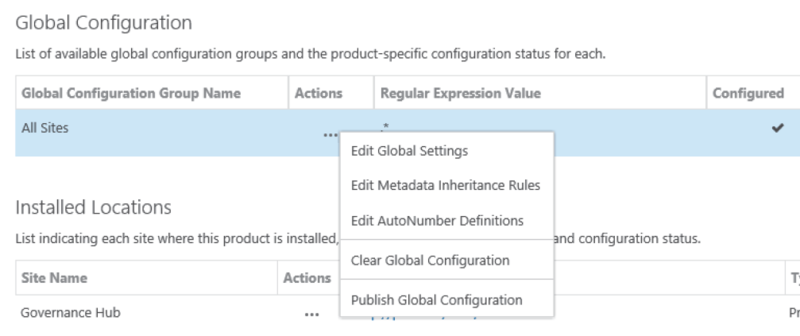
For information on Actions (...) Menu items that are product-specific (such as Edit Metadata Inheritance Rules and Edit AutoNumber Definitions, shown in the screenshot above), see that product's configuration section in this Help.
Creating, Editing, Deleting, & Clearing Global Configuration Groups
Creating a Global Configuration Group
-
Click + new item from the Global Configuration Group Management List. The Global Configuration Group form displays.
-
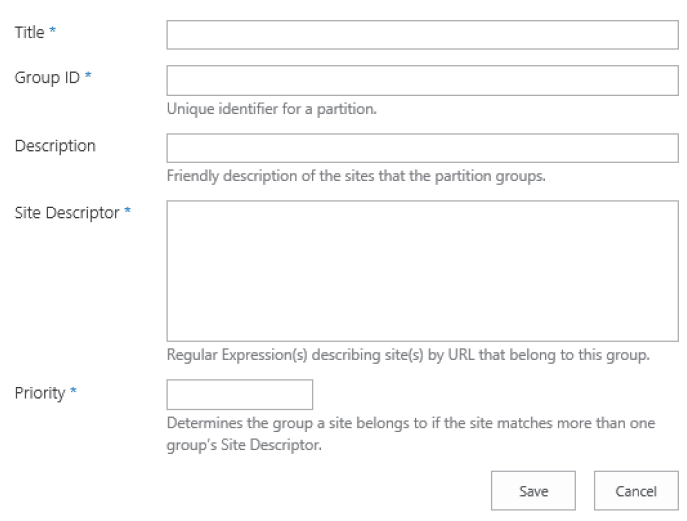
On the Global Configuration Group form, enter the following values:
-
Title – Required. Enter a unique value to display on other Governance Hub pages. (Note: You cannot enter special characters in the Title field.)
-
Group ID – Required. Enter an ID of your choice, but it must be unique. For more information, see Microsoft's naming requirements. (Note: You cannot enter special characters in the Group ID field.)
-
Description – Explanation for the sites that belong to the group.
-
Site Descriptor – Required. This value must be either a fully qualified URL or a regular expression that describes one or more fully qualified URLs. You can enter multiple URLs or regular expression values in this field, one URL/value per line. For more information on formatting Regular Expressions, see Regular Expression Language - Quick Reference.
-
Priority – Required. Valid values are 1 – 100. Lower numbers indicate higher priority. Determines the Global Configuration Group's display order on the Product Configuration page.
-
-
Click Save. The Global Configuration Group is created.
Editing a Global Configuration Group
Select the Edit Global Configuration Actions Menu item to open the Global Configuration Group configuration form. Global configurations for each Global Configuration Group are propagated from, and stored, here.
-
Navigate to the Global Configuration Groups Management List by selecting Global Configuration Groups from the Governance Hub Dashboard left navigation. The Governance Hub - Global Configuration Groups page displays.
-
Open the Actions menu (…) next to the item you want to edit and select Edit Global Settings. The Global Configuration Group's form displays.
-
Modify any of the following values:
-
Title – Required. Enter a unique value to display on other Governance Hub pages.
-
Group ID – Do not change this value.
Do not modify the Group ID of an existing Global Settings Group.
-
Description – Explanation for the sites that belong to the group.
-
Site Descriptor – Required. This value must be either a fully qualified URL or a regular expression that describes a fully qualified URL. You can enter multiple URLs or regular expression values in this field, one URL/value per line.
-
Priority – Required. Valid values are 1 – 100. Lower numbers indicate higher priority. Determines the Global Configuration Group's display order on the Product Configuration page.
-
-
Click Save. The Global Configuration Group is saved.
Deleting a Global Configuration Group
If you delete a Global Configuration Group, you lose all product-specific configuration associated with that group!
-
Navigate to the Global Configuration Groups Management List by selecting Global Configuration Groups from the Governance Hub Dashboard left navigation. The Governance Hub - Global Configuration Groups page displays.
-
Open the Actions menu (…) next to the item you want to delete and select Delete Item. A confirmation dialog displays.
-
Click OK. The Global Configuration Group is deleted.
Clearing Global Configuration Information
The Clear Global Configuration option only displays on the Action menu if settings are configured for the selected group.
-
On the site where Governance Hub is deployed, navigate to Settings > Site Settings. The Site Settings page displays.
-
Under Site Administration, click Governance Hub. The Governance Hub Dashboard displays.
-
Click the icon corresponding to the product you want to manage. The product's configuration page displays.
-
In the Global Configuration section of the configuration page under the Actions column, click the ellipsis menu (…) next to the Global Configuration Group where you want to clear configuration and select Clear Global Configuration. A confirmation dialog displays.
-
Click OK. The Global Configuration Group's configuration information is cleared.
Importing & Exporting Global Configuration Groups
All product configuration data are importable and exportable. Global configuration data can be imported from a Global configuration export and vise versa, allowing settings to be moved intact from one environment to another (e.g., DEV > TEST > PROD). Follow these steps to import or export an installed product's global configuration information from a .govhub file into a Global Configuration Group.
You can only import a .govhub configuration file that was created using the Export Global Configuration function.
-
On the site where Governance Hub is deployed, navigate to Settings > Site Settings. The Site Settings page displays.
-
Under Site Administration, click Governance Hub. The Governance Hub Dashboard displays.
-
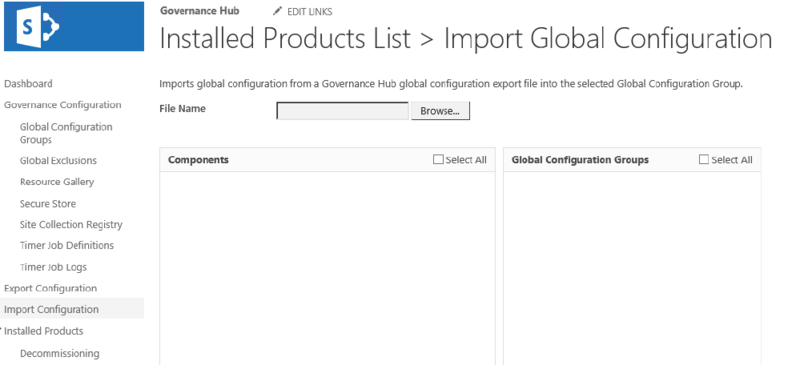
Select Import Configuration or Export Configuration from the left navigation. The Import or Export Global Configuration page displays
-
Getting File:
-
To Export: Click the checkbox next to the Global Configuration Groups you want to export and select Export. An Export Progress bar displays.

-
To Import: On the Import Global Configuration page, click Browse and select a .govhub file that contains global configuration information for this product. Click Open. The global configuration information is imported.
-
5. If you chose Export you will be prompted by the browser to save the .govhub export file. Save the .govhub file. You can import this file into any Global Configuration Group associated with the same product.
Publishing & Managing Global Configuration Groups
Publishing Changes to a Global Configuration Group
-
On the site where Governance Hub is deployed, navigate to Settings > Site Settings. The Site Settings page displays.
-
Under Site Administration, click Governance Hub. The Governance Hub Dashboard displays.
-
Click the icon corresponding to the product you wish to manage. The product's configuration page displays.
-
In the Global Configuration section of the configuration page under the Actions column, click the ellipsis menu (…) next to the Global Configuration Group you wish to import into and select Publish Global Configuration. A confirmation dialog indicates that the Governance Hub Publish Settings timer job is queued.
-
Click OK. The global configuration is scheduled for publishing.
Managing Local Configuration Settings for Installed Locations
-
Edit Local Settings (product-specific and only displays if available for that product)
-
Subscribe/Unsubscribe
-
Import Local Configuration
-
Export Local Configuration
For information on settings that are product-specific (such as Edit Metadata Inheritance Rules and Edit AutoNumber Definitions) see that product's configuration chapter.
Gimmal recommends that all sites in the governed environment use HTTPS and that all URL domains are in the Intranet zone.
Governing Installed Locations
From a product's configuration page in Governance Hub, administrators can configure both global and local settings for Gimmal products in order to achieve governance over an enterprise's configuration. This section describes managing these configurations.
Installed Locations
Each product's configuration page includes an Installed Locations section where an item in the list represents an installed instance of a particular product within a site. This list is automatically updated when a new product instance is installed in a site. This list allows an administrator to quickly visualize all site collections relevant to a product by site collection and perform local configuration actions.

The Installed Locations list presents the following information about each installed instance to the user:
-
Site Name
-
Site URL
-
Product Type (Provider-Hosted or Feature-Activated)
-
Site Subscription Status
-
Product Configuration Status
-
Global Configuration Group priority membership
-
Product Version number
Searching the Installed Locations Site List
You can search your Installed Locations list by entering a keyword in the Installed Locations Search field. Follow these steps to search the installed locations site list:
-
Click the drop-down arrow to the right of the Version column. The Search field displays.
-
Enter a keyword to filter your list. The site list on the left refreshes and displays only those sites with that keyword in the title.
-
To return to the complete site list:
-
Click in the Search field and press the Backspace button on your keyboard to remove the keyword
-
Click the X in the Search field, and press Enter
-
Subscribing & Unsubscribing
Subscribing To Governance Hub
For an installed instance of a product to receive global configuration data from the Governance Hub, it must be both subscribed and belong to a configured Global Configuration Group. Follow these steps to subscribe an installed product instance to the Governance Hub:
-
Navigate to the Governance Hub Dashboard.
-
Click the icon corresponding to the product you wish to manage. The product's configuration page displays.
-
In the Installed Locations section of the configuration page, under the Actions column, click the ellipsis menu (…) next to the site you wish to import into and select Subscribe. A checkmark displays in the Subscribed column. The instance is subscribed.
Unsubscribing From Governance Hub
An installed product instance may be excluded from Governance Hub's configuration governance by unsubscribing from Governance Hub. When unsubscribed, the installed instance does not receive global configuration data from the Governance Hub.
Follow these steps to unsubscribe an installed product instance from Governance Hub:
-
Navigate to the Governance Hub Dashboard.
-
Click the icon corresponding to the product you wish to manage. The product's configuration page displays.
-
In the Installed Locations section of the configuration page, under the Actions column, click … next to the desired Global Configuration Group and select Unsubscribe. The checkmark is removed from Subscribed column and the instance is unsubscribed.
Working with Governance Hub Resource Gallery
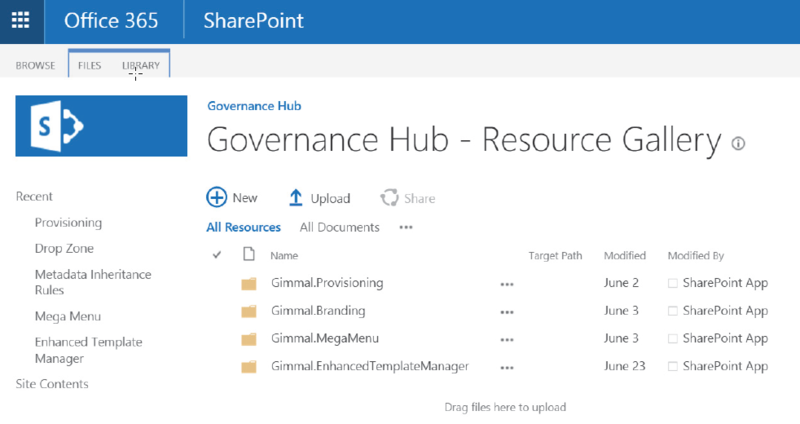
The Governance Hub Resource Gallery provides a way for you to copy your custom app artifacts to one central location for use by multiple apps, such as Gimmal's Branding Manager, Provisioning, Mega Menu, etc.To access the Resource Gallery, follow these steps:
-
On the site where Governance Hub is deployed, navigate to Settings > Site Settings. The Site Settings page displays.
-
Under Site Administration, click Governance Hub. The Governance Hub Dashboard displays.
-
Select Resource Gallery from the left navigation pane. The Resource Gallery displays.
For information on how a Gimmal Content Governance product integrates with the Governance Hub Resource Gallery, see that product's specific configuration section in this Help (where applicable).
Logging
The Governance Hub provides a variety of logging capabilities:
-
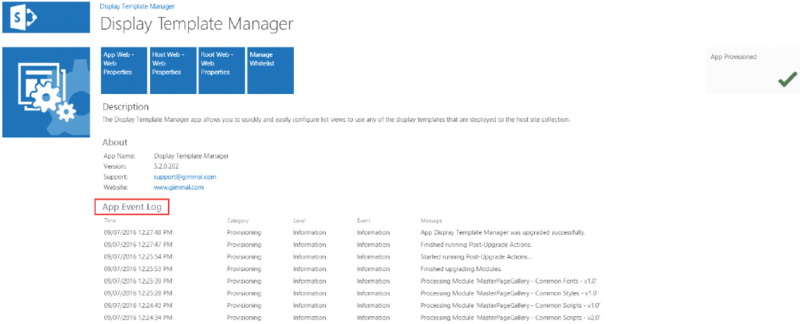
Log entries produced during add-in (PH) installation, or during add-in operations, are found on the App Web landing page, under the App Event Log section. The App Web landing page is described in each app's specific configuration guide, available on the Gimmal Software Download Site.
-
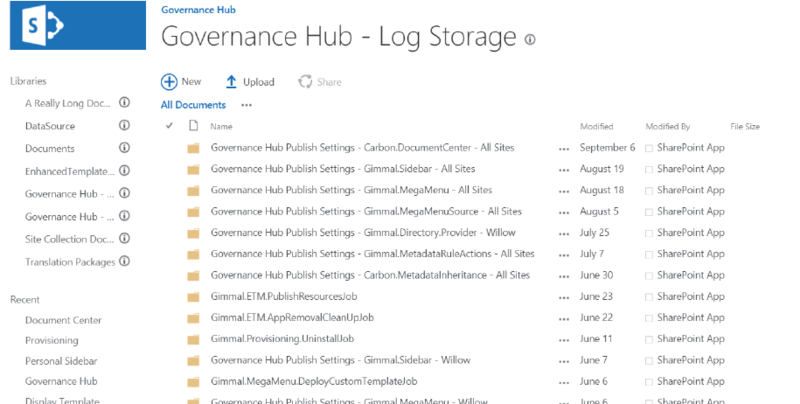
Log entries produced while running an Azure WebJob or while running a job in the Gimmal Job Scheduler are found in the Governance Hub Log Storage library. Each job produces a single log file containing all log entries produced during the running of the job. You can access the Log Storage library by entering the following in your browser window: http://<ServerHost>/<YourGovernanceHubSite>Lists/GimmalLogStorage.
The Gimmal Provisioning (PH) add-in relies on a Feature-Activated timer job running in the SharePoint Timer Service to provision any sites in an on-premises environment. Therefore, any logs produced while provisioning an on-premises site will be stored in the ULS and will not be located in the Gimmal Log Storage library.
Scheduled Jobs & Configuration Lists
Governance Hub Scheduled Jobs
Governance Hub installs several scheduled jobs that are run by the Gimmal Job Scheduler Service. These jobs run daily at midnight, by default. You can adjust how often the jobs are run from the Gimmal Job Definitions list.
-
ComponentInstanceCleanupJob: Reconciles the installed instance information by removing references to installed instances when the instance's site URL is not accessible. The intent of this job is to clean up instances belonging to deleted sites.
-
FindComponentInstancesJob: Reconciles all products' installed instance information by scanning sites listed in the Site Collections list and adding an installed instance for a given product when an instance of that product is found in a site.
-
PopulateSiteCollectionListJob: Populates the site collection list with additional information about site collections.
-
PublishSettingsJob: Publishes global product configuration information from each configured Global Configuration Group to each group's subscribed member site(s).
Governance Hub Configuration Lists
Governance Hub manages configurations through two sets of lists: Governance Hub Site Lists and Local Site Lists.
Only modify lists listed within the Governance Hub Dashboard. Do not modify the lists itemized in this appendix unless directed to do so by Gimmal Support!
Governance Hub Site Lists
|
|
|
Site Lists |
Location |
|
Global Components |
<Governance Hub Site URL>/Lists/GimmalComponents |
|
Global Component Instances |
<Governance Hub Site URL>/Lists/GimmalComponentInstances |
|
Global Settings |
<Governance Hub Site URL>/Lists/GimmalSettings |
|
Global Configuration Groups |
<Governance Hub Site URL>/Lists/GimmalConfigurationGroups |
|
Global Exclusions |
<Governance Hub Site URL>/Lists/GimmalExclusions |
|
Site Collections |
<Governance Hub Site URL>/Lists/GimmalSiteCollections |
|
Resource Gallery (Site List) |
<Governance Hub Site URL>/Lists/GimmalResiurces |
|
Gimmal Job Definitions |
<Governance Hub Site URL>/Lists/GimmalJobDefinitions |