
Prerequisites:
-
An M365 site collection for which you have a tenancy administration account.
Registering the Azure Application
First, register an “Application” in your M365 azure tenancy. The purpose of this application is to permit access via the Microsoft Graph API to your M365 environment through the application’s Client ID and Client Secret.
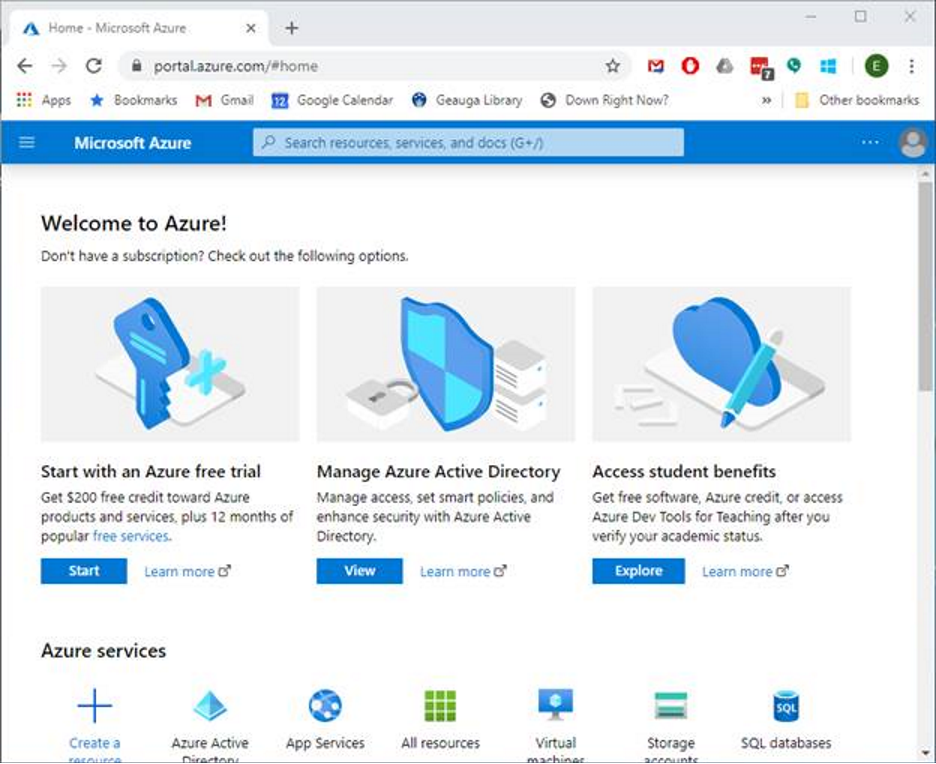
Navigate to https://portal.azure.com and log in with your M365 tenancy administrator account
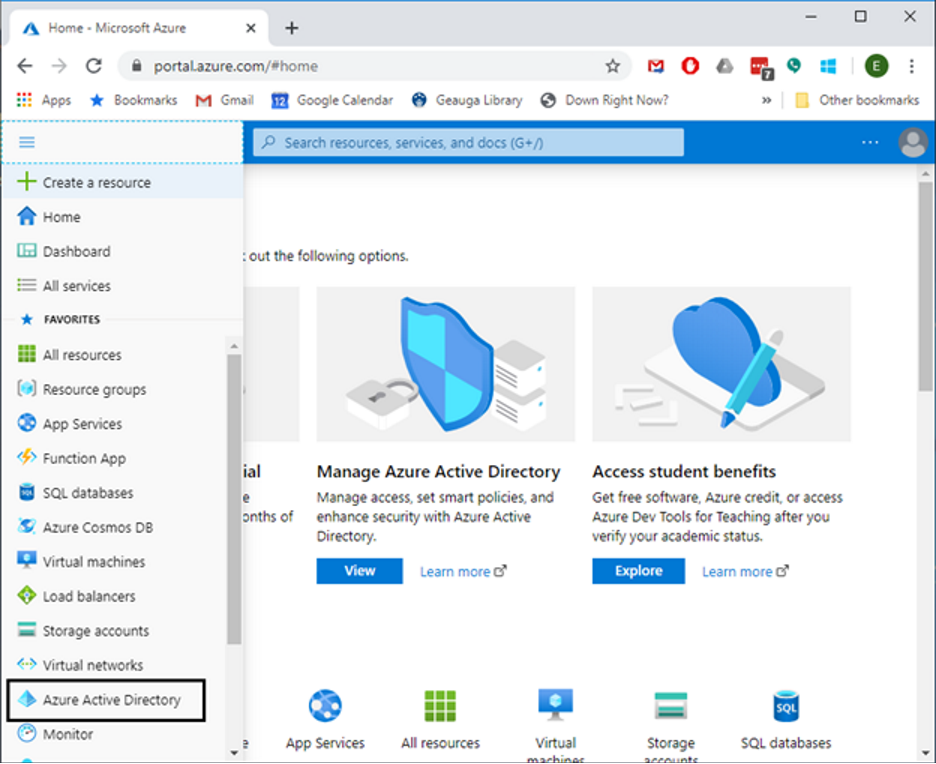
Click the gripper in the upper-left corner and select Azure Directory Services in the left-hand menu.
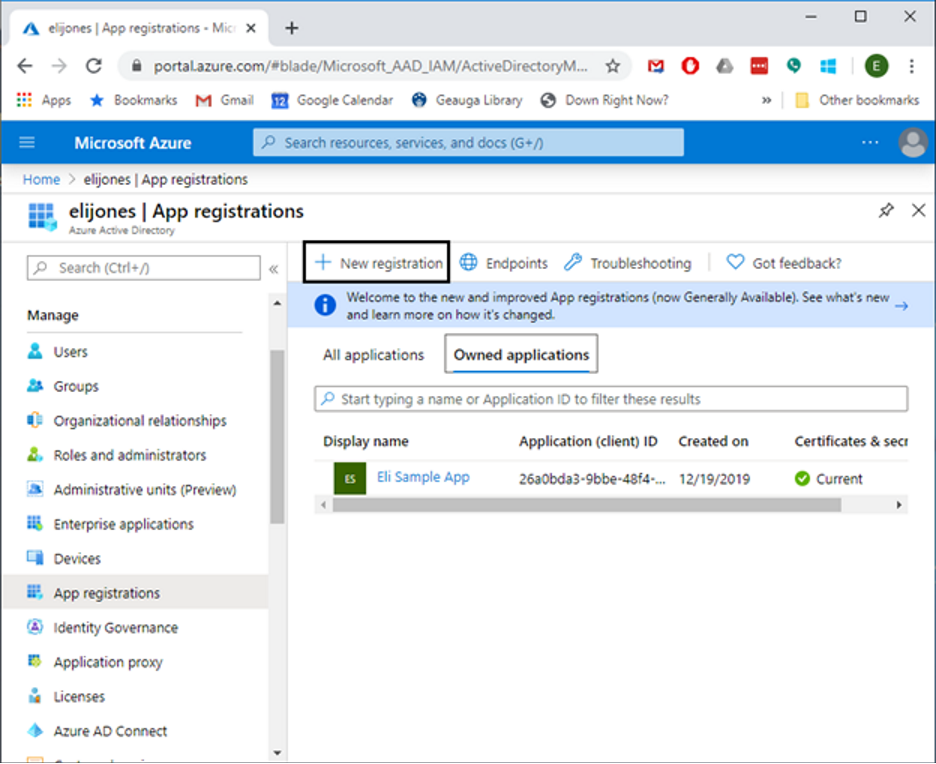
In the left hand side, click on App registrations, and then in the upper part of the right-side pane, click on New registration
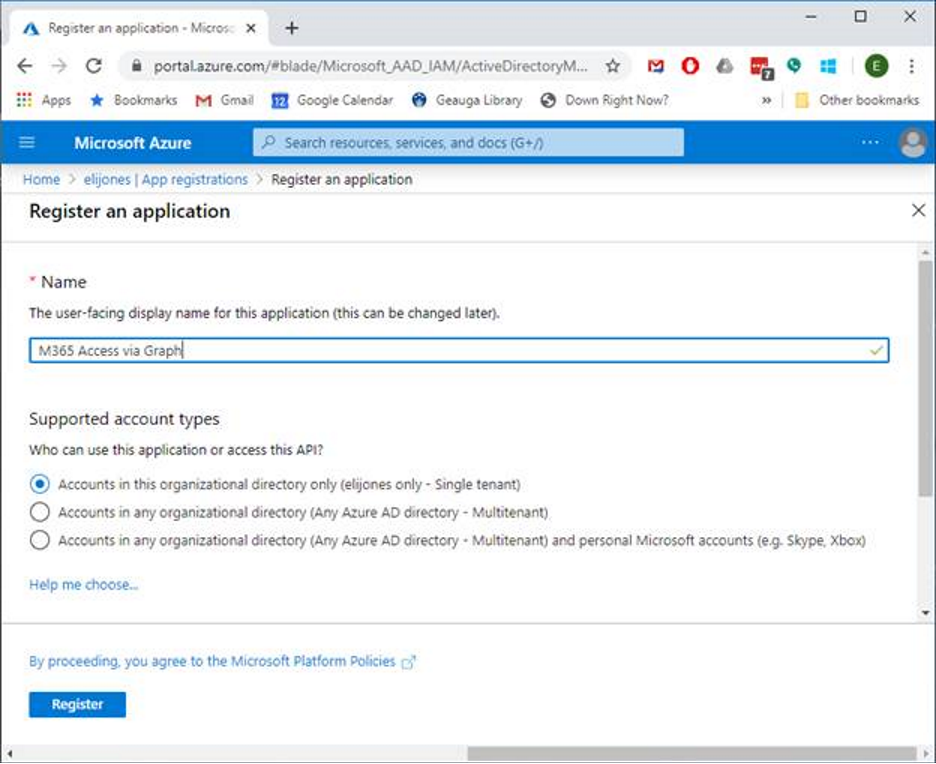
Specify a name for the application. This name will allow you to recognize the application in your Azure administration. For this document, we will use “M365 Access via Graph” for our name. For Supported account types, select the appropriate needed types. We are using the first choice in this example. Click Register to create the application.
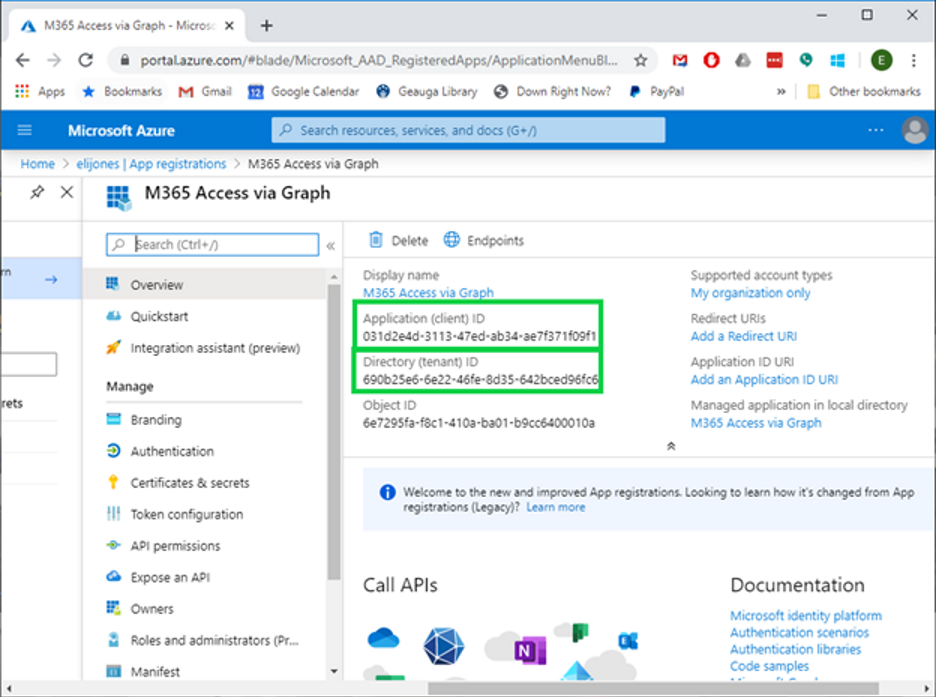
In the next screen, make a note of the values for Application (client) ID and Directory (tenant) ID. These will be the client ID and tenant ID values when configuring the Drop Zone authentication settings.
Under the left hand menu under Manage, click on Certificates & secrets:
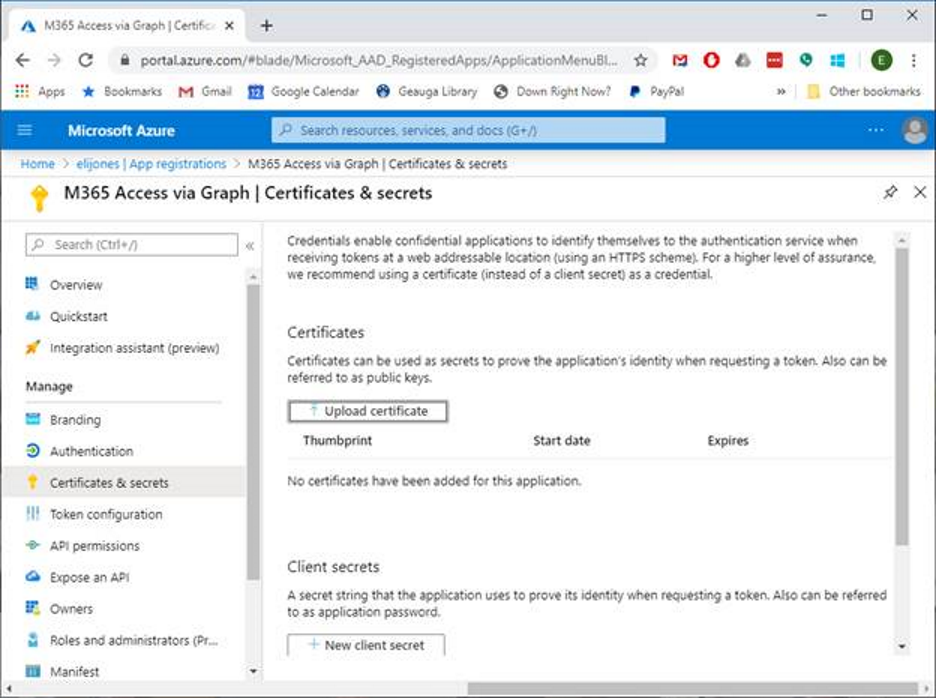
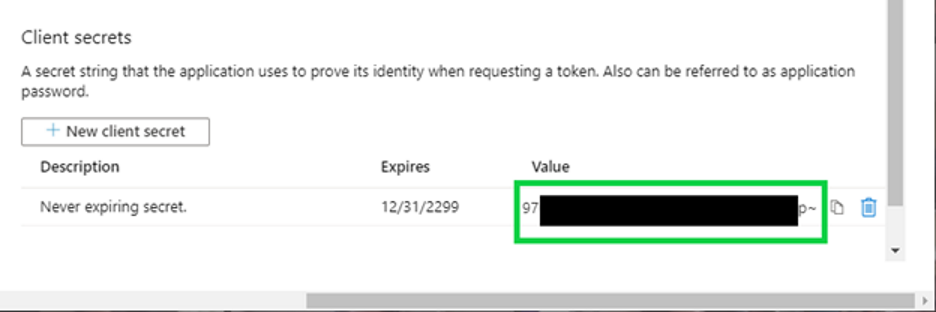
Click on New client secret, enter a meaningful description and select your desired Expiration. After creating the client secret, please make a note of the value.
This will be the value of Client Secret when configuring the Drop Zone Authentication Settings.
Configure Permissions for Microsoft Graph
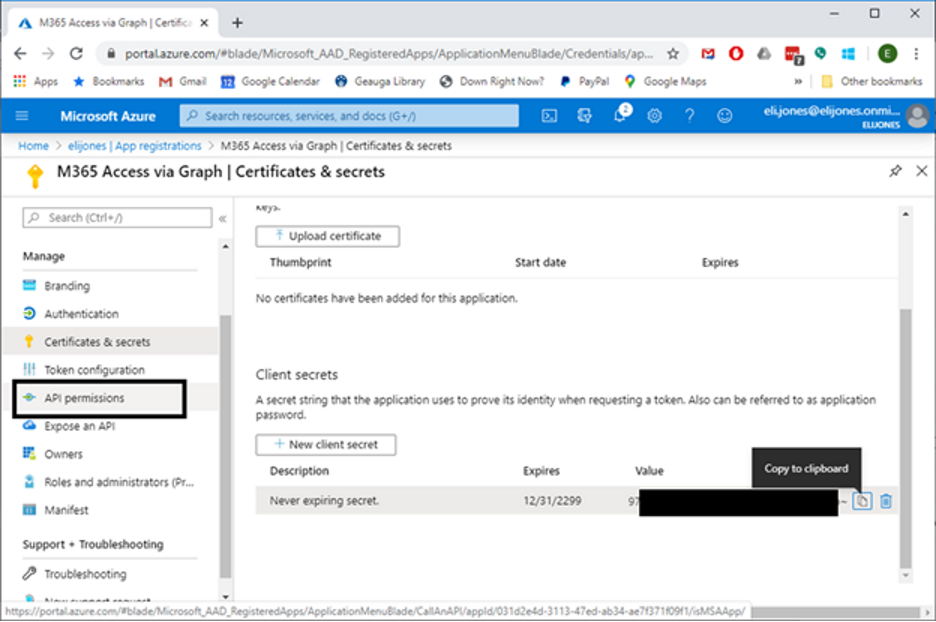
While in the Azure Portal App registration screen, click API permissions under the Manage heading on the left hand side:
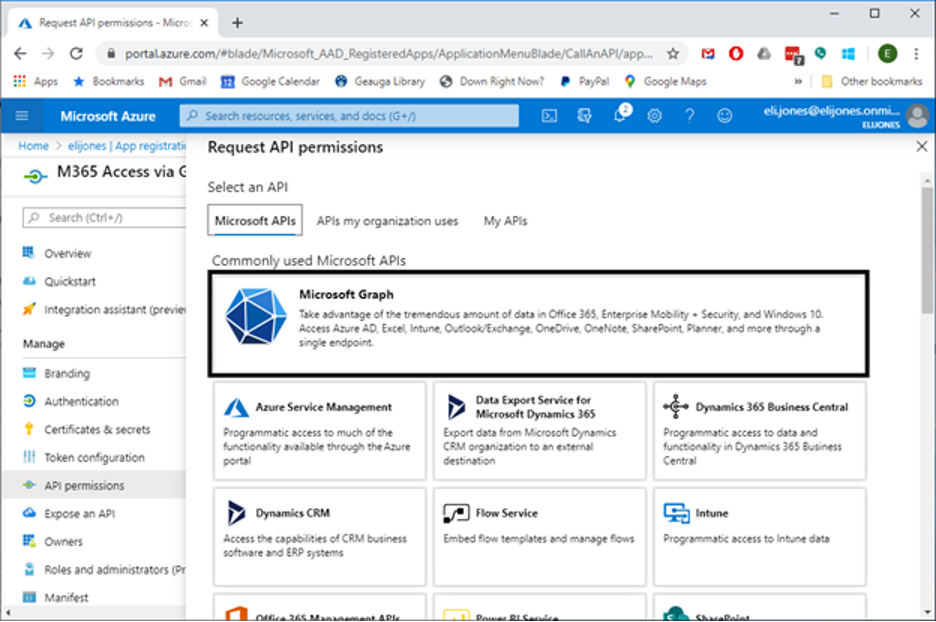
Click on “Add a permission” and in the next screen, click on “Microsoft Graph”:
In the question for What type of permissions does your application require?, select Application permissions:
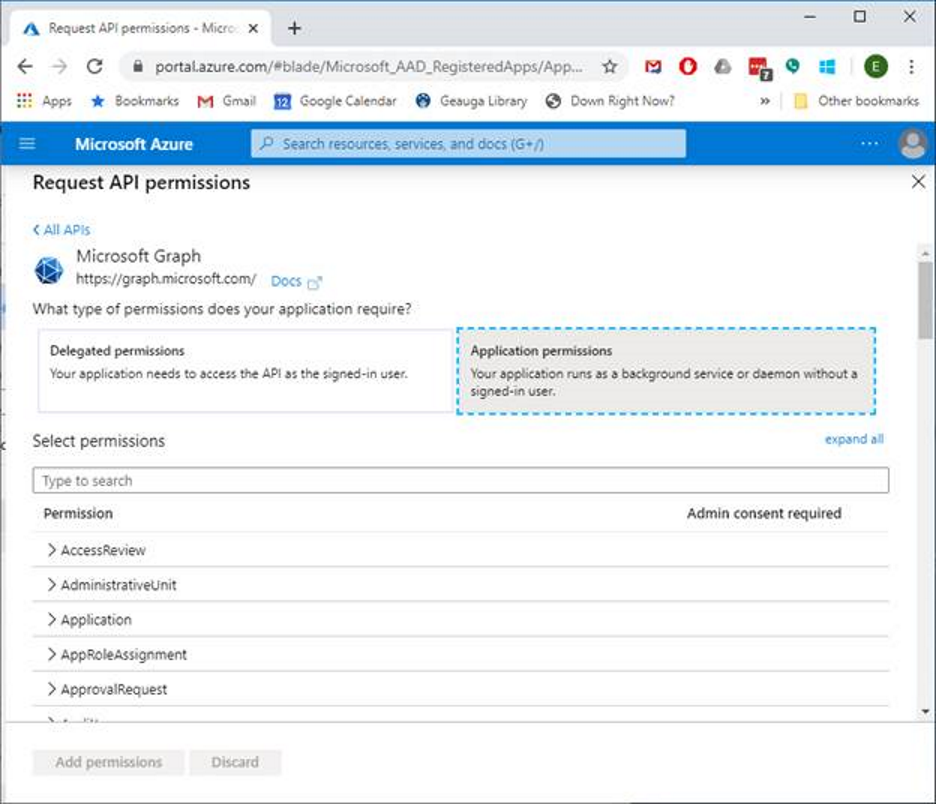
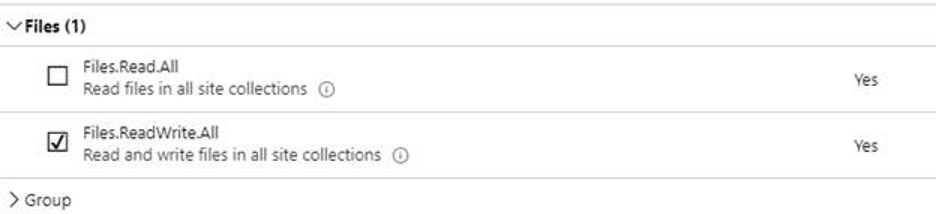
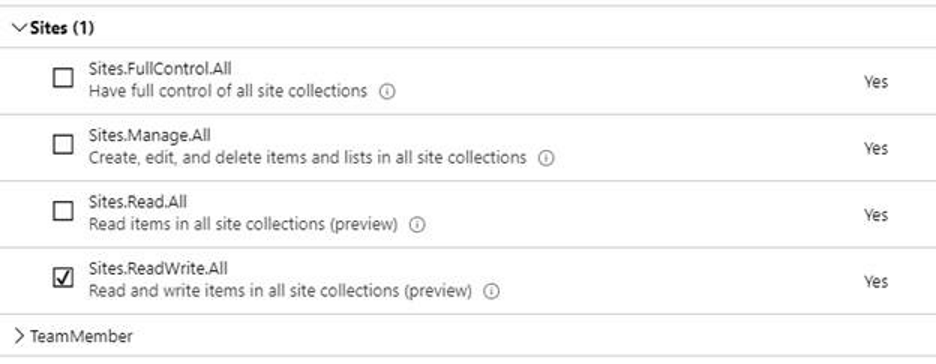
Under Select permissions, select the following:
-
Files.ReadWrite.All
-
Sites.ReadWrite.All
And click on Add permissions.
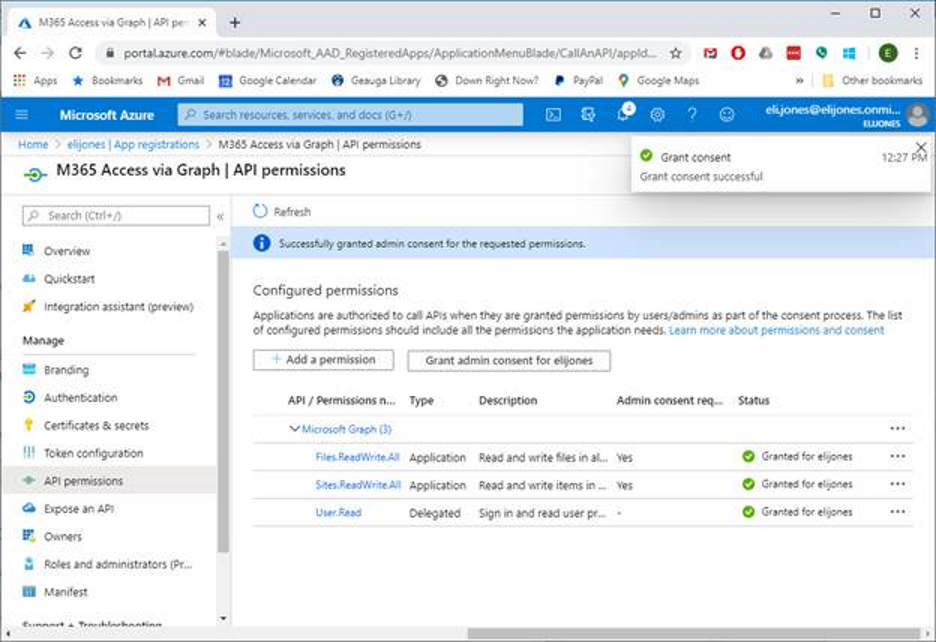
Under Configured permissons, click on Grant admin consent… and answer Yes to the prompt to grant the applicaton rights to read and write files and "listitems" in the M365 tenancy via the Graph API.

Microsoft References:
https://docs.microsoft.com/en-us/graph/auth-register-app-v2
https://docs.microsoft.com/en-us/graph/auth-v2-service
https://docs.microsoft.com/en-us/graph/permissions-reference