
Collection, in Gimmal Discover, is the process of exporting items by copying them from the original location where they were found during a search into a separate storage area. Typically, these items are then imported into a legal review platform for further processing (i.e., Bates stamping, redaction, etc.). To initiate a collection in Discover, you will have to create a matter, process one or more searches for the matter, review the search results, and label items that you wish to collect.
The Discover collection process allows for the collection of items from different data sources in a single collection. In other words, unlike when creating a search, where each search is restricted to processing a single data source, when creating a collection, you may choose to collect search result items returned by multiple searches with different data source targets. For example, file results and email results may both be included in the same collection.
File-based results that are exported from repositories like Windows file shares, OneDrive, Box, etc. will be collected in native format -- as Word documents, PDF files, etc. All email message results regardless of their source (Microsoft Exchange mailboxes, Office 365 mailboxes, or PST files) will be collected in PST files, one PST per type of email store -- so, Discover will create a PST for search results exported from Exchange mailboxes, a PST for search results exported from Office 365 mailboxes and a PST for results exported from PST files. There is also a limit on the size of the PST that the exported results are saved in; the limit is 1.8 GB. Once that size is exceeded, a new PST with the same name with an incremental counter appended to the end of it is created for the additional results.
The collected data will be accumulated in a location selected during the collection configuration; this will typically be a network path within your organization's environment. The folder path where the data will be housed within additional sub-folders under the path defined in the configuration. For example, let's assume the collection location you choose in the configuration is \\server\share\collections. Within this path, Discover will generate a sub-folder with the internal ID (a system-generated GUID) of the matter for which this collection is being processed and a sub-folder within that folder named with the unique internal ID (another system-generated GUID) of the specific execution of the collection. So the path for a given collection execution would be: \\server\share\collections\[Matter ID]\[Collection ID]. Here, the results are then broken down further by the target machine from which the data was exported. For file collections, the original folder path of the file is maintained within the collection location. So, if a file was collected from the c:\Documents\Projects\Gimmal folder on a user's desktop, that folder path is recreated in the collection location. For emails, the original folder path within the source email store is recreated within the collection PST file.
Viewing Collections
You can access Discover's collections either by selecting a matter from the Matter screen, then clicking the Collections option found under the More button in the toolbar, or clicking the Collections link found in the left-hand navigation pane of eDiscovery.
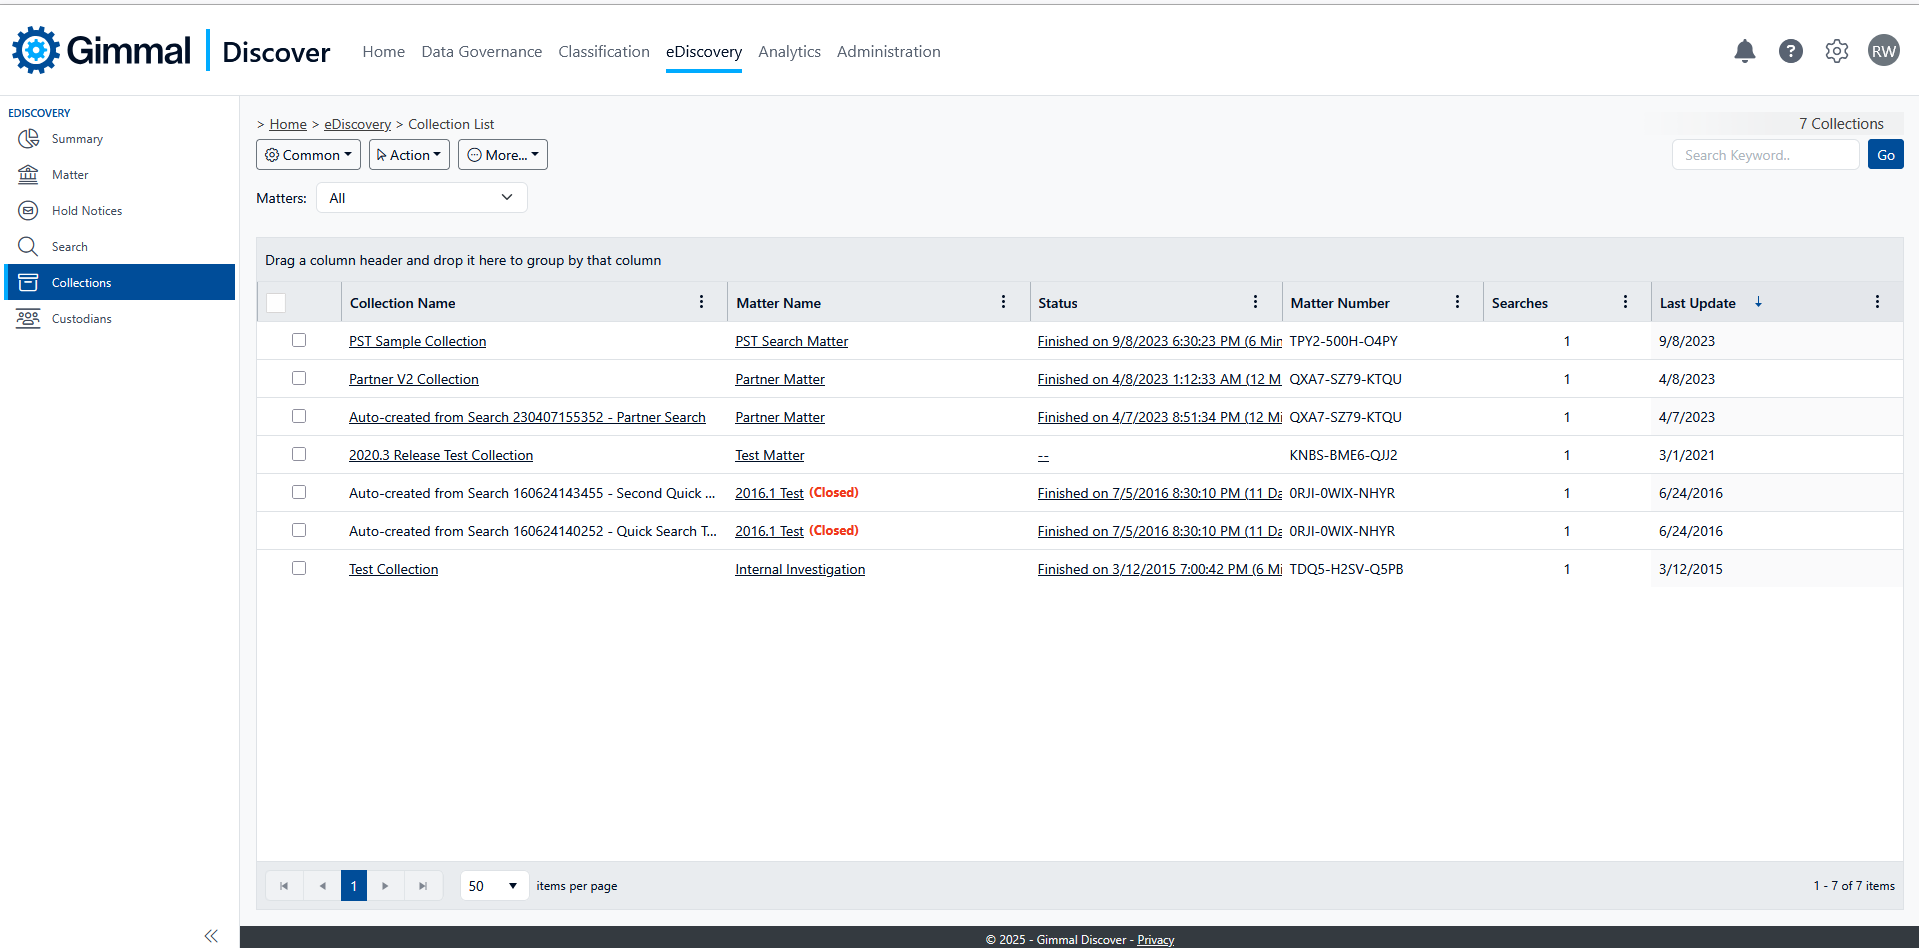
The details available in this list view are:
-
Collection Name - A user-assigned name for the collection
-
Matter Name - The name of the matter that the collection is associated with. Click the name to view details of the matter
-
Status - The current running or last completed status of the collection
-
Matter # - The unique case identifier assigned to the matter
-
Searches - The number of searches whose results are configured to be collected
-
Last Update - The last time the collection configuration was modified
The options found under the Action button of the toolbar are:
-
Add Collection – Click to add a new collection
-
Edit Collection – Select a collection and click this button to modify the collection configuration
-
Delete Collection - Deleting a collection will delete not only the configuration but also the details of all the times the collection was executed
-
Start Collection – Select one or more collections and click this button to initiate the collection(s). This button will be disabled if the selected collection is currently running
-
Stop Collection – This button is enabled only when the selected collection is in progress. Click it to initiate the cancellation of the execution. Because of the distributed nature of the search process, it may take a few minutes before the process is completely canceled at the client(s) where the collection is running.
-
Collect Logs – retrieves current copies of the log files for collections that are in progress
The options found under the More button of the toolbar are:
-
Collection History - Select a collection and click this button to view a list of each time the collection has been executed
-
Collection Summary Details - Select a collection and click to view the summary details of the collection. It lists the configuration details, including the searches that were included in the collection; for collections that have been processed, count, and size details of the collected items are also listed
-
Collection Details – a non-modifiable view displaying all of the Collection options
Creating a Collection
To create a new collection, click the Add link found under the green Action button in the toolbar.
Until a new Collection is saved, it will appear in the Matter List view with the caption (PENDING SAVE). In this case, to release a collection from that status, use either of these options:
-
Edit Collection - Return to the collection in Edit mode
-
Delete Collection - Discards the unsaved collection. For a previously saved collection in partial edit mode, you will be offered the option of deleting the collection or just discarding the unsaved changes
Collection options are divided into two tabs (General and Details) when adding or editing a collection.
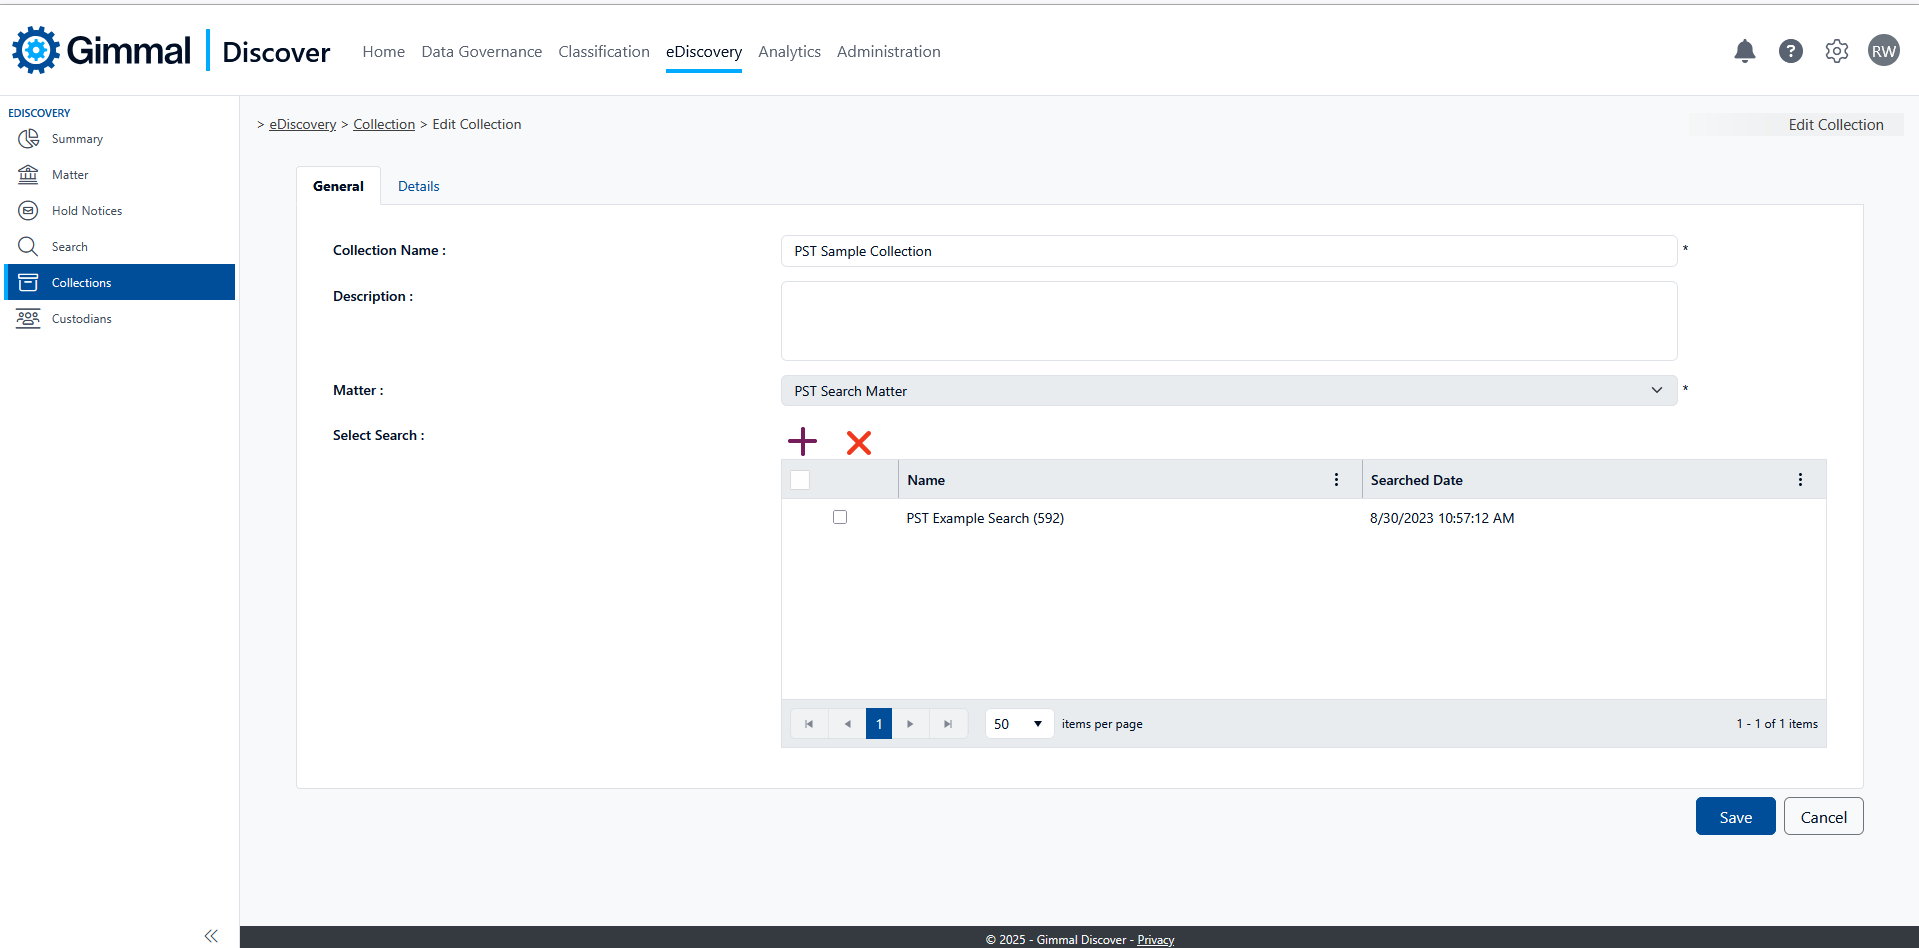
General tab of the collection:
-
Collection Name - A user-assigned name for the collection. The value defaults to "New Collection", so you'll want to give it a more descriptive name.
-
Description - A freehand text box where you can fill in other relevant details about the collection.
-
Matter - You must select a matter from the list to save the collection.
-
Select Search - Once you select a matter, the Add Search button will be enabled. Click it to see a dialog with a list of all the searches that have been created for the selected matter
-
Selecting a search will display a list of all the specific executions of the selected search. Select a specific execution and click the Add button to add to the search selection list. Please note that you can include only one execution of a specific search for a given collection.
-
-
If you would like to include additional searches in the collection, select a different search from the Search dropdown list and pick the desired execution of that search.
-
Click OK when you are done selecting all the searches you would like to include in the collection.
-
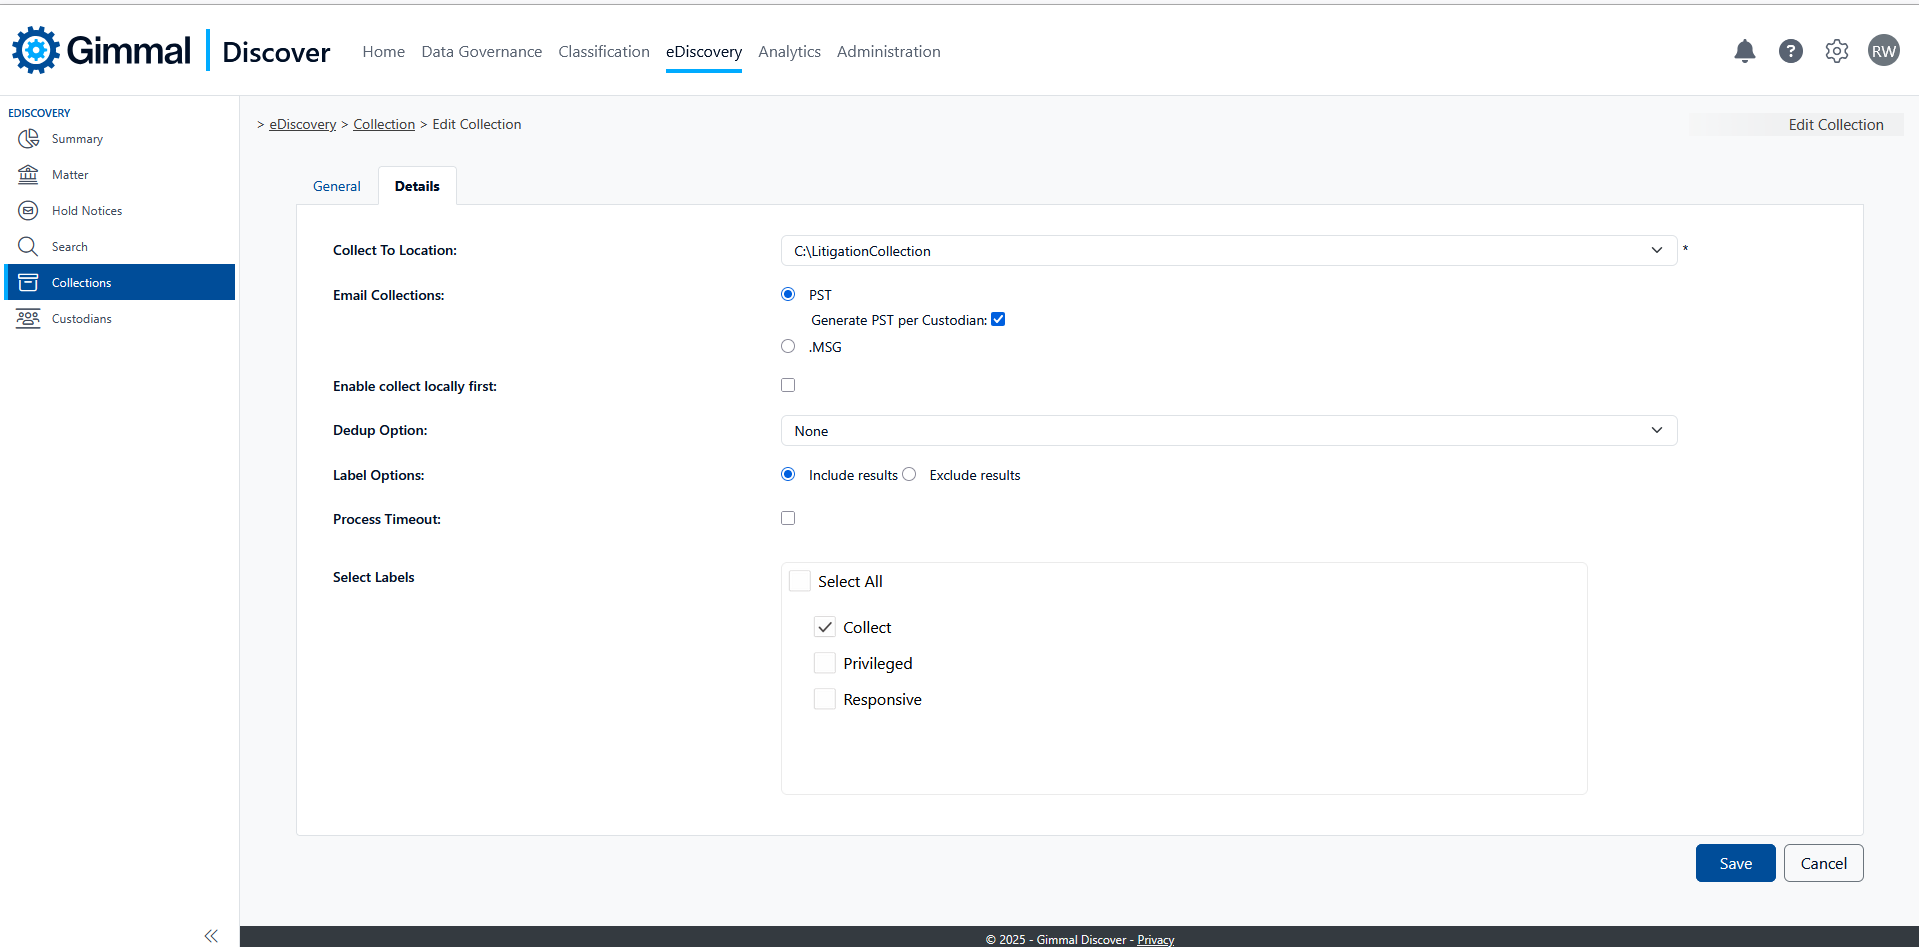
Details tab of the collection:
-
Collect Location – Select a Collection path from the list of locations provided; this will be the root path where data exported from the source targets will be saved. Note: additional collection locations may be added by administrators in the Settings area (pink gear icon) at the top of the Discover dashboard.
-
Email Collections - If your collection will include email-related results, select what format those results should be stored in: PST, MSG, or EML. If you selected PST, the option "Generate PST per Custodian" will cause Discovery to create separate PST files in the collection for each custodian.
-
Enable Collect Locally First – if your search was performed on workstations, this option causes Discover to create local collection folders on each workstation, then upload those collections to the central location. This is important if the workstations do not have consistent access to the network collection location (i.e., a VPN is required)
-
Dedup Options - The options are None and Global. The default choice of no will cause all items from all the searched targets will be exported to the collection location. If you choose the Global option, once all the exported data is accumulated to the collection location, a deduplication process is run to exclude duplicate files and duplicate emails (regardless of where they came from -- Exchange mailboxes, PST files, Office 365 Archives, etc.) retaining only a single copy of every collected item.
-
Label Options – Designate whether labels indicate items to include or exclude from the collection
Labels - Select the labels that indicate to Discover which specific items from the list of search results will be collected. Based on your selection, Discover will export only the items from the source data store, the items that were tagged with the selected label in the Discover search results.
-
Process Timeout – If the collection is being performed on workstations, should a timeout be used to determine how long to wait for the workstation to respond before it is bypassed
Click Save to save the collection configuration.
Note, like searches – collections do not start automatically. You must select the collection, then choose the Start option under the green Action button on the toolbar