
Introduction:
This document describes the configuration steps that are necessary to allow Discover to manage content stored in a Box repository.
Section One – User Creation
Verify the Box edition
The Discover Box Agent supports the following versions: Business, Business Plus, or Enterprise. To validate that you have one of these editions, please log in to the Box Admin site using the following link:
After logging in, verify that you are using one of the supported Box editions. That information can be found on the screen shown below:

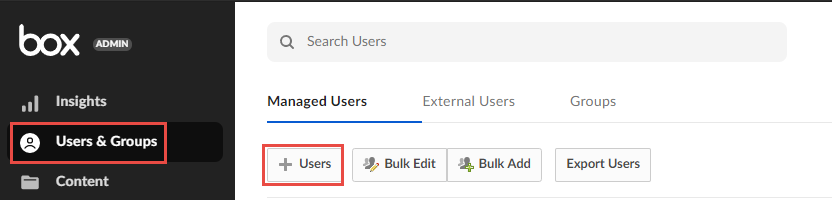
Next, click on the 'Users & Groups' option in the left-hand navigation pane, then click the button labeled '+ Users':
Fill out the highlighted sections in 'Edit User Account Details' and 'Edit User Access Permissions' as shown below (at a minimum):
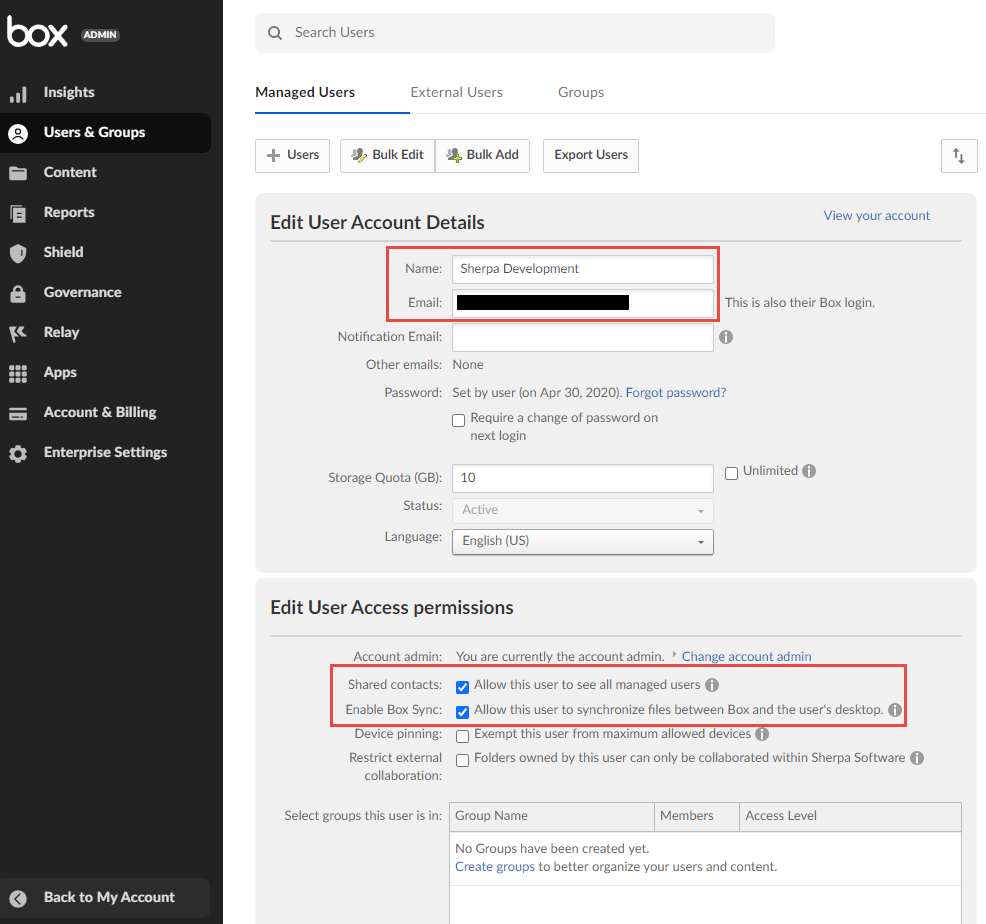
Click the Save button.

Log back into the Box using the new account you just created, then click on the profile icon found in the upper right-hand corner:

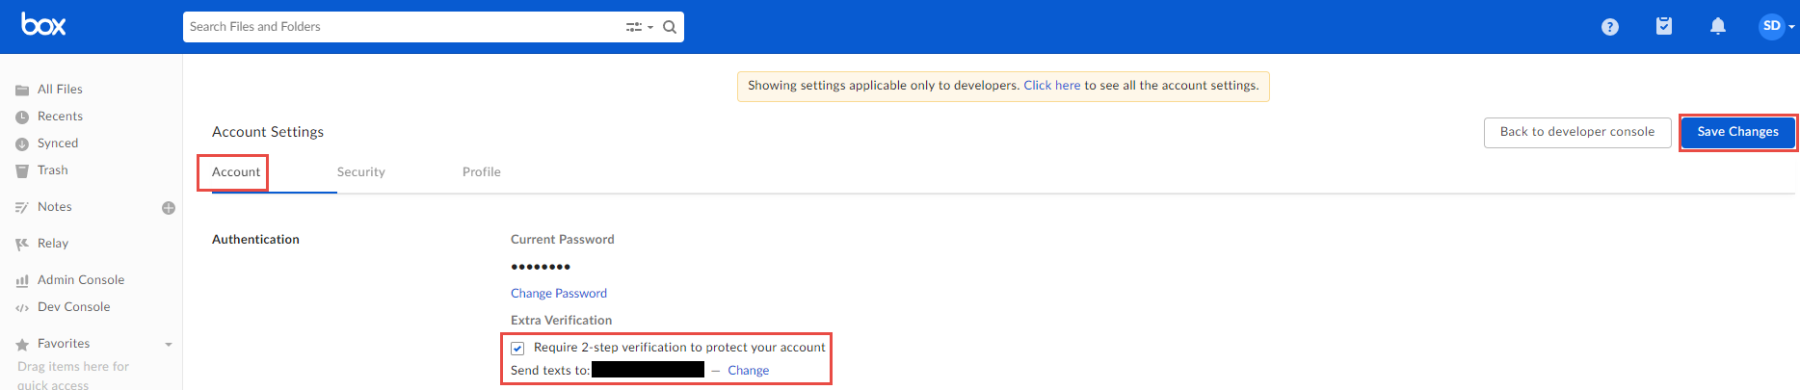
Click the down arrow and then click on 'Account Settings'. Scroll down to 'Authentication', check the box beside 'Require 2-step verification', enter a cell phone number, and verify the code sent via text message. Click 'Save Changes' once complete.
Section Two – Creating the Box App
Before Discover can manage information stored in the Box environment, it must be registered as an app in the Box developer portal. Creating the app allows you to specify the permissions that Discover requires and generates the security information that must be supplied when installing the Discover Box Agent.
Access the Box developer portal using the following link:
Click the 'Go to Dev Console' button and use the login credentials from Section One to access the site:

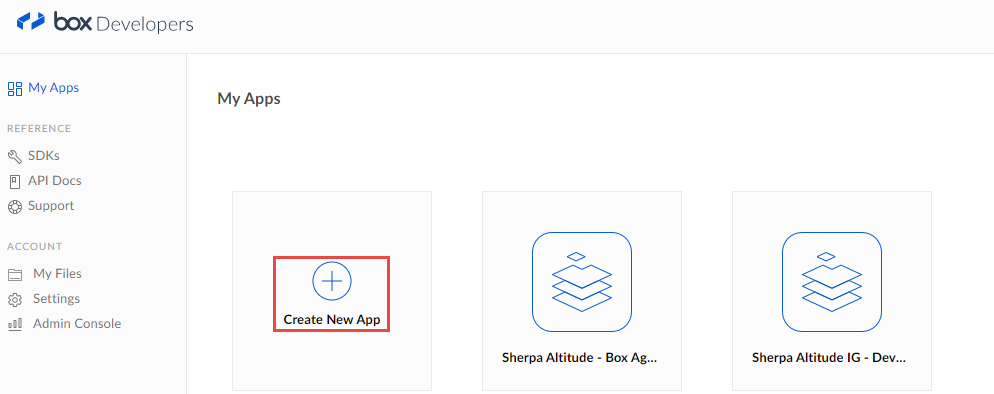
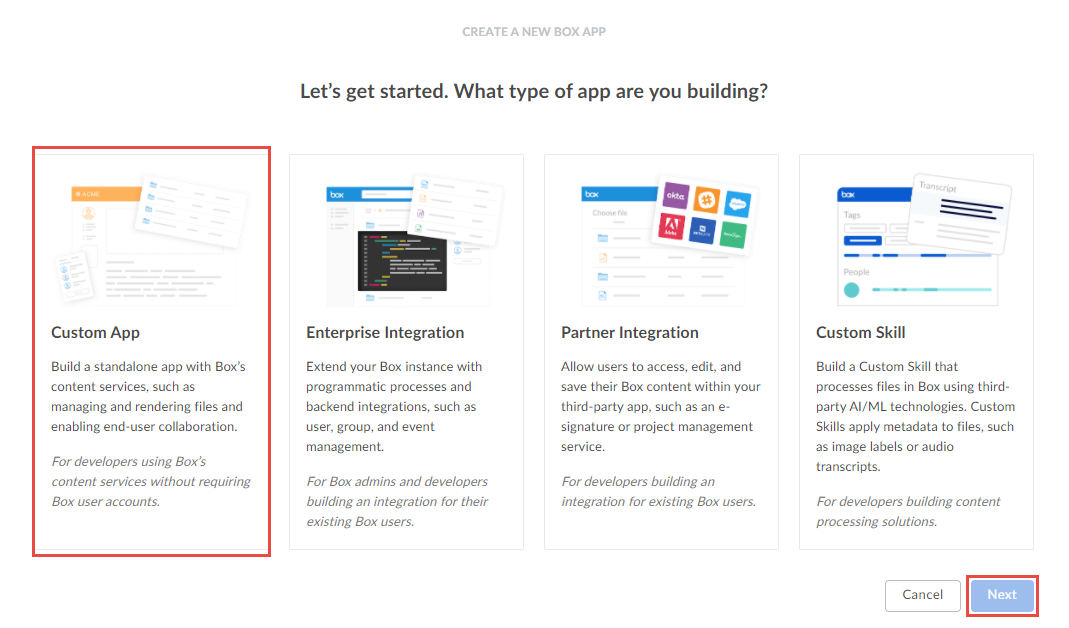
After logging in, click on the 'Create New App' tile:
Select the 'Custom App' tile and then click 'Next':
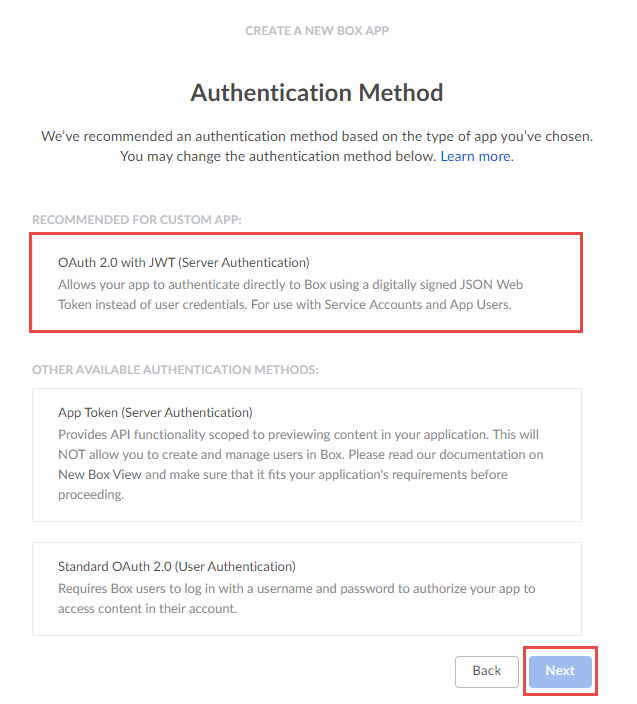
Choose the 'OAuth 2.0 with JWT' server authentication method, then click 'Next':


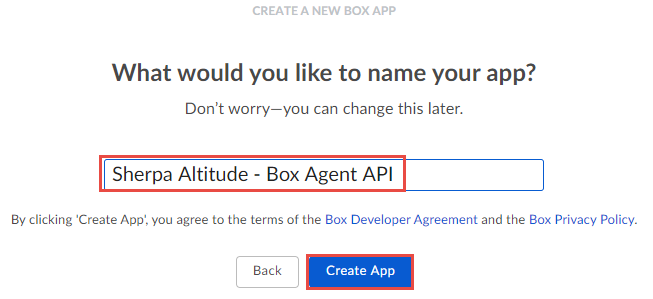
Enter a name for the new Box app (we recommend something related to Discover), then click the 'Create App' button:
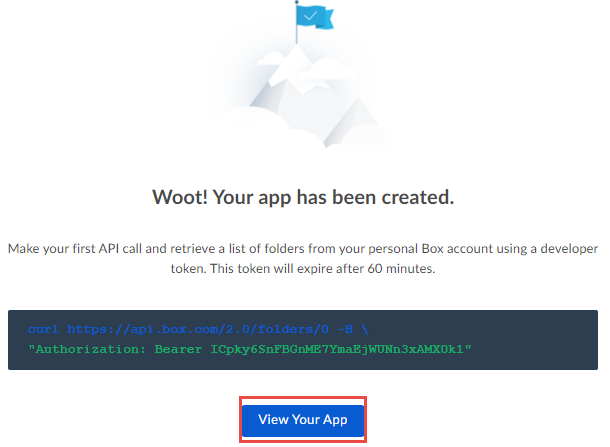
Box will verify that your new app has been created. On this verification screen, click the 'View Your App' button
Once on the app configuration page, select the 'General' option in the left-hand navigation pane, then apply the settings detailed below:
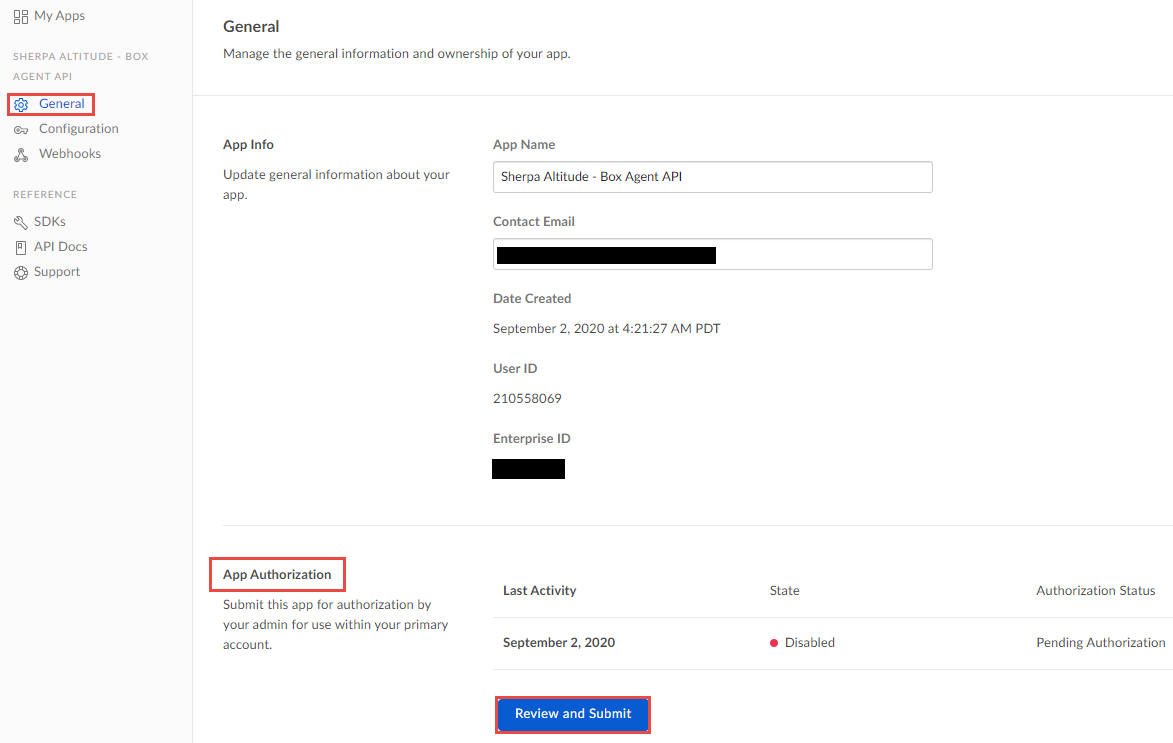
In the App Authorization section, Click on the 'Review and Submit' button.
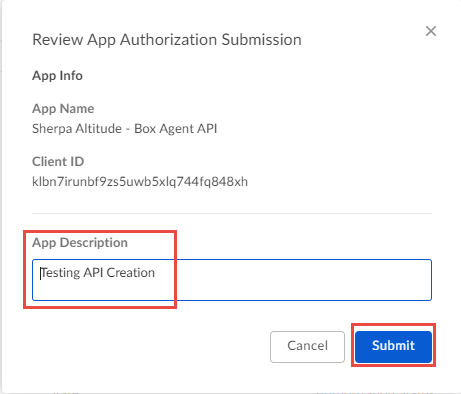
Review App Authorization Submission – add a description of the App being requested, and then click the 'Submit' button. This will email the Admin account an approval link required to activate the app.
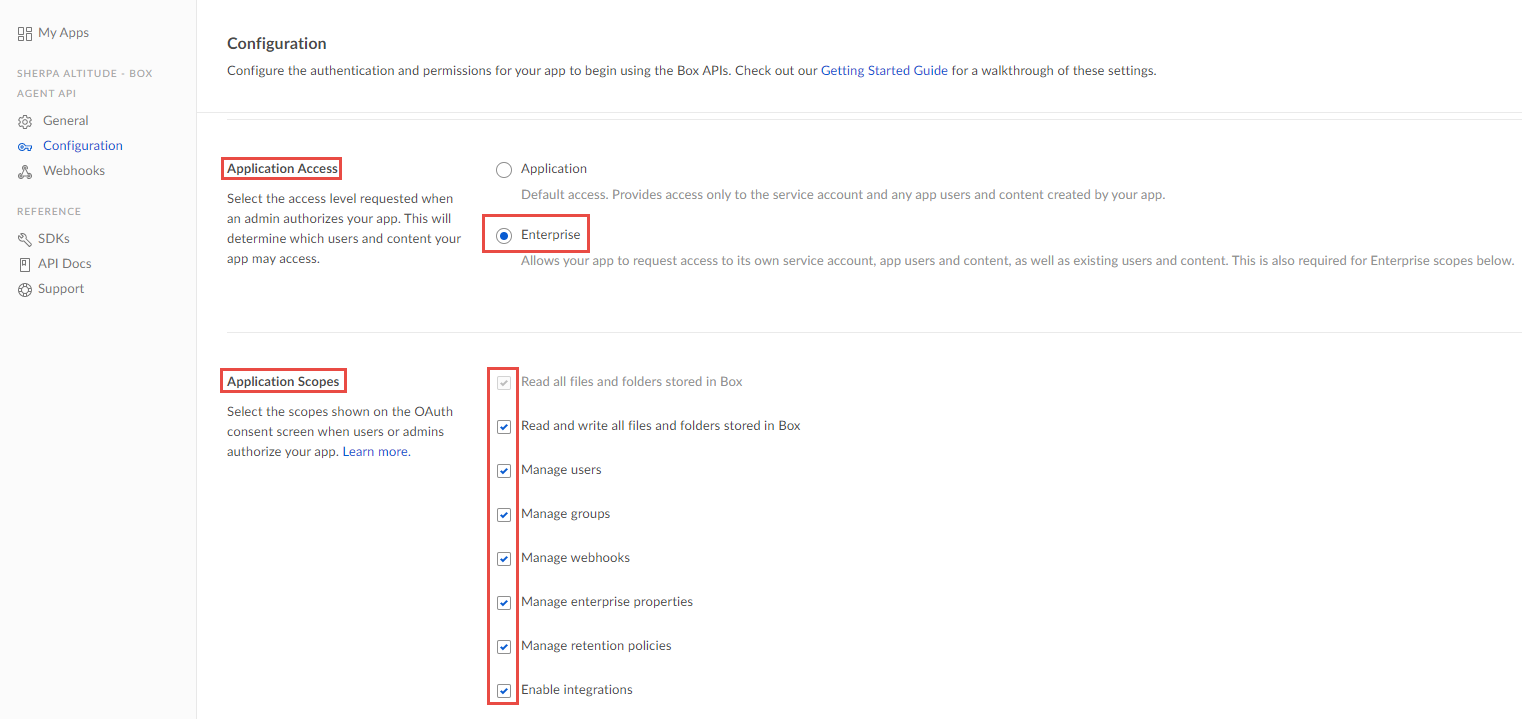
Next, click on the 'Configuration' link in the left-hand navigation pane. Then scroll down to the following sections:
Application Access:
Click the 'Enterprise' radio button
Application Scopes:
Click ALL checkboxes
Advanced Features:
Enable both options
Add and Manage Public Keys:
Click the 'Generate a Public/Private Keypair', this will send a 2-step verification code to the cell phone number provided in section one (also a JSON file will be downloaded to the local machine)

CORS Domains:
Enter 'http://localhost:3333' into the text field

Click the 'Save Changes' button found in the upper right-hand corner to save these configuration settings.
Section Three – Installing the Discover Box Agent
NOTE: Install the Box Agent through the Add Agent List option in the Agents List page of the Discover dashboard (outlined below). You may also install the Box Agent when initially installing the Connector and Agents using the Connector Setup program downloaded from the Download Center of the Discover console.
Discover Box Agent Installation:
The Box Agent for Discover can be installed from the web dashboard by following the steps outlined below.
-
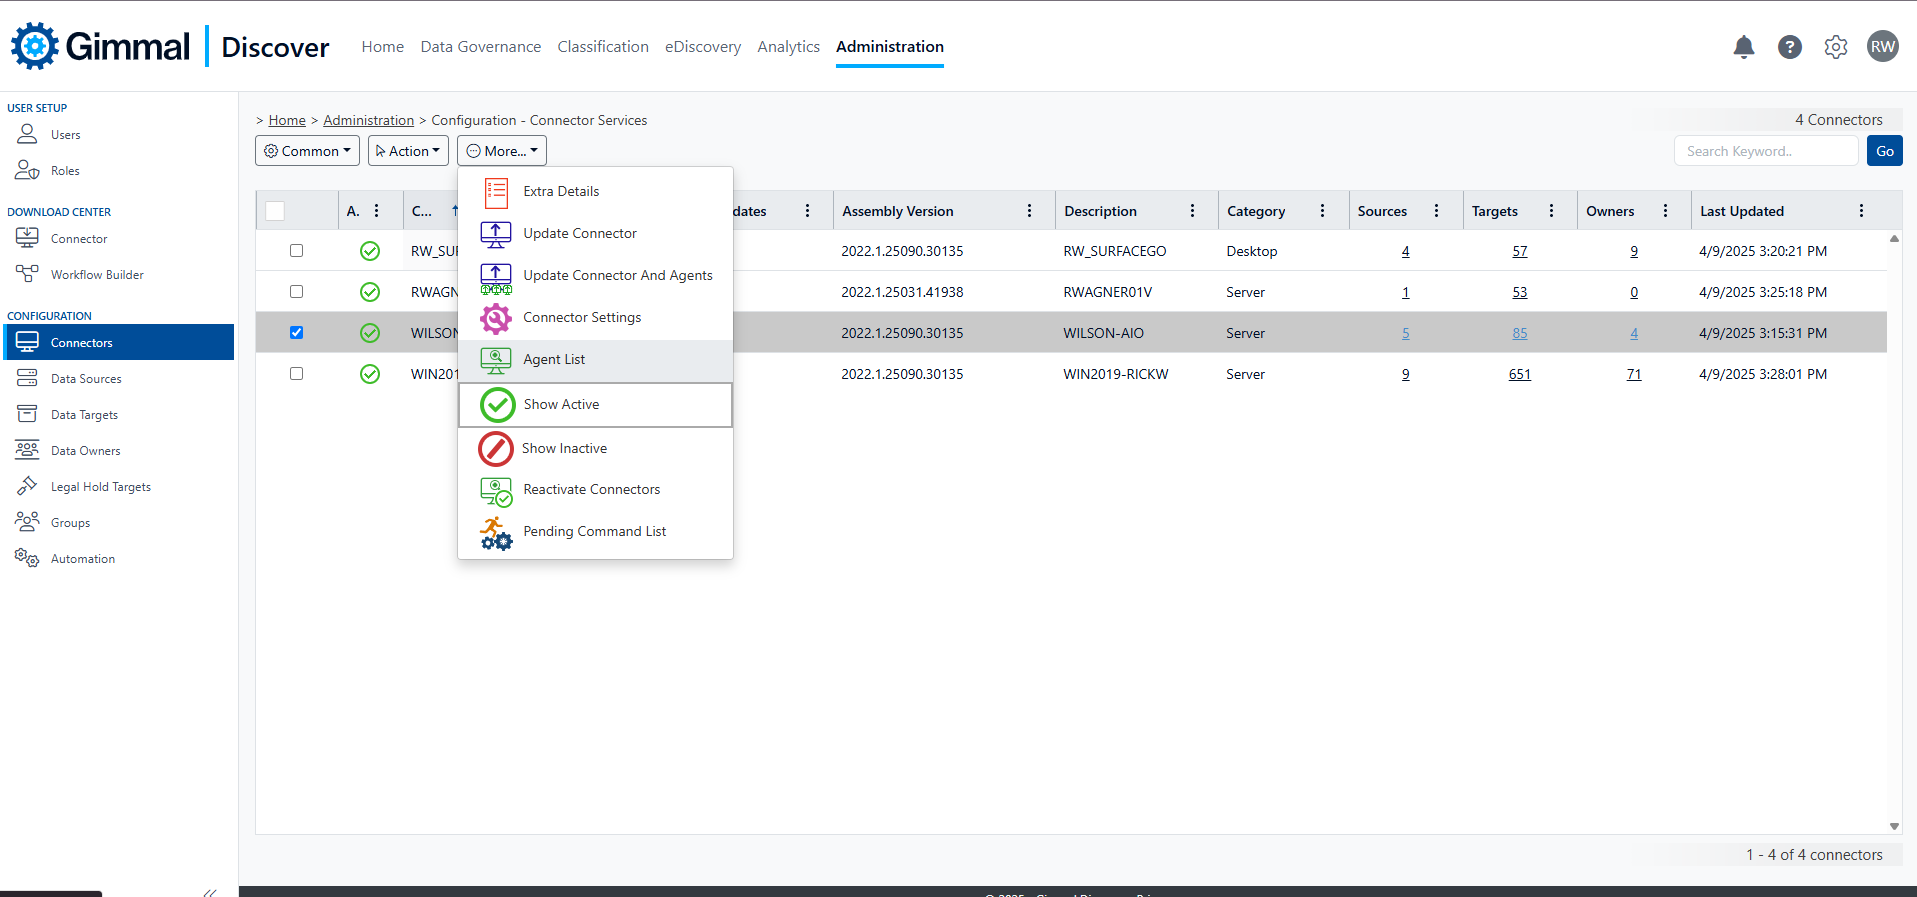
Go to the 'Administration' tab at the top of the dashboard. In the left-hand navigation pane, click on 'Configuration', then 'Connectors'.
-
Choose the connector device by checking the appropriate box.
-
Click on the More button and choose 'Agent List'.
-
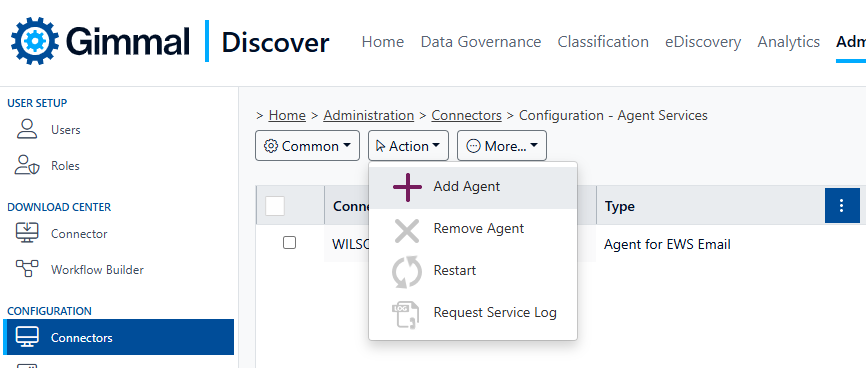
Click on the Action button, then select 'Add Agent'.
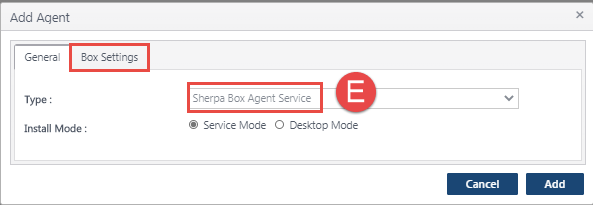
Select the 'Box Agent Service'.
Next click on the ‘Box Settings' tab. Use the 'Choose File’ button to locate the Box JSON file. Importing the JSON file should populate the remainder of the fields shown on the Add Agent screen below:
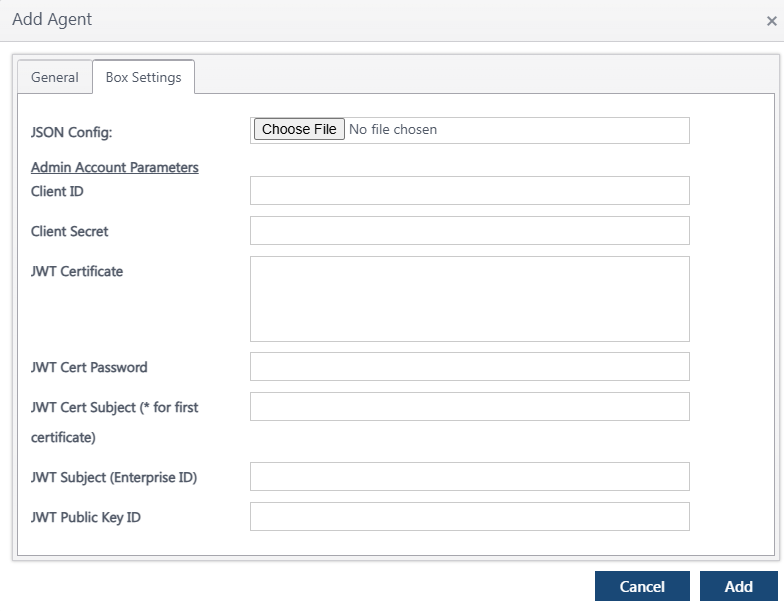
Then click the ‘Add’ button to begin the Agent installation. There are two ways to speed up the installation of the agent. On the Connector server either:
-
Shutdown and restart the Gimmal Connector service, or
-
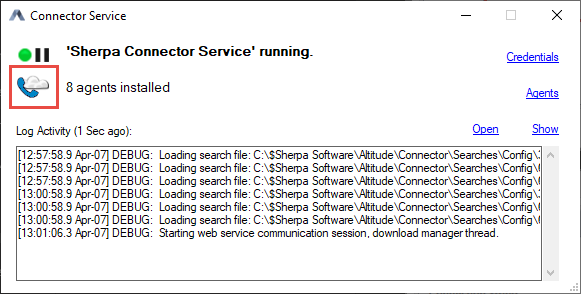
Open the Gimmal Connector Status tool and click the 'phone home' button shown below. Note, if you need to change or update the Box Agent credential settings after the Agent is installed, that may be done by clicking on the Credentials hyperlink in the Connector Status tool.
After the Box Agent service has been installed, proceed with adding a Data Target search for Data Owners (using the Box Accounts option) and for Box File Paths.
Important: When adding the Data Target searches, the order matters. Ensure that you create a Data Owners search first, then run that search to add the Box owner accounts. Once those are available in the Discover dashboard, create and run an AD Data target search for Box File Paths.
For more information on building Data Target searches, please refer to this: Searching for Data Targets