
Introduction
As part of the move to a Microsoft 365-centric architecture, often on-premises Active Directory information is migrated into Entra Active Directory (AD). Discover fully supports obtaining user or group information from Entra AD. This document describes how to configure this access.
Note: The commands required to access Entra AD are only supported by 64-bit machines. If you plan to use Entra AD, please make sure you are installing on a 64-bit operating system with 64-bit components (i.e., Outlook if required).
Section 1: PowerShell Setup/Access
Any Discover Connector server that will be performing queries into Entra AD must have the following PowerShell module loaded:
-
Microsoft.Entra
You can verify if this module is present by launching a PowerShell session as Administrator, then issuing the following command:
get-installedmodule
If the module is present, the response to that command will show the following:
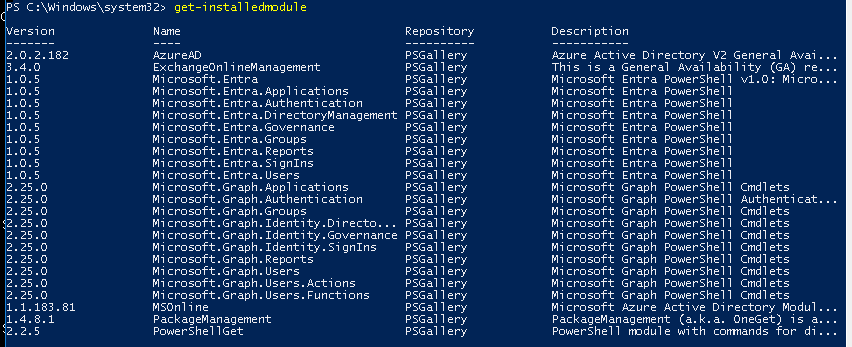
If the modules are present, the Discover machine is prepared to access Entra AD. Please continue with configuring the data target search as described in Section 2. If the modules are not present, continue with the installation instructions shown in this section.
Installing Microsoft.Entra
Install the Microsoft.Entra module by issuing this command from a PowerShell session:
install-module Microsoft.Entra -AllowClobber
As shown below, this command will also present a confirmation prompt. When it does, press Y to proceed

Section 2: Discover Configuration
Once the PowerShell module has been loaded, there are two locations where Entra-related settings should be verified within your Discover configuration. First, the PowerShell authentication type and URL should be verified in the Connector settings. Also, the PowerShell account information should be verified in the Connector Status Utility.
If you are using Oauth (Modern) Authentication, please skip the Connector Settings section, and refer to the setup directions included in the Oauth Configuration Guide, then return to Section 3 of this document
Connector Settings
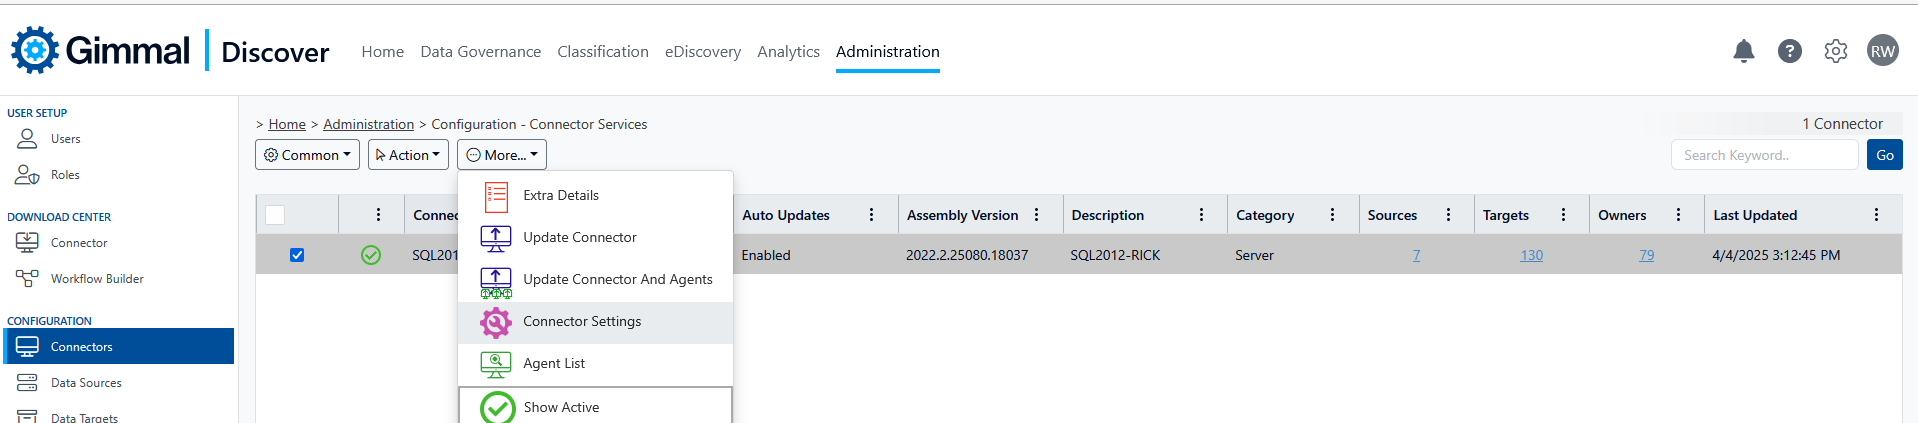
To validate the PowerShell authentication and URL in the Connector settings, log in to the Discover dashboard. Either click the red Connectors block on the home page or click Administration, then Configuration/Connectors.

Select a Connector, hover over the More button, and choose connector settings
Check the advanced box, then select the tab for Connector settings and scroll to the bottom of the page to locate the settings for PowerShell Auth Type and URL, and verify the settings are correct for your environment.
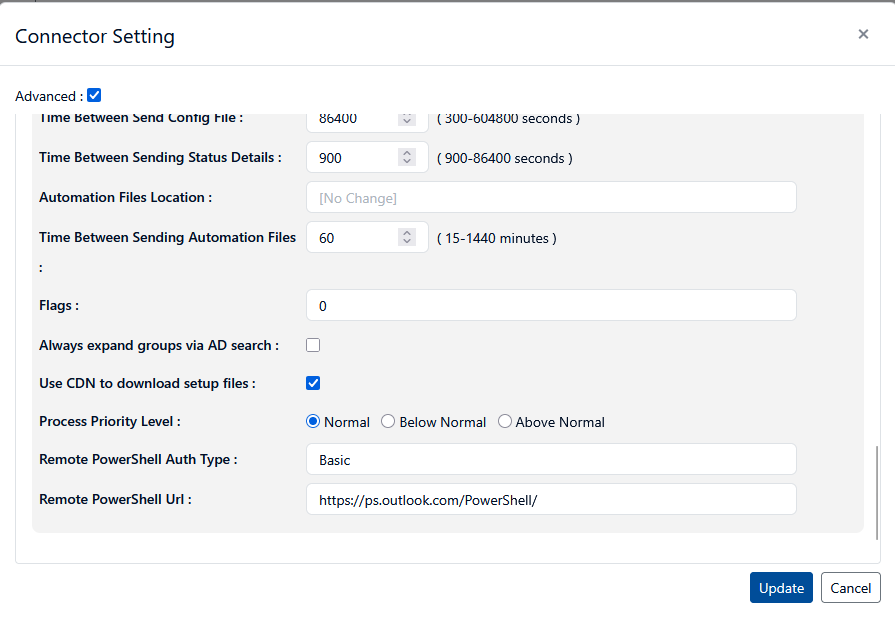
If your settings are correct, move on to the Connector Status Utility Settings section of this document. If you do modify the settings, be sure to click the blue Update button at the bottom of the form. Return to the Connectors screen, then hover over the Action button and click Download Configuration File.
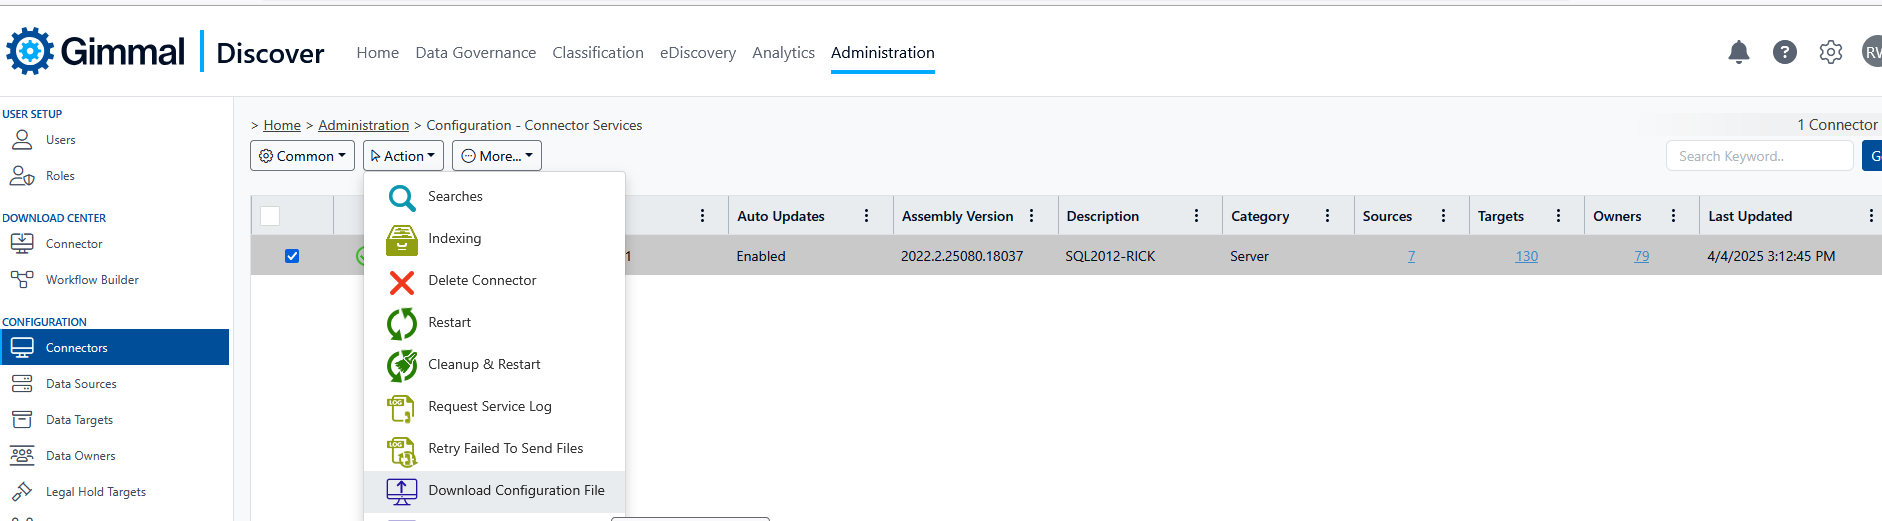
Selecting this option will force an update of the Connector settings from the Discover database to the local Connector server. Gimmal recommends restarting the Connector service on the server to ensure the updated settings are in effect.
Connector Status Utility Settings
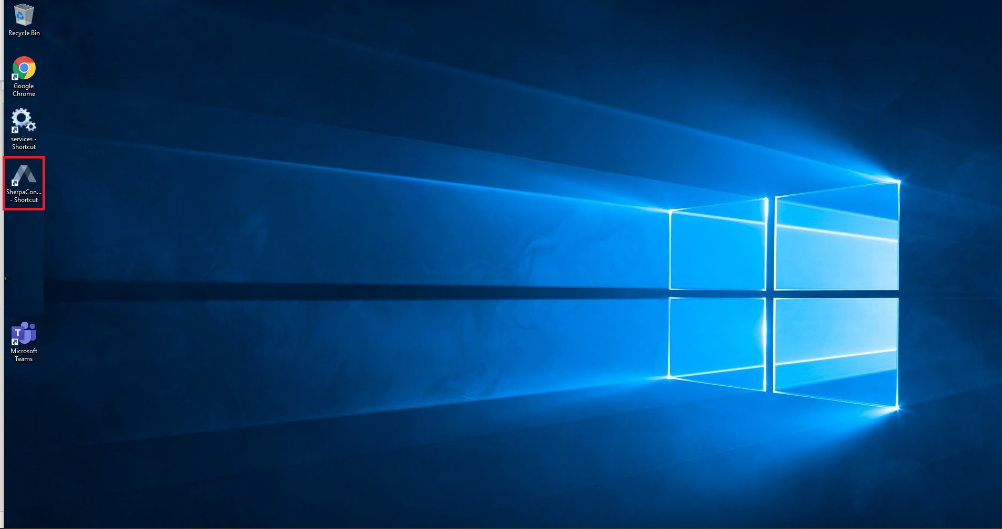
Log into the Connector server and launch the Connector Status Utility by clicking the desktop icon shown below.
If your server does not have a desktop icon, locate the file SherpConnectorStatus.exe file in the folder
C:\Program Files (x86)\Sherpa Software\Sherpa Connector
And launch the utility from that location.
Click on the Credentials hyperlink, then click the Connectors tab:
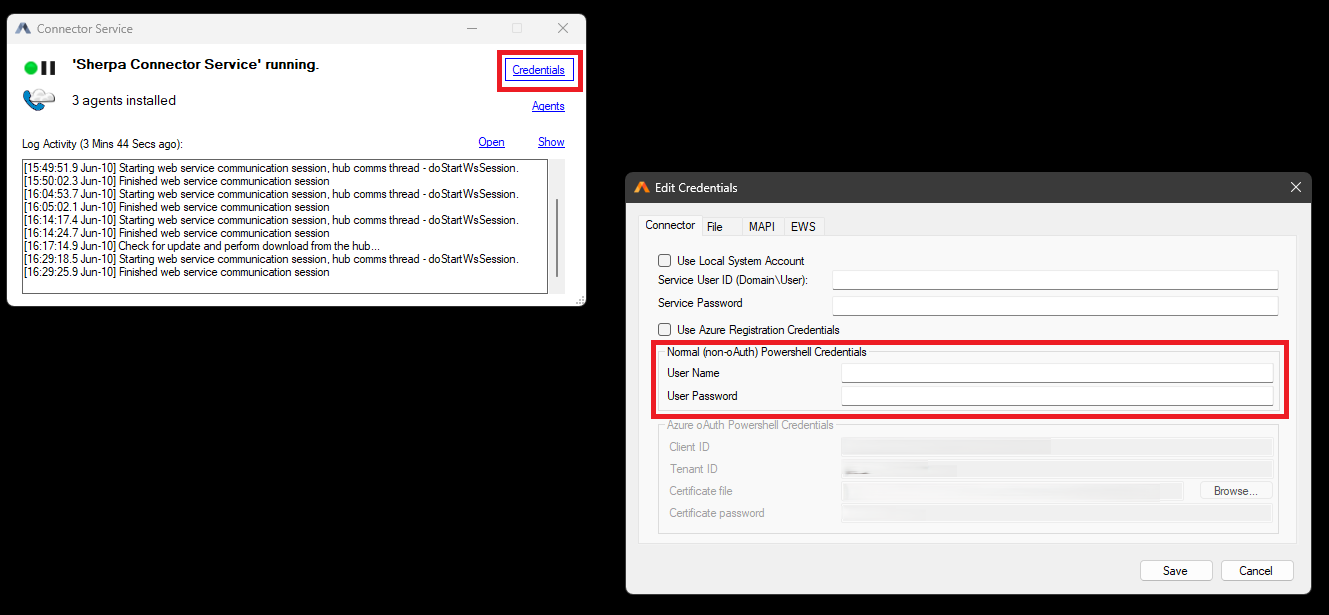
In the middle of the form, confirm that the Master PowerShell Credentials shown are accurate. If the credentials are correct, continue with Section 3: Entra AD Data Target Searches in this document.
If you need to enter (or modify) the credentials, be sure to click the Save button at the bottom of the form. Then close the Connector Status Utility, and restart the Connector Service to ensure the latest credential information is being used by the service.
Section 3: Entra AD Data Target Searches for Data Owners
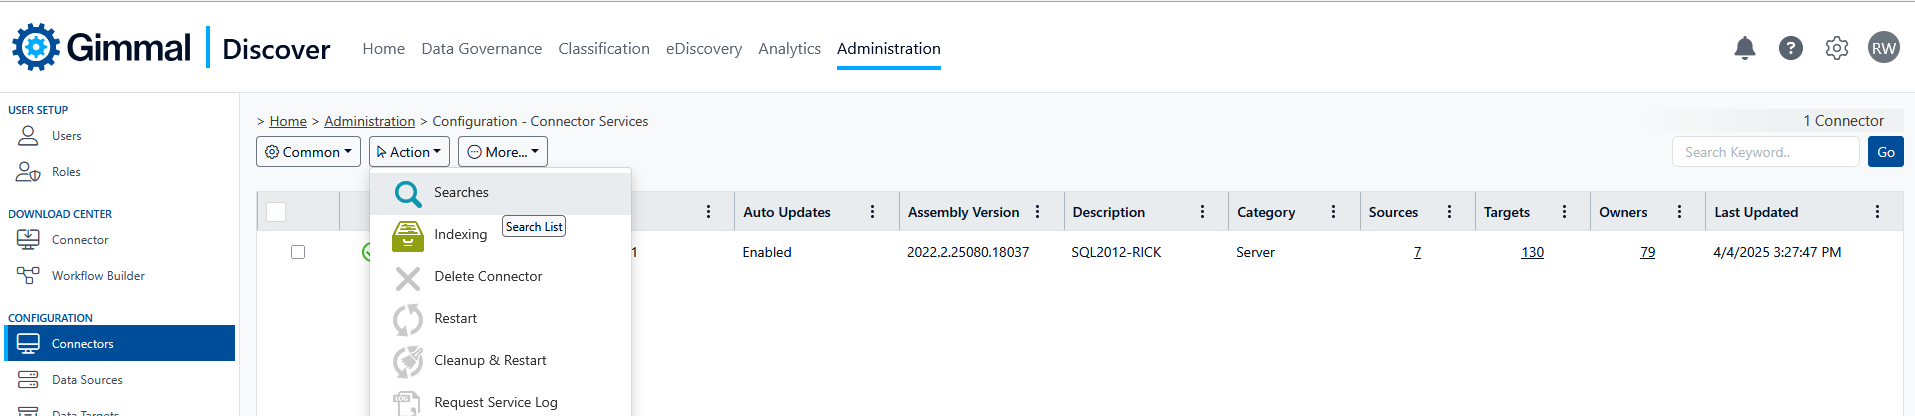
Once the Entra AD components are in place, Discover should be able to query Entra AD through a Data Target search query. In the Discover Administration module, select Configuration then Connectors. Hover over the Action button and select Searches:
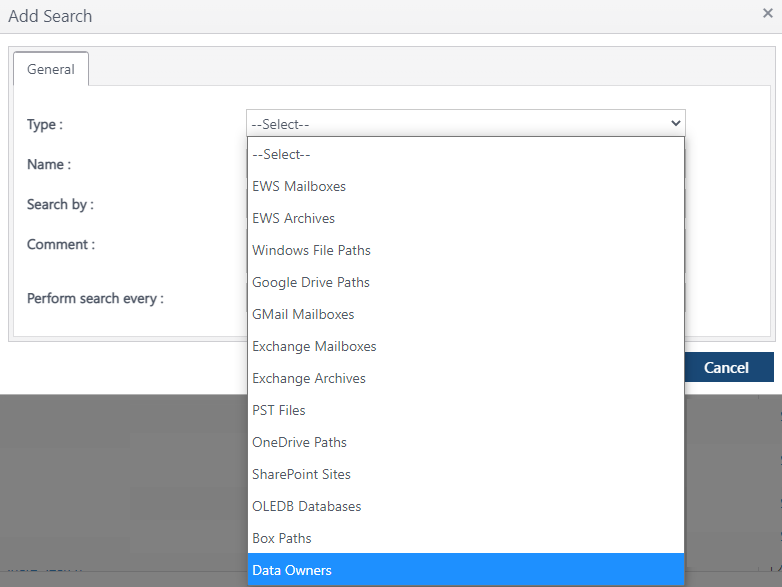
On the search screen, hover over the Action button and select Add. From the Type drop-down list select Data Owners.
Supply a name for the search type, then select the 'Search For' option shown below to reference an Entra AD group. Then set the 'Search By' to Specific Connector and select your Connector device using the Edit button.
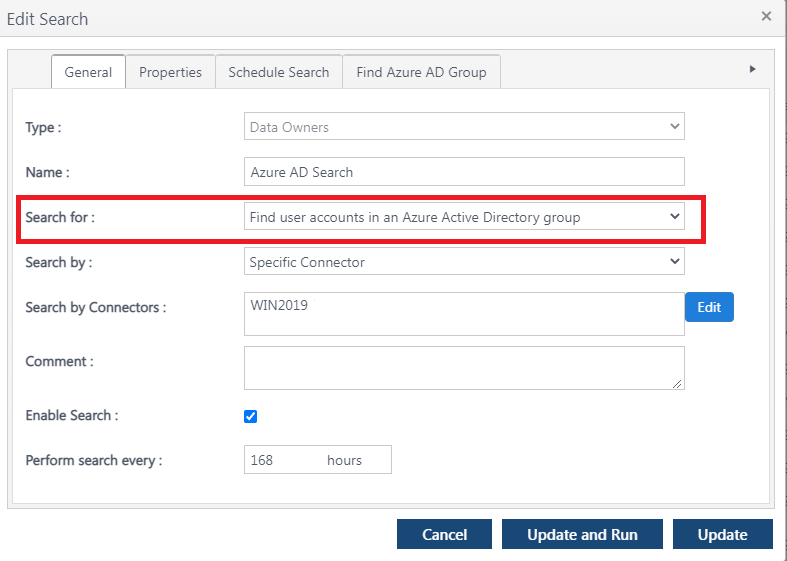
Click the Find Entra AD Group tab at the top of the form and supply the name of the Entra AD group that you would like Discover to query for user information.
Note: You may only specify one group name for each search. To search for additional groups, create multiple Entra AD searches
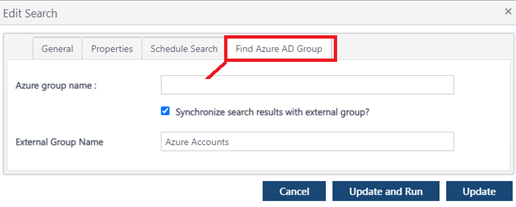
If you would like to create a corresponding group within Discover (this step is optional), check the 'Synchronize search results with external group' box and supply a name for the Discover group to be created.
When finished, click the blue UPDATE AND RUN button to queue the search for execution. The next time the Connector device checks in, it will pick up the search request and perform the query.
Section 4: Entra AD Data Target Searches for EWS Mailboxes
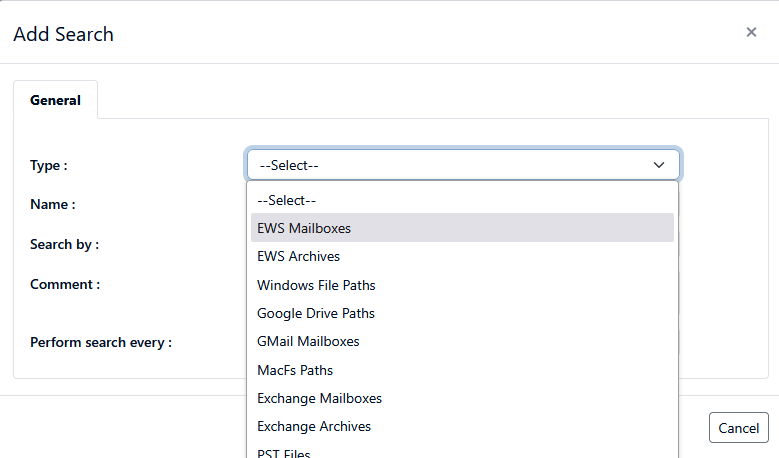
If you are using Discover to manage Exchange mailboxes in Microsoft 365, you can also obtain a list of mailbox data targets through an Entra query. Like Data Owners (described in Section 3), the process begins with creating a search from the connector screen. In this case, select EWS Mailboxes as the type of Data target
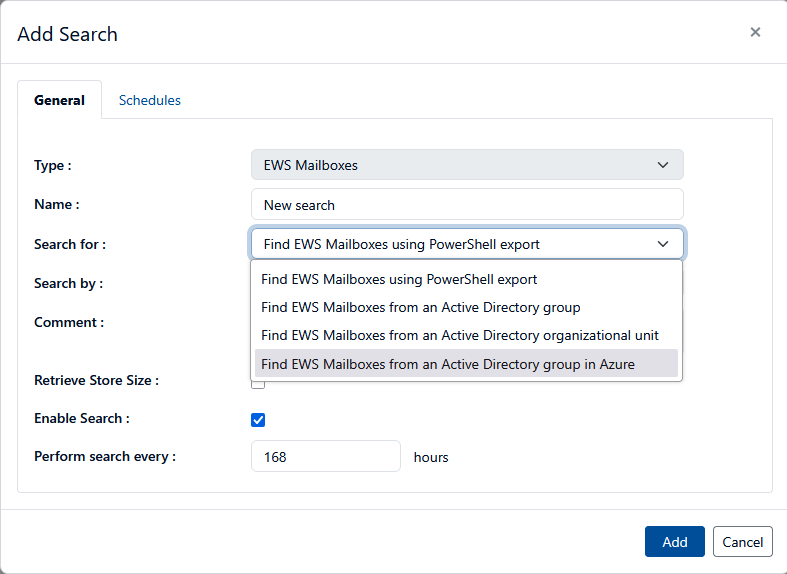
In the search list drop-down box labeled “Search For” select the option “Find EWS Mailboxes from an Active Directory group in Azure”.
When finished, either click the Add button, then select the search and run it, or open the search in edit mode and click the blue UPDATE AND RUN button to queue the search for execution. The next time the Connector device checks in, it will pick up the search request and perform the query.
Appendix A - Testing Entra/AD group queries using PowerShell
If you are having difficulty obtaining group information from Entra/AD, it may be helpful to issue the PowerShell commands directly to determine if additional troubleshooting information is available. Initiate a PowerShell session as an administrator and issue the commands shown below. Note, you will need to replace the items shown within [] brackets with the appropriate pieces of information from your configuration:
$Secure_String_Pwd = ConvertTo-SecureString '[PASSWORD]' -AsPlainText -Force
$certObj = New-Object System.Security.Cryptography.X509Certificates.X509Certificate2('[PATH TO CERTIFICATE PFX FILE]', $Secure_String_Pwd)
Connect-Entra -TenantId '[TENANT ID]' -ApplicationId '[CLIENT ID]' -CertificateThumbprint
$certObj.Thumbprint -NoWelcome
$group = Get-EntraGroup -filter "displayname eq '[GROUP NAME]'"
Get-EntraGroupMember -GroupId $group.id | select ObjectId,UserPrincipalName,Mail,DisplayName,GivenName,SurName,MailNickName,Department,PhysicalDeliveryOfficeName