
Physical Records Management Configuration
Log into Records Management Manager Web using your Master ("Administrator") account, and verify that the Physical Records Management Service Account has been created. (For more information, see Creating a Service Account.)
Gimmal Cloud
If you are using Records Management on the Gimmal Cloud, you must create the Service Account (referenced in step 1 above) as a user with “System Admin” access. Then, configure the Physical Records Management Connection (see remaining steps) as a user with “Physical Administrator” access. (This may be the same user with both permissions.)
Click Physical on the Main Menu, and then click Connection on the left Navigation Menu. The Connection Configuration page displays.
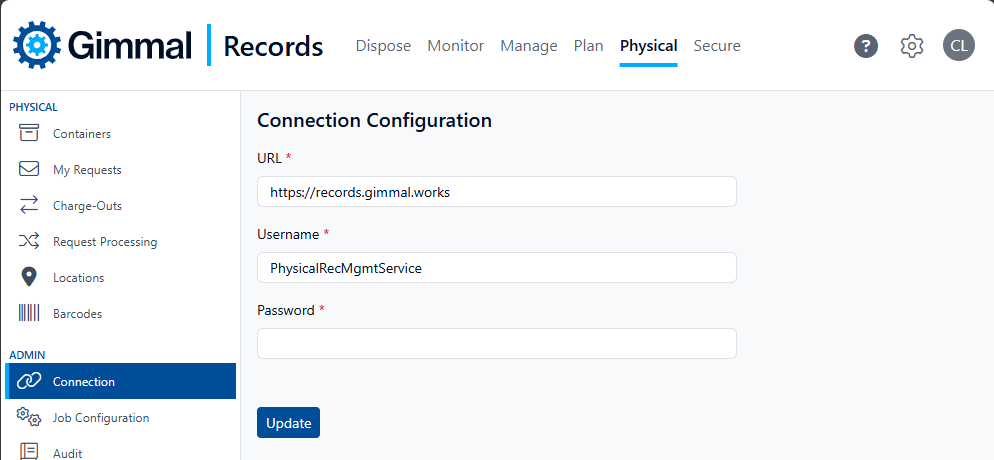
Enter the connection URL
Enter the Service Account Username and the Service Account Password.
Click Update. (This button will display Save if this is the first time configuring the connection)
Start the Gimmal Physical Records Management Service from the Windows Services dialog.
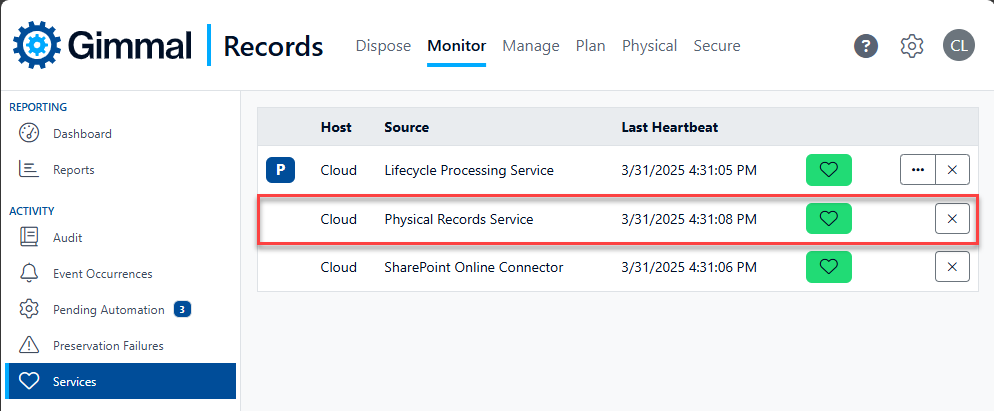
Return to Physical Records Management, and on the Main Menu, click Monitor > Services. A list of services displays.
Verify that Physical Records Service displays with the green heartbeat icon, as well as the "P" icon indicating that it's a Primary service.
Existing Gimmal Cloud service customers (pre-Feb. 27th, 2021) should continue to use the existing URLs.
US Test - https://test.recordlion.net
US Production - https://app.recordlion.net
UK Test - https://testuk.recordlion.net
UK Production - https://uk.recordlion.net
New Gimmal Cloud service customers (post-Feb. 27th, 2021) should use the new URLs.
US Test - https://records.gimmal.build
US Production - https://records.gimmal.cloud
UK Test - https://records.uk.gimmal.build
UK Production - https://records.uk.gimmal.cloud
CAN Production - https://records-ca.gimmal.cloud/
NOTE: Existing customers already using the existing URL should not change to the new URLs as this may cause issues.