Connect to the OData API
The steps in this article can be skipped by downloading the Power BI template from the Gimmal Records download site. If you don’t have access to this site, please contact Gimmal Support.
The Gimmal Records OData API allows you to access reporting data in your Gimmal Records cloud tenant from reporting tools such as Excel, Tableau, and Power BI. This article walks you through connecting to the API with Power BI Desktop.
Currently reporting data is only available for production tenants, and is not available on test tenants.
Prerequisites
Access to the Gimmal Records cloud service.
The user name and password to a Service Account in the Gimmal Records cloud service.
Advanced knowledge of Power BI Desktop.
Loading Data into Power BI
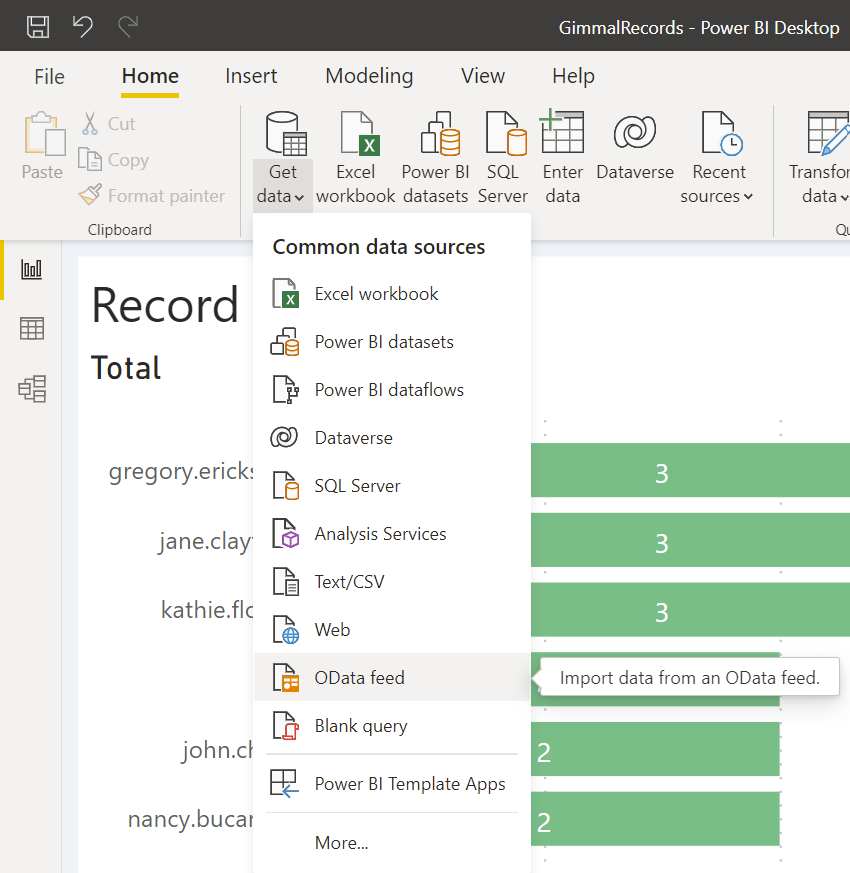
From the Home ribbon select Get Data | OData feed.
The OData feed window appears.
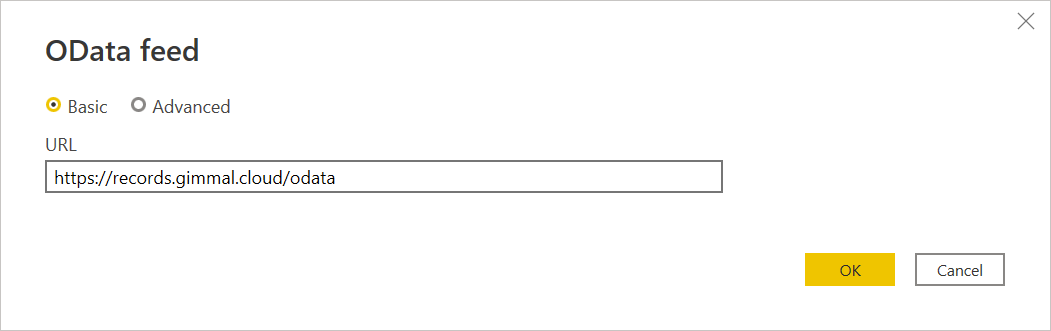
Enter the Uri for the Gimmal Records base OData endpoint (https://records.gimmal.cloud/odata) and click OK.
Note: For our customers in the Canadian Cloud, please use https://records-ca.gimmal.cloud/odata for the URIThe authentication window will appear.
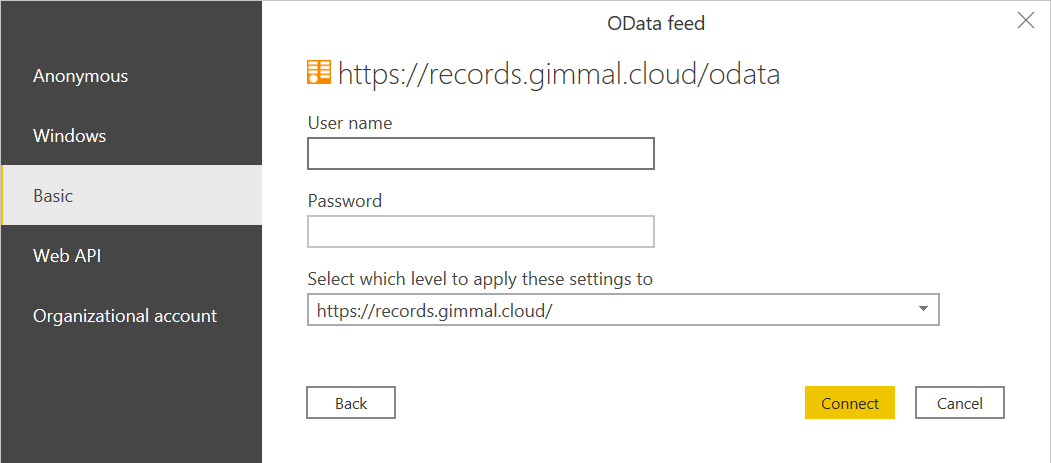
Select Basic authentication and enter the user name and password for a service account.
Ensure https://records.gimmal.cloud/odata is selected (rather than https://records.gimmal.cloud/) and click Connect.
Note: If you are on the Canadian cloud tenant, please use https://records-ca.gimmal.cloud/odata for the URIThe Navigator windows will appear.
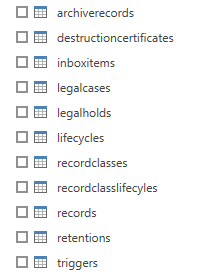
Select the tables needed and click Load. If this is your first time connecting, it may be best to load all tables to get an understanding of the data.
Loading related tables
The default OData API will give you basic information in Gimmal Records, however, there are also some related tables you may want to connect to. Use any of the following URLs to connect to the related data. The ODataAPI is https://records.gimmal.cloud/odata, or https://records-ca.gimmal.cloud/odata for Canadian cloud tenants.
URL | Description |
|---|---|
ODataAPI/destructioncertificates?$select=*&$expand=approvals($select=*) | Destruction Certificate approvals |
ODataAPI/destructioncertificates?$select=*&$expand=content($select=*) | Destruction Certificate content |
ODataAPI/legalcases?$select=*&$expand=holdrules($select=*) | Legal hold rules |
ODataAPI/lifecycles?$select=*&$expand=phases($select=*) | Lifecycle phases |
ODataAPI/recordclasses?$select=*&$expand=approvalgroups($select=*;$expand=users($select=*)) | Record Class approval groups and users |
ODataAPI/recordclasses?$select=*&$expand=classificationrules($select=*) | Record Class classification rules |
oDataAPI/triggers?$select=*&$expand=triggerrules($select=*) | Trigger rules |
Follow these steps to load a related table in Power BI Desktop:
From the Home ribbon select Get Data | OData feed (just like step one above.)
Enter the URL of the related table you need from the table above (ODataAPI is the base URL for the OData API) and click OK.
If you are asked for authentication, see step 4 above.
The following window will appear:
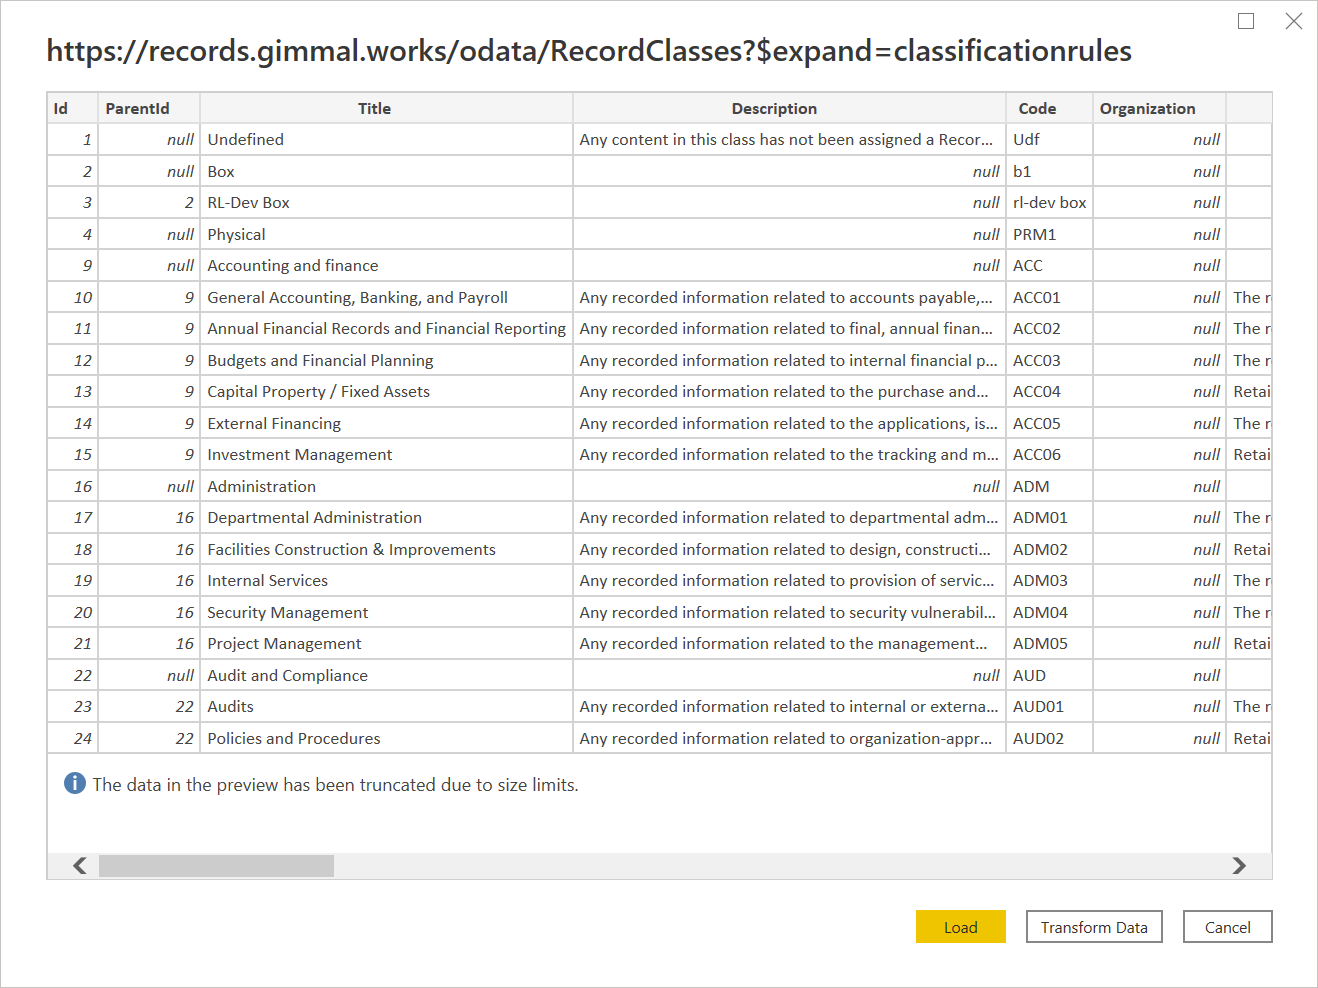
Select Transform Data.
The Power Query Editor will open. For any related table, you will need to expand the column listed in the URL, in this case, ClassificationRules.
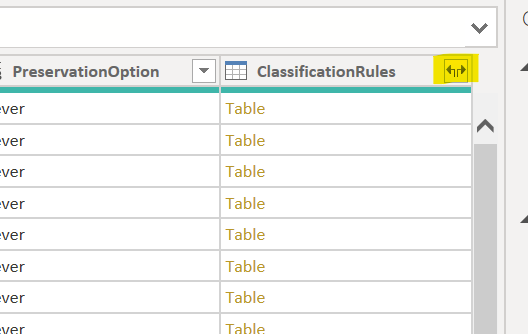
Click the highlighted button to expand the column. The following window will appear:

Unselect any columns you do not want to expand, however, if this is your first time using this data, it may be best to select them all. Click OK.
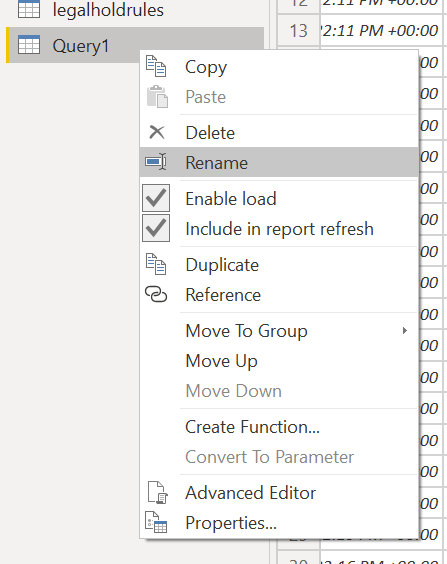
We recommend you rename the table (likely Query1) to something more user-friendly, such as classificationrules.
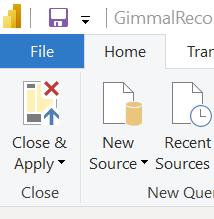
Click Close and Apply from the Home Ribbon in the Power Query Editor.
Your new table will be loaded into Power BI Desktop.
Repeat these steps for the other tables as necessary.
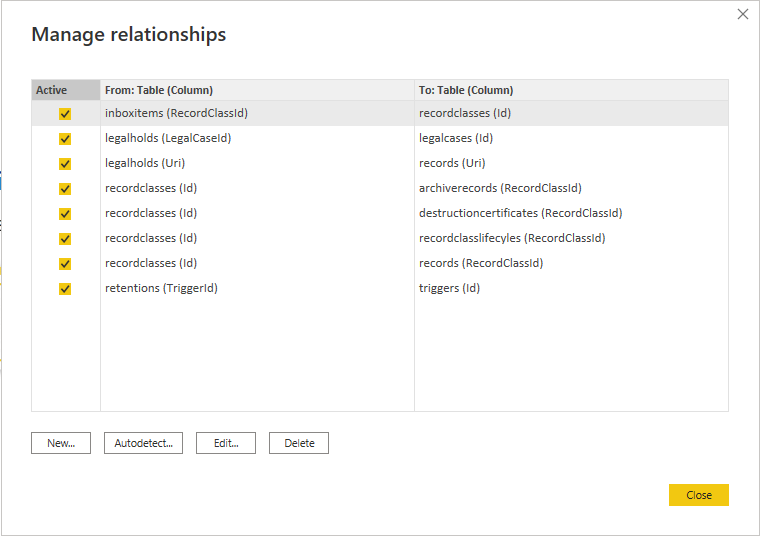
Managing Relationships
When loading the tables, Power BI Desktop will attempt to automatically create relationships. Unfortunately, it will most likely do this incorrectly for Gimmal Records. You will likely have to remove, modify, and create relationships manually. The correct relationships for all tables, including related tables should look similar to the following: