Configuring Box
The following sections explain the required information, settings, and apps needed in your Box account before you can start using the Connector.
Box Enterprise ID
Your enterprise ID is available in several places throughout Box. You can easily find it within the Admin Console under the Account & Billing page.
Custom Subdomain
You must configure your box account to use a custom subdomain. This enables the Gimmal Box Connector to uniquely identify requests to/from your Box account back to your Gimmal Box Connector subscription. For more details, please follow Box’s instructions on their Custom Setup for your Enterprise page.
Sign in to your Box Account.
Access your admin console.
Navigate to the Custom Setup tab.
Under the Custom Subdomain section, ensure you have entered a value and click Save.
Box Apps
You are required to create two Box Custom Apps in order for the connector to communicate with your Box account—both a Box User App and a Box Server-to-Server App. Please note that the majority of this information comes from Box’s documentation. For more details beyond what is provided by Gimmal, please see Box’s Creating Your First Application page.
Box User App
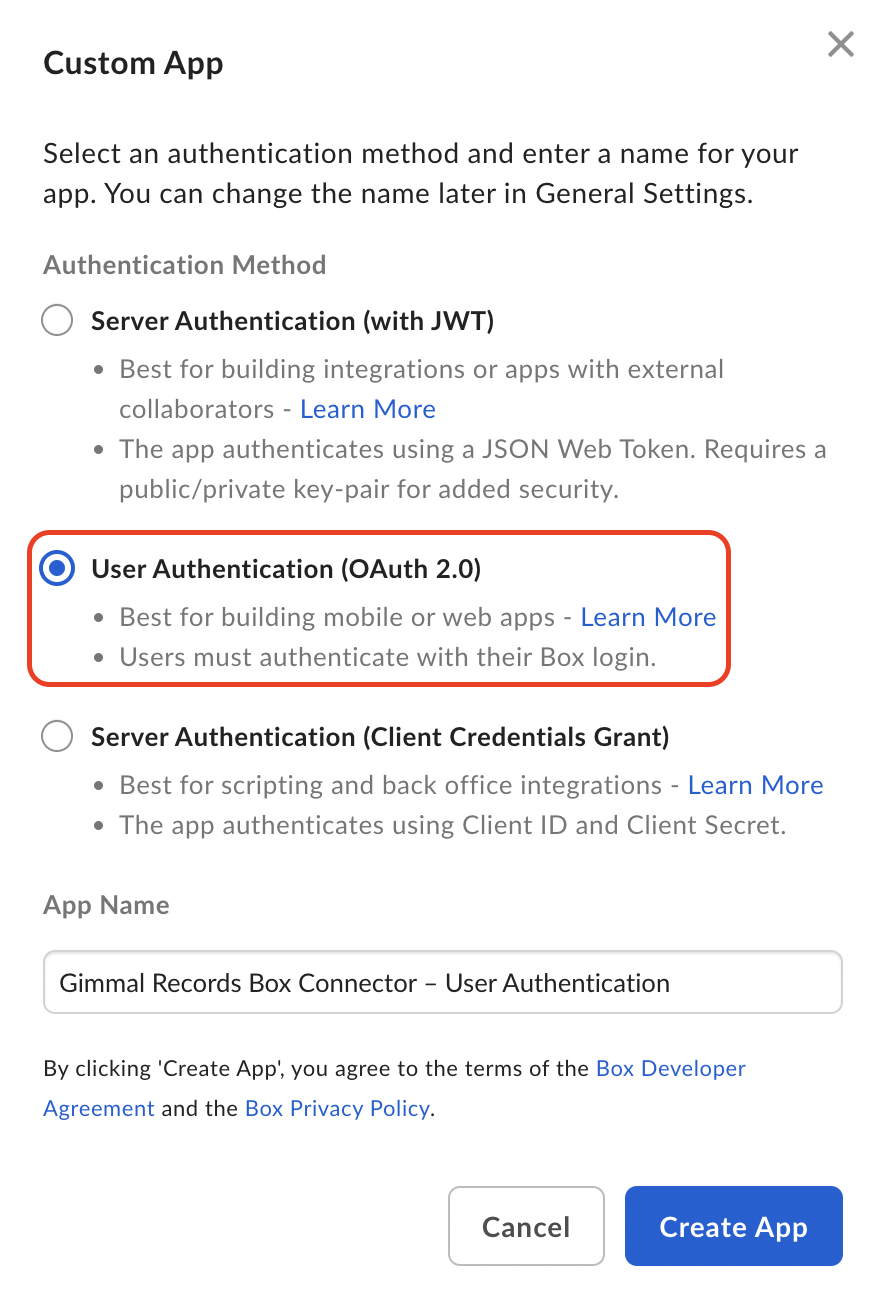
This is a standard OAuth 2.0 app in Box (which Box also refers to as User Authentication). For more details, please see Box’s Setup with OAuth 2.0 developer page. This app allows you to manage the connector through a web browser.
Create a new Custom App Box app that uses the User Authentication (OAuth 2.0) authentication method.
Configure the app:
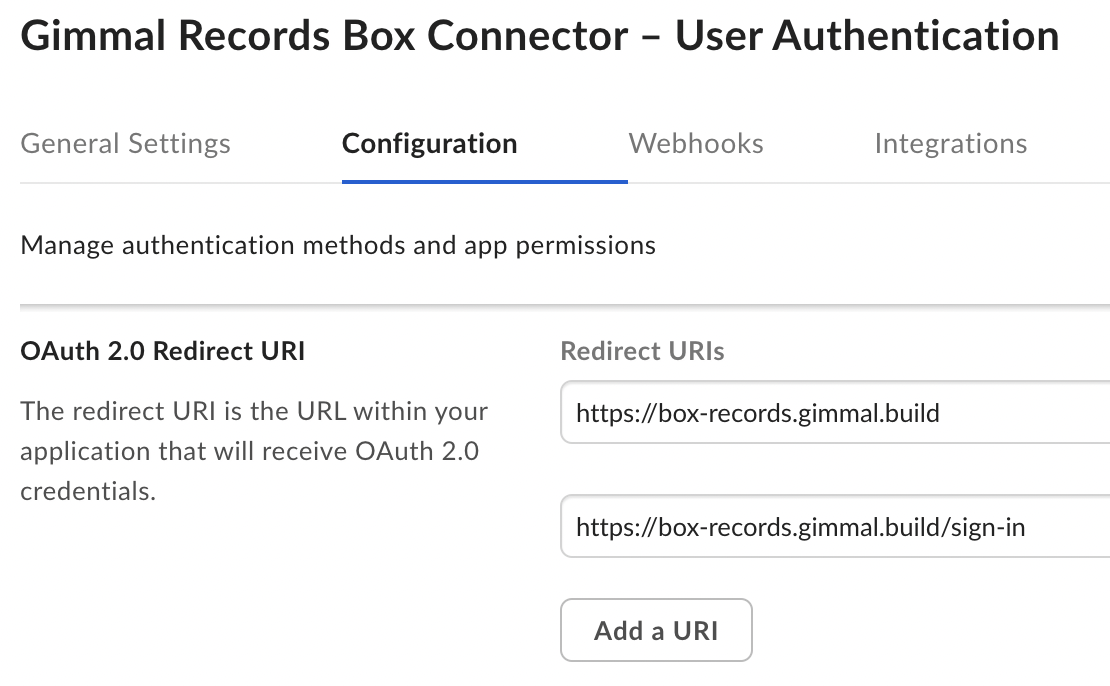
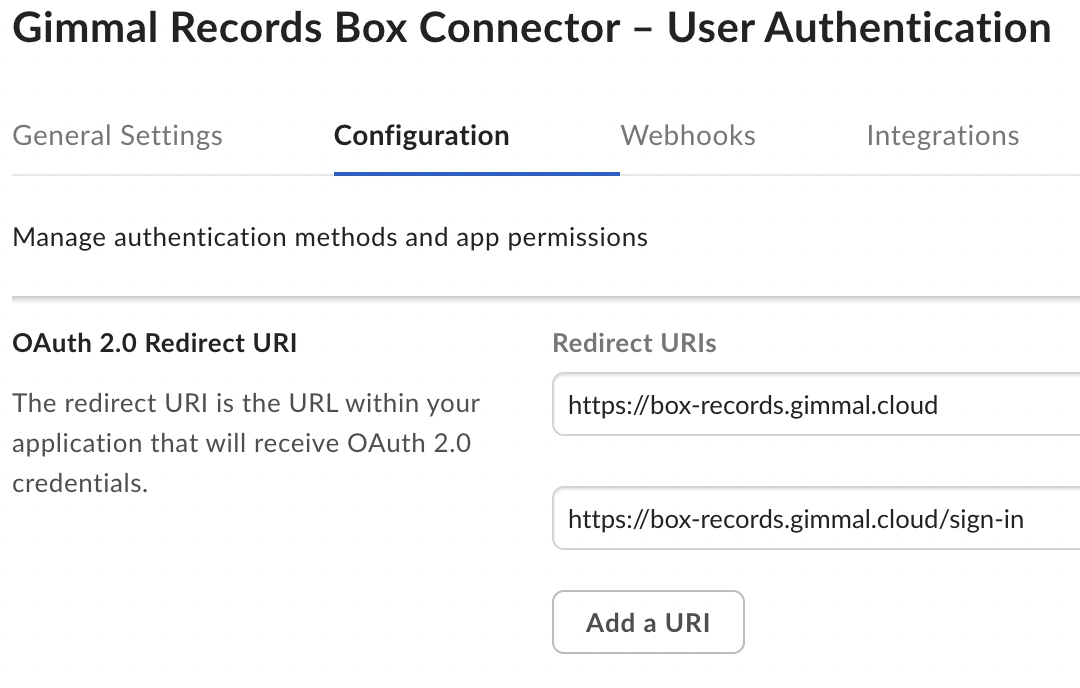
OAuth 2.0 Redirect URI - Enter one of the following options:
SaaS-TEST
Existing Customers (pre-Feb. 27th, 2021) include both https://test-conn-box.recordlion.net and https://test-conn-box.recordlion.net/sign-in
New Customers (post-Feb. 27th, 2021) include both https://box-records.gimmal.build and https://box-records.gimmal.build/sign-in
SaaS-PRODUCTION
Existing Customers (pre-Feb. 27th, 2021) include both https://app-conn-box.recordlion.net and https://app-conn-box.recordlion.net/sign-in
New Customers (post-Feb. 27th, 2021) include both https://box-records.gimmal.cloud and https://box-records.gimmal.cloud/sign-in
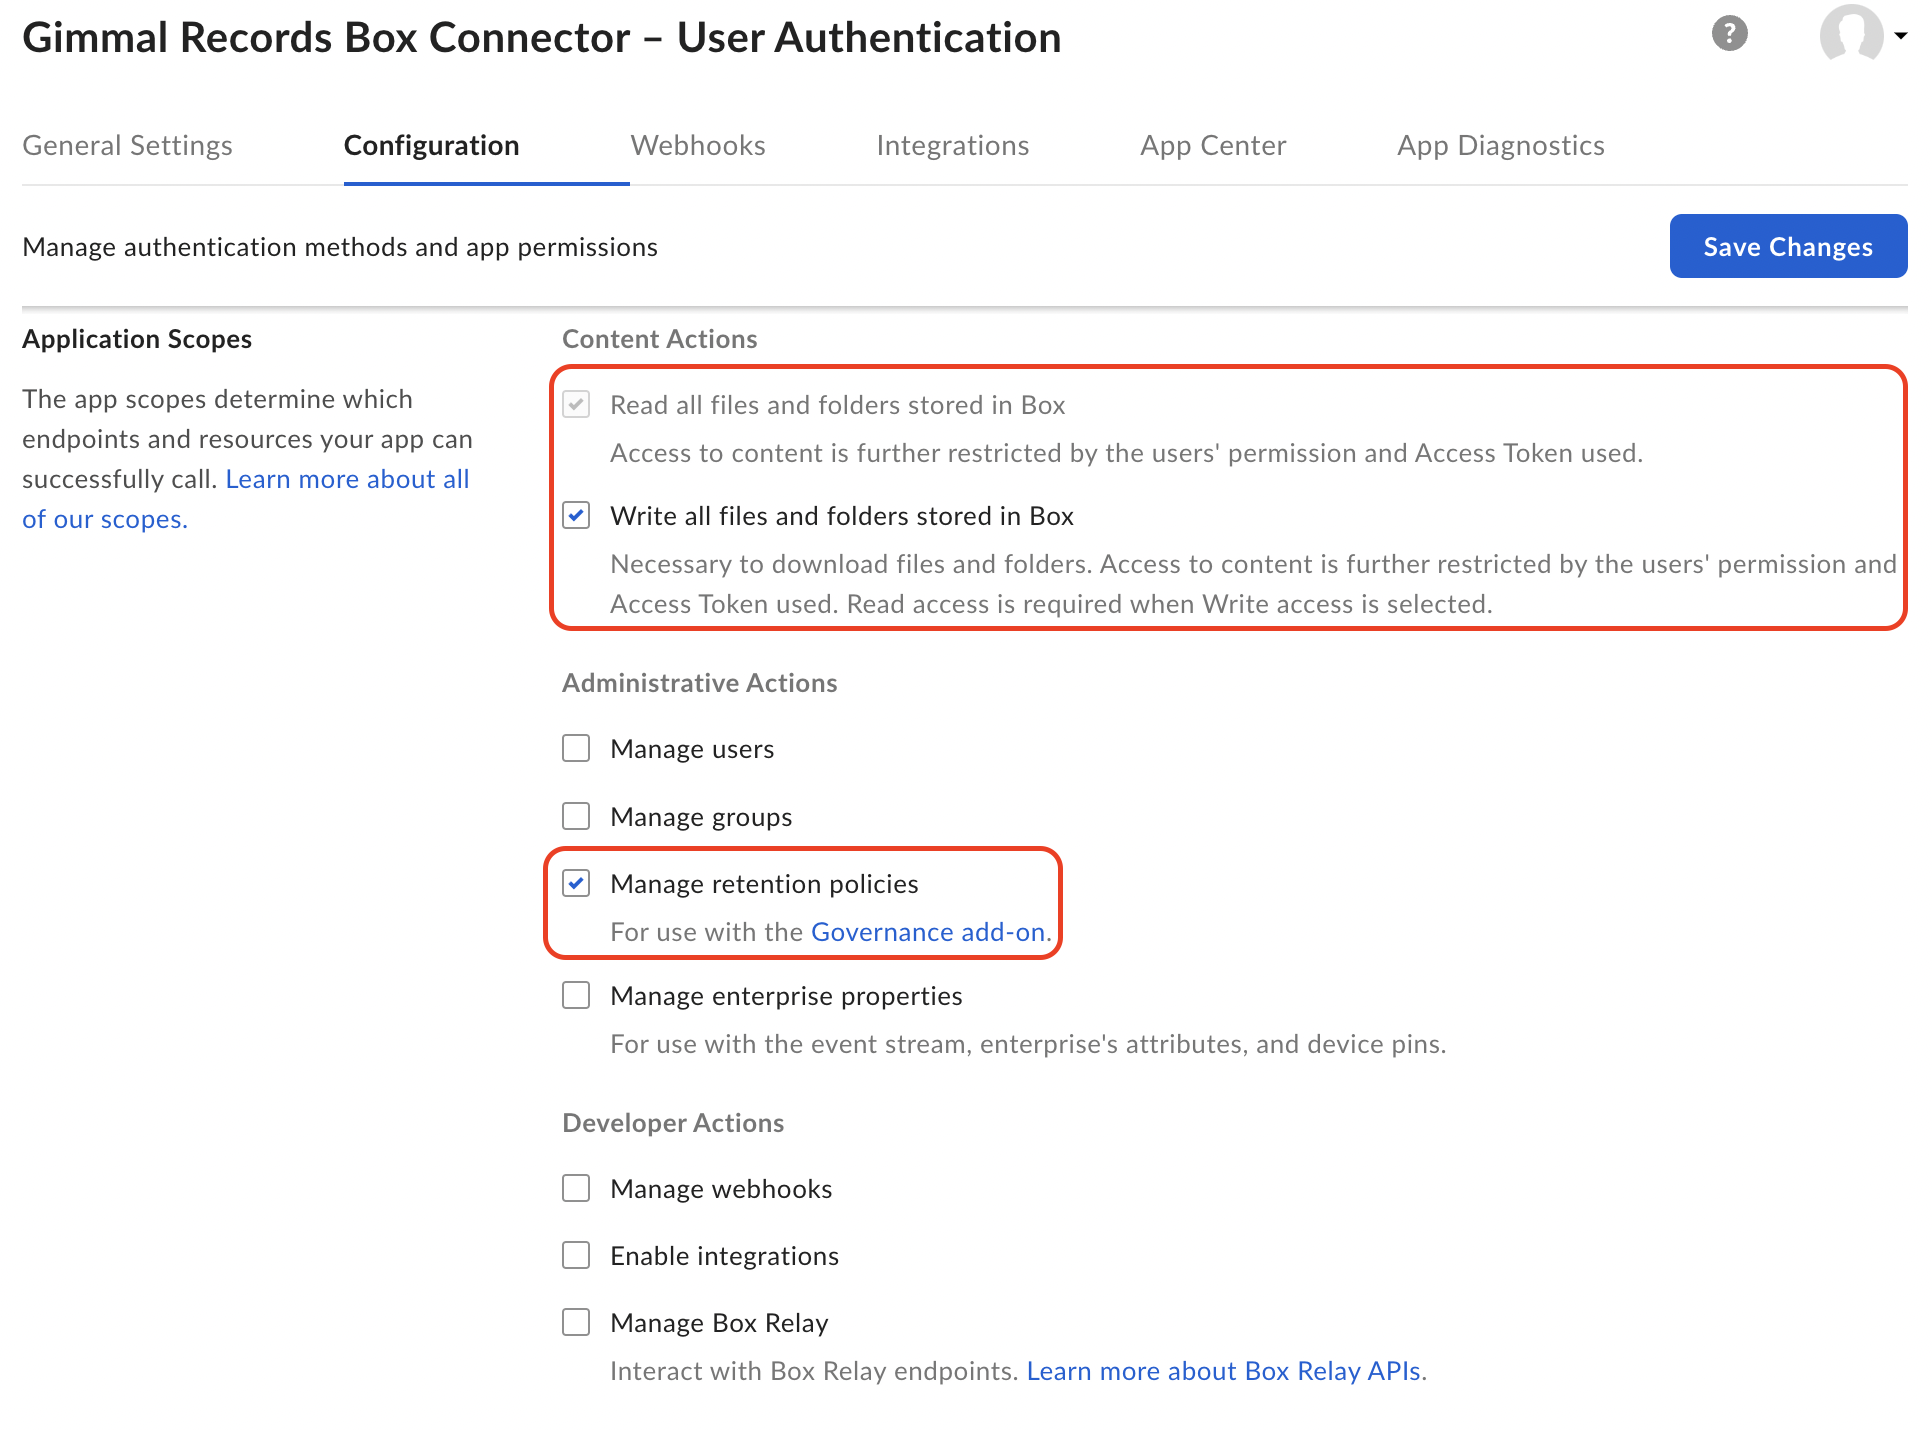
Application Scopes - Select all of the following:
Read all files and folders stored in Box.
Write all files and folders stored in Box.
If your organization is using Box Governance, also select Manage Retention Policies.
CORS Domains - Enter one of the following options. It should match the redirect URIs you selected above for TEST or PRODUCTION:
SaaS-TEST
Existing Customers (pre-Feb. 27th, 2021) include both https://test-conn-box.recordlion.net and https://test-conn-box.recordlion.net/sign-in
New Customers (post-Feb. 27th, 2021) include both https://box-records.gimmal.build and https://box-records.gimmal.build/sign-in
(Note: these URIs are comma-separated.)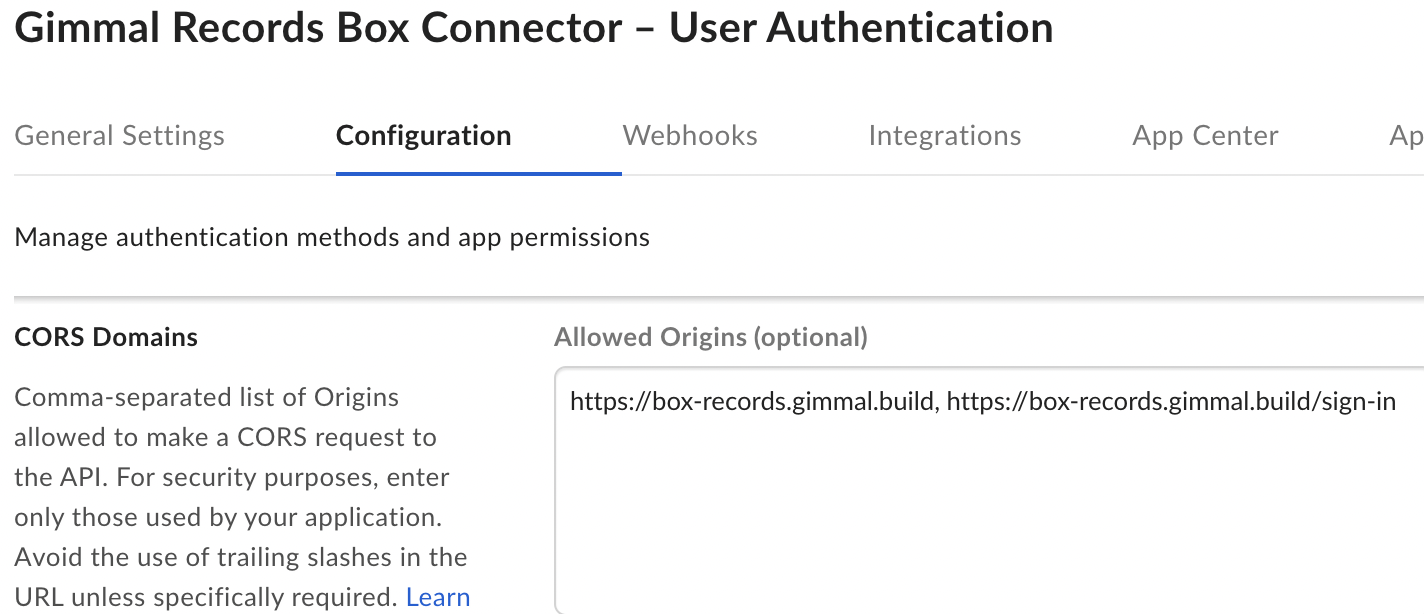
SaaS-PRODUCTION
Existing Customers (pre-Feb. 27th, 2021) include both https://app-conn-box.recordlion.net and https://app-conn-box.recordlion.net/sign-in
New Customers (post-Feb. 27th, 2021) include both https://box-records.gimmal.cloud and https://box-records.gimmal.cloud/sign-in
(Note: these URIs are comma-separated.)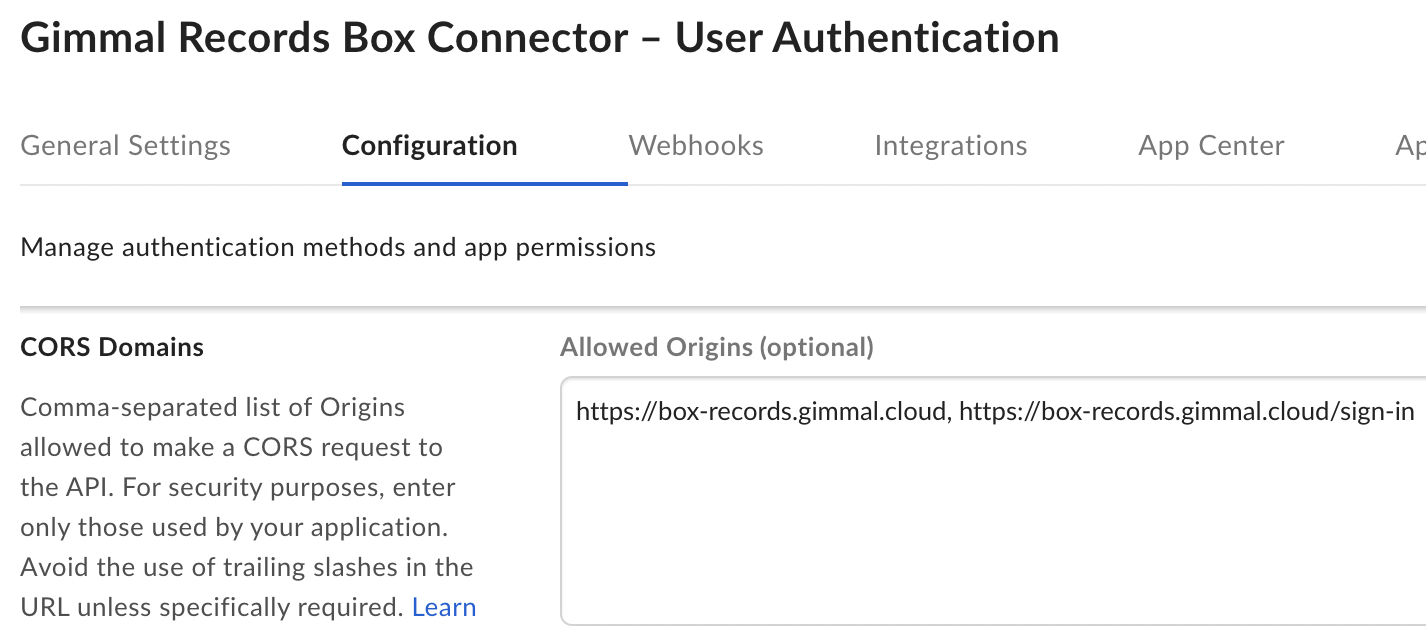
Click Save Changes.
Box Server-to-Server App
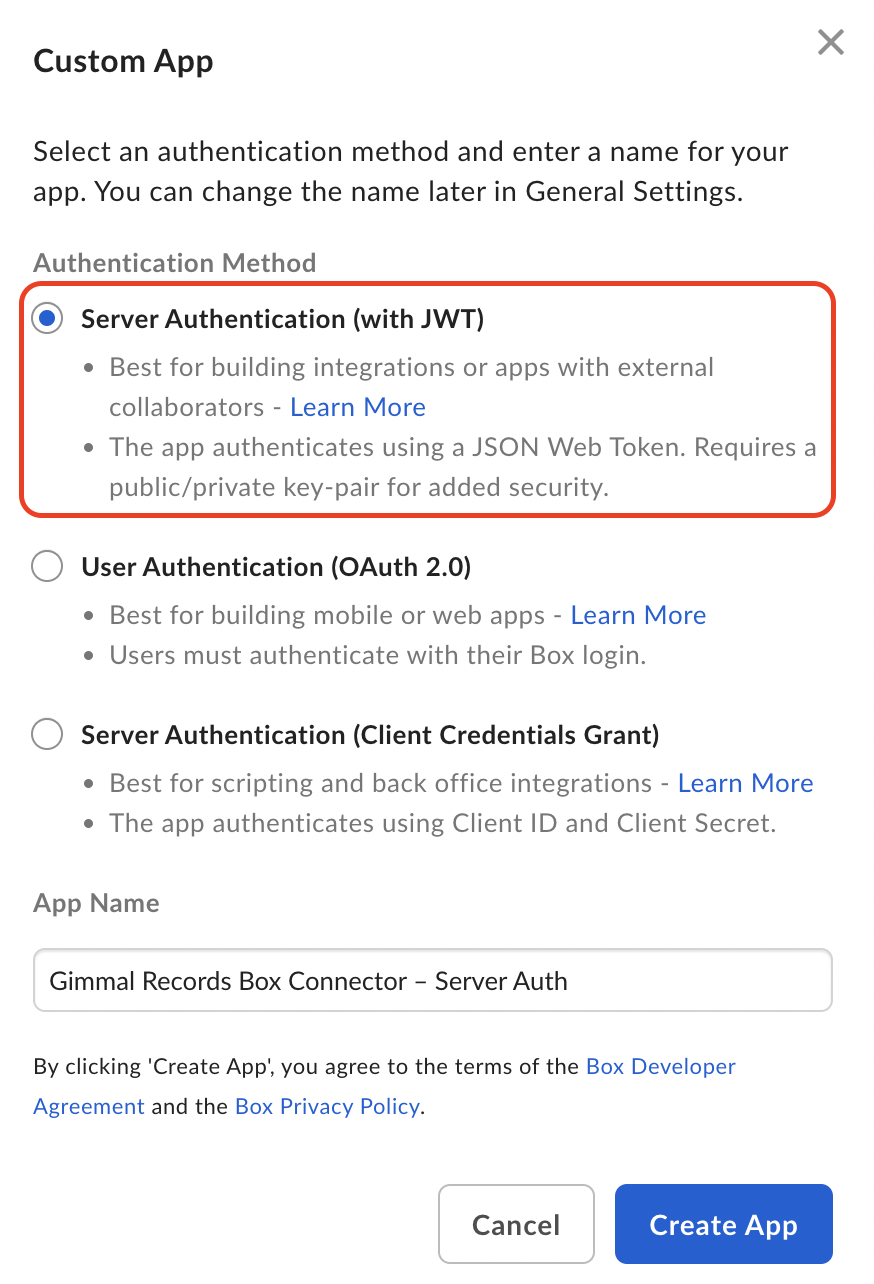
This is an OAuth 2.0 with JWT app in Box (which Box also refers to as Server Authentication). For more details, please see Box’s Setup with JWT developer page. This app enables the connector to communicate with your Box account as a background service without any user interaction.
Create a new Custom App that uses the Server Authentication (with JWT) authentication method.
Configure the app:
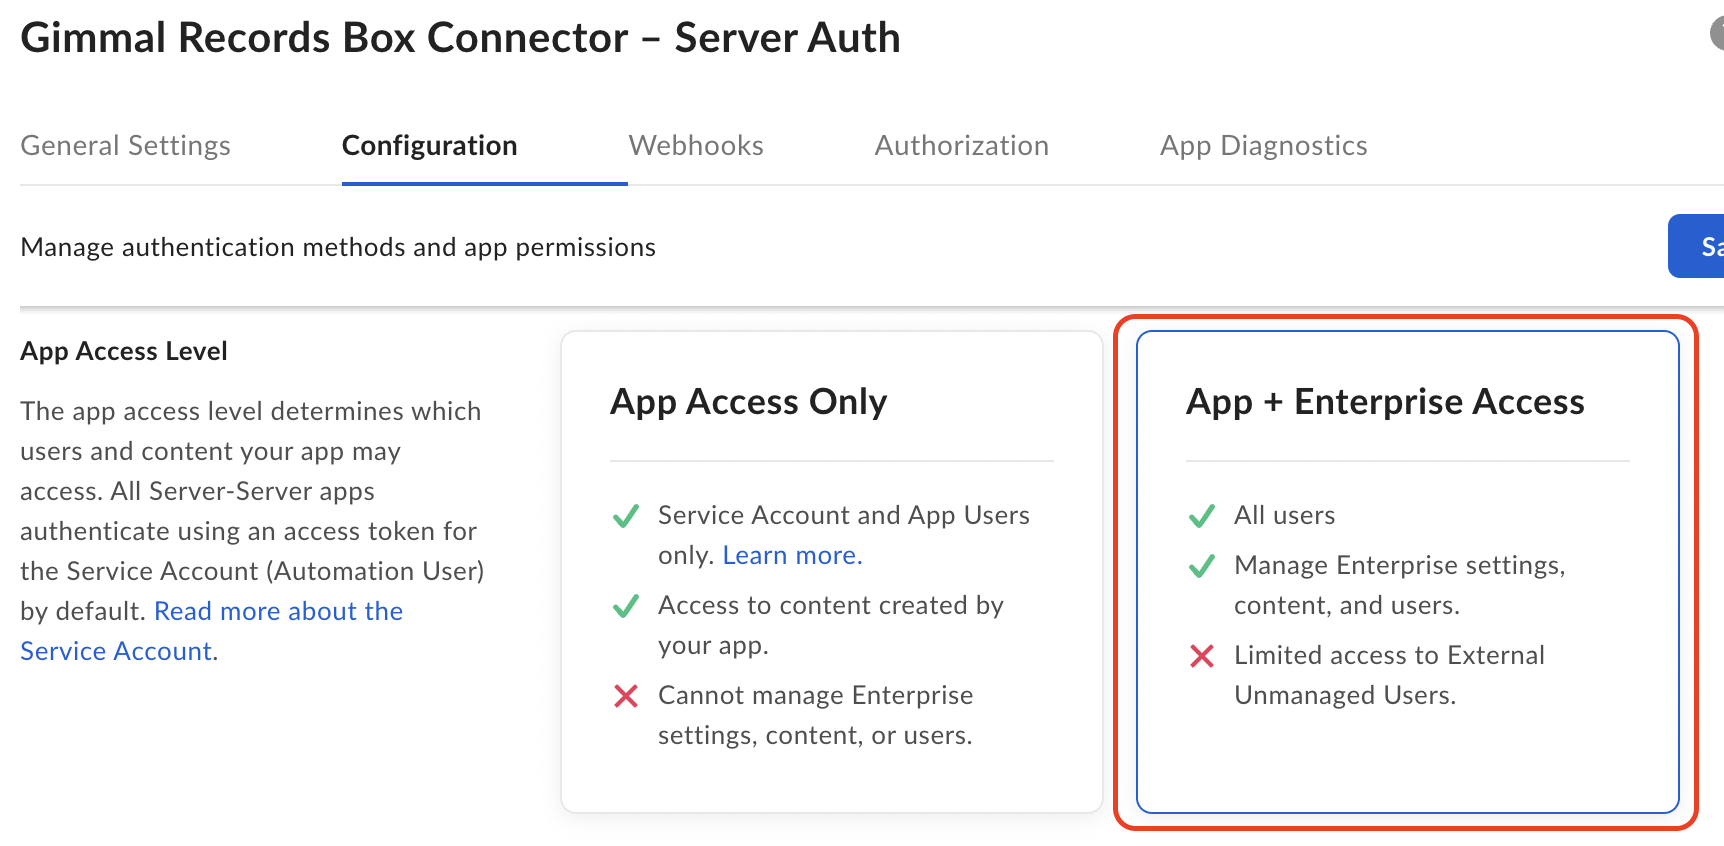
App Access Level should be App + Enterprise Access.
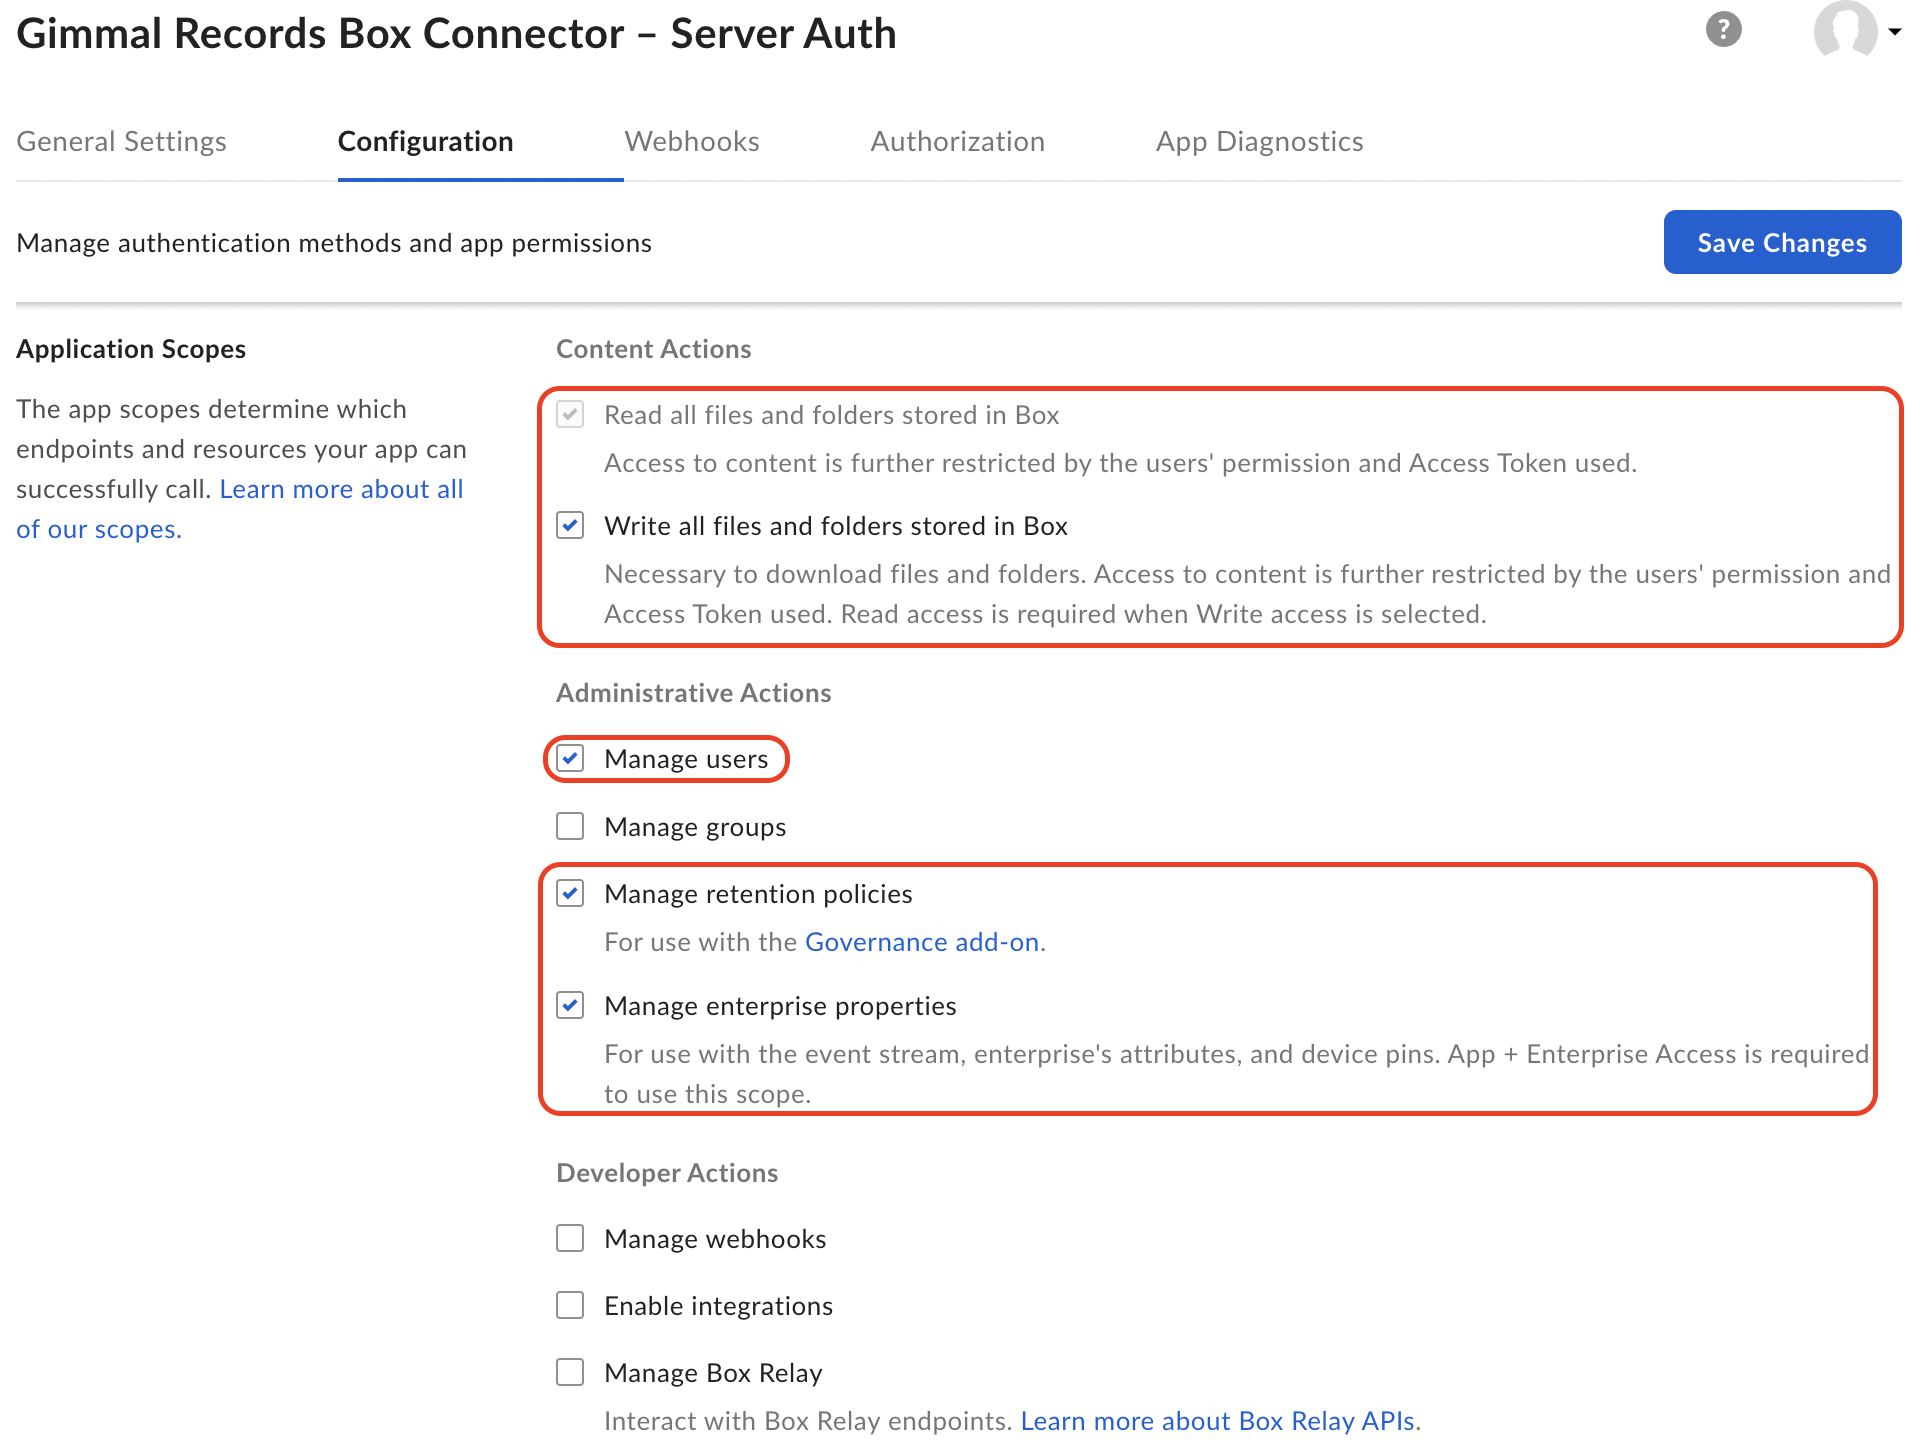
Application Scopes - Select all of the following:
Read all files and folders stored in Box.
Write all files and folders stored in Box.
Manage users.
Manage enterprise properties.
If your organization is using Box Governance, also select Manage Retention Policies.
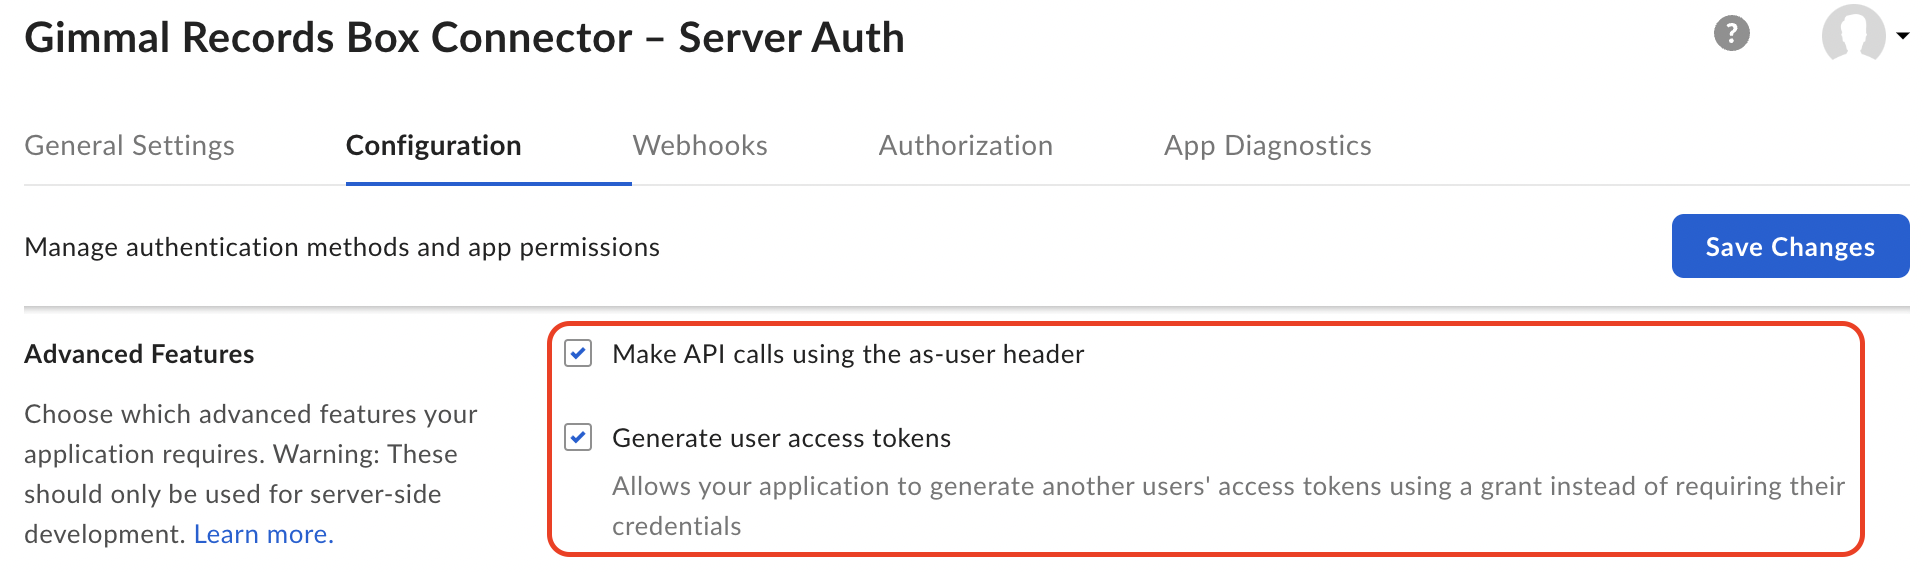
Advanced Features:
Make API calls using the as-user header is enabled.
Generate user access tokens is enabled.
Generate a Public/Private Keypair by following the instructions in Box's documentation (please note that this requires Multi-factor Authentication be enabled on your Box account).

CORS Domains is one of the following options. It should match the redirect URIs you configured in the OAuth 2.0 User App previously.
SaaS-TEST
Existing Customers (pre-Feb. 27th, 2021) include both https://test-conn-box.recordlion.net and https://test-conn-box.recordlion.net/sign-in
New Customers (post-Feb. 27th, 2021) include both https://box-records.gimmal.build and https://box-records.gimmal.build/sign-in
(Note: these URIs are comma-separated.)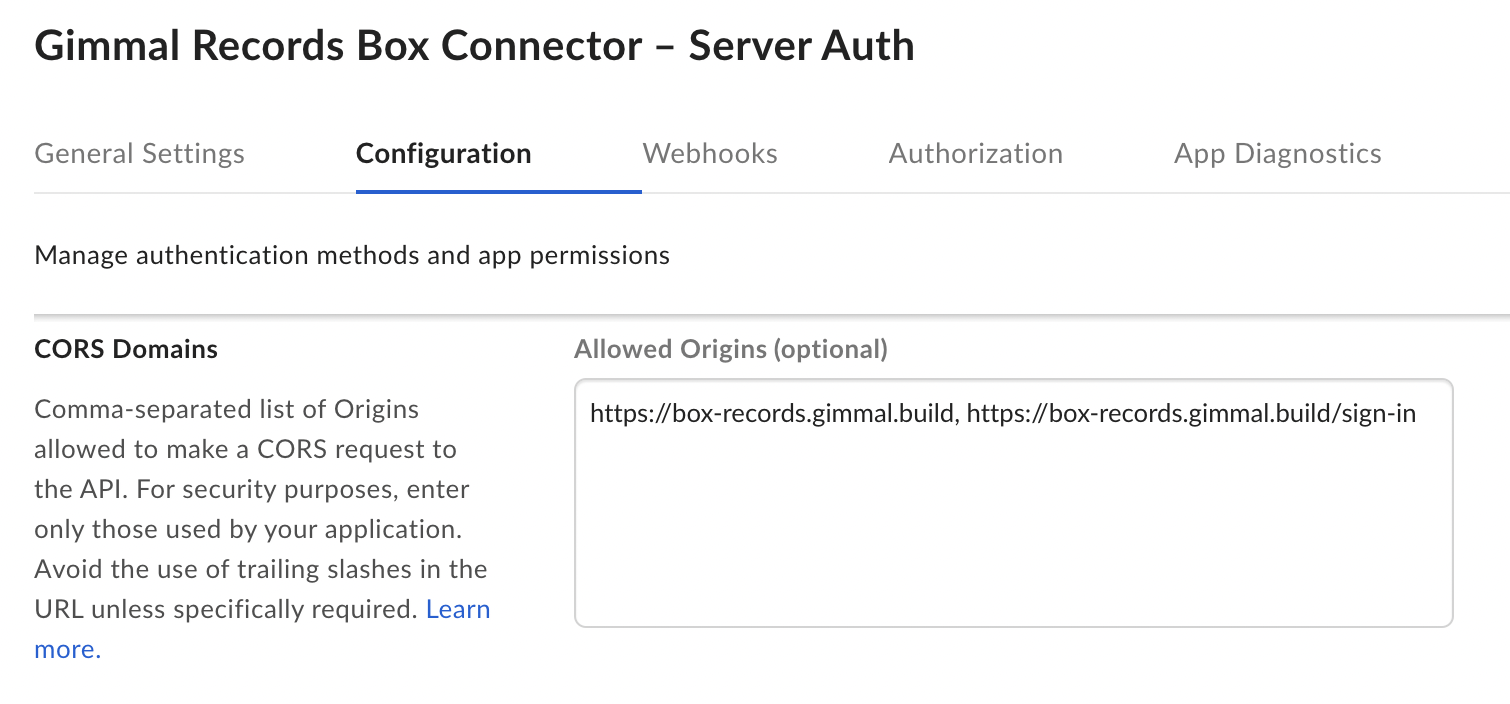
SaaS-PRODUCTION
Existing Customers (pre-Feb. 27th, 2021) use https://app-conn-box.recordlion.net
New Customers (post-Feb. 27th, 2021) use https://box-records.gimmal.cloud
(Note: these URIs are comma-separated.)
Click Save Changes.
Authorized and Approve the app. For full details, please see Box's documentation for Authorizing Custom Applications in Sandbox and Production Environments.
Under the Authorize tab, click the Review and Submit button.
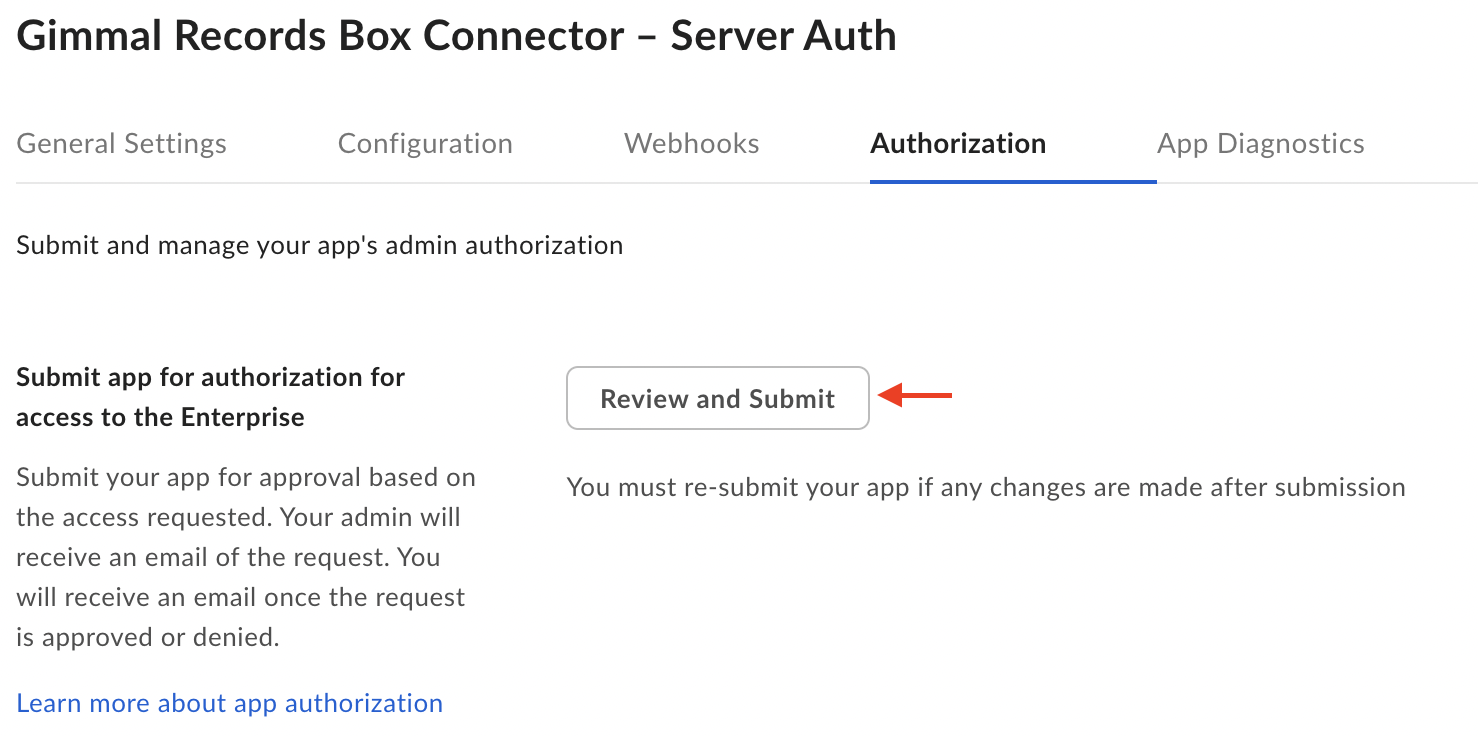
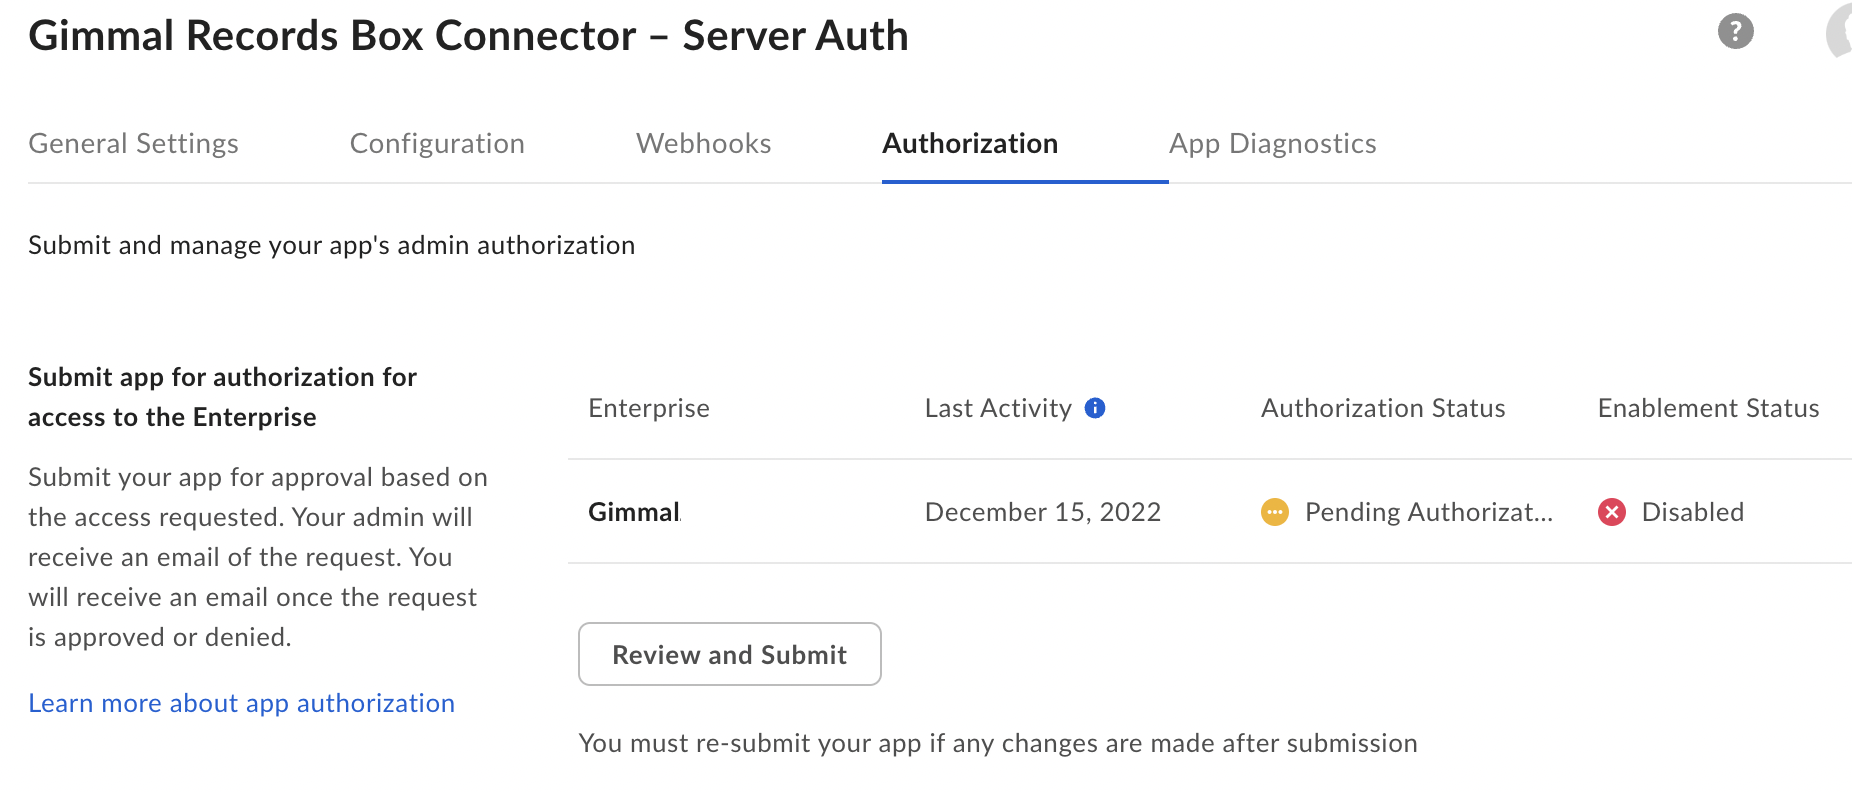
The authorization status will be Pending Authorization. This must be reviewed by an Administrator on the Box account.
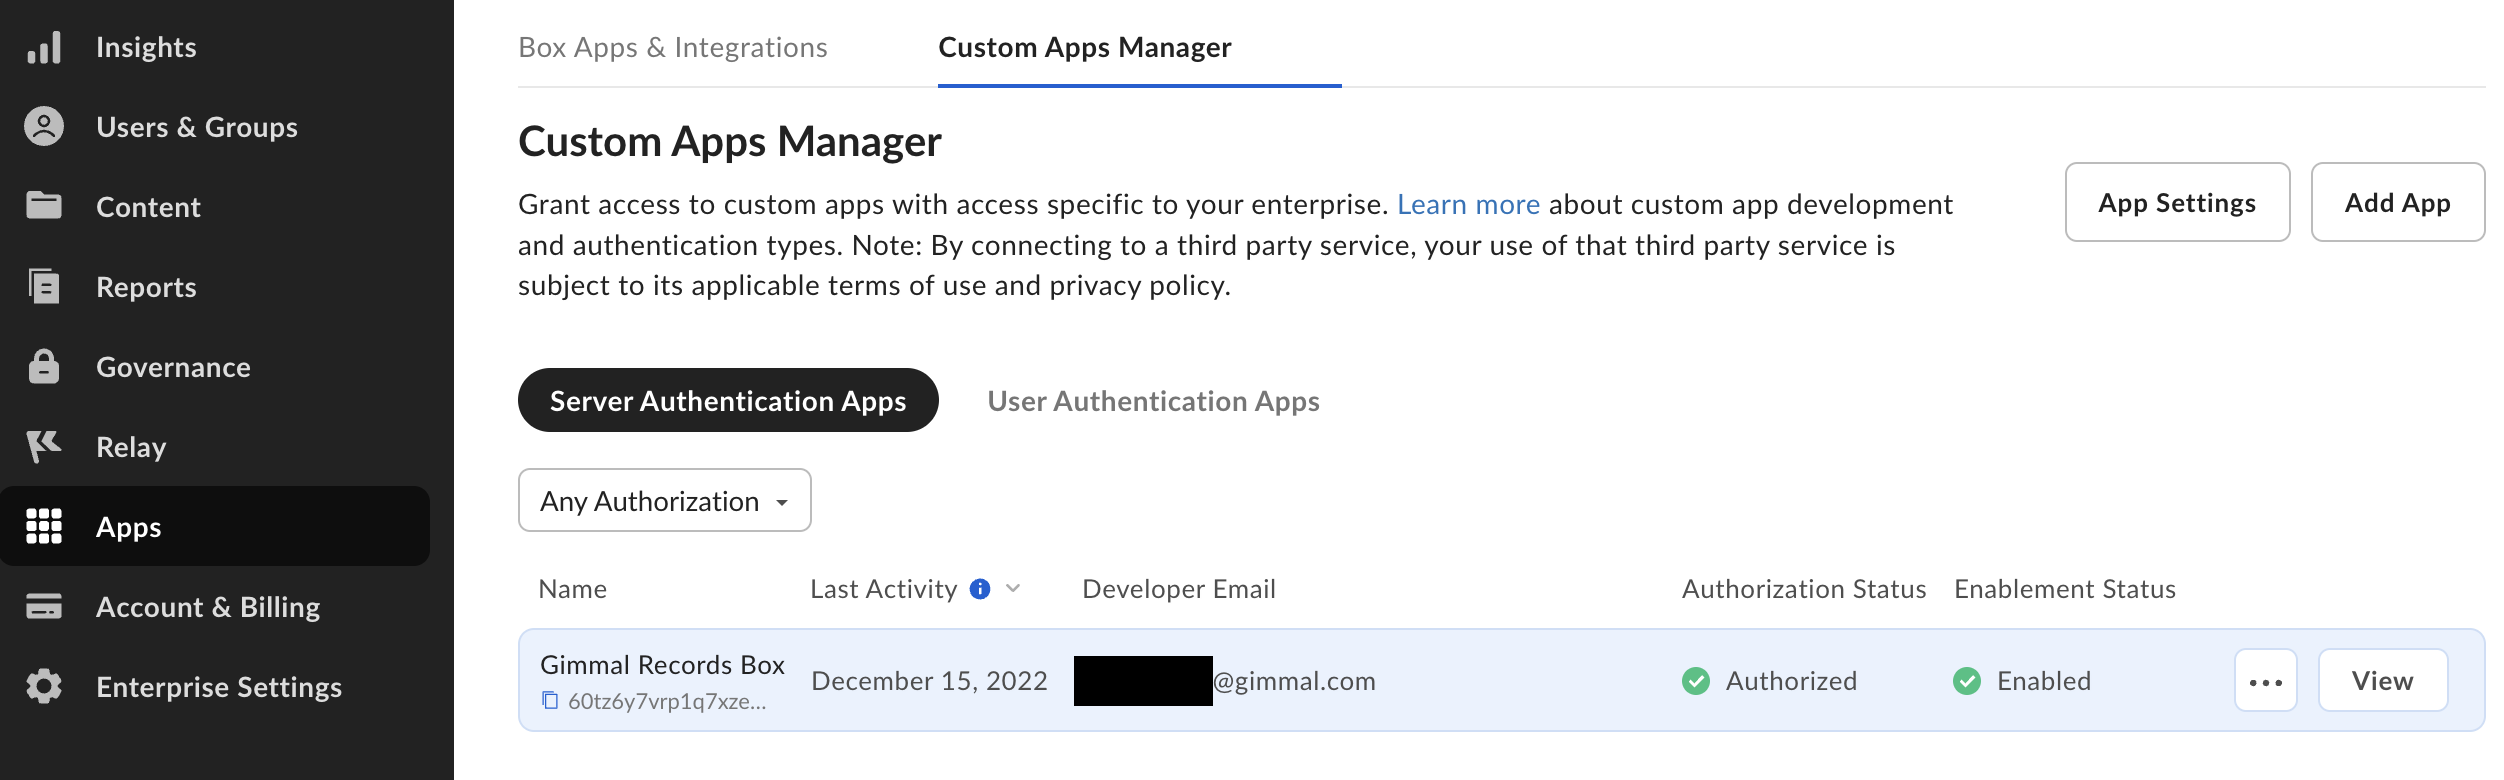
Go to the Admin Console on the Box account and navigate to the Apps tab.
Click on Custom Apps Manager at the top of the page.
The Server Authentication (with JWT) app you created should be present. Click the ellipsis (…) next to the app and select Authorize App from the drop down menu.
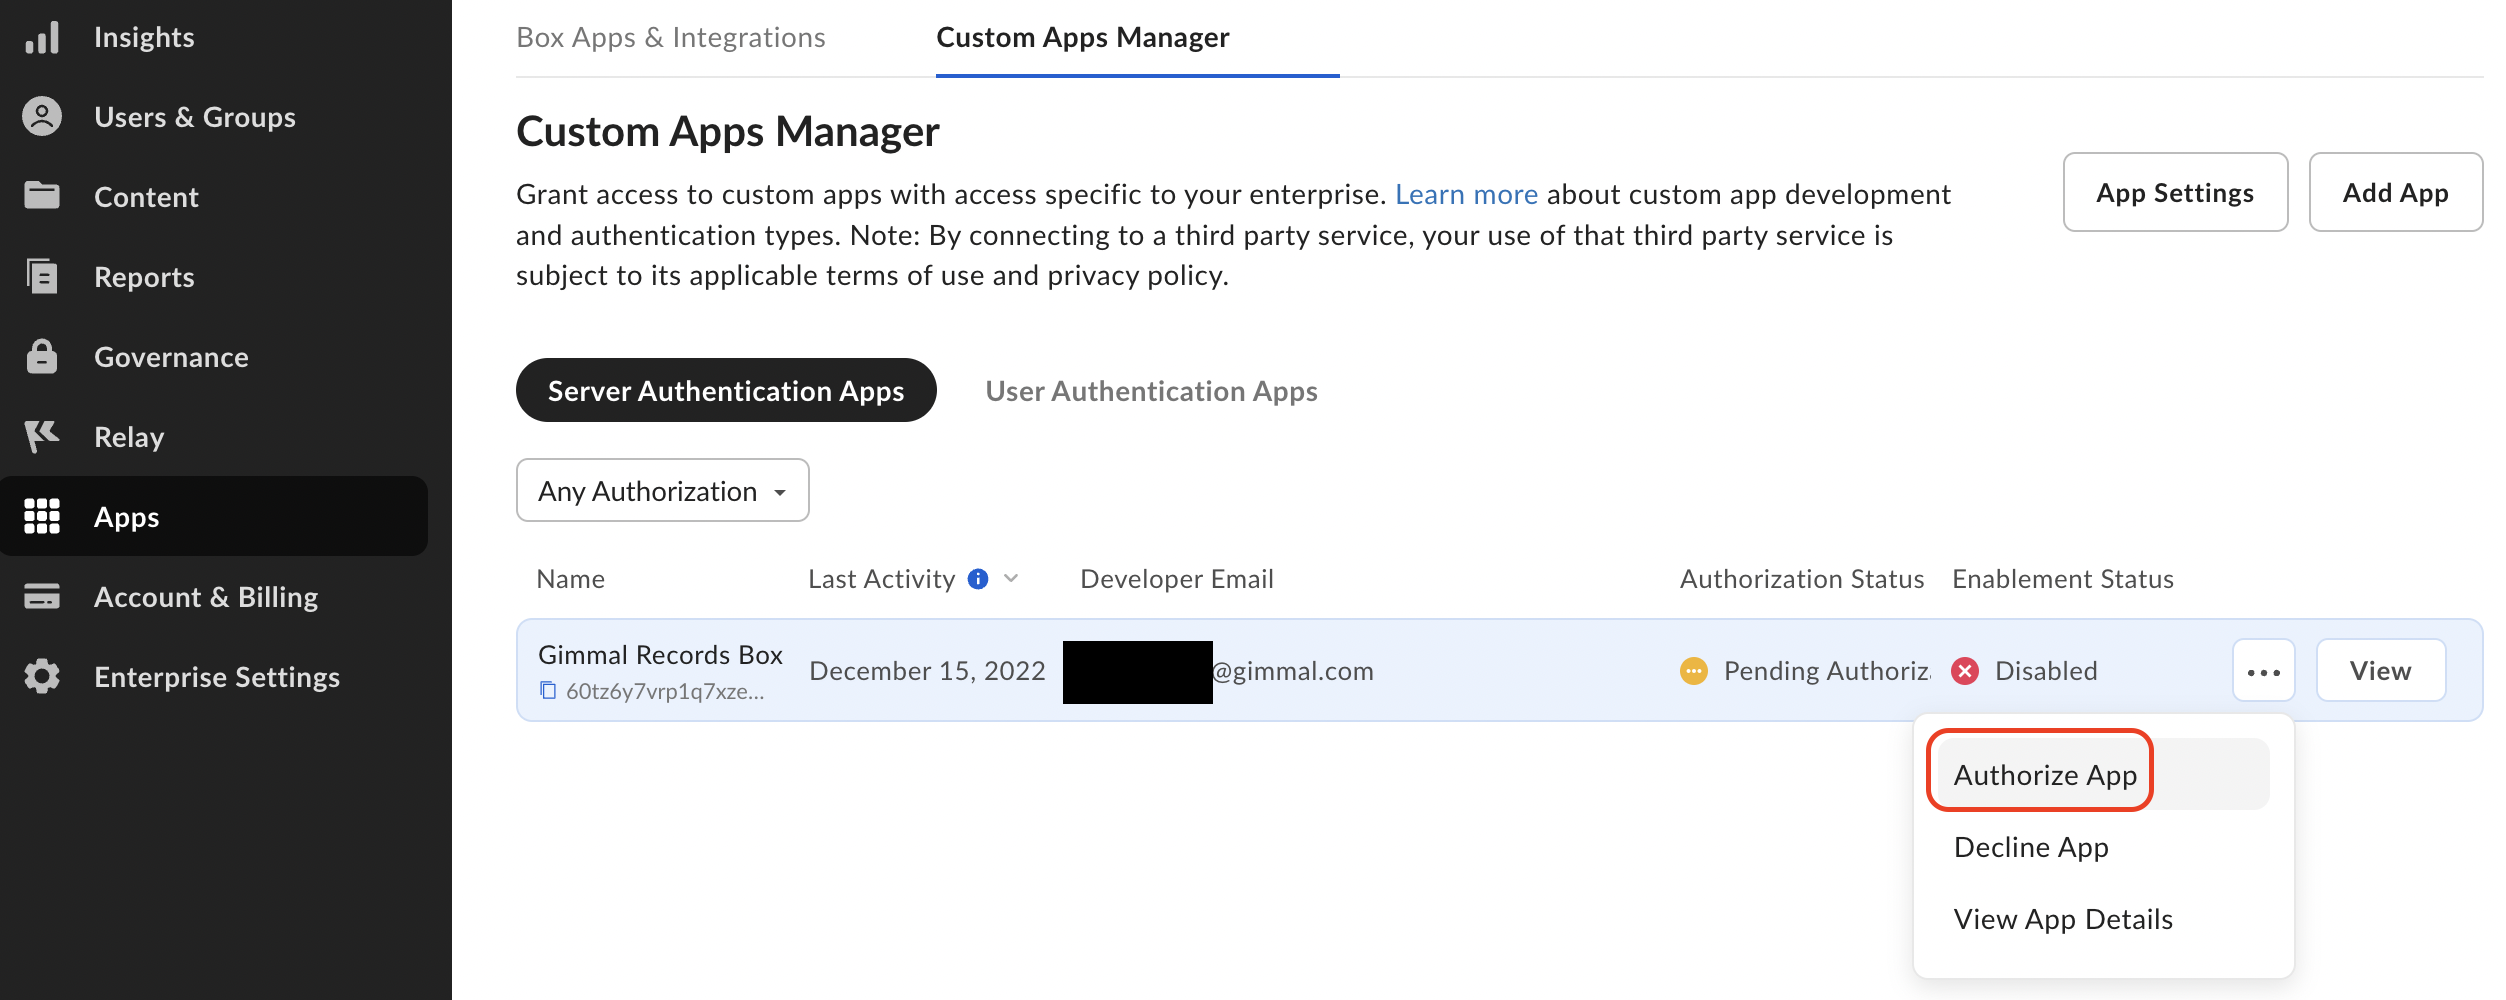
Once done, the app should say Authorized and Enabled.