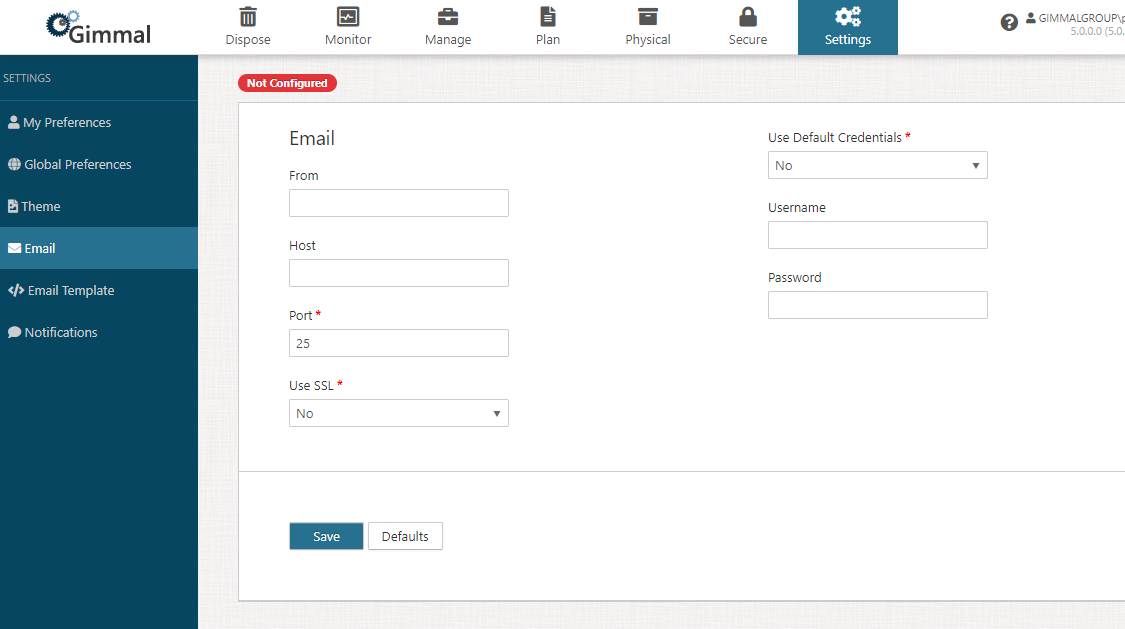
Email Server
To send out notifications, you must configure a valid email server that will be used to send the Records Management notifications. You can set up your email server by performing the following steps:
-
Select Settings from the Main Menu.
-
Select Email from the left navigation menu.
-
In the "From" field, enter the “From” address that will be used in the email notification.
-
In the "Host" field, enter the “Host” which represents the address of the actual email server.
-
In the "Port" field, enter the “Port” on the host which is used for SMTP.
-
Indicate whether “SSL” is used on the email server.
-
Indicate if “Default Credentials” should be used to access the email server.
-
If "Yes", the email server will be connected to using the Records Management Web’s App Pool.
-
If "No", the specified “Username” and “Password” will be used.
-
-
Click Save.
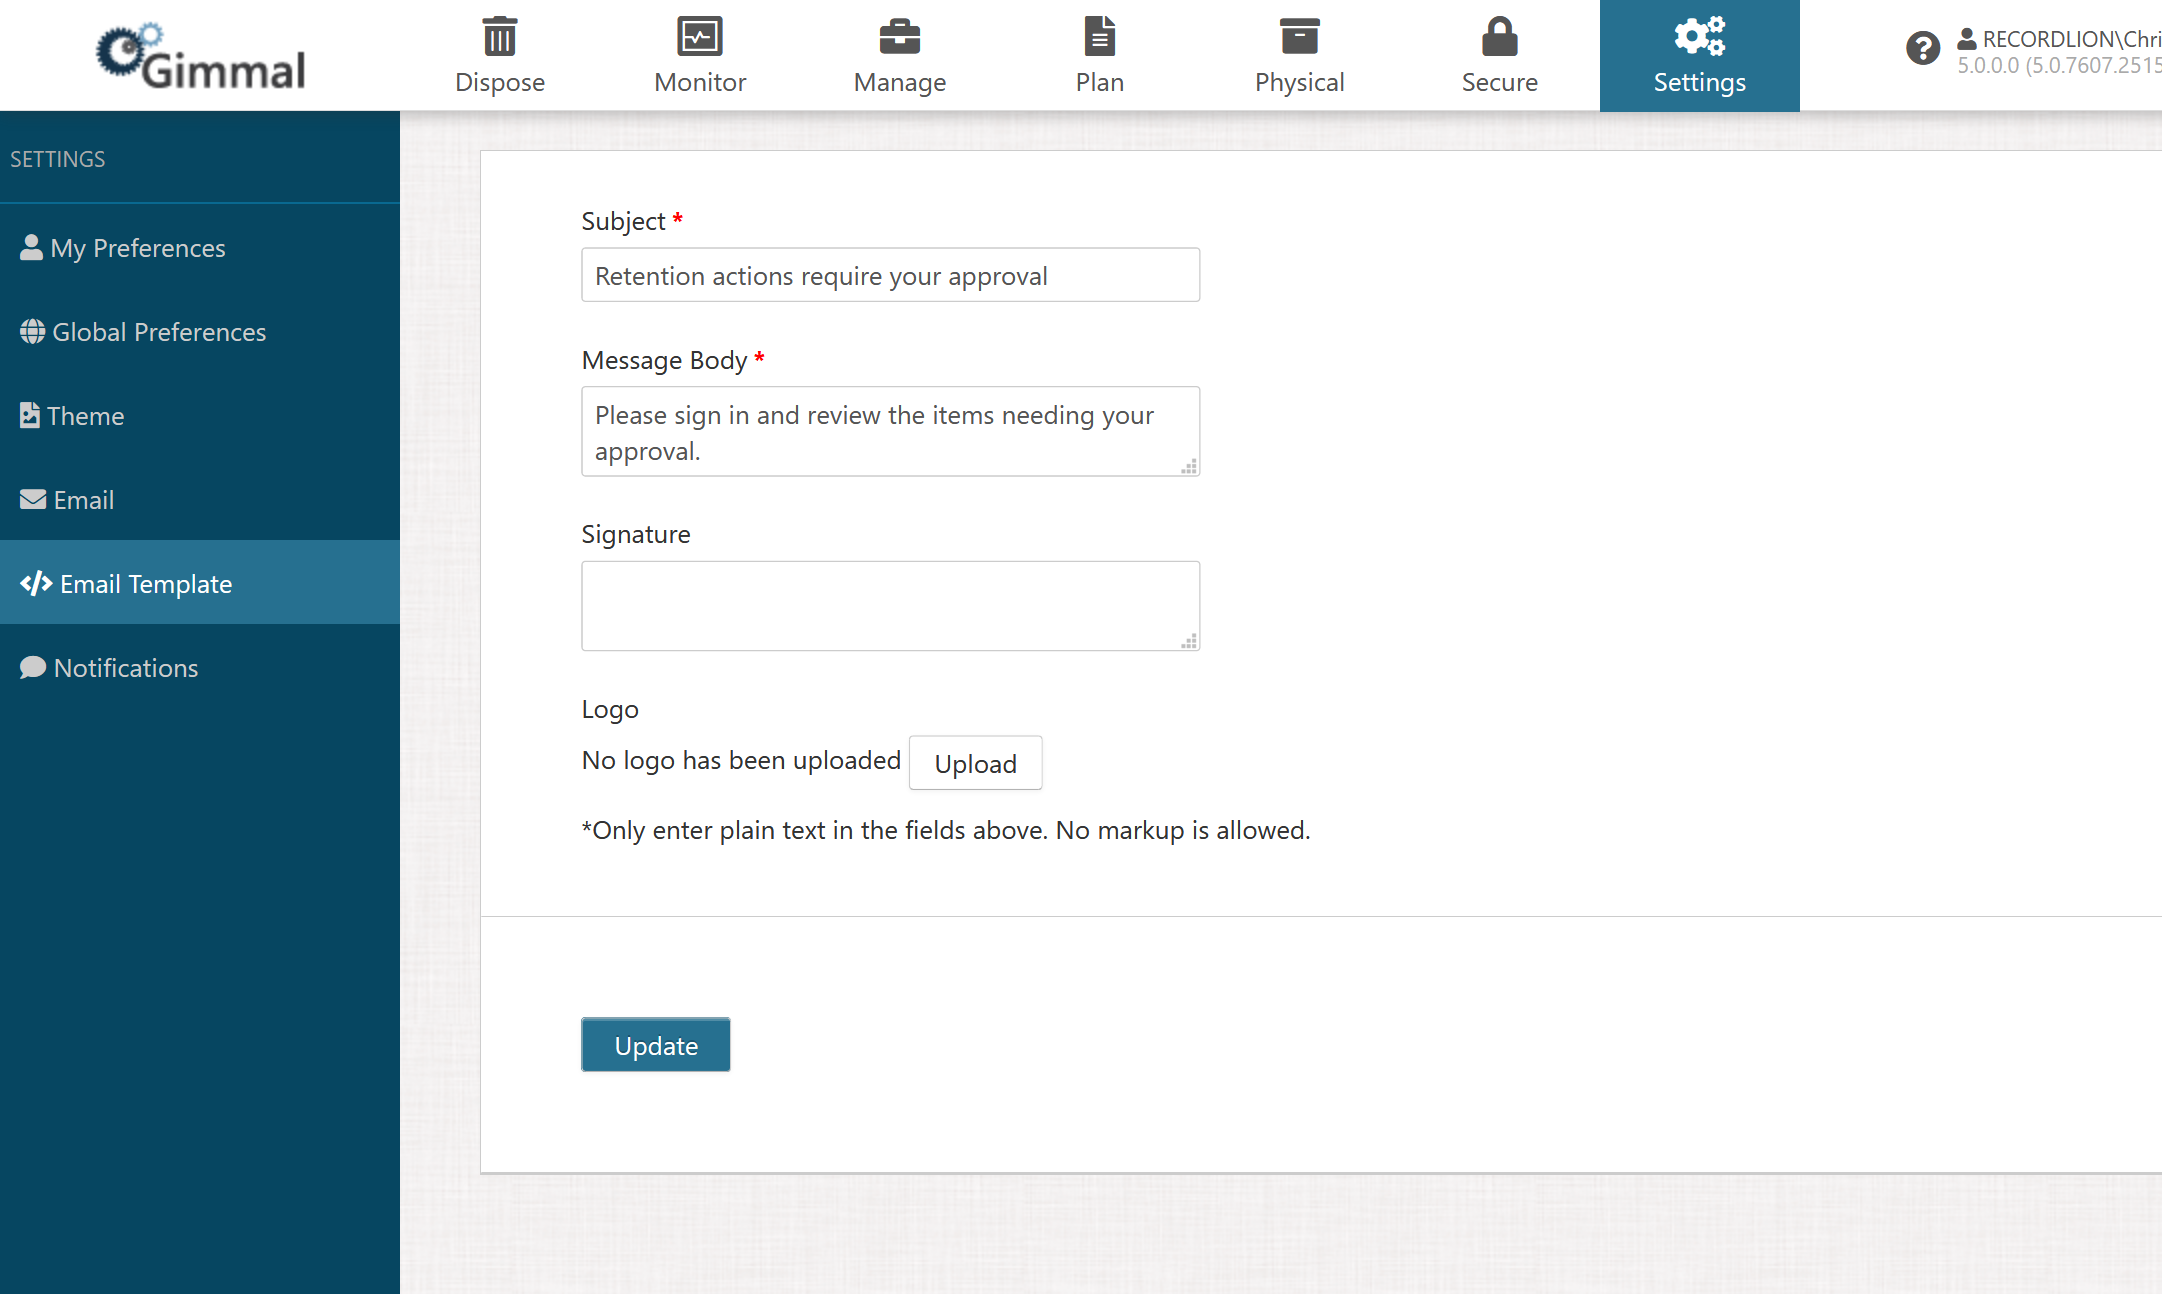
Email Template
Customize an email template for your Records Management approval notifications by performing the following steps. This will be used when the system sends emails for approvals. An asterisk (*) indicates that the property is mandatory.
Only enter plain text in these fields. No markup is allowed.
-
Select Settings from the Main Menu.
-
Select Email Template from the left navigation menu.
-
Enter a custom subject, message body, signature and logo that will be used in the email notification.
-
Choose a .PNG file for the logo. The maximum preferred logo dimensions are W: 300px X H: 100px
-
Click Update.
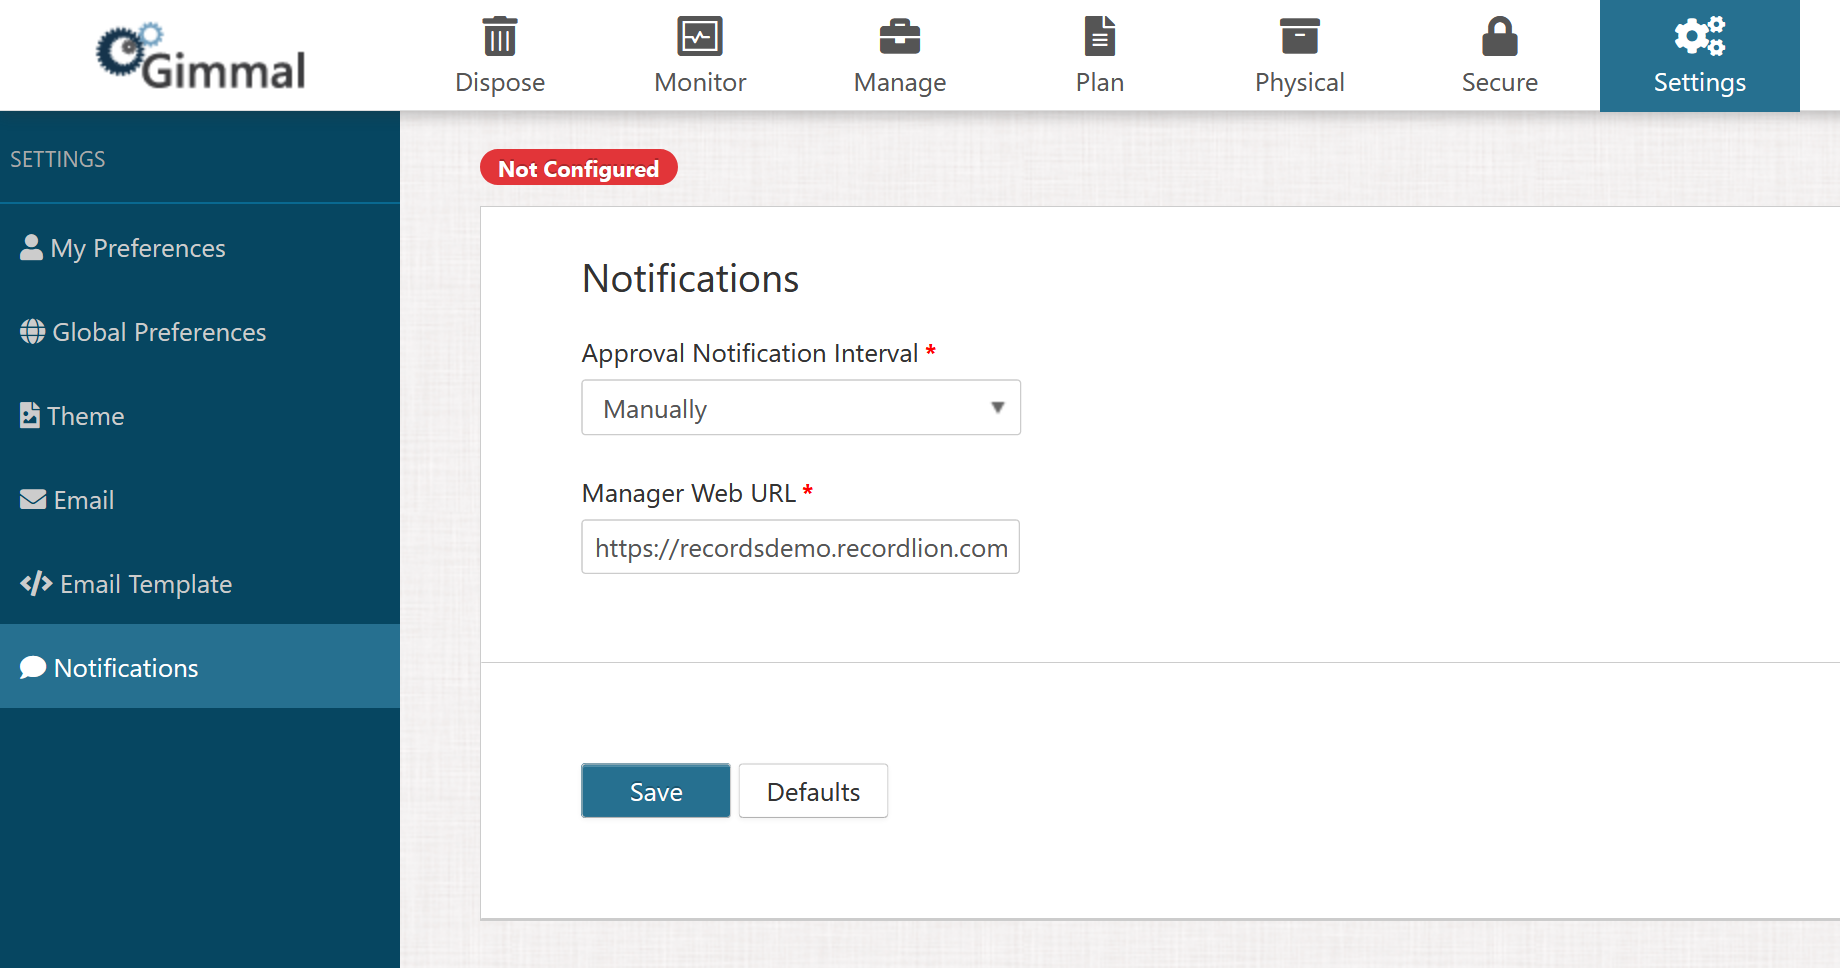
Notifications
Approvers with any pending action items will be sent a notification based on when they last received an approval notification and the configured schedule. If the schedule is set to Weekly and an approver receives a notification Tuesday afternoon and still has pending approvals the following Tuesday afternoon, they will receive another notification.
Once your Email server is configured, you can configure the interval in which notifications should be sent to users by performing the following steps:
-
Select Settings from the Main Menu.
-
Select Notifications from the left navigation menu.
-
Choose how often to notify users of Pending Action Items (Daily, Weekly, Monthly).
-
Enter the “base” URL that should be used to generate the link contained in the notification, which will be used to guide the user to the appropriate location based on the notification type. (Note: This defaults to the current URL in the browser’s address bar, but can be changed to account for load balancing or FQDN names.)
-
Click Save.
When Notifications are configured, a Push Notifications button will be shown on the Secure screen that will, when clicked, manually send notifications to approvers with pending action items. This button will not be displayed until your Email Server is also configured.