Submitting a Request
After you create a request for a physical asset, you must submit the request so that it will be processed by the Processor/Administrator. There are two ways to submit a request:
Submitting it from an asset
Submitting it from the My Requests page
Submitting from an Asset
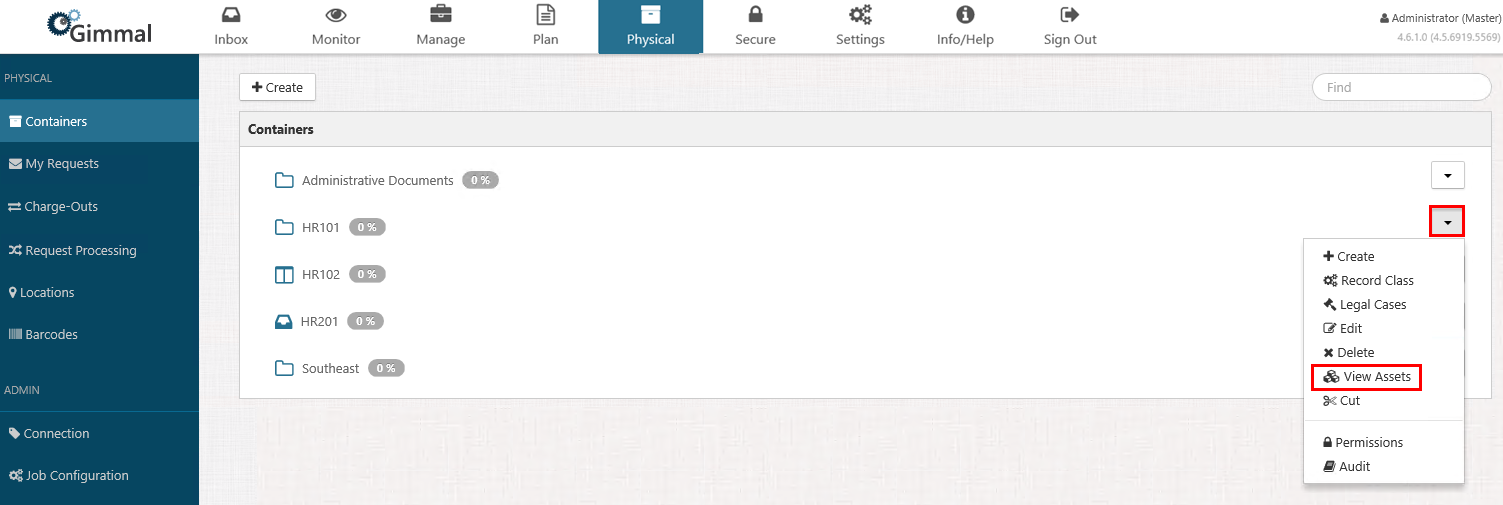
Select Physical on the Main Menu, and then Containers on the left navigation menu. The Containers page displays.
Locate the container whose physical asset(s) you want to request and click the drop-down arrow on the right side. The container context menu displays. (The drop-down options you see may vary, depending on your permissions.)

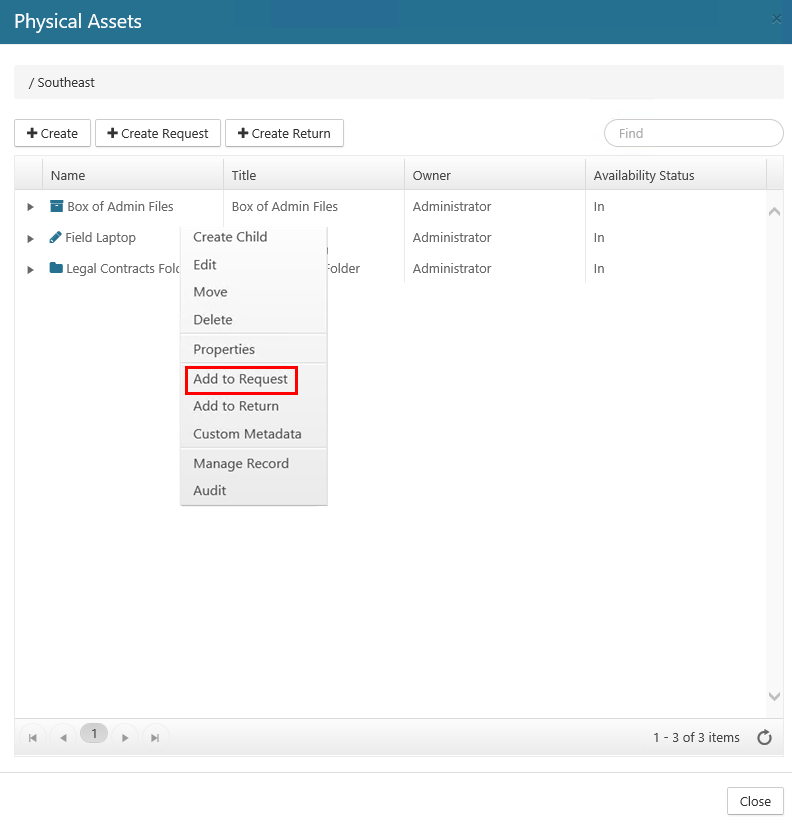
Click View Assets. The Physical Assets dialog displays, showing a list of all the physical assets in that container.
On the Physical Assets dialog, right-click the asset you want to add to your request and select Add to Request. (The drop-down options you see may vary, depending on your permissions.)

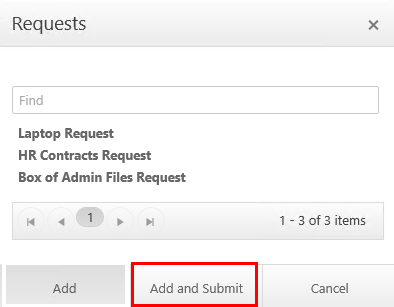
The Requests dialog opens, which lists all of your open requests

Select the request you want to add the asset to, and then click Add and Submit. This step performs two actions: it adds your request to the My Requests page and it submits the request to be processed. Two green confirmation messages display in the upper right corner of your screen.
The return's Status changes from New to Submitted. After the Request Processor job has finished running (defaults to every 5 minutes), the Status will change to Processing. This indicates that the request is now ready to be processed by the Processor/Administrator.
Submitting a Request from the My Requests Page
Select Physical from the Main Menu, and then select My Requests from the left navigation menu. The My Requests page displays
Locate the request you want to cancel or edit. The request must have a Status of Submitted if you want to cancel. Click the drop-down list on the right side, and select the action you want to take

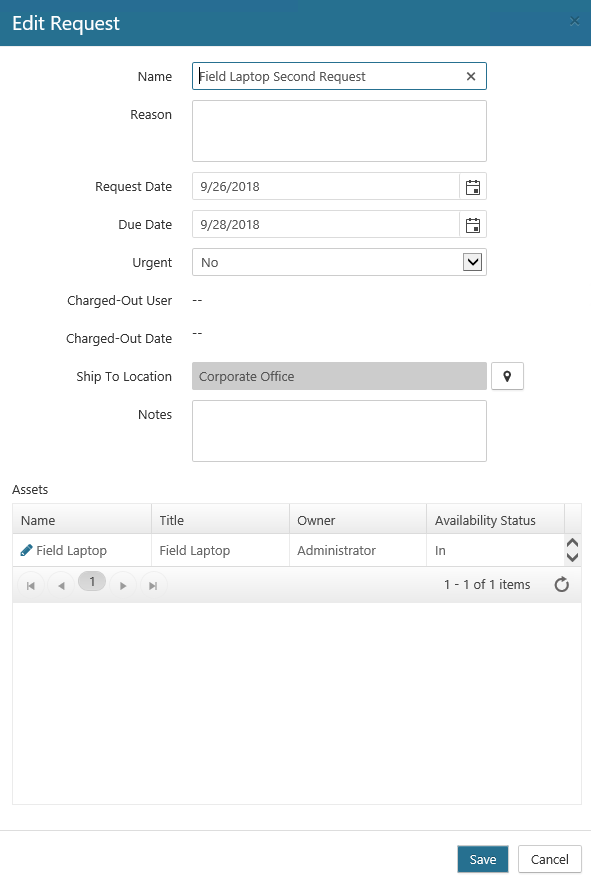
The Edit Request dialog opens. Make the desired changes to the properties and then click Save. The request updates on the My Requests page. If you chose to cancel, go to step 3.

