
Managing Container Permissions
Containers have their own set of permissions, which are required in order for the Physical User to perform certain tasks involving parent containers and child containers. This topic describes how to set, edit, and remove permissions. It also describes permission inheritance, with respect to parent and child containers. An overview of container permissions can be found in the Physical Records Permission Overview topic.
Setting Permissions for a Container
Login to Records Management with either of the following roles/permissions:
A user with the Physical Administrator role, or
A Physical User with container permissions set to Edit Container Permission
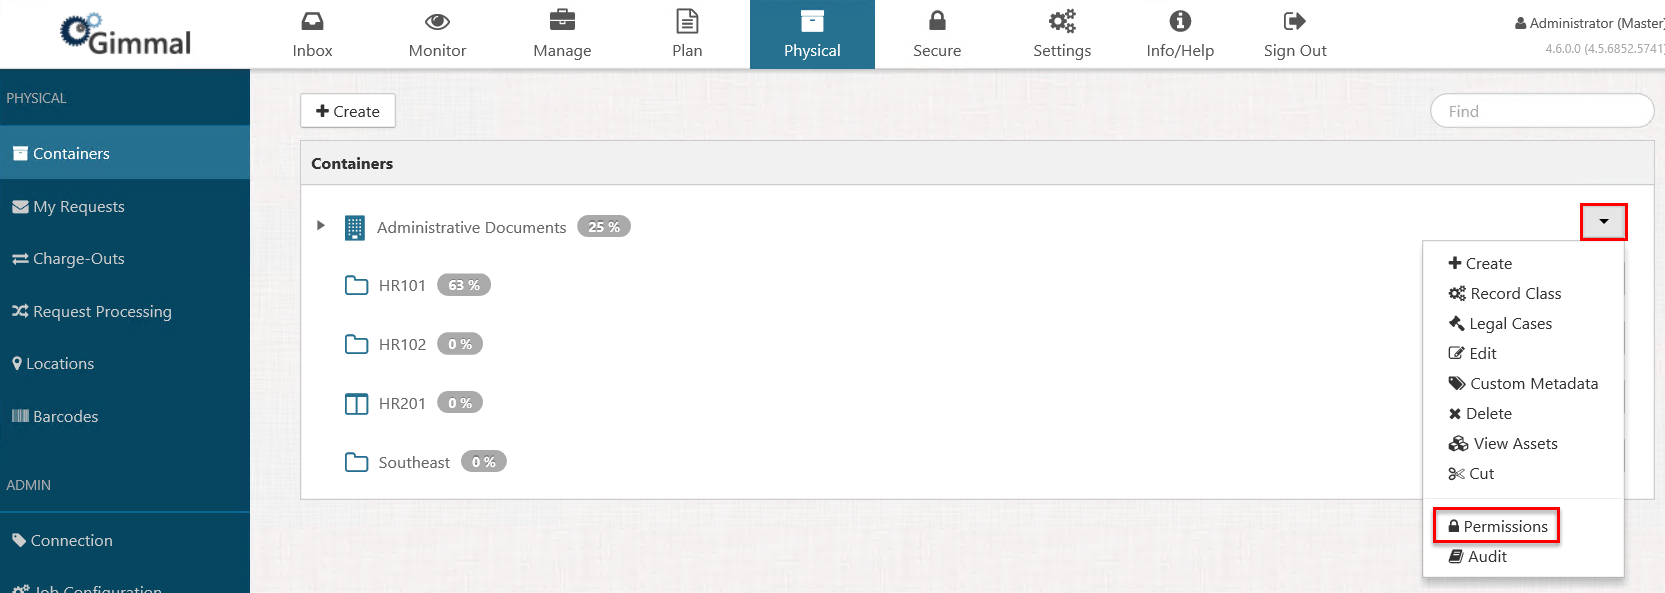
Click Physical on the Main Menu, and then click Containers on the left navigation menu. The Containers page displays.
Click the drop-down arrow to the right of the desired container, and then select Permissions. (The drop-down options you see may vary, depending on your permissions.)
On the Permissions window, click +Assign.
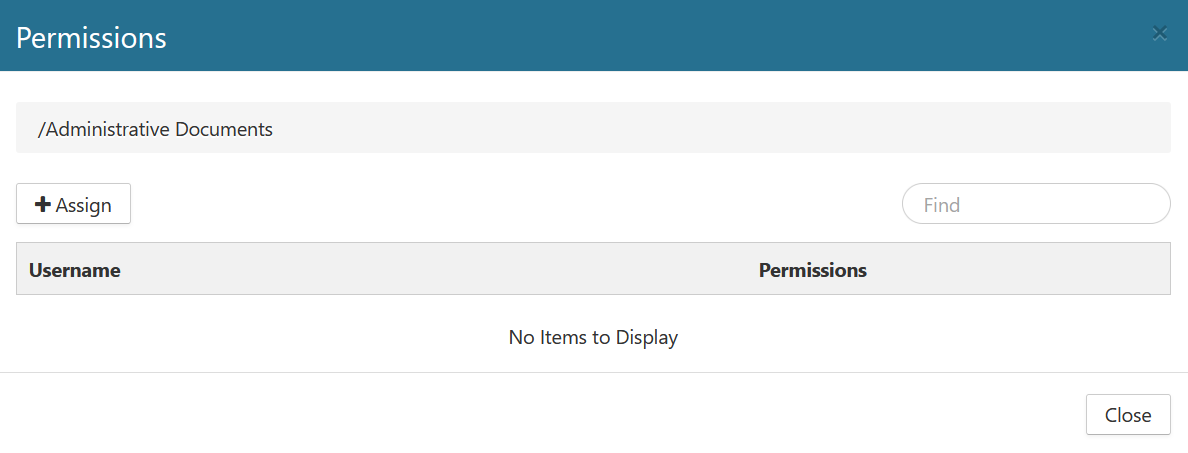
On the Assign Permissions window, select a user from the drop-down list, or enter a valid user name. This can be a user or a group, however, the only users who display in this list are those who are Physical Administrators or Physical Users.
Apply the desired permission(s) to the user, and then click Save.
The new user and associated permission(s) displays on the Permissions window.
Click Close.
Editing Permissions for a Container
From the Permissions window, referenced in step 4 above, click the Edit icon for the user whose permissions you wish to edit.
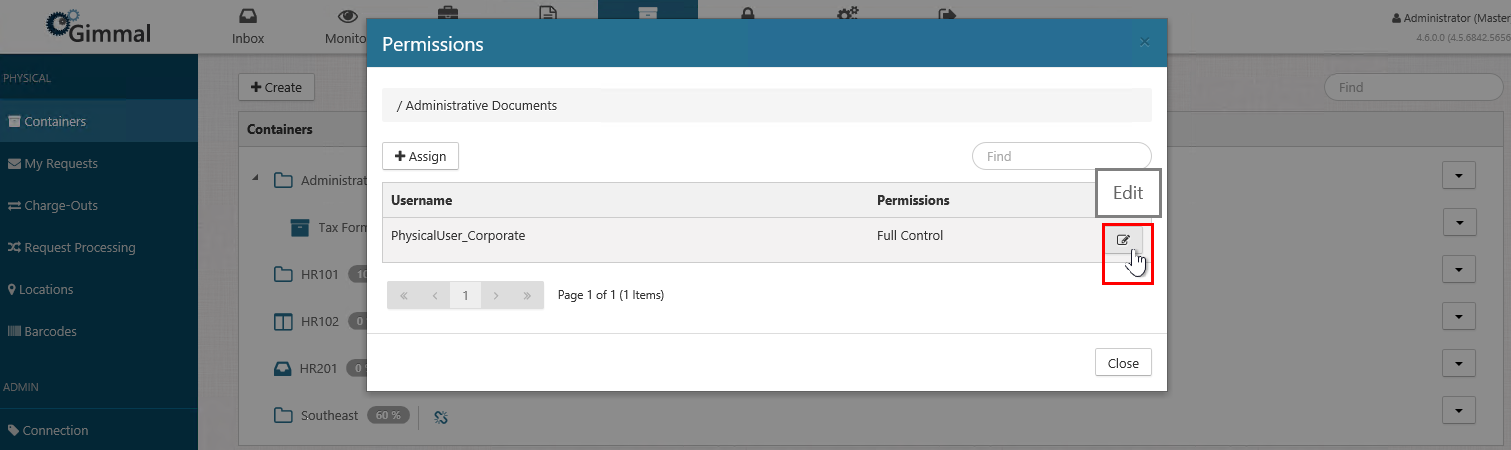
The Edit Permissions window opens. Make the desired changes to the user's permissions, and then click Save. The permissions are updated for that user.
Removing Permissions for a Container
From the Permissions window, referenced in step 4 above, click the Edit icon for the user whose permissions you wish to remove. The Edit Permissions window opens.
Deselect all of the permissions for the user, and then click Save. The user no longer displays in the list on the Permissions window.
Permission Inheritance
By default, a child container inherits the permission of its parent. However, you can specify unique permissions for a child container (thus breaking the inherited permissions), as well as the ability to revert back to the original parental permissions if desired.
Login to Records Management with either of the following roles/permissions:
A user with the Physical Administrator role, or
A Physical User with container permissions set to Edit Container Permission.
If you haven't done so already, create a parent and child container hierarchy by performing the steps in Creating a New Container.
Click Physical on the Main Menu, and then click Containers on the left navigation menu. The Containers page displays.
Set permissions for the parent container using the steps in the previous section.
On the Containers page, select the drop-down arrow for the child container you want to break permissions for and select Permissions. (The drop-down options you see may vary, depending on your permissions.)
Break the inheritance by adding additional user permissions or by deleting permissions.
Click Save to close the Edit Permissions window and return to the Permissions window. On the Permissions window, the revised permission(s) will display, as well as a Revert to Parent button located above the permissions table. This button indicates that permission inheritance has been broken.
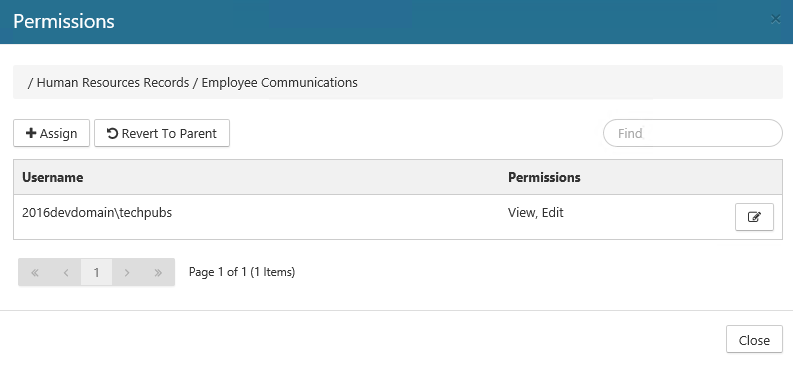
To revert back to the original permissions of the parent container, click Revert to Parent. The Confirm Revert window opens, asking you to confirm the reversion.
Click Confirm. The child container permission listed on the child Permissions window reverts back to the parent container permissions.
Click Close to close the Permissions window.