
Adding and Removing Assets from a Request
Adding a Physical Asset to a Request
You can add one or more physical asset(s) to an existing request (one that has not yet been submitted) or you can create a new request and add it then. You must add an asset(s) to a request before you can submit it. If you do not, you an error message displays.
Child Assets
If you request a parent physical asset, all child assets will be included with the request. Conversely, you can request a child asset without requesting its parent asset.
To add a physical asset to a request, perform the following steps:
Click Physical on the Main Menu, and then click Containers on the left navigation menu. The Containers page displays.
Locate the container whose physical asset(s) you want to request, and click the drop-down arrow on the right side. The container context menu displays. (The drop-down options you see may vary, depending on your permissions.)
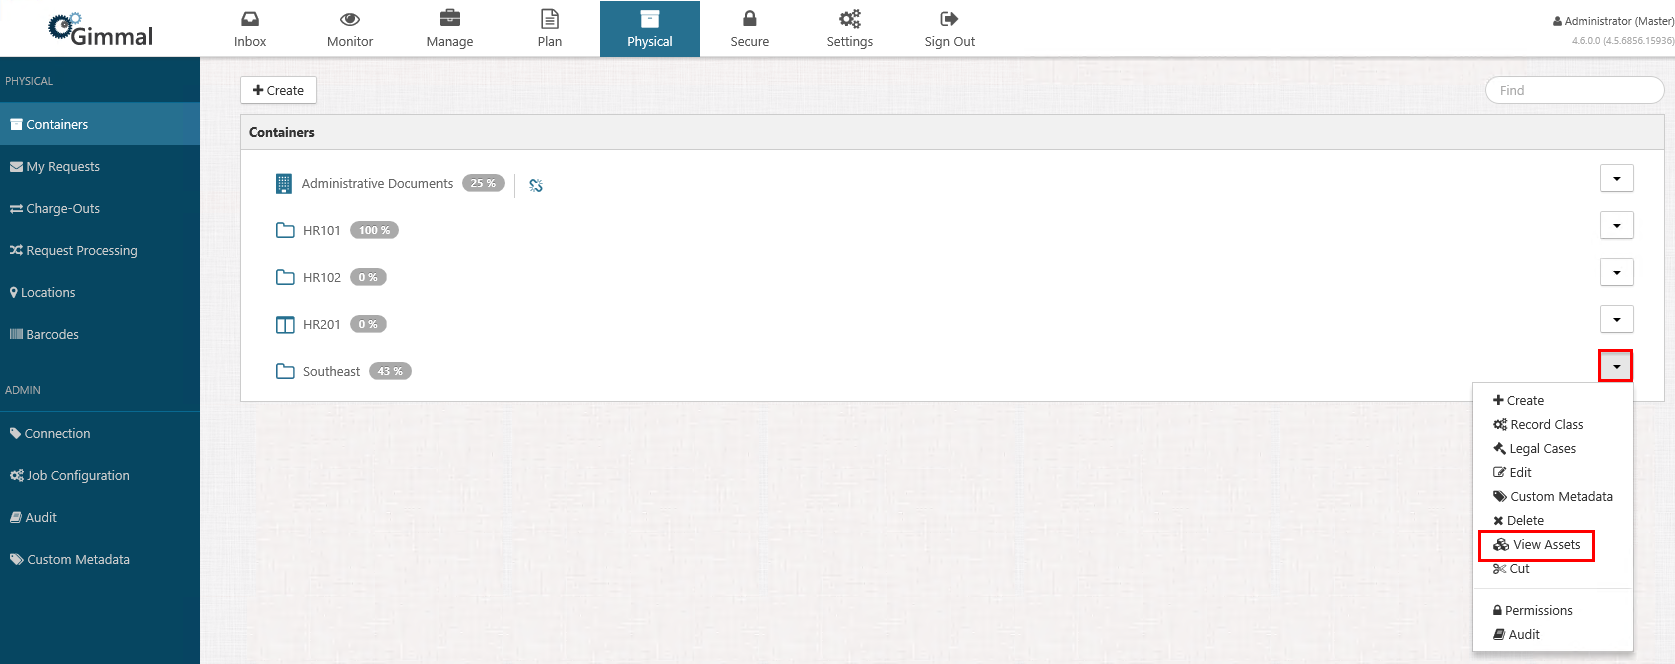
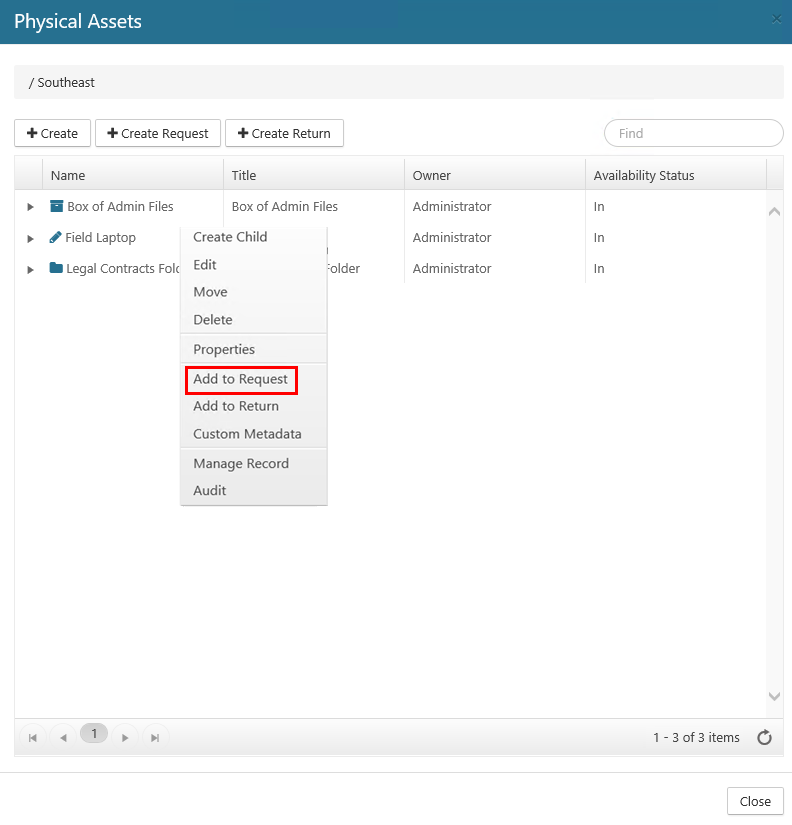
Click View Assets. The Physical Assets dialog displays, showing a list of all the physical assets in that container.
On the Physical Assets dialog, right-click the asset you want to add to your request and select Add to Request. (The drop-down options you see may vary, depending on your permissions.)
The Requests dialog opens, which provides a list of all of your open requests.

Perform either of the following steps:
Select the request you want to add the asset to, and then click Add. A green confirmation message displays in the upper right corner, indicating that the request was added. (You can verify the asset was added to the request by returning to the My Requests page, clicking the drop-down next to the request name, and selecting Edit. On the Edit Request dialog, the added asset displays in the Assets list in the middle of the dialog. Note that the Status column still indicates that the request is "New", since it hasn't been submitted yet.)
Select the request you want to add the asset to, and then click Add and Submit. Two green confirmation messages display in the upper right corner, indicating that the request was added and submitted. (You can verify the asset was added to the request by returning to the My Requests page, clicking the drop-down next to the request name, and selecting Edit. On the Edit Request dialog, the added asset displays in the Assets list in the middle of the dialog. Note that the Status column now indicates that the request is "Submitted", since you added the asset and submitted the request in one step.)
Removing a Physical Asset from a Request
If you no longer wish to request the asset, you can remove the asset from a request provided that the request has not been processed by the Processor/Administrator (i.e. the Status column on the My Requests page is listed as New or Submitted for the request.) If a request is in the Processing stage, you cannot delete the asset from the request.
To remove a physical asset from a request, perform the following steps:
Select Physical from the Main Menu, and then select My Requests from the left navigation menu. The My Requests page displays.
Locate the request you want to remove the asset from, click the drop-down arrow on the right side, and then clickEdit. (The drop-down options you see may vary, depending on your permissions.) The Edit Request dialog opens.
Under the Assets section of the dialog, locate the asset you want to remove, right-click its name, and select Remove.
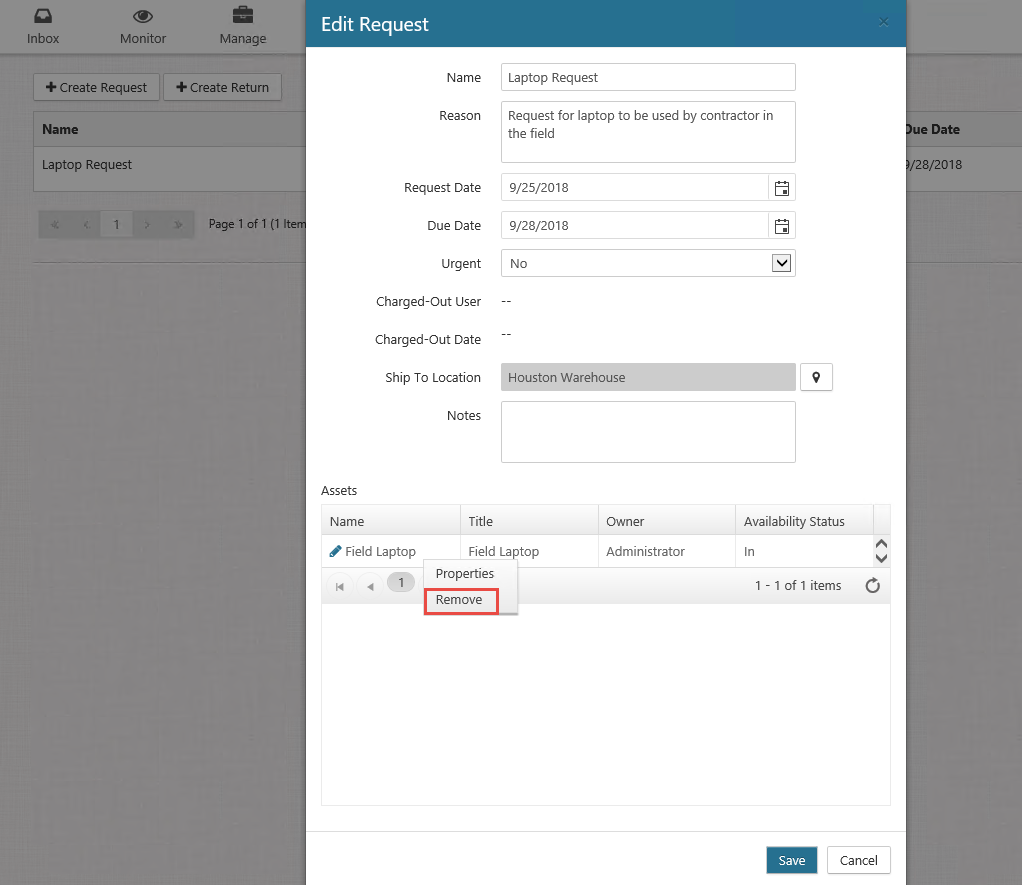
A Remove confirmation dialog opens, asking you to confirm the removal of this asset.
Click Confirm. The Edit Request dialog refreshes, and the asset you removed no longer displays under the Assets list on the Edit Request dialog.