SharePoint Server Connector Installation
Launching the SharePoint Connector Installer
The SharePoint Server Connector must be installed on a SharePoint Application Server, the same server that hosts Central Administration.
Installing the SharePoint Connector
The SharePoint Connector component enables Records Management to manage the lifecycle of documents stored within SharePoint 2010, SharePoint 2013, or SharePoint 2016. The Connector also integrates with the SharePoint user interface to allow direct interaction with Records Management as though it were a part of SharePoint.
To install the SharePoint Connector, perform these steps:
From the Records Management splash screen, click the Install SharePoint Connector link. The SharePoint Connector installation screen displays.
Click Install to the right of the SharePoint Connector option. The first screen that displays is the check for prerequisites. This screen validates the following information before allowing the installation to proceed:
SharePoint is installed
Current user is Local Administrator
Current user is a SharePoint Farm Administrator
Click Next. The Installed screen displays.
Click Next to complete the installation.
When the application finishes installing, the Finish screen displays. This indicates that everything installed successfully.
If you experience any errors during the installation process, refer to the installer log in your Windows Temp folder.
Click Finish to close the installer screen.
After the installation has completed and the solution has been deployed to SharePoint, you must perform the following steps within SharePoint:
Open Central Administration.
Navigate to Central Administration > System Settings > Manage Farm Solutions.
Select the solution: .recordsmanager.sharepoint.wsp.
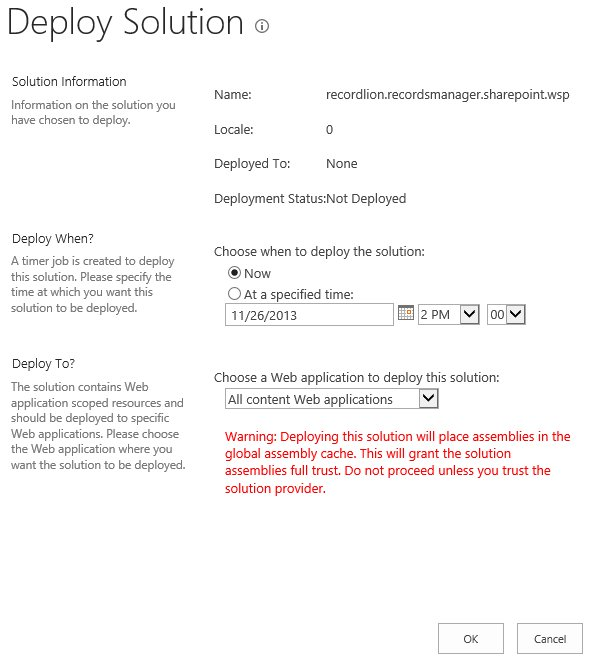
Click Deploy Solution.
Specify When and Where to Deploy the Solution.
Default settings of Now and All Content Web Applications should suffice.
Click OK.
When the solution is finished deploying, its status will be indicated in Central Administration > System Settings > Manage Farm Solutions.

Important Note for Least Privileged Installations
The Records Management installation is designed to automatically configure SharePoint during the solution deployment. This design has the benefit of requiring little intervention by the setup user across a large farm. However, this design does require that you perform additional steps in a least privileged installation of SharePoint.
In a least privileged installation of SharePoint, the farm account is typically not a local machine administrator. The farm account is the Windows user account running the SharePoint timer service (SPTimerV4) and the SharePoint Central Administration IIS application pool. Note: The farm account is also known as the database account.
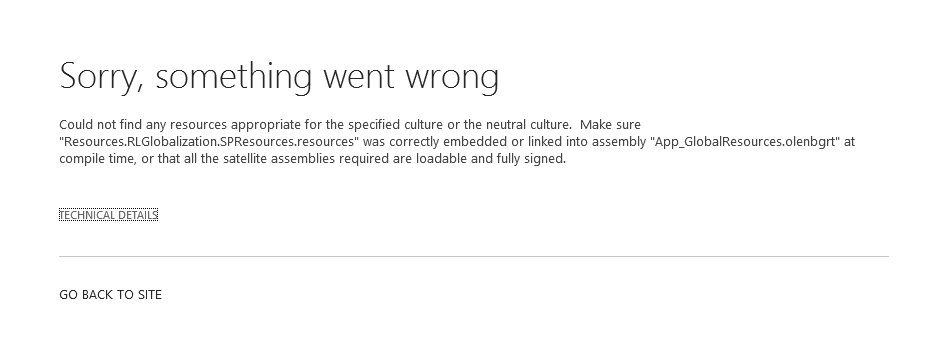
If the farm account is not a local machine administrator when deploying the solution, then the farm account will not be able to copy files needed for the Central Administration web site. This can result in an error message similar to, “Could not find any resources appropriate for the specified culture or the neutral culture” when accessing the Records Management pages in Central Administration.
The first workaround is to grant the farm account membership to the local machine administrators group for each Central Administration or web front end server in the farm. This workaround is only necessary during the deployment phase of the installation. The second workaround requires the use of the STSADM utility. The utility is typically located in the following directory:
%ProgramFiles%\Common Files\Microsoft Shared\Web Server Extensions\15\Bin
From an elevated command prompt, execute the following STSADM command:
STSADM.exe -o CopyAppBinContent
You will be notified that one of these workarounds is required if you receive the following error when attempting to access the SharePoint Connector pages within Central Administration:

In order for the SharePoint Server connector to work, you will need to configure SharePoint Server and the SharePoint Server connector. The following topics will walk you through those steps:
