
Physical Records Management Plugin Configuration
To set up Physical Records Management properly, you must configure the plugin first (using either SQL Authentication or Windows Authentication). This establishes your connection to the SQL database. Then, you can configure the Physical Records Management connection. Each authentication method is described below.
Setting Up the Plugin using SQL Authentication
Open the SQL Server Management Studio.
In Object Explorer, right-click your server name, and then click Properties. The Server Properties window opens.
From the left pane, click the Security page, and then select SQL Server and Windows Authentication mode in the Server authentication section. (Note: Windows Authentication mode is selected by default.)
You can skip this step if the SQL Server and Windows Authentication mode setting has already been set on this server. (If this option has not already been set, a message displays telling you that the server will need to be restarted.)
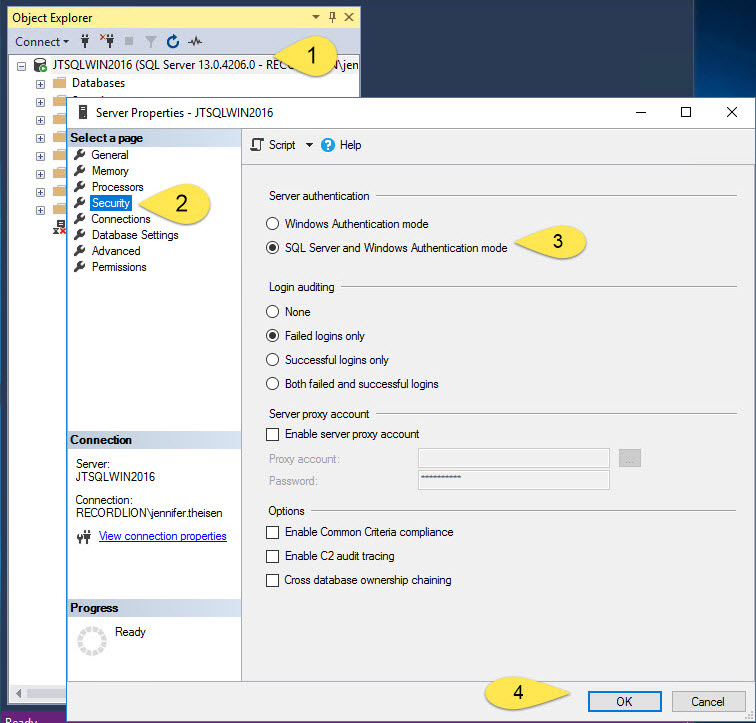
Click OK to close the window.
Return to Object Explorer, right-click your server name again, and select Restart.
If the User Account Control window box appears, click Yes.
When prompted if you want to perform the action, click Yes. The SQL Server Database Engine restarts.
Return to Object Explorer and expand the Security folder.
Right-click the Logins folder and select New Login... The Login - New window opens.
Enter the credentials for a new SQL Server Authentication login. (For information on creating a new login, see Microsoft's SQL documentation.)
Note: Ensure that you uncheck the box for "User must change password at next login".
Click OK to create the new login.
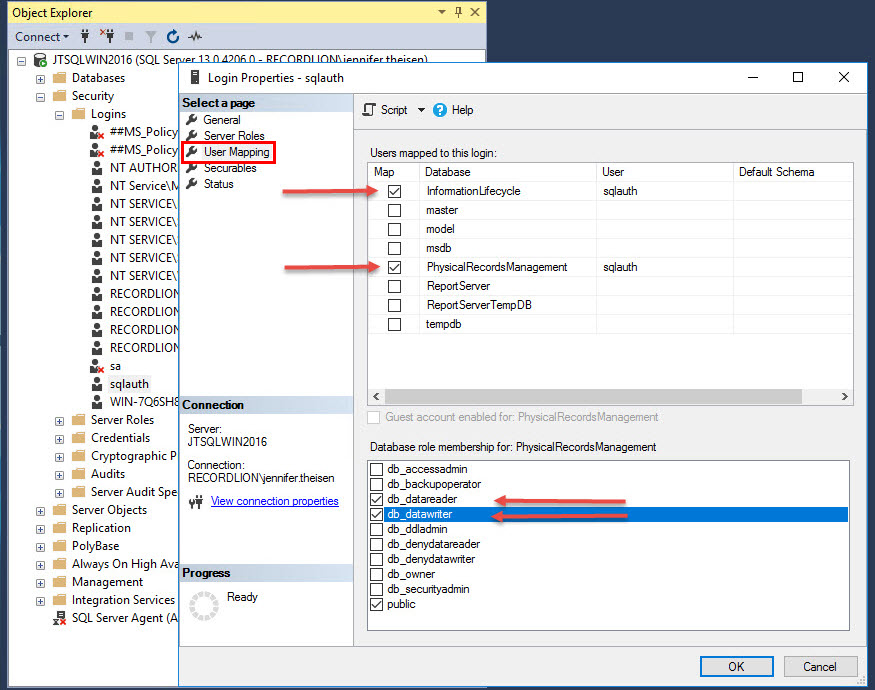
Under Select a page, click User Mapping. The User Mapping page displays.
Give db_reader and db_writer access to any Manager Web databases, including the following SQL Server databases, for the new SQL login you just created.
InformationLifecycle
PhysicalRecordsManagement (or the database name you entered during the installation process)
Under Select a page, click Securables. The Securables/Permissions window displays.
Under the "Permissions for" section at the bottom, scroll down to Connect SQL, ensuring that under the Grantor column, the name of your new SQL Server authentication login is listed there.
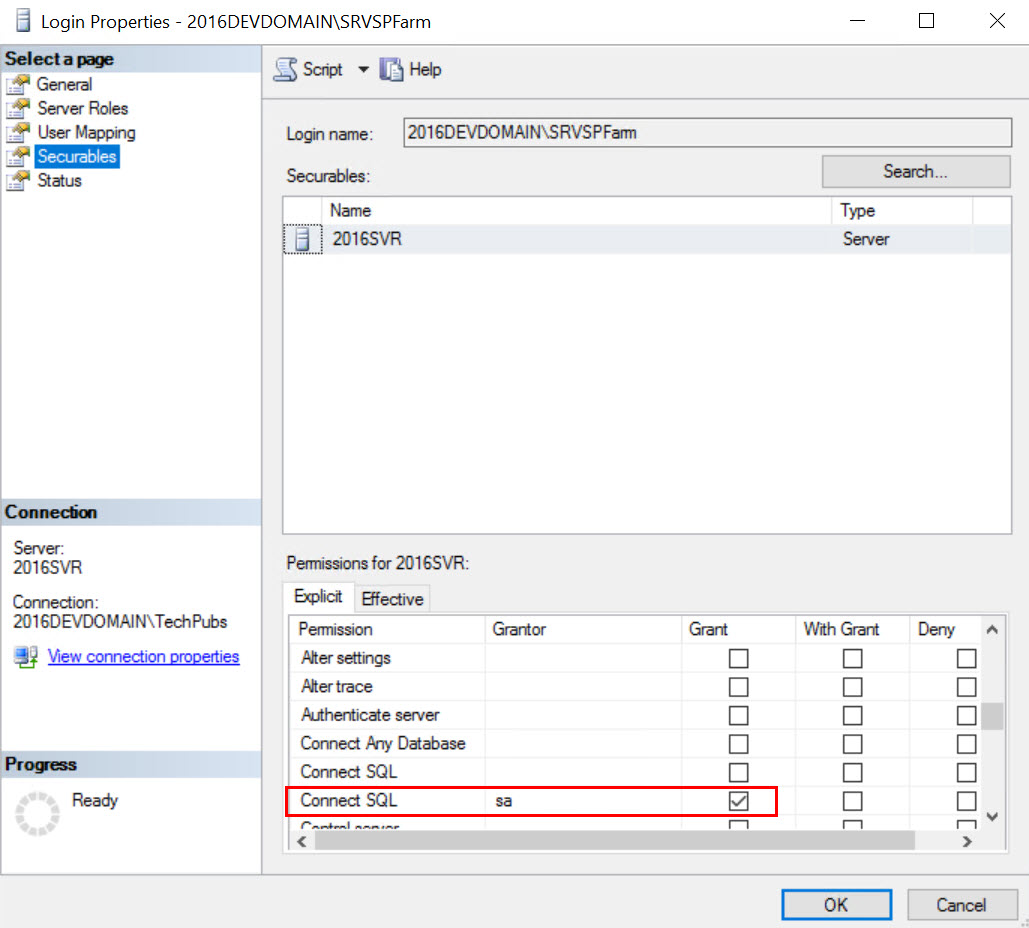
Select the checkbox under the Grant column.
Click OK. This concludes the steps required in SQL Server Management Studio.
Next, sign in to Records Management's Manager Web as "Administrator" to create a Service account for the Physical Records Management plugin.
Click Settings > Plugins. The plugins list displays.
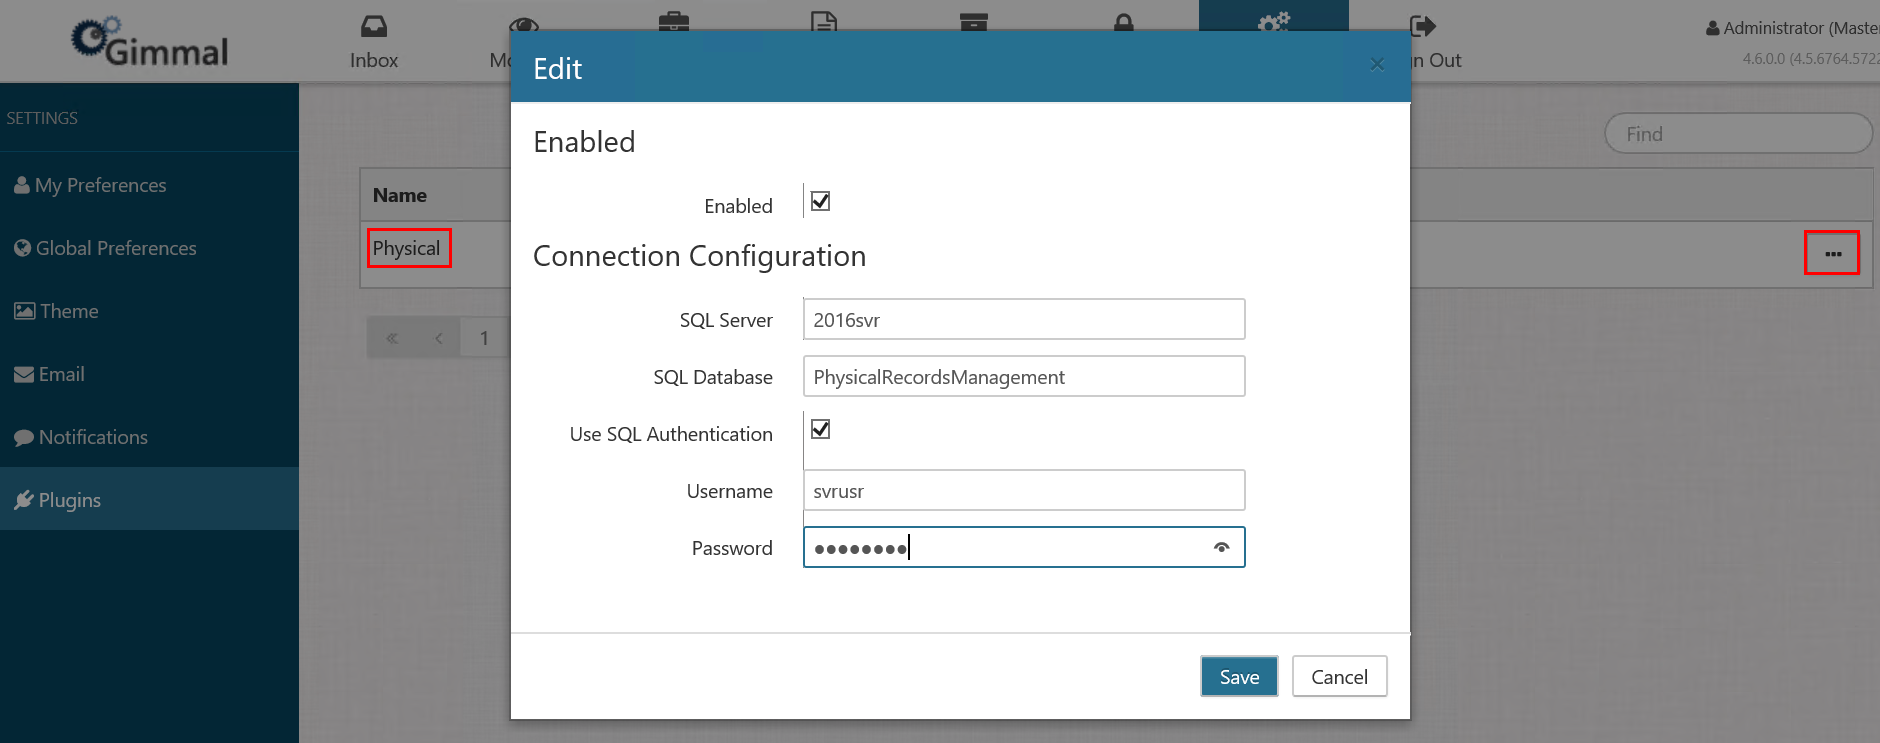
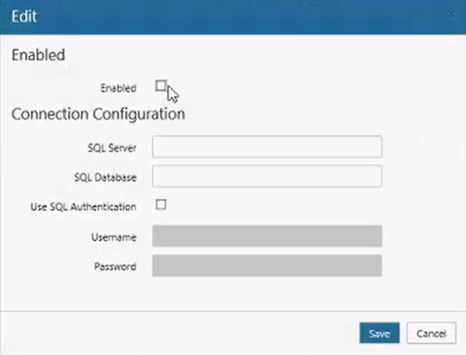
Click the ellipsis (...) to the right of the Physical plugin. The Edit window displays.
Click the Enabled checkbox.
Enter values for SQL Server and SQL Database.
Click the Use SQL Authentication checkbox.
Enter the Username and Password for the login you created in SQL Server Management Studio.
Click Save. The Edit window closes, and the following occurs:
The Physical tab displays at the top of the Manager Web Main Menu.
The following new roles appear on the Secure tab:
Physical Administrator
Physical User
Setting Up the Plugin using Windows Authentication
Create a new service account for the Physical Records Management user.
Click Settings > Plugins to see the list of available plugins by name.
Click the ellipsis (...) next to the desired plugin name to open the Edit window.
Check the Enabled box. (This activates the Physical tab on the Records Management main menu.)
Enter the name of your SQL Server and your SQL Database.
Click Save. The Edit window closes, and the following occurs:
The Physical tab displays at the top of the Manager Web Main Menu.
The following new roles appear on the Secure tab:
Physical Administrator
Physical User