
Manage Records 1
The Records option, available under Manage on the Main Menu, provides access to all Records that are be being managed by Records Management.
From this section, you can view the Record Details, perform declaration functions, manually place an item on Legal Hold, and manually classify an item as a particular Record Class.
Viewing Record Details
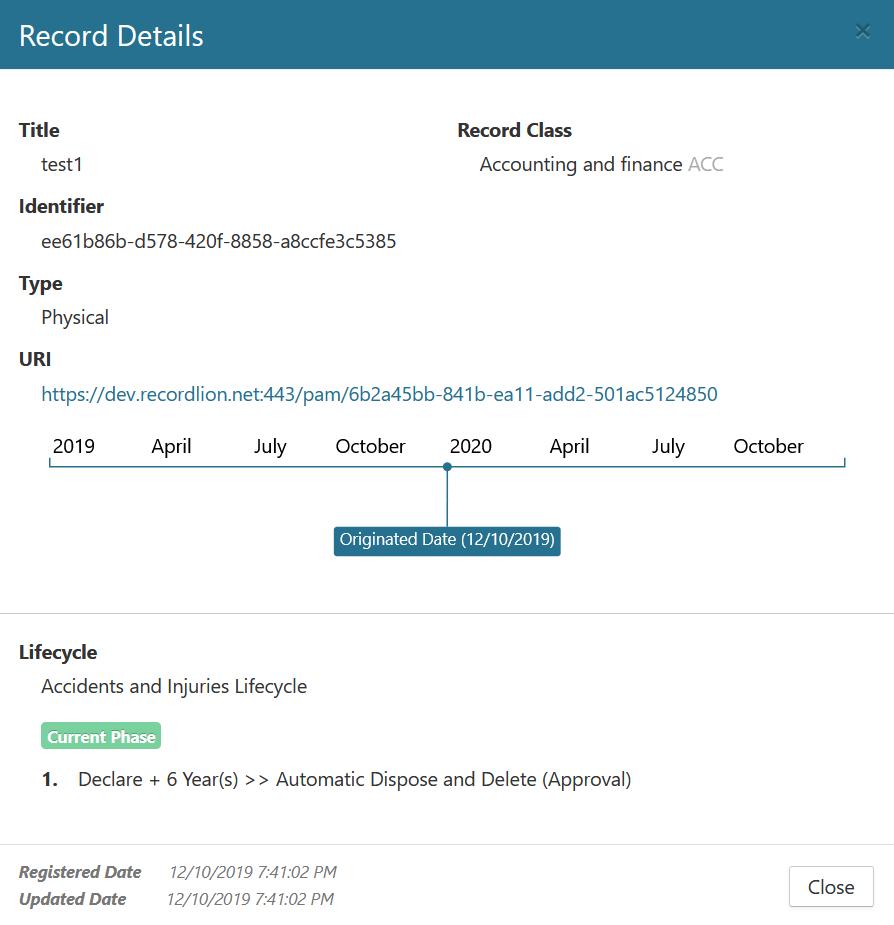
The Record Details screen provides detailed information pertaining to an Individual Record. From this screen, you can see what Record Class an item has been assigned, where the item is in its Lifecycle, its declaration status, as well as any Legal Holds that may exist on the item.
To view the details of a Record, perform the following steps:
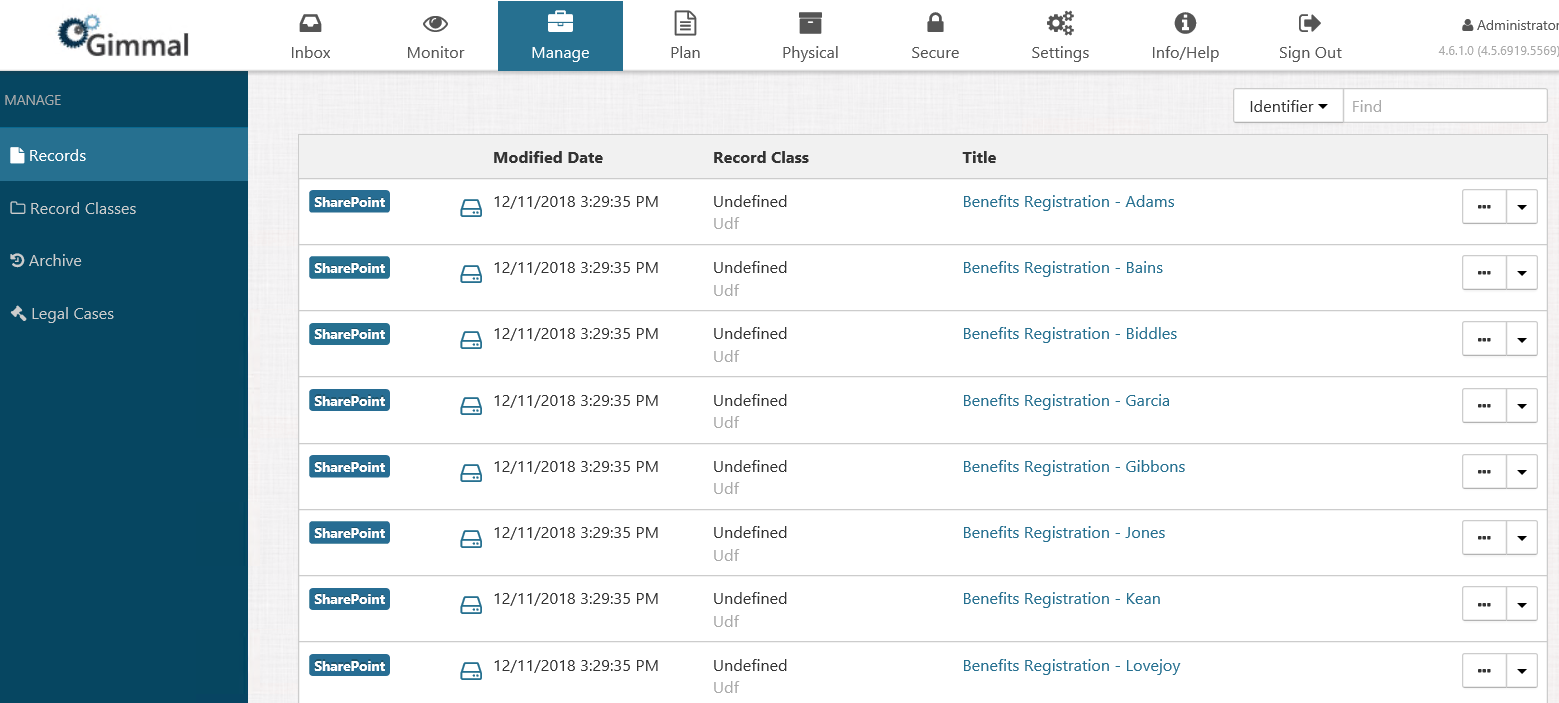
Select Manage from the Main Menu.
Select Records from the left Navigation Menu.
Click the ellipsis (…) for the desired Record. The Record Details screen displays, as shown below.
Manually Classifying a Record
To manually assign a Record to a specific Record Class, perform the following steps:
Select Manage from the Main Menu.
Select Records from the left Navigation Menu.
Click the drop-down for the desired Record.
Select Classify.
Choose the desired Record Class.
Click Save.
Declaring & Undeclaring Different Types of Records
Select Manage from the Main Menu.
Select Records from the left Navigation Menu.
Click the drop-down for the desired Record.
Select one of the following:
Declare Record
Undeclare Record
Declare Vital
Undeclare Vital
Declare Obsolete
Declare Superseded
Click Confirm.
Creating a Legal Hold Manually
To create a Legal Hold on an item manually, perform the following steps:
Select Manage from the Main Menu.
Select Records from the left navigation menu.
Click the drop-down for the desired Record. (The drop-down options you see may vary, depending on your permissions.)
Select Legal Hold.
Select the appropriate Legal Case from the drop-down.
- Click Confirm.
Only legal cases that are created and open are available for holding new items.
Viewing the Record Audit
To view the Audit Log for an individual item, perform the following steps:
Select Manage from the Main Menu.
Select Records from the left navigation menu. A list of records displays on the page.
Click the drop-down to the right of the desired Record. (The drop-down options you see may vary, depending on your permissions.)
Select Audit. The Audit window opens for the selected Record, showing a time-stamped list of all of the operations performed on that Record.
To search for a specific audit log entry, enter a keyword(s) in the Find field in the upper right corner.

Viewing the Record Properties
To view the Properties for an individual item, perform the following steps:
Select Manage from the Main Menu.
Select Records from the left Navigation Menu.
Click the drop-down for the desired Record.
Select Properties. The Record Properties dialog opens, enabling you to view all of the properties for that record.
Click Close to close the dialog.