
Installing File Share Connector Shell Extension
To install the File Share Connector Shell Extension, perform the following steps:
From the Records Management splash screen, click the Install File Share Connector link. The File Share Connector installation screen displays.
Click Install to the right of the File Share Connector Shell Extension option. The first screen that displays is the check for prerequisites. This screen validates the following information before allowing the installation to proceed:
Current User is Local Administrator
Click Next. The installation location screen displays, which determines where the connector will be installed.
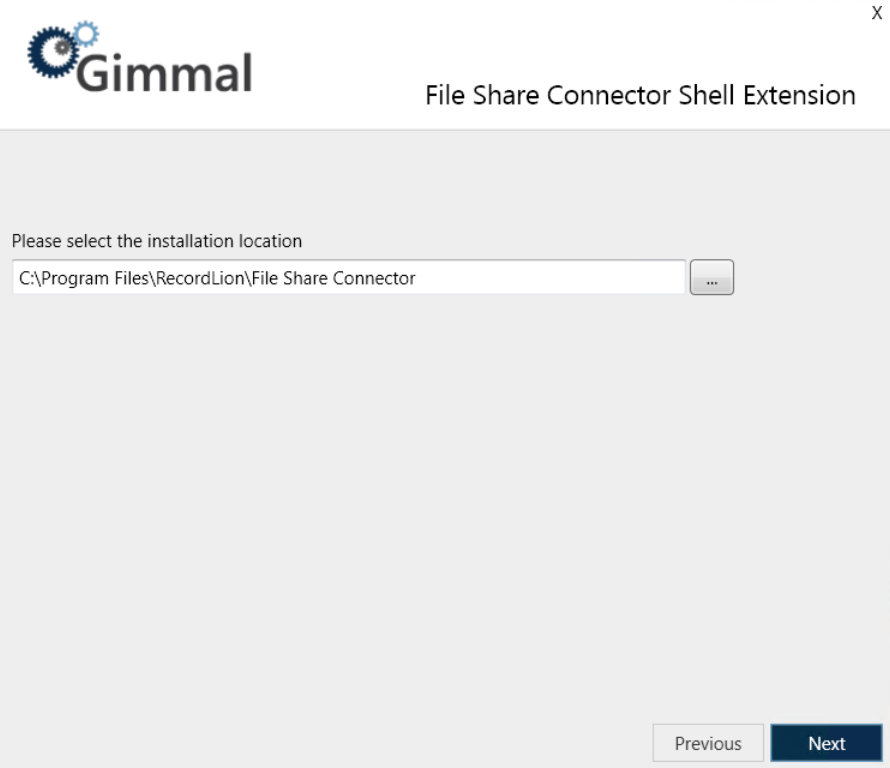
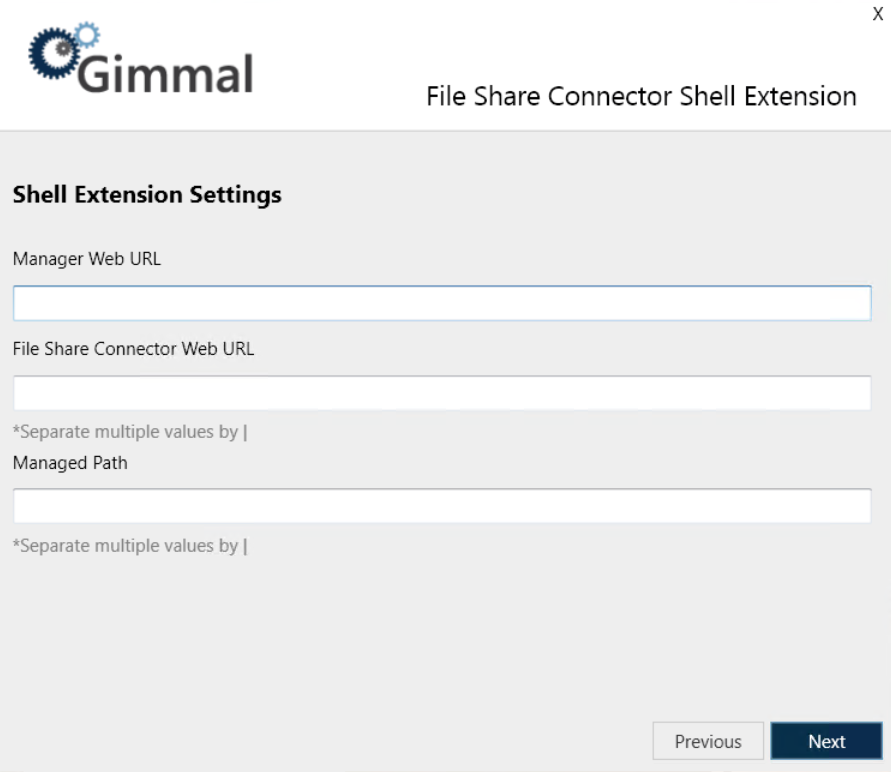
Leave the installation path as the default, or to change it, click the ... icon next to the installation location field, select the desired installation location and then click Next. The Shell Extension Settings screen displays, where you will configure the Shell Extension settings.
Enter the required information for the following settings:
Manager Web URL: The URL to the Records Management Manager Web (i.e., where Records Management is installed). This setting directs the shell extension to the Manager Web URL so it can perform any necessary communications.
File Share Connector Web URL: The URL to the File Share Connector Web. This setting directs the shell extension to the File Share Connector Web URL so it can get a list of managed locations for the cluster. Note: It's possible that you have multiple independent File Share Connector clusters. If this is the case, you can enter multiple cluster URLs separated by '|'.
Managed Path: Enables you to specify the Managed Path locations directly. If you specify this option, the File Share Connector Web URL option is ignored and only the paths you provide will be used. Note: Multiple paths should be separated by '|'.
Click Next to perform the final installation using the settings you specified above. A progress bar indicates the state of the installation.
When the application finishes installing, click Next to continue to the Finish screen. The final screen indicates that everything installed successfully.
If you experience any errors during the installation process, refer to the installer log in your Windows Temp folder.
Click Finish to close the installer window.
Handling Client Push Installs
To support push installation for the File Share Connector Shell Extension, you will not leverage SetupFileShare.exe. For push installation, you will leverage the shell extension MSI directly by passing the path to the MSI to MSIEXEC.EXE, making sure to include the required parameters.
These parameters will create the appropriate registry keys on the user’s computer that contain the necessary configuration options for the Shell Extension to function.
The MSI is located in the setup subfolder of the File Share Connector folder on the installation media and the command to execute is as follows:
msiexec /i “%install media%\File Share
Connector\setup\RecordLion.RecordsManager.FileShare.Shell.Installer.msi”
MANAGERWEBURL=”https://managerweburl” FILESHAREWEBURL=”https://fileshareweburl”
Deploying Configuration File Using Group Policy
You can leverage Group Policy Preferences to deploy a pre-configured file for the File Share Shell Extension without having to script any commands. On a reference or test computer, use the SetupFileShare.exe to configure the application. Next, verify the settings are working correctly.
Finally, refer to this section for directions on using Group Policy to deploy the file. Be sure to use the following file in the user’s My Documents folder: RecordLion\FileShareConnector\settings.xml.