
Creating Report Parameters
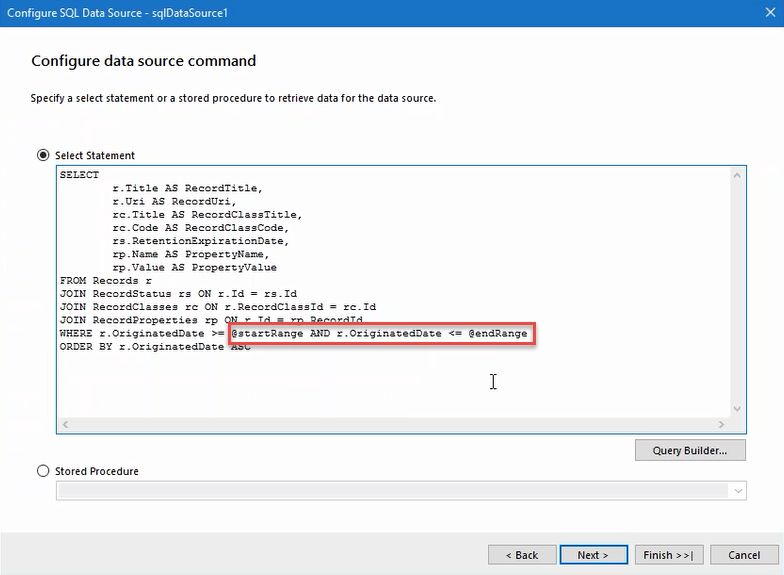
To create a report that will require the user to enter parameters/values, you will need to create Report Parameters in your SQL statement for the report. The example below shows a range being used for the OriginatedDate. The parameters in this example are @startRange and @endRange.
In addition, this sample SQL statement shows a report that will return the record metadata, record classes, and the associated disposition dates when the user selects a range of origination dates.
Click Next and the Configure data source parameters window will display.
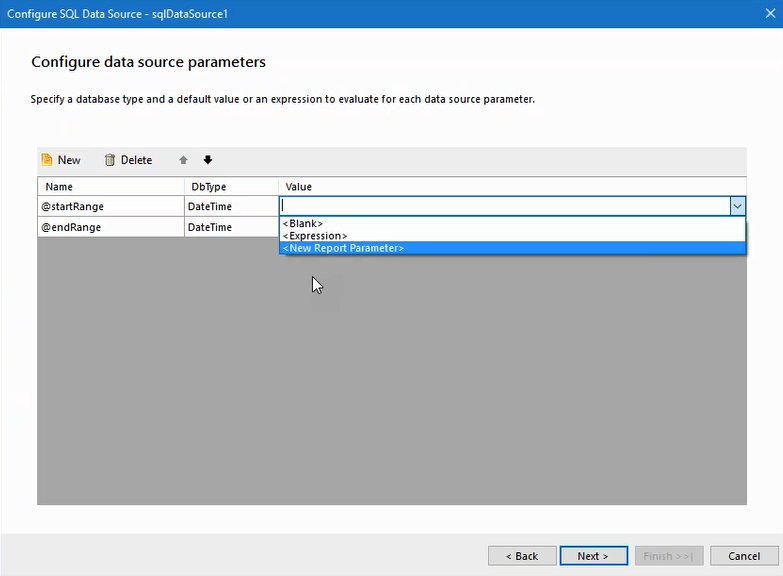
Select DateTime for the DbType since the parameter is going to be a date.
For the Value field, you can hard code a value or expression, or you can define a New Report Parameter. The New Report Parameter will enable the user to enter values for the report parameters when the report is executed. In this example, the user will enter values for the Start Date and End Date.
Select New Report Parameter. This will open another dialog box titled Report Parameter Editor.
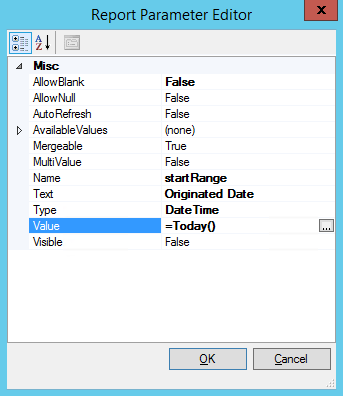
You can use the default settings, but depending upon the results desired, there may be some fields you want to modify.
AllowBlank - Change to False to force the user to enter a value.
Text - This is the label of the field that will be displayed to the user.
Visible - This shows the field to the user.
Value - This provides a default value for the field. This is not required. This example shows using a default value of Today's date. When you click the elipses in the Value field an Edit Expression dialog box is displayed which enables you to enter an expression.
Click Next
The Configure design time parameters dialog box will be displayed. These values are not used in the final report, but they allow for testing of the data. Enter values for the Start and End Range fields.
Click Next
Click Execute Query.
The Preview data source results dialog box is displayed with the results of the query.
Click Finish
Click Next
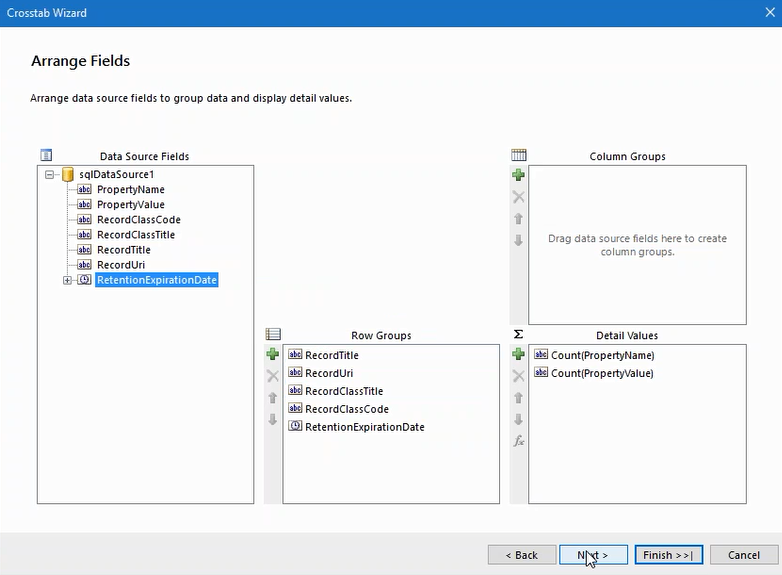
The Arrange Fields dialog box displays. This enables you to arrange the fields to group data and display detail values.
Detail Values - Display these fields as detail values.
Row Groups - Display these fields as row groups.
Click Next
Choose Layout. Select whether to show subtotals and grand totals, and their placement.
Choose Style. Select a style to customize the appearance to the generated report.
Click Finish.