
Documentum Connector Configuration
The Documentum Connector Configuration component is a desktop application that is installed along with the Documentum Connector. The Configuration dialog provides three "tabs" that enable you to configure your Documentum connection settings, select your Documentum DocBases, view the available jobs in the connector, and schedule the job intervals.
Configuring the Documentum Connection Settings
The Connection tab enables you to enter the required credentials so you can access the Documentum server.
Before you begin these configuration steps, ensure that you have created the Manager Web account username and password.
To configure the Connection settings, perform these steps on the same machine where you are running the Records Management Documentum Connector.
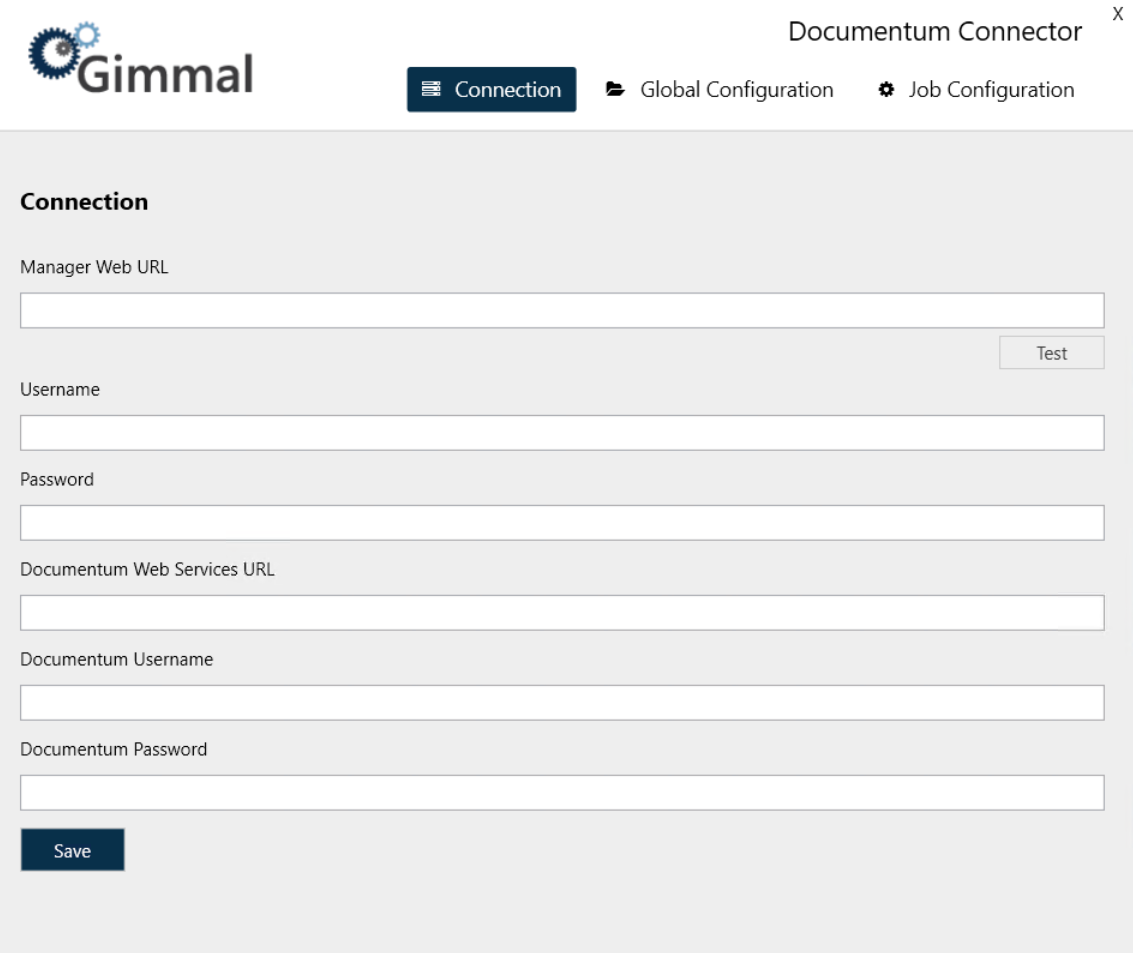
- Launch the Documentum Connector Configuration application. The application should be found in the installation location you specified during the Documentum Connector installation process, or you can launch the application from the Windows Start menu. The Documentum Connector window opens on the Connection page.
- Enter the following information
- Manager Web URL: The URL to the Manager Web (i.e., where Records Management is installed)
- Username: The username of the Service Account created in Records Management
- Password: The password of the Service Account created in Records Management
- Documentum Web Services URL: The URL to your Documentum Services API (i.e., the base address of the Documentum Connector’s web service API set; points to a deployed application running on a web application server in the Documentum environment.) Note that multiple Documentum Web Services instances are not supported.
- Documentum Username: The user ID of a Documentum superuser; ID is used to carry out all Connector activities within Documentum
- Documentum Password: The password of a Documentum superuser
- Click Save
- Continue to next section
Configuring the Documentum Global Configuration
The Global Configuration dialog enables you to select which DocBases (or repositories) you would like to classify and apply retention actions to. Different DocBases support different users, departments, operations, etc.
To ensure that all documents are entered into Records Management accurately, the DocBases you select on this tab must initially be crawled by the Custom Classification job described in Configuring the Documentum Job Configuration.
One or more DocBases, containing content (documents), must exist. They must share a common superuser ID for the Records Management Documentum Connector to use when carrying out its tasks. (You configured this Documentum user on the Connection screen. You must configure a user first, or you will not be able to access the Global Configuration dialog.)
To select your DocBases, perform the following steps:
On the Documentum Connector Configuration dialog, click Global Configuration. The Global Configuration DocBases page opens, showing a list of available DocBases in Documentum.
The Documentum Superuser ID being used requires at least read access to all DocBases within a DocBroker. Option to create a dedicated DocBroker to limit access to chosen DocBases is available.
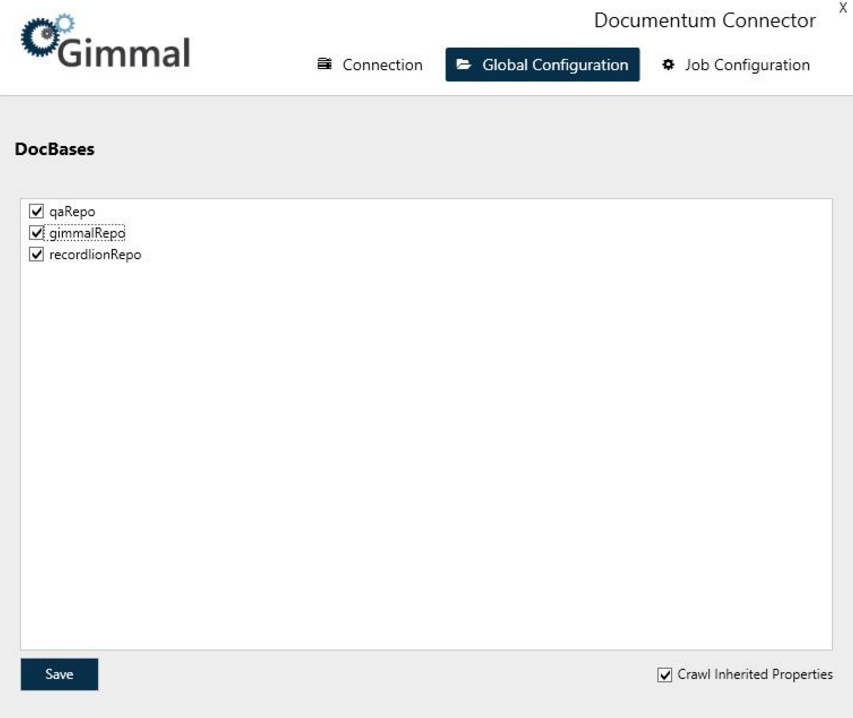
Select the desired DocBase(s).
Indicate if you want the system to crawl the inherited properties for the selected DocBase(s) by clicking the Crawl Inherited Properties* checkbox in the lower right corner. (Defaults to checked.)
Click Save
Continue with the next section
Setting up the Documentum Job Configuration
The Job Configuration dialog displays the retention and classification jobs included in the Documentum Connector, and enables you to either run the jobs immediately, or schedule how often you want the jobs to run. The jobs default to running every five minutes.
The only way to schedule the retention and classification jobs is through the Connector configuration application.
To configure your retention and classification jobs, perform the following steps:
- Ensure that you have started both the Documentum Retention Service and the Documentum Classification Service either manually or from the Windows Services dialog.
- On the Documentum Connector Configuration screen, click Job Configuration. The Job Configuration dialog opens, showing a list of retention and classification jobs.
- To run a job, perform either of the following steps:
To run a job immediately, click the drop-down arrow to the right of the desired job and then click Run Now.To schedule how often a job is to be run, click the Edit icon to the right of the desired job and set the Schedule Type (Minutes, Hourly, Daily), and the Time Interval; then click Save. The Next Run column will update with the time when the job is to be run next.
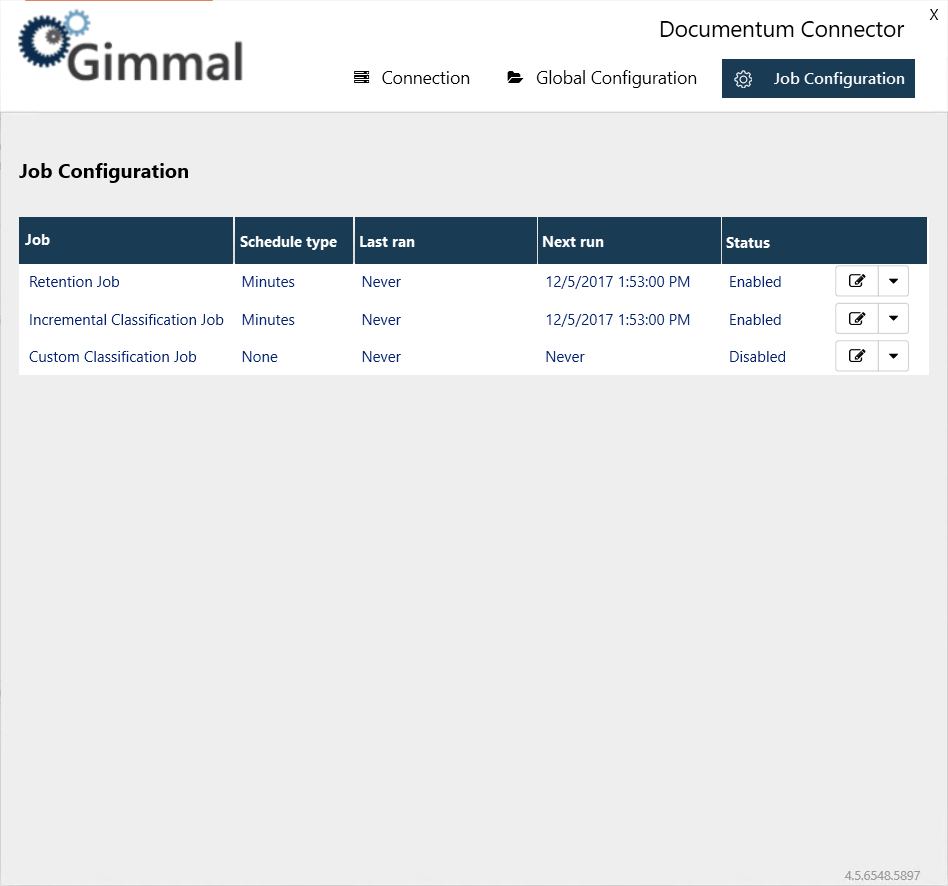
There are three jobs listed on this screen. When initially setting up a system, the Custom Classification job must be run first (disable the Incremental Classification Job initially). Once the Custom Classification job has completed, disable it and reenable the Incremental Classification Job.
The Custom Classification Job is essential when configuring a system for the first time.
To configure a job, click the Edit icon, which will open a separate dialog that displays all of the DocBases, along with Object Types that are available in that DocBase. This dialog enables you to select which Object Types under each DocBase you want to be included in the initial classification of a Documentum Server.
The Object Types list on the Custom Job Configuration page may display duplicate Object Type names. This is because the list displays the "labelText" property of the Object Type, and multiple Object Types can have the same label. For convenience, if you hover your pointer over any Object Types in the list, a tooltip displays, showing the "name" field. This "name" field is unique for every item in the list and helps you differentiate between duplicate Object Type names.

The Documentum Connector Configuration application will show all descendants of DM_document except the following:
'dm_staged','dm_plugin','dm_java','dm_message_container','dm_email_message','dmc_search_template','dmc_jar','dm_esign_template','dm_format_preferences','dm_menu_system','dmc_tcf_activity_template','dmc_tcf_activity','dm_xml_config','dm_xml_style_sheet',"'dm_xml_zone','dm_xml_custom_code','dm_docset','dm_docset_run','dmc_preset_package'
In addition, the Configuration application does not support any Object Types found in these cabinets:
‘Temp’
‘System'
’Resources’
‘Templates’
After you make your selections and activate the job, it will run immediately. Caution must be used when you perform this task if you are dealing with a large volume of documents. It could take many hours (possibly days) to complete and can consume an exorbitant amount of resources from the Documentum and Records Management Documentum Connector servers.
To ensure that all documents will be entered into Records Management accurately, ensure that the DocBases you selected on the Global Configuration tab are initially crawled by the Custom Classification job.
After you select a DocBase/Object Type option and run a job, the selections do not persist. The next time you open the job scheduler, the check boxes will be unchecked.
Windows Services
When you install the Documentum Connector, two Windows Services are added during the installation process. These Services enable Records Management to manage the lifecycle of records and information stored in Documentum. A description of the Services follows:
Service Types | Description |
|---|---|
Gimmal Documentum Classification Service | The Classification Service is responsible for discovering the content that exists in Documentum and notifying Records Management of its existence, including any updates and removals of this content. |
Gimmal Documentum Retention Service | The Retention Service is responsible for executing the lifecycle actions, as indicated by Records Management at various points in time according to the specified File Plan. |