
Configure SharePoint Server
Configure for SharePoint 2010
This section is only for SharePoint 2010, skip this section if you are running SharePoint 2013 or later.
To finish installing the SharePoint Connector for SharePoint 2010, after the solution has been deployed, you must configure the SharePoint Connector to communicate with Records Management. To do this, perform the following steps:
Open Central Administration.
Navigate to Central Administration > SharePoint Connector > Configure Connector.
- Enter the following information:
URL to Records Management (ex. https://server:8080 )
Records Management Service Account (Service accounts are created in Records Management Core)
Password for Service Account
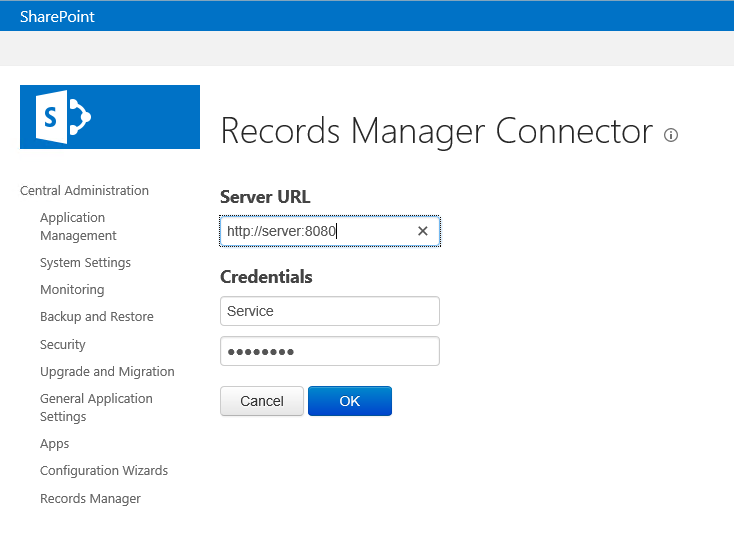
Click OK
Proceed to Enabling a Site Collection for Records Management to configure the connector, and continue with the remaining topics in the Configuring section.
Configure for SharePoint 2013/2016
This section is only for SharePoint 2013 and later. Skip this section if you are running earlier versions of SharePoint.
To finish installing the SharePoint Connector, you must perform the following steps:
After the solution has been deployed, you must activate SharePoint Connector Farm Feature by performing the following steps:
Open Central Administration.
Navigate to Central Administration > System Settings > Manage Farm Features.
Find the SharePoint Connector Feature and click Activate.

Next, you must create a Gimmal SharePoint Connector Service Application. To do this, perform the following steps:
Open Central Administration.
Navigate to Central Administration > Application Management > Manage Service Applications.
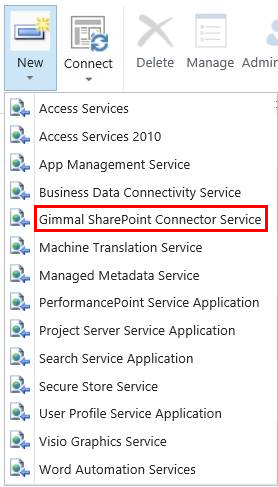
From the New option in the ribbon, choose Gimmal SharePoint Connector Service.
Provide the requested information to create the Service Application. (Important! A unique name is required for the Database Name setting.)
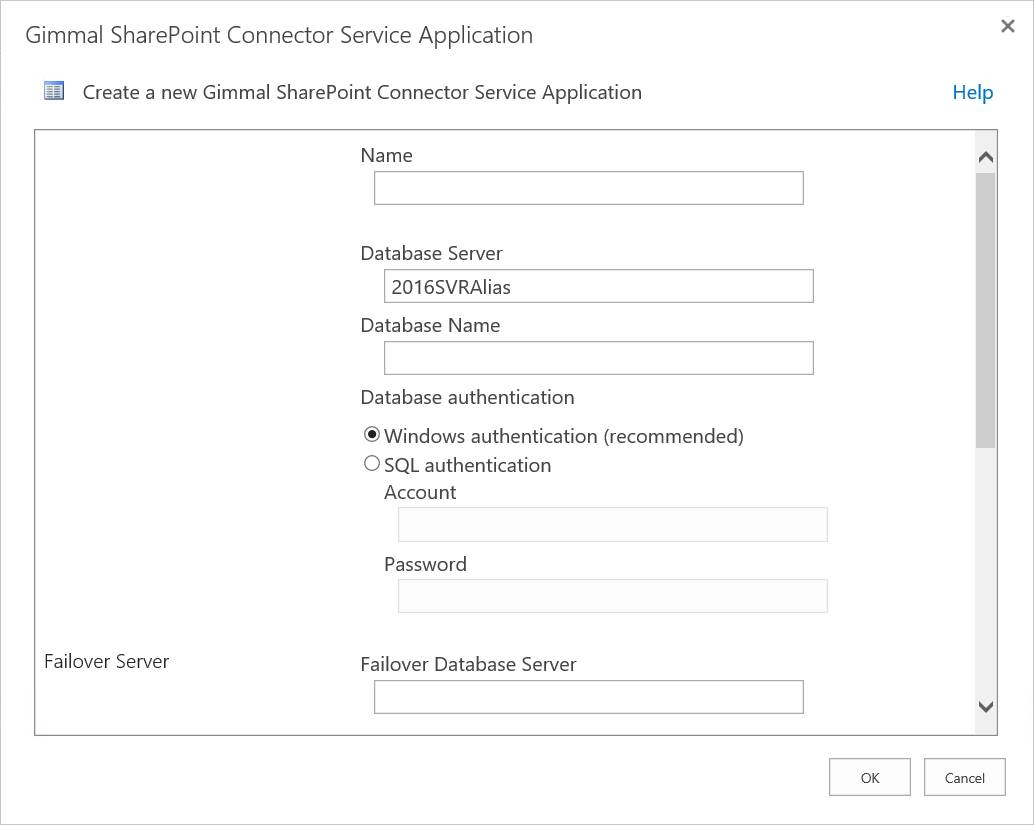
Click OK.
After you create the Gimmal SharePoint Connector Service Application, you must start the Gimmal SharePoint Connector Service on each SharePoint Server that should process Gimmal SharePoint Connector Timer Jobs. To do this, perform the following steps:
Open Central Administration.
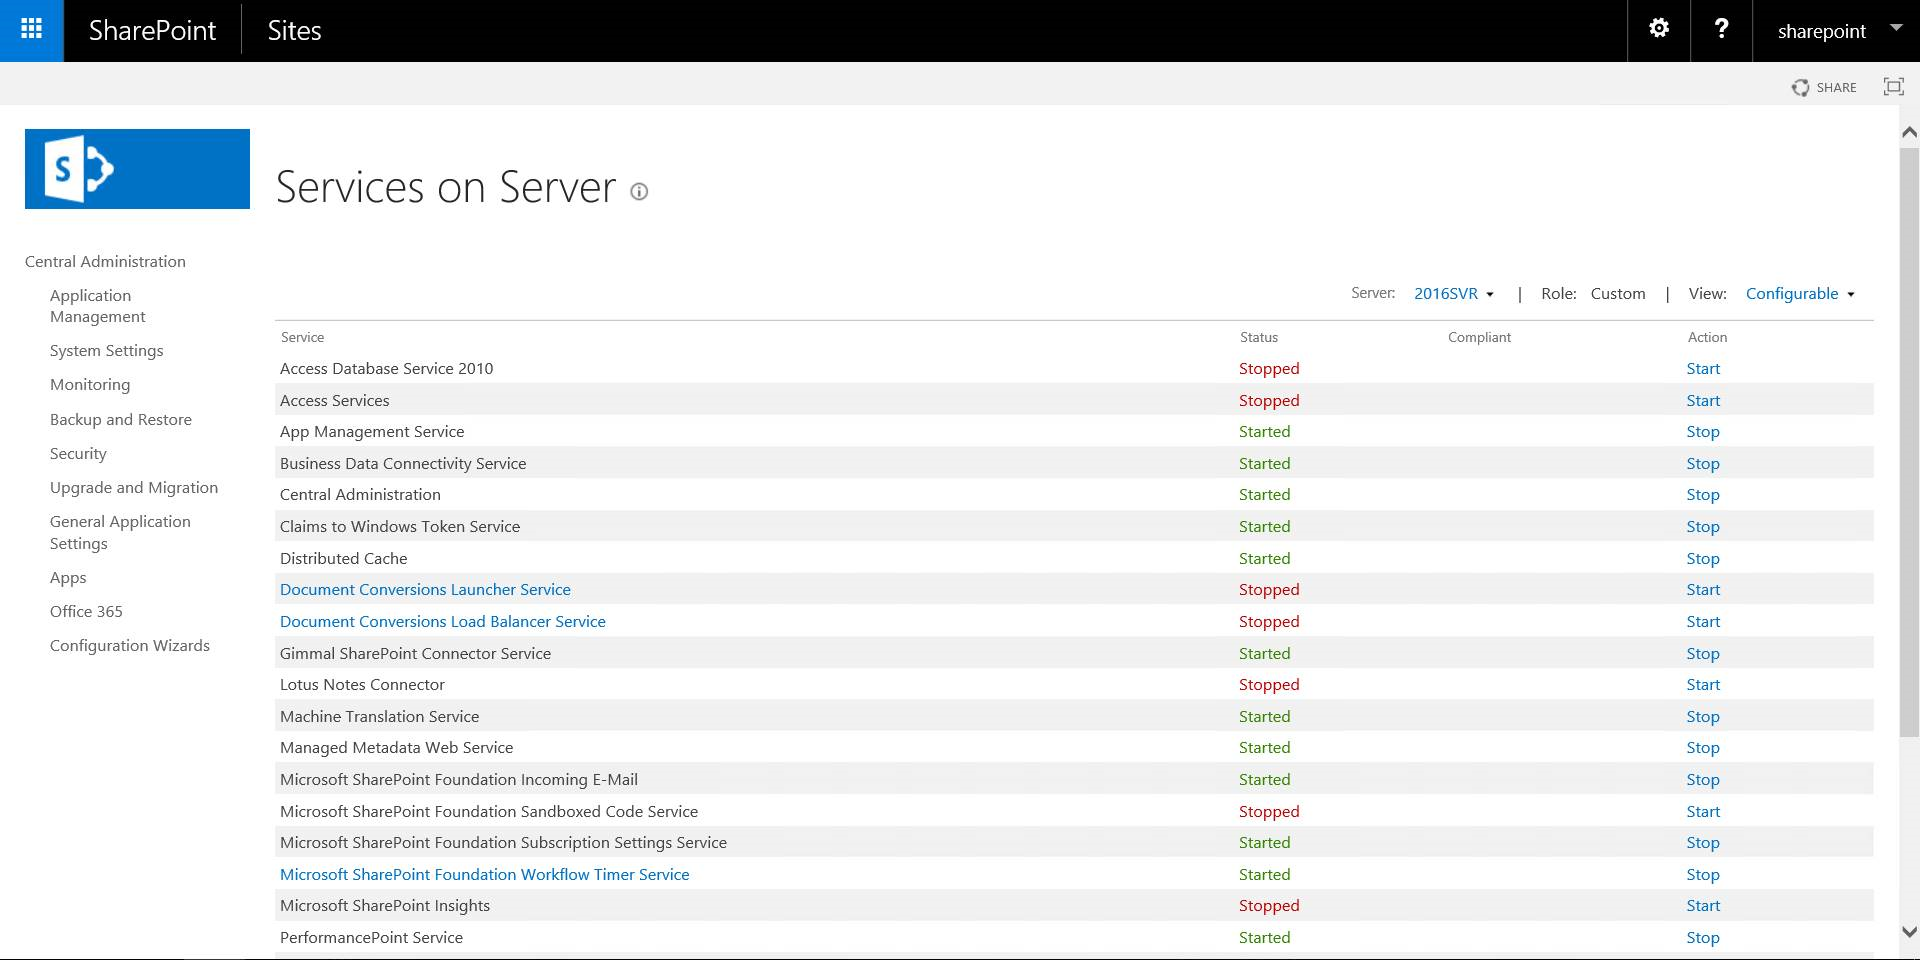
Navigate to Central Administration > System Settings > Manage Services on Server.
Select the Server in which you want to start the service.
Click Start on the row provider for the Gimmal SharePoint Connector Service.
After starting the Gimmal SharePoint Connector Service, you must configure the Connector to communicate with Information Lifecycle. To do this, perform the following steps:
Open Central Administration.
Navigate to Central Administration > Application Management > Manage Service Applications.
Select the Gimmal SharePoint Connector Service Application.
From the Ribbon, click Manage.
Click Configure Connection.
Enter the following information:
URL to Information Lifecycle (ex. https://server:8080 )
Records Management Service Account (Service accounts are created in Records Management Core)
Password for Service Account
Click OK.