Introduction
NetDocuments' eDOCS product manages and organizes enterprise documents and information. Morae’s eDOCS Bulk Exporter extracts information and metadata from the eDOCS platform. Typically, the exporter works with Morae's migration suite component, MAPIT, to transfer the exported content into platforms like Microsoft SharePoint.
1. Requirements
This section provides information about usage requirements for running the Exporter Tool.
1.1 Compatibility
The Exporter Tool supports the following eDOCS environments as the source System.
Server Versions Supported:
|
eDOCS DM 21.x |
|
eDOCS DM 22.x |
|
eDOCS DM 23.x |
1.2 Client Software Pre-requisites
Pre-requisites for the Client/Host PC must be satisfied:
• Windows 11 or equivalent OS.
• Admin access to install the application.
Client PC or VM minimum specification:
|
Components |
Minimum Requirements |
|
CPU |
2 Core CPU for physical, 4 Core CPU for VM; 3 GHz Pentium or equivalent |
|
RAM (Memory) |
8 GB Minimum, 16 Recommended |
|
Operating System |
Windows 10,11, Windows Server 2019/2022 |
|
Architecture |
x86 & x64 |
|
Hard Disk |
Min 100 Mb for the install; additional space required for exporting data |
1.3 eDOCS DM Pre-requisites
Please ensure the following:
-
REST API is configured and available for use in the eDOCS Environment.
-
REST API Server is running.
-
REST API Server URL has this form:
http(s)://< REST API Server Address>:<REST API Server Port>/edocsapi/v1.0/
-
-
-
An eDOCS DM account with adequate access to the source content is required.
-
User Account should have Administrator privileges.
-
This Account must be a member of Local Users and Groups in the eDOCS DM server.
-
-
2. Overview and Optimizations
2.1 About
This quick start user guide is intended to provide a quick reference for Users/Administrators.
Morae has provided this tool as a standalone executable exporter tool to allow a correctly permissioned user the ability to access an eDOCS environment and extract information to network drives.
The exporter tool specifically performs the exporting of documents and metadata (read-only) from eDOCS. Documents and metadata from eDOCS are not modified in any way. The exports from eDOCS will allow an organization to extract documents and metadata from eDOCS for multiple purposes, including:
-
Further manipulation and loading to other destination locations (i.e., SharePoint Online)
-
Long-term archival
-
Removal of documents from eDOCS and storage on network drives (allowing use of a search mechanism to index metadata for searching)
Functions of the Exporter Tool:
A. Document Export:
Allows selection of multiple folders from an eDOCS Library to export/extract documents – does not allow the selection of the whole Library.
-
Specify the export destination network or local file share location
-
Document and document name
-
Base eDOCS metadata/properties
-
Description
-
Object ID
-
Created Date
-
Created By
-
Owned By
-
Folder Path
-
Library Name
-
Version #
-
-
-
-
Document Type properties
-
For each property:
-
The attribute name and corresponding attribute value (dependent on data type)
-
-
-
Produces a master CSV file with a row for each document describing:
-
Documents, versions, folders
-
Base metadata and document type metadata
-
Created and Modified Dates and Users
-
-
Option to export just the master metadata CSV and not the documents
2.2 Overview of Use
The eDOCS Bulk Exporter Tool
-
Is intended to be run on a Client / Host PC
-
Uses a REST API to retrieve the Libraries on the DM Server.
-
Requires login credentials, eDOCS REST API URL, and Library to access the contents of eDOCS Libraries.
-
Provides one-way read-only communication with eDOCS – only extract, no modification to source documents or metadata
-
Requires full access rights/permissions for the user or use (recommend Administrator or Admin equivalent).
-
Provides an option to not replicate the eDOCS Library folder structure on the shared drive to prevent running into folder length name and Windows 256-character path limits.
-
Exports output to a network shared drive with adequate capacity.
Please note that if the eDOCS environment is down or unavailable during an export, errors will be reported, and an export restart will be required. This tool is not responsible for managing or preventing such outages.
You should aim to have enough disk space on the destination drive for the size of your exports. If you do not have enough disk space, your migration will not complete as expected.
Please note that if there are corrupt files in your eDOCS Library, attempting to export a corrupted file is unsupported at this time. If you encounter corrupted files in your eDOCS Library, you should delete these before running the eDOCS Exporter Tool.
2.3 Performance Optimization Considerations and Tips
The speed and performance of the Exporter Tool are dependent on many factors.
Morae does not warrant or guarantee the performance of the Exporter Tool in any way.
We outline some tips and considerations for optimization of performance below.
The implementation of optimization considerations and tips is out of scope for this tool and document. The performance of the exports depends on many factors, such as:
-
Network latency
-
Server location impacts
-
eDOCS Server configuration and hardware available (e.g., Fail Over Load Balancing)
-
Local IT environment and architecture
-
Size of existing metadata to be exported from eDOCS Libraries
-
Versioning (how many versions for a document on average)
-
Size of selected folders/documents included in the export
-
Number of metadata attribute fields
-
Size and speed of destination location/drive
-
Network traffic and its relation to the time of day the exports are run
-
Memory available on client/host machine (where you are running the Exporter Tool)
We recommend that you work with your local IT to review the considerations outlined above and to ensure performance optimizations are realized.
Performance Tip 1:
Running the tool in the same network and ensuring minimal network latency for the fastest migration/export speeds.
Performance Tip 2:
Another technique would be to split the document loads into smaller chunks and run them on multiple clients to achieve parallel exporting. You would need to ensure the exports do not overlap both from the source data and the destination location.
In this case, the limiting factor would be the DM servers’ capability to handle the additional load, as well as destination network drive speed and capacity considerations.
Performance Tip 3:
Please ensure the client/host has an adequate amount of RAM memory (minimum 8 GB, recommended 16 GB).
Performance Tip 4:
If possible, have an eDOCS DM environment that is performant or load-balanced from which you are exporting. If the environment is unhealthy or unstable, this will directly impact the tools’ ability to extract content from the source system.
Performance best practice:
When exporting items for archive or migration into another system, we recommend that you try to keep a single export/migration job to under 90,000 objects. This ensures that you balance migration speeds against the case that there is an error and you need to re-migrate or address an issue. If you conduct an export that is larger than, say 100,000 objects, it will begin taking a long time, as well as harder to address any potential migration-related errors or issues.
As such, we recommend the maximum export size to be kept under 90,000 objects where possible. Based on experience, 50,000 objects is a good limit for best practices, and a maximum of 90,000 objects. You can export more than 90,000 objects in one session, but it becomes difficult to address or remediate any issues.
3. Using the eDOCS Exporter Tool
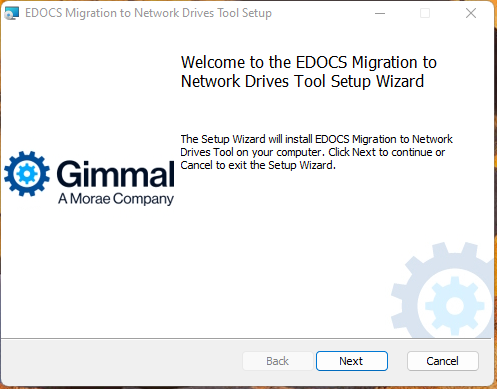
3.1 Installation
Before running the installer (MSI file), please ensure that the REST API server is installed and configured on your machine.
The eDOCS Bulk Exporter Tool has all the libraries required for eDOCS DM connectivity embedded in the installer.
If .NET 8.0 libraries are not available on your machine, you will be prompted to install them when you run the installer.
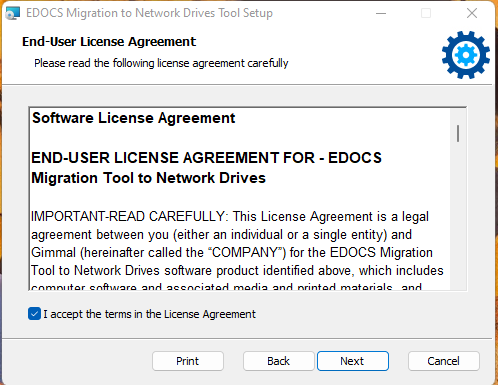
Accept the End-User License Agreement and click Next (If you decline the license terms, you cannot proceed with the installation)
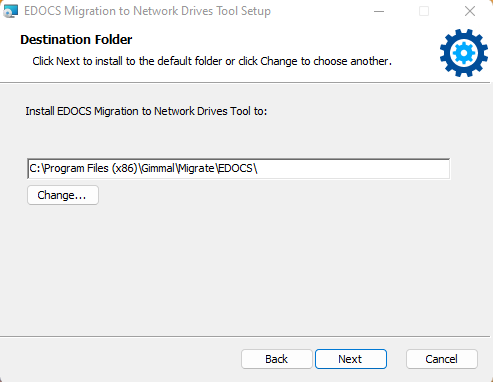
Click Next to install to the Default Folder (recommended), then Next again to install the tool:

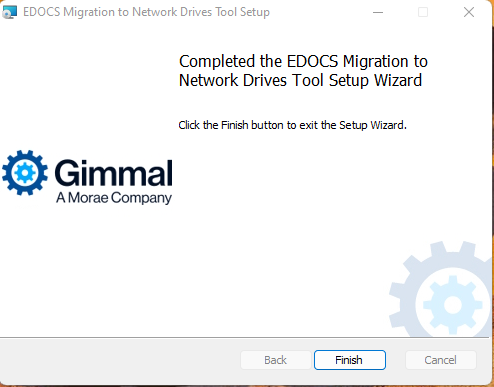
To finish the installation after completion and exit the install wizard, click Finish.
3.2 Activation
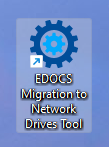
Launch the program by clicking on the Desktop icon that was created by the installer:
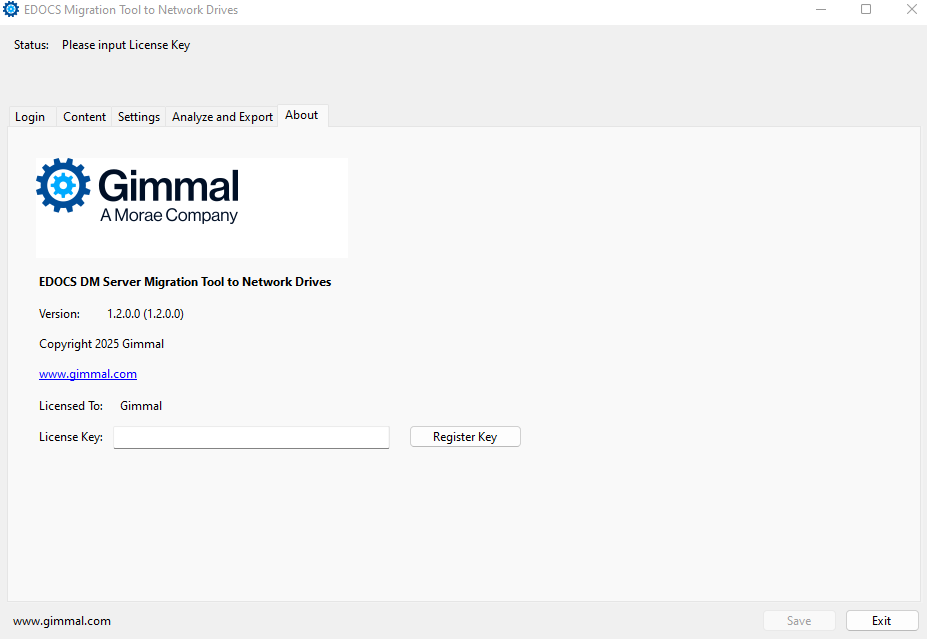
Please note that a valid activation code is required on the first use of the eDOCS Exporter Tool. This code is required for every Client PC on which it is run.
Upon purchase of the tools, you would have been provided with details on how to obtain the necessary activation codes for your requisite Client PC use.
When first running the Migration Tool, you will be required to specify a unique license key to register the product for use. You can enter the provided License Key in the “About” tab and by clicking the “Register” button. The registration will occur once and will activate the software for use; no further activation will be required.
If you require assistance or would like to obtain additional activation codes for additional Client PC use within your environment, please contact your Morae support contact.
If your organization is behind a firewall or proxy and cannot validate your license across the internet, please contact Morae support to obtain a firewall/proxy key. Once you have the proxy key, you can register your software using the steps below.
-
Browse to: <InstallDrive>:\ C:\Program Files (x86)\Gimmal\Migrate\EDOCS\net8.0-windows\
-
Open and edit EDOCS.Exporter.Network.dll.config
-
Look for “OverrideKey” setting and enter the value provided for PROVIDED_PROXY_KEY
-
Save the ‘EDOCS.Exporter.Network.dll’.config file and close it.
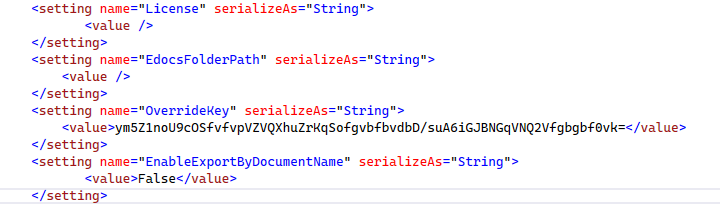
-
Close and reopen the eDOCS Bulk Exporter – it should now automatically use the proxy key and no longer prompt for a valid license key for registration.
-
The Product is registered now.
3.3 Credentials and Login
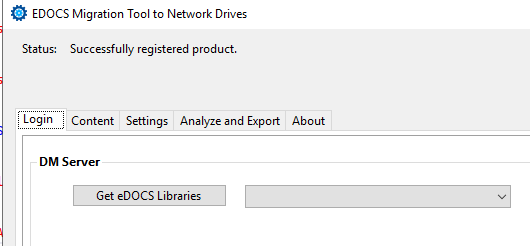
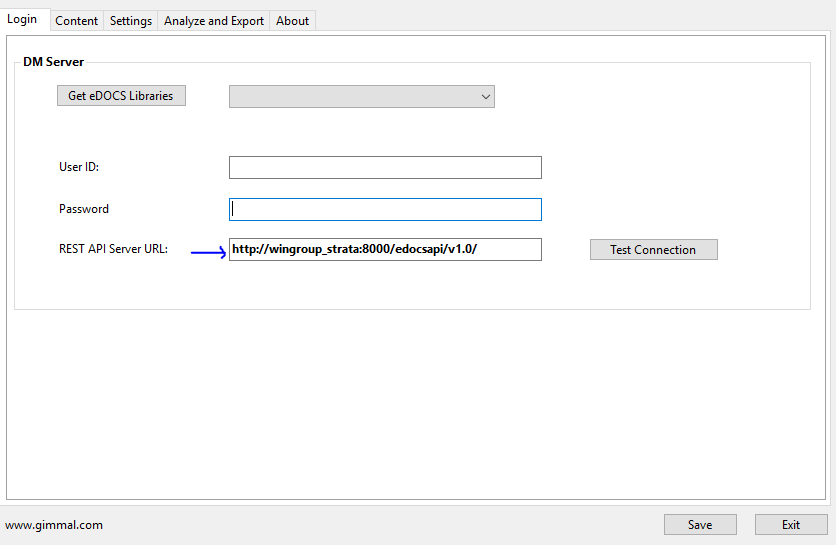
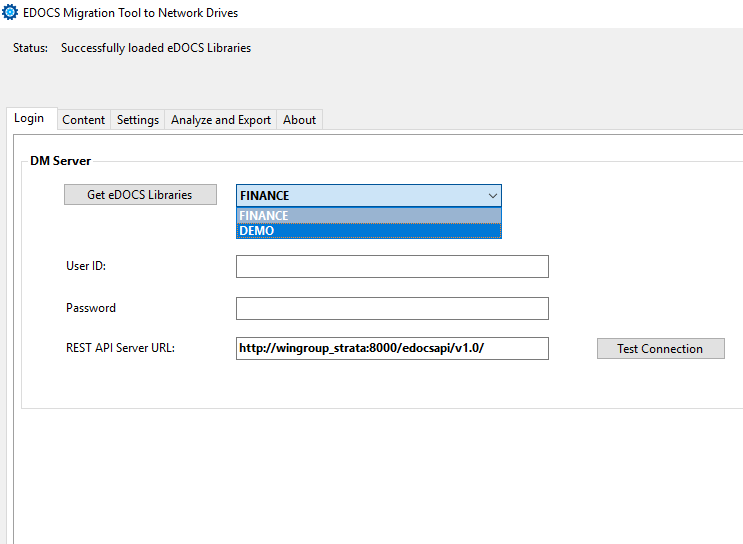
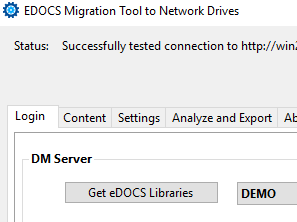
Before you test the connection (“Test Connection” button) to the DM server, you need to retrieve the eDOCS libraries.
-
Start by providing the REST API Server URL in the field (http(s)://< Server Name or IP Address>:<Rest API Server Port>/edocsapi/v1.0/).
-
Click on the “Get eDOCS Libraries” to populate the libraries drop-down menu. Retrieving the libraries and populating the drop-down only requires the REST API Server URL at this point.
Next, input:
-
User ID and Password
-
Credentials for your eDOCS user or Admin account
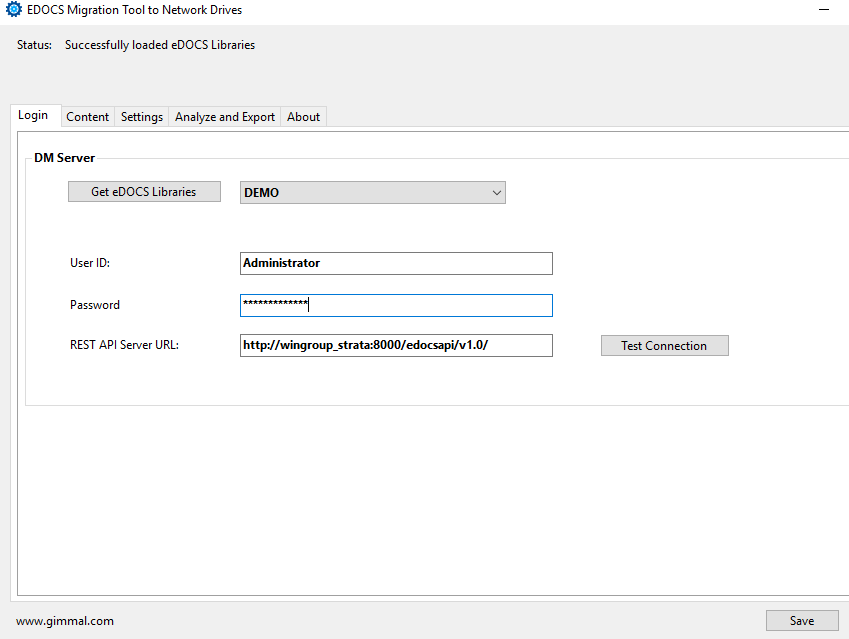
-
Select a Library from the available entries in the drop-down.
-
Click the “Test Connection” button. to verify that you have specified valid credentials and a valid connection to your eDOCS environment. If you are unable to connect, please work with your eDOCS DM system administrator to ensure you have the proper settings, and the DM and Rest API Server are configured to accept connections from the location of the eDOCS Export tool.
-
A successful connection status will be displayed if you have specified valid credentials and a valid connection to your eDOCS environment
Clicking “Save” will save your login credentials and REST API URL values for future use.
Please note that the libraries will not be saved for future use and you will need to retrieve them from the DM Server using the “Get eDOCS Libraries” button every time you start a new session (reopen the eDOCS Bulk Exporter application).
3.4 Running an Export
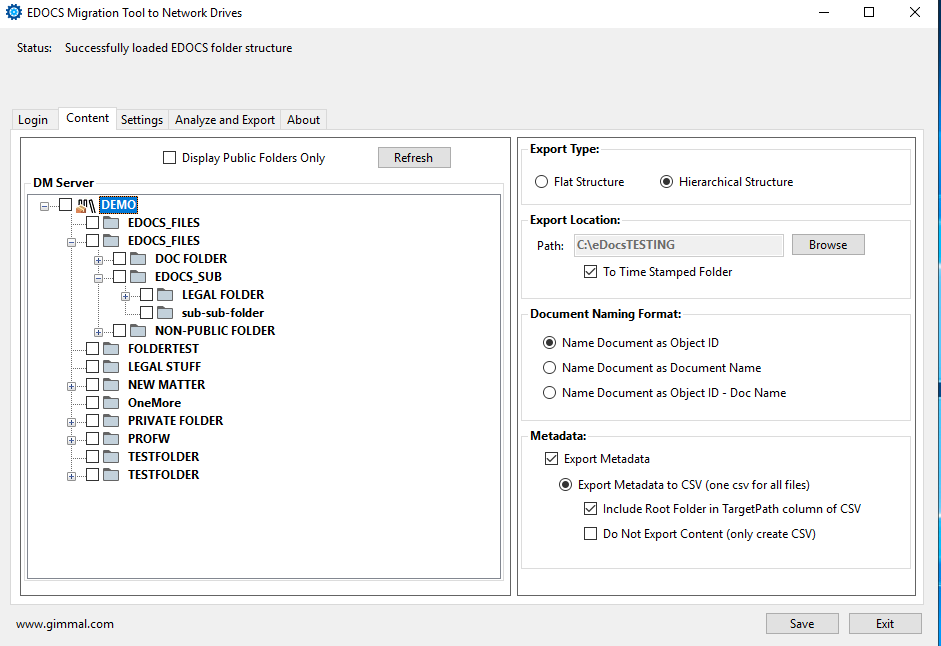
The panel on the right of the ‘Content’ tab allows the user to set the destination export location (local or network drive), the document naming format of exported data from the eDOCS source system, and options for metadata export.
3.4.1 Choose Source
Select Source Items
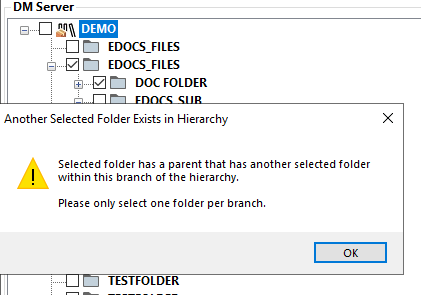
Items for Export can be selected from the eDOCS Repository (Library) tree view - browse to the folder area for the content to be exported. You may select any number of folders to be exported – please use caution to ensure that you select folders that occur at the same level.
-
When you select a folder, the selected folder and its children will be included in the export. You cannot check the selected folder’s children for exporting; likewise, if you select the child folders, you cannot check their parent folder. If you do so, you will be prompted with a warning message, and the system will correct the ”duplicate” selection:
Recommendation – splitting out areas to be exported is recommended, as doing so will minimize potential for error conditions, and allows for parallel processing, and generally make migrations/exports more manageable as they are in smaller chunks.
3.4.2 Export Settings
Settings in the Content Tab
Choose Export Type
• Ignore the source folder structure and export as a flat structure (recommended).
-
You would want to use this option if your eDOCS structure was deep (paths longer than 255 characters)
OR
-
Preserve the source hierarchical folder structure
-
Please be advised that there is a Windows 255-character NTFS path restriction.
-
If this option is chosen and a document or folder exceeds the path limitation, the object will be logged as an error, and the tool will try the next object for export. The contents of the folder will also be skipped.
-
We recommend, in most cases, using the flat structure option as the path metadata is preserved in the CSV control file. If choosing hierarchical export, most use cases would run into the 255-character NTFS limitation. This option would only be recommended in cases where the location can be verified, and the path limit will not be exceeded.
-
You may also wish to choose whether to export to a time-stamped folder
-
If enabled, will create a unique time-stamped folder for every export operation
-
If disabled, will export documents to the same folder; if duplicates are found, they will be skipped
-
We recommend using timestamped folders to ensure your exports are uniquely identified
Browse to Destination Export
The Export Location can be local, a network drive, or OneDrive
-
The export location will have an impact on performance due to size and latency considerations
-
Please ensure adequate space is available on the destination export location to handle the size of the export
Specify Exported Document Name
-
Choose the naming of documents
-
Name Document as Object ID (the unique Object ID from the eDOCS source system)
-
Name Document as Document Name (the document name/title from the eDOCS source system)
-
If you choose this setting with a Flat Export, this document naming option will be disabled to avoid collisions in the document names across multiple source folders to the destination folder.
-
Name Document as Object ID - Doc Name
-
This option is desired if you are doing a flat export and ensures there will be no collision with the document names since the unique Object ID is appended to the front of the document name.
Note: The original eDOCS file name is always preserved as metadata and can be rehydrated as required from your metadata.csv file.
Specify Export Metadata options for Export
-
Choose the option to enable export of metadata.
-
If metadata is included, they will be generated and stored in a master CSV file.
-
Please note – including metadata has a performance impact depending on the amount and type of metadata.
-
If choosing the master CSV option – the master CSV file – “metadata.csv” will be created at the root of the export area .
-
If not enabled, metadata file(s) are not generated.
Option to export only metadata and suppress the download of content (folders and documents)
-
This option is useful for customers who wish to review the metadata only prior to exporting the content.
-
If you enable this option, in the metadata.csv, the source directory column will be invalid since we aren't exporting any of the files.
-
Please note: most customers will choose export as metadata.csv – since this provides the greatest flexibility in preserving a centralized manifest of all information about the exported content.
-
If you intend to migrate your content to SharePoint, you will need to ensure the metadata.csv option is chosen, as that is used by Morae MAPIT for M365.
-
Please note that if you choose to export to a CSV master file, all metadata will be included in a single file, where each row in the file represents each document (related by local source path).
3.4.3 Other Export Settings
Settings Tab
The Settings tab provides supplementary settings for Export:
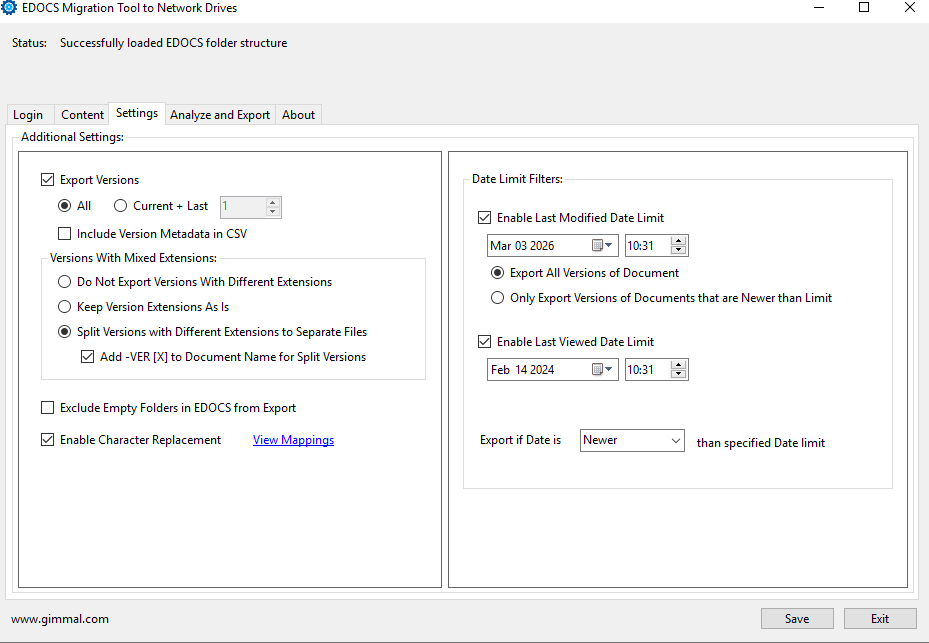
Choose Versions to Export
-
Choose the option to export All Document Versions or just the latest.
-
Please note: Choosing all versions has a performance impact since a Document could have many versions
-
Note: if you choose to export versions, you will have a row entry in your metadata.csv for every version of a document. This will preserve the exact version numbers from eDOCS, as well as created by and modified by dates for those versions.
Versions with Mixed Extensions
-
In eDOCS there may be cases where a document/object has multiple mixed extensions
-
This is an eDOCS behavior in that a single MIME type extension is not enforced on a document
-
It may not be very common, but you may encounter, from time to time, documents with versions that have mixed extension types
-
If you try to keep version extensions as is, you will receive a warning during analysis and migration steps:
-
-
“Version mime type of '.pdf' is different than that of the latest version's mime type of '.docx'.
-
This will cause problems when importing into a new system like SharePoint
-
-
SharePoint does not allow versions with mixed extensions for the same document
-
This feature allows migration analysts to choose what happens to documents with versions that have mixed extensions/mime types
-
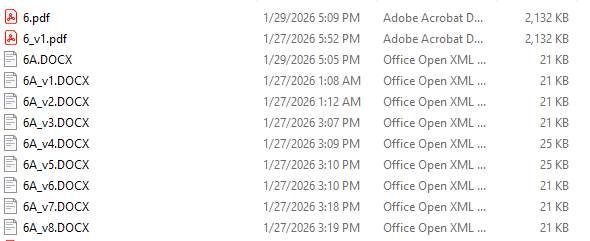
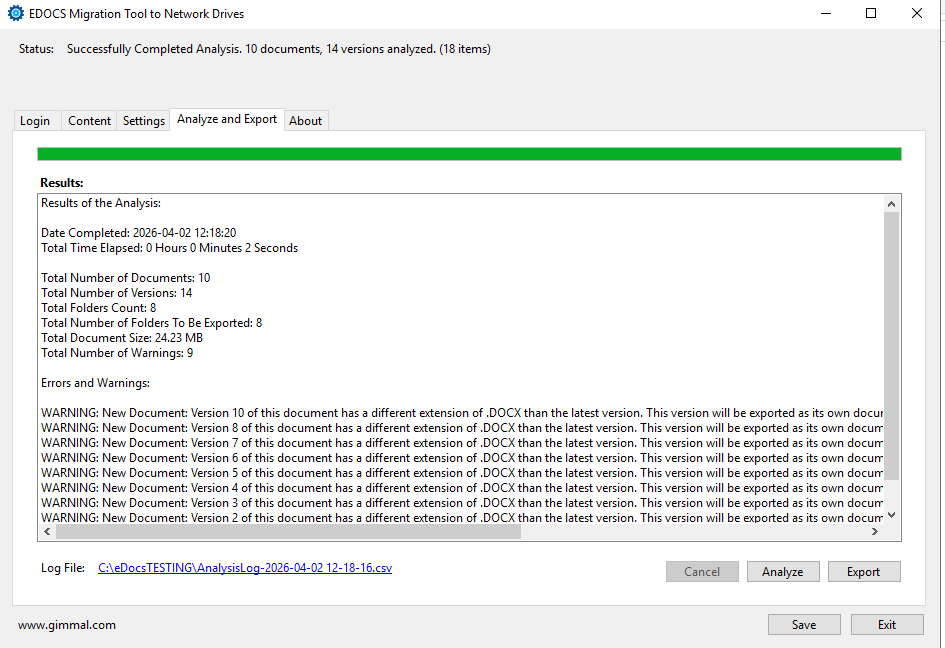
eDOCS Mixed Extensions Example
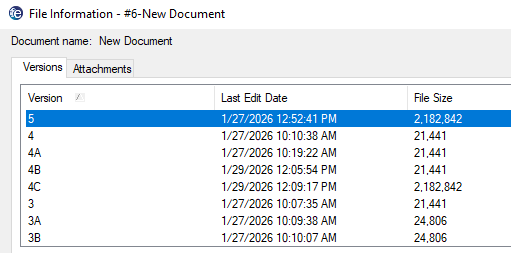
The New Document (Object Id # 6) in this case has 2 extensions: .pdf and .docx. The Exporter tool will split the exported document into 2 files, each with its own version numbers.
|
Do not keep versions with different extensions |
Split versions with different extensions to separate files |
|
Use Case: You do not wish to keep the versions with different file extensions than the current version. In this case, the latest version's file extension is used, and all other versions with different extensions are skipped |
Use Case: You are exporting to SharePoint, and SharePoint does not allow mixed extensions for a single document object. This will automatically separate version extensions into separate documents by extension. |
|
Export Result: 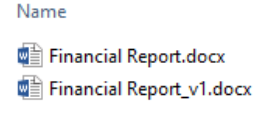
|
Export Result: 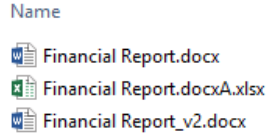
If you are using metadata.csv, in this case, the export will create separate line items for each extension type. The child documents will maintain the same Category metadata and Created Date as the parent document. In the metadata file, the Child document name will have “- VER A” appended, starting from letter A, descending for each unique extension if you enable that optional setting. |
Versions with Mixed Extensions – Recommendation
The recommended best practice is to use the setting “Do not keep versions with different extensions” where possible. This will ignore all versions with different extensions. This works well when the mixed extensions case is rare, and you only care about the newest document versions anyway - then this is the simplest approach.
In the case that you are migrating to SharePoint and MUST preserve all versions, only then should you use the setting “Split versions with different extensions to separate files”. This will guarantee that all document versions are exported for SharePoint use and will allow the versions with different extensions to be loaded as separate documents altogether, since SharePoint does not support documents with mixed extensions/mime types.
eDOCS DM Server as Source for SharePoint Destination – Version Notes
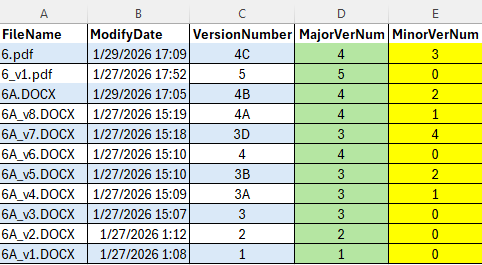
The eDOCS Exporter will preserve all original eDOCS Libraries’ version #’s (major -1.0, 2.0, etc., and minor – 2A, 3B). If you are migrating to SharePoint Online with Morae Migrate MAPIT for M365 – the original version #’s from eDOCS will automatically be preserved in the SharePoint version history comments along. For regular major and minor versioning, this will be mapped in SharePoint to major and minor versions, respectively. The original major/minor version # scheme will be shown in the SharePoint version history.
An example of how the eDOCS Major and Minor versions (column C) would be translated to SharePoint automatically by Morae tools. The column in green represents the SharePoint Major versions, and the column highlighted in yellow represents the minor versions in SharePoint.
Version Created By
Note: By default, when using Morae Migration Tools to migrate to SharePoint, the original version created by the comment will be preserved in SharePoint. Morae tools will automatically add the Created By comment into the SharePoint version history comments if the user is no longer in Active Directory or does not map to Active Directory.
Enable Character Replacement
-
eDOCS Libraries supports many characters that are invalid on a network file share. This setting allows one to replace invalid characters with valid characters in the exported location when it is enabled.
-
By default, the main common replacement characters are already included in the Character Replacement list
-
If you need to add additional character mappings, you can add them from the <eDOCS Install folder> – by editing the CharacterReplacementMappings.xml file and adding the corresponding character replacement entry.
Warning -Adding additional char code replacements will have an impact on performance since it takes effort/cycles to do the replacement checks. We recommend only adding the necessary replacement entries to ensure optimal performance is achieved.
Upgrading - When uninstalling an old version of eDOCS Exporter Tool and then installing a new version, if you have custom CharacterReplacementMappings.xml files for char or hex replacements, you must copy those files out first - otherwise, upon uninstall, the files will be lost. Upon installation of the new version, you can copy the corresponding CharacterReplacementMappings.xml files back to replace the default char files, which preserves your custom replacement mappings.
3.4.4 Run Analyze
Perform pre-export analysis, click the “Analyze” button
-
This step performs an analysis of your planned export, identifying potential issues with your export.
-
The analyst can review the analysis log to determine if any actions are required to fix issues prior to performing the export.
-
Summarizes a list of object types that are not supported if discovered in the path.
-
A log file is generated that summarizes the results of the analysis.
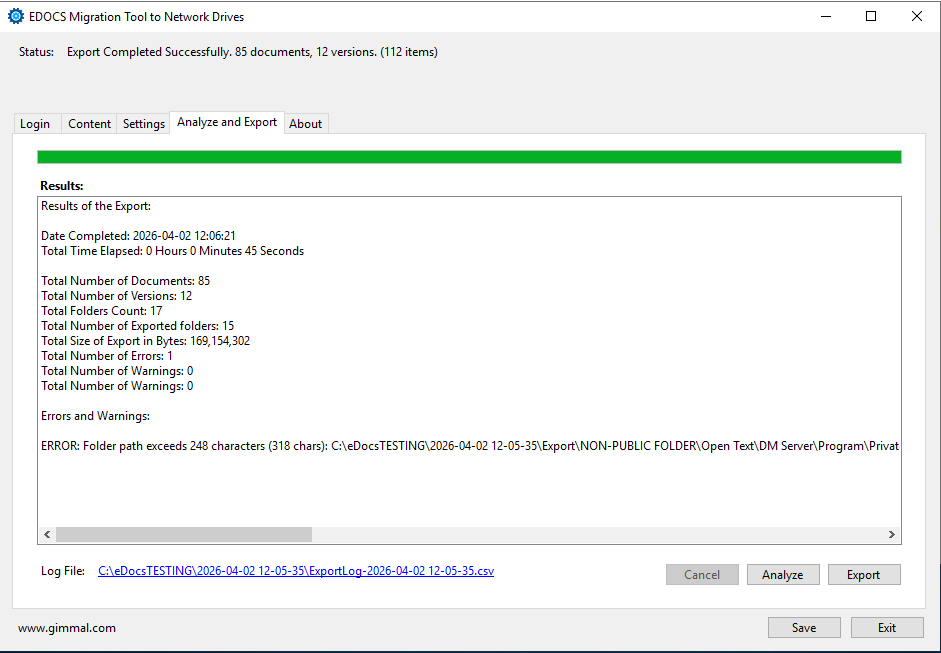
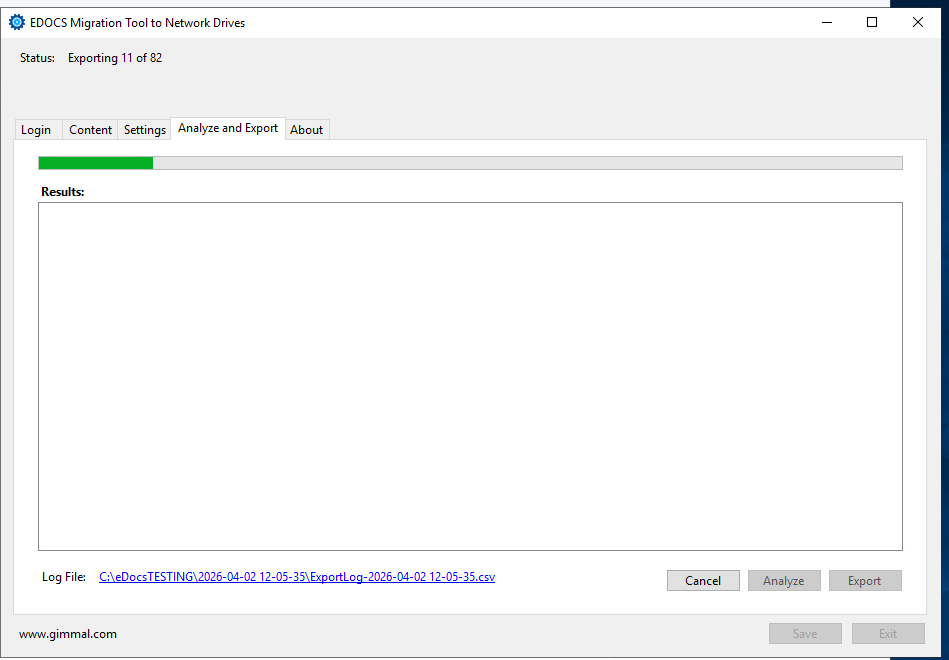
3.4.5 Run Export
Click the “Export” button
-
The export will start
-
If timestamp is enabled, a new folder is created in the export location named with a time stamp (e.g. YYYY-MM-DD HH-MM-SS
-
The export output is contained in the created folder (export location)
-
The progress bar will indicate the progress of the export
-
The status bar will indicate the # of items currently processed
-
When completed, the status bar will indicate completion and the # of items processed
-
A log file is generated in the root folder (ExportLog.csv)
-
The log file contains detailed logging of operations and logs successes or failures
-
The log file can be used as an audit/proof of export, as well as for validation purposes
-
You may interrupt and cancel an export by clicking the “Cancel” button at any time
-
Please be aware that if you click the Cancel button, the operation is stopped and will need to be restarted from the beginning
-
The Results pane will display a summary of the export and any errors or warnings that may have been encountered: