Policies are used to assign workflows to data owners and devices on a schedule. Workflows contain the actual instructions that act on the data that Discover is configured to manage. Policies direct workflows on where and when to execute.
Viewing Policies
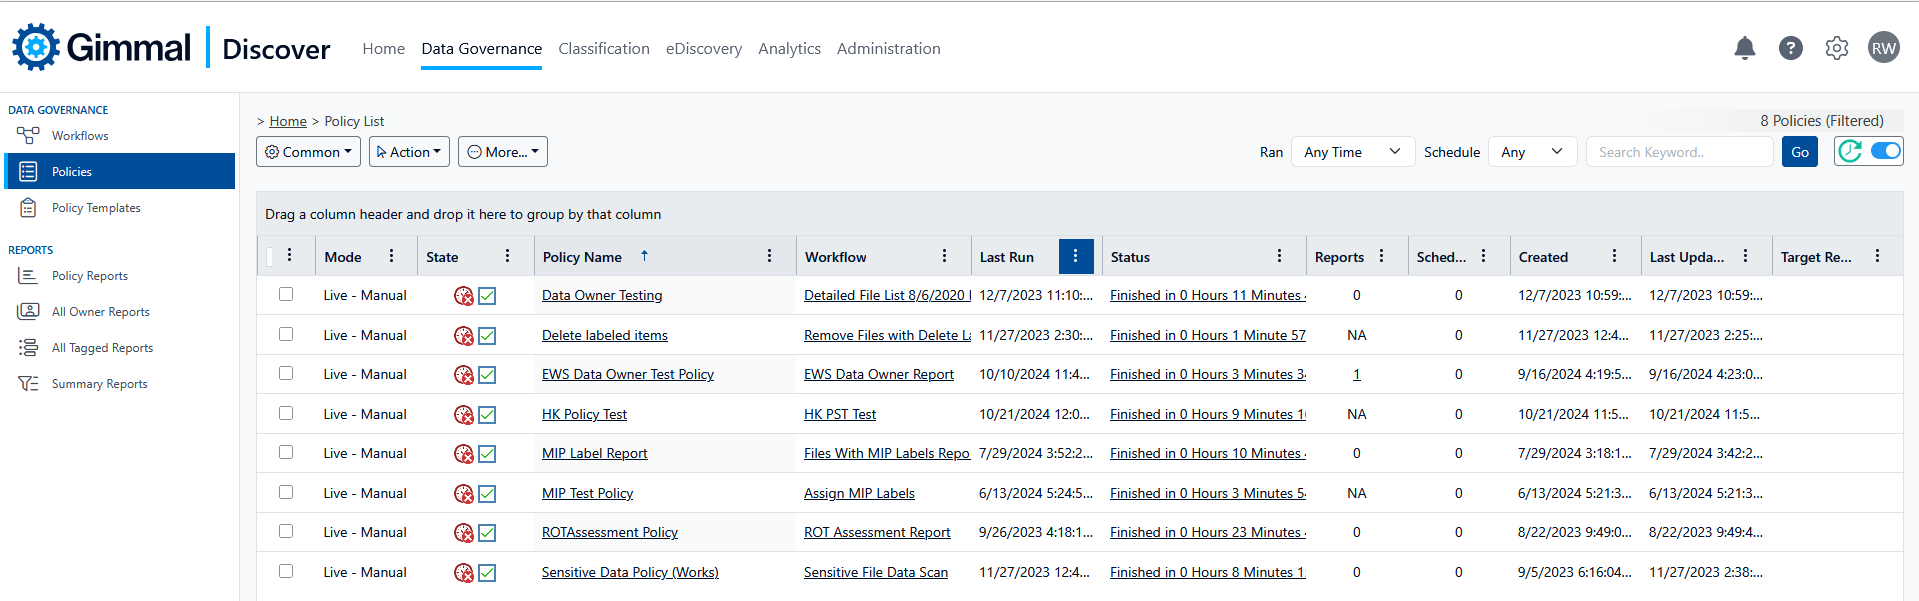
Selecting Data Governance, then Policies will display the list of currently defined policies.
The details available from this view describe the Policies and their status.
-
Mode - The various modes the policy can have: Live versus Test, and Manual versus Scheduled.
-
State - The Scheduled mode of the policy, green indicates scheduled and red indicates not scheduled
-
Policy Name - The user-assigned name of the policy
-
Workflow - The workflow used with the policy
-
Last Run - date and time of the last policy execution
-
Status - The current execution status of the policy
-
Reports - The number of reports generated by the last policy run
-
Schedules - The number of schedules assigned to this policy
-
Created - date and time the policy was created
-
Last Updated - The date and time the policy status was last updated
-
Target Report - an indicator to show that a complete data target report showing all of the content affected by the policy
Selecting the policy name will load the policy details in edit mode. Selecting the workflow name will load a detailed view of the workflow.
The toolbar for Policies contains the following options:
-
Common
-
Select All - Select all policies
-
Clear All - Clear selection of all policies
-
Reset Grid - Reset the view back to the default, such as all columns being viewable
-
Export to CSV - Export the list of policies to a CSV file
-
Refresh Grid - Reload the grid showing any changes
-
-
Action
-
Add - Create a new policy
-
Add from Template - Create a new policy from a template
-
Edit - Opens the policy to allow modification
-
Delete Policy - Removes the policy
-
Start Policy - Executes the policy immediately, whether the policy is set to run on a schedule or not
-
Stop Policy - Stops a currently executing policy. It may take a few minutes for the policy execution to stop and cleanup at the client machines
-
Request Logs - Sends a request to the Agent running the policy to retrieve an 'in process' version of the log file. Note, this request is not sent to the Agent until its next scheduled check-in, so it may take some time for the log to be available
-
Generate Target Report- Build a report showing all of the content areas affected by the policy
-
Share Policy - By default, a policy (and its results) are private to the Discover user who created it. If you wish to share the policy with other members of your team, use this link to grant them access. You can select individual users or opt to share to policy with all users.
-
-
More
-
Policy Detail- Displays a few high-level policy details in a pop-up dialog
-
Policy History - Opens the policy history view to display a complete execution history of the policy and the workflow it calls
-
Creating a Policy
-
Hover over the Action button and select Add
-
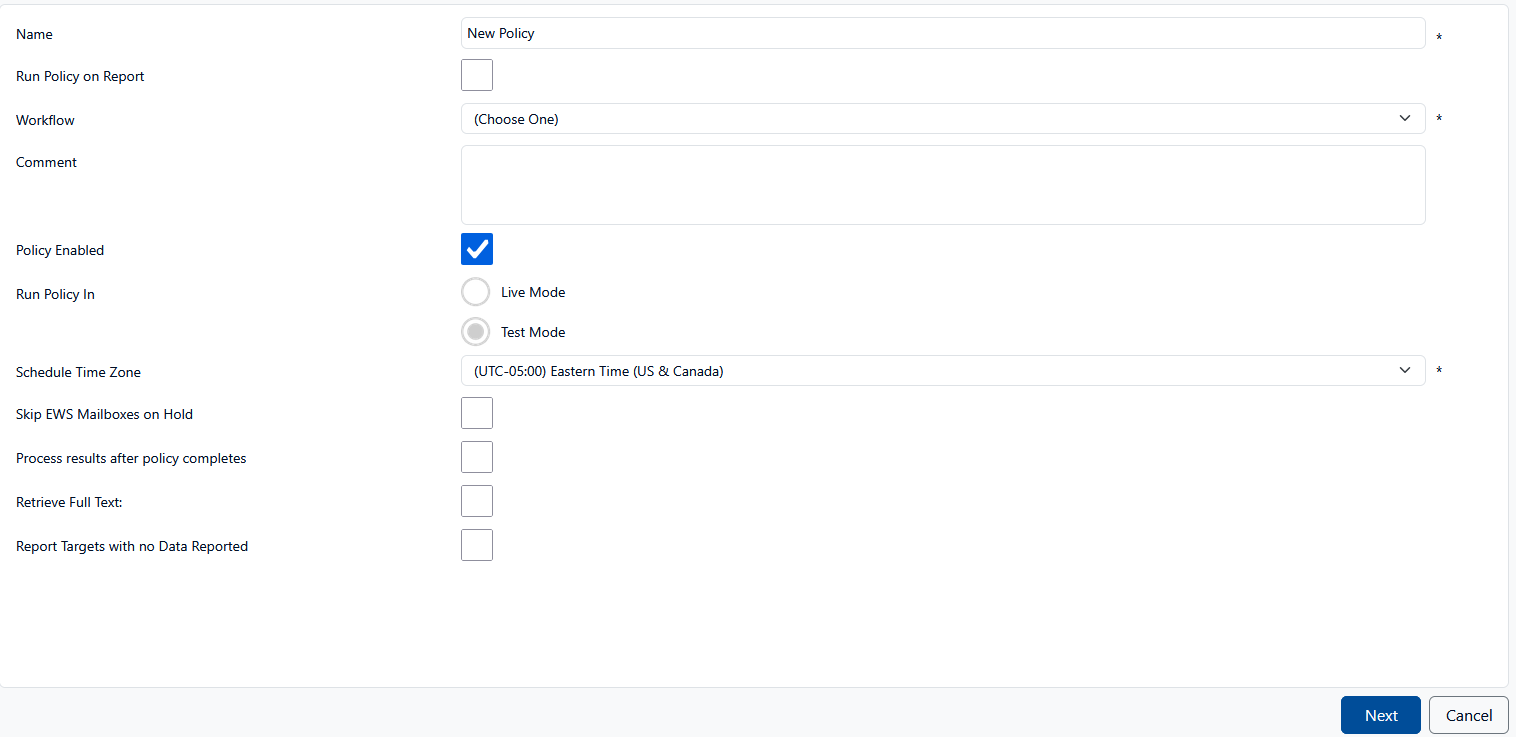
Complete the fields provided:
Name - A user-assigned name for the policy. The value defaults to "New Policy," so you'll want to give it a more descriptive name
Run Policy on Report - When using the Advanced Reports option, items on a policy report may be marked for further processing (I.,e. to be deleted). If this policy is intended to apply those actions, select this check box. Checking the box will open a new option where you may select the report that contains the items to be processed.
Workflow - Select a workflow from the drop-down menu. Workflows define the core functionality of a policy and exist in a separate workflows view. These are constructed either by using the wizard on the web or by using a special tool, the Workflow Builder. A single workflow can be assigned to multiple policies, to run on separate schedules, or to impact different targets.
Comment - A text field to track any specific comments you may choose to indicate for the policy
Run Policy In - Policies can be run in one of two modes: Live or Test. In Test Mode, no destructive actions will be performed against your data, such as deleting or moving email messages or other documents. Live mode will perform all the actions.
Schedule Time Zone- This option allows you to choose the time zone where this policy will be applied. It will be used in conjunction with the scheduled time of the policy to kick off at the appropriate time in the selected time zone. This field defaults to the time zone setting for the current user (set in the Discover dashboard). If a time zone default is not set, the application will default to UTC.
Skip EWS Mailboxes on Hold - If this policy includes Exchange 2016 or Office 365 mailboxes that have been placed on Litigation Hold in Exchange, automatically exclude them
Process results after policy completes - if a workflow timeout has caused the policy to end in the data center, accept late reporting results from agents
Retrieve Full Text - if the policy generates a report, export the text of the report items and store them in the cloud
Report Targets With No Data - keep track of any Agent that does not complete the policy, and store that list for review -
Select the Next button to add Targets to the Policy
-
Hover the Action menu and select one of the following:
Add Members - Assign people, devices, or groups to the Policy.
Add Non Owned Targets - Assign Data Targets that are not already owned
Delete Targets - Delete any Member or Target selected -
Select the Next button to add the schedules for the Policy
-
Hover the Action menu and select one of the following:
Activate Schedule - Activate the schedules selected
Deactivate Schedule - Deactivate the schedules selected
Add - Define a regular schedule when the policy will execute
Edit - Edit the selected schedule
Delete - Delete the selected schedule -
Select the Next button to add Shared Users
-
Hover the Action menu and select one of the following:
Add Members - Select other users to share the policy with
Delete Members - Delete selected shared users -
Select the Create button to create the Policy
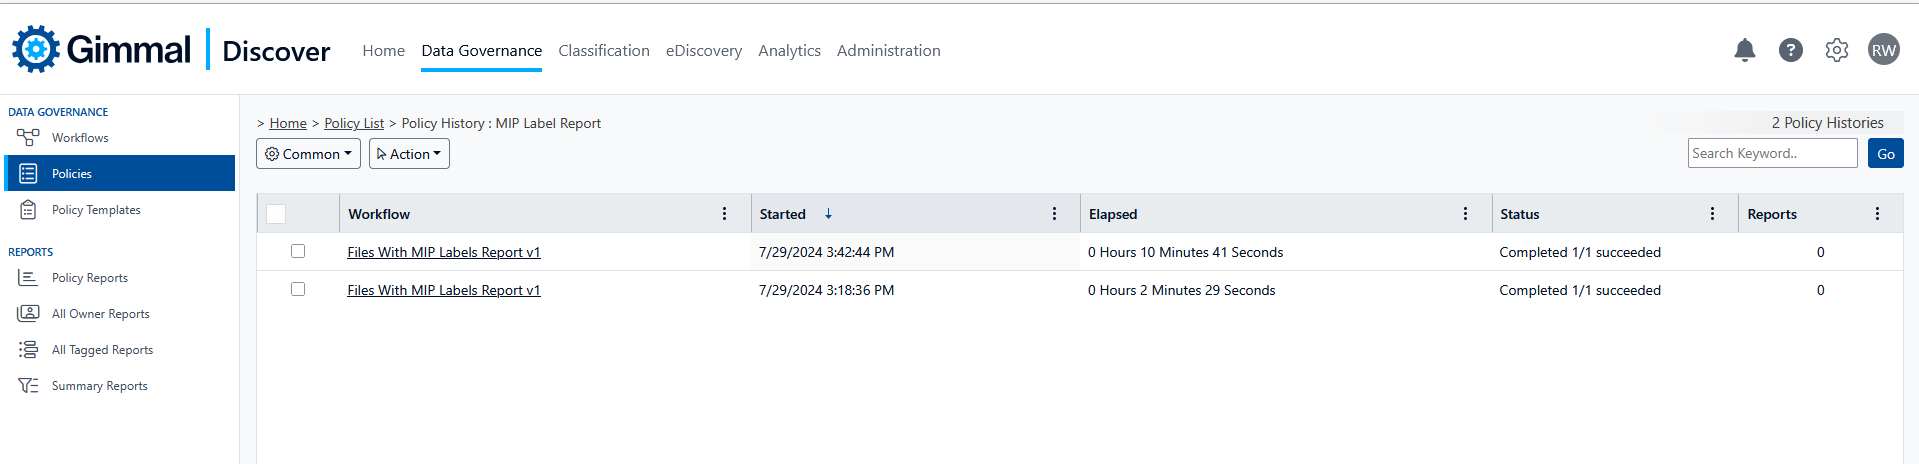
Viewing Policy History
Select a policy on the policy list screen, and hover the More button on the toolbar. Select Policy History, and a list of every instance that particular policy has been run will be displayed. In this view, each row represents an individual execution of the Policy.
View Workflow Executions
While still viewing the Policy History, select the Workflow column on a particular row to view each Data Target the workflow executed on.
Once in this view, you can hover the Action button to see the possible actions to take on selected Data Targets:
-
Restart Policy for Failed Target - Retry the workflow on the selected Data Targets
-
Cancel Policy - If the Workflow is still executing on a Data Target, this will cancel it
-
View Log - View the execution log for the Workflow
-
Download Log - Download the log in text format