Introduction
This guide describes the process for installing the Discover OLEDB Agent. This Agent may be used to search content inside a variety of structured databases including Microsoft SQL Server, PostgreSQL, MySQL, and Oracle.
There are two ways to install any Discover agent, either through the Connector setup utility (typically used on new machines) or by adding an Agent through the Discover dashboard (typically used on devices where a Connector is already in place. This guide describes the latter process of adding an OLEDB Agent to a machine where a Connector is already in place.
Pre-Requisites
Successfully connecting to and searching a database using Discover's OLEDB Agent requires compatible driver software. The driver should be installed on the machine where the database server is running. Below is a list of download links for the OLDEDB drivers required by the Discover Agent (note: these links were current at the time this document was created).
Microsoft SQL Server.
Microsoft Access
PostgreSQL
Oracle
After downloading the driver, please follow each vendor's recommendation for installing their software.
OLEDB Agent Installation
-
From the Discover dashboard Home page, click on Administration, open the Configuration section in the left-hand navigation pane, and click the Connectors link.
-
Choose a connector by checking the appropriate box.
-
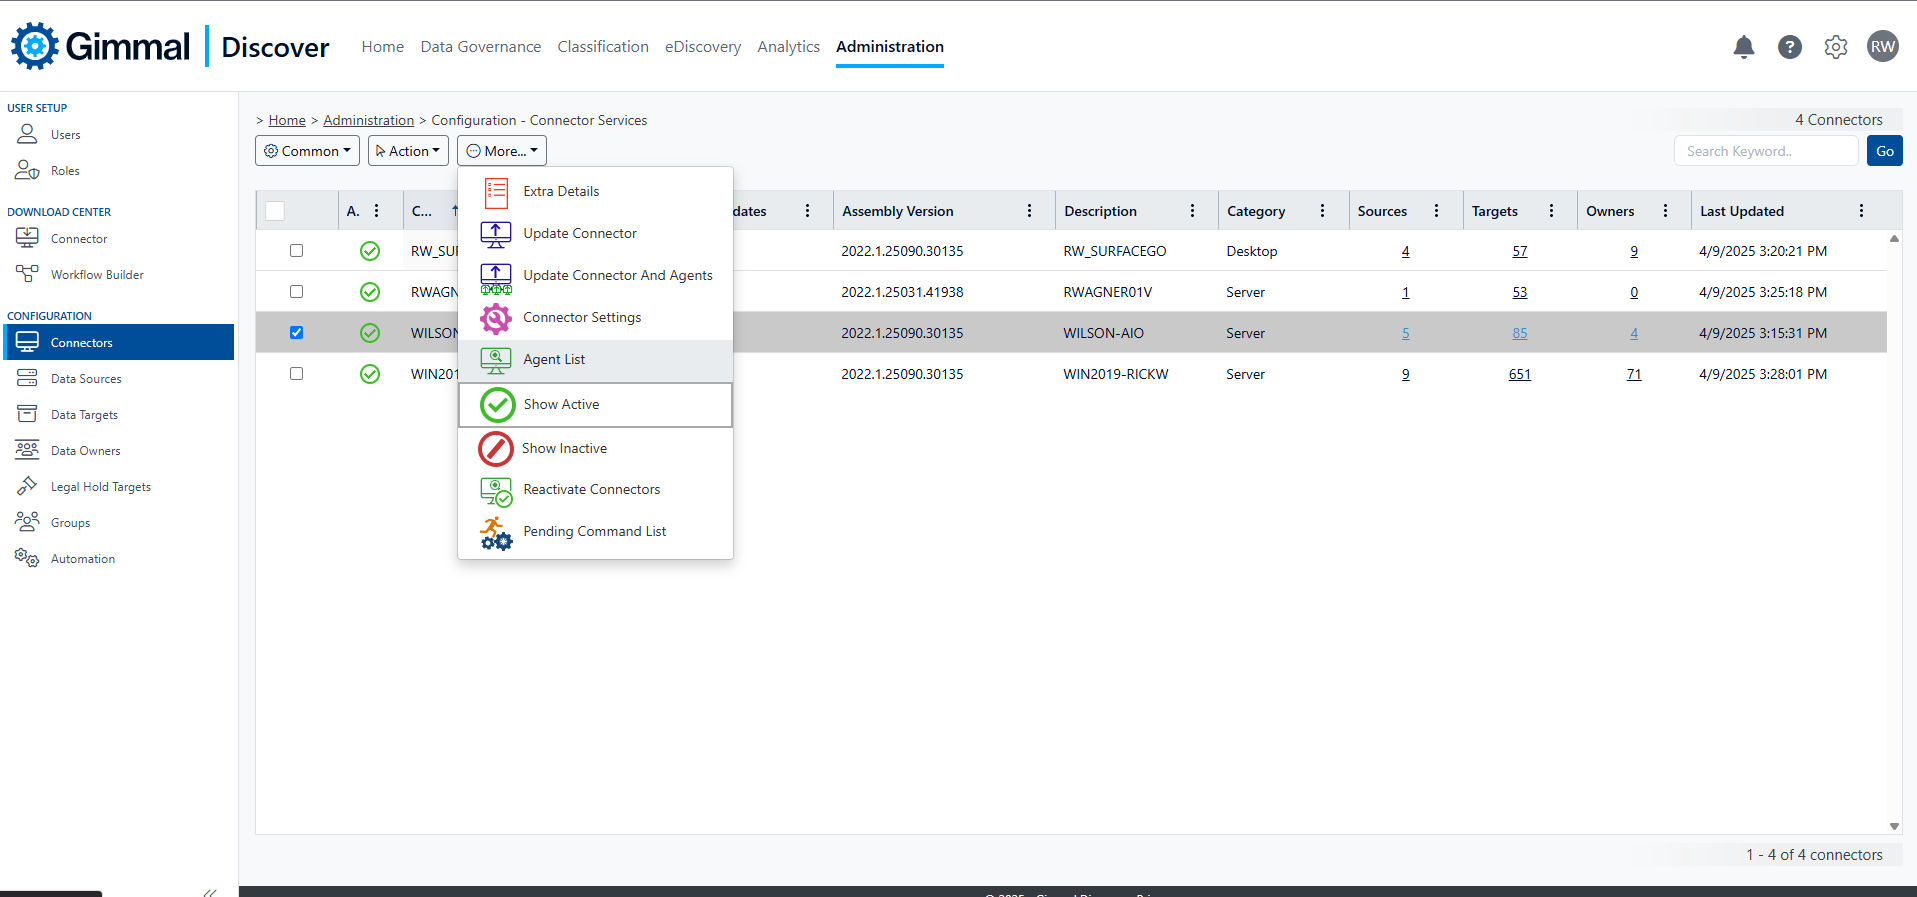
Click on the More button and choose Agent List.
-
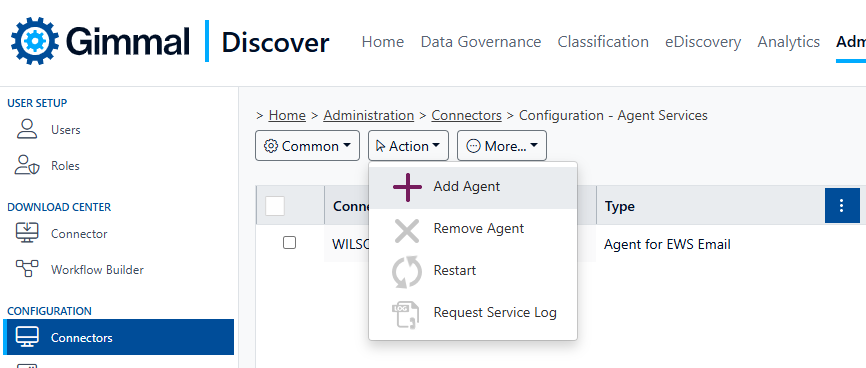
Click on the 'Action' button and then select the Add Agent link.
-
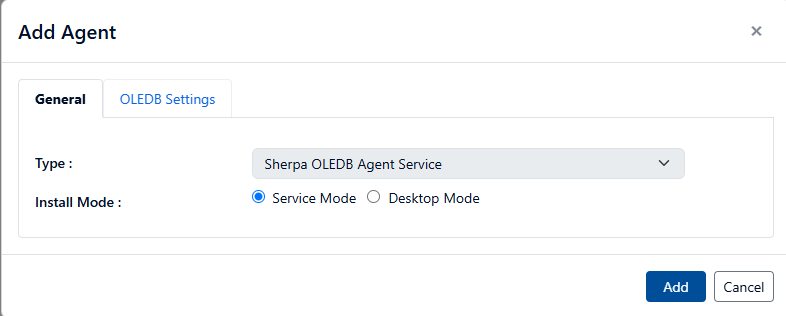
Select the OLEDB Agent Service from the list of available agents
-
Next, click on the 'OLEDB Settings' tab
-
Select a database type from the drop-down list and supply a valid connection string. Connection strings provide the details necessary to establish a connection with a database server. Here is an example of a SQL Server connection string; the parameters shown in BOLD must be supplied based on your installation.
Provider=SQLOLEDB;Data Source=SERVER\INSTANCE;Initial Catalog= %InitialCatalog%;User ID=XX;Password=XXXX;PersistSecurityInfo=True
Here is a useful link to a site with connection string examples. After supplying the connection string, click 'Add' to start the Agent installation.

Do not specify a database name - use %InitialCatalog%, when the Agent scans your database server, it will return a list of every database found as a separate data target.
To help speed up the installation of the OLEDB agent, there are two options:
-
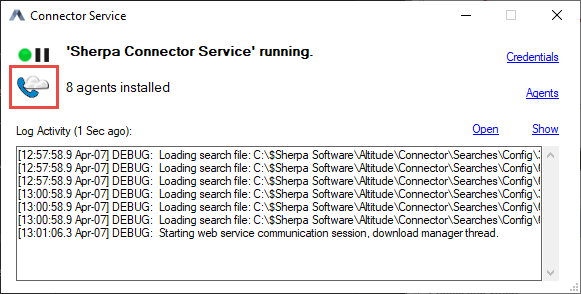
Shutdown and restart the Connector service
-
Use the Connector Status Tool to initiate a check-in by clicking the 'phone home' button.
After the OLEDB Agent is installed, add a Data Target search to locate a list of databases for Discover to manage. To create and view searches to be performed by agents associated with connectors, browse to Administration → Connectors, hover over the Action button, and select Searches.
On the Searches window, click the Action button, then select Add.
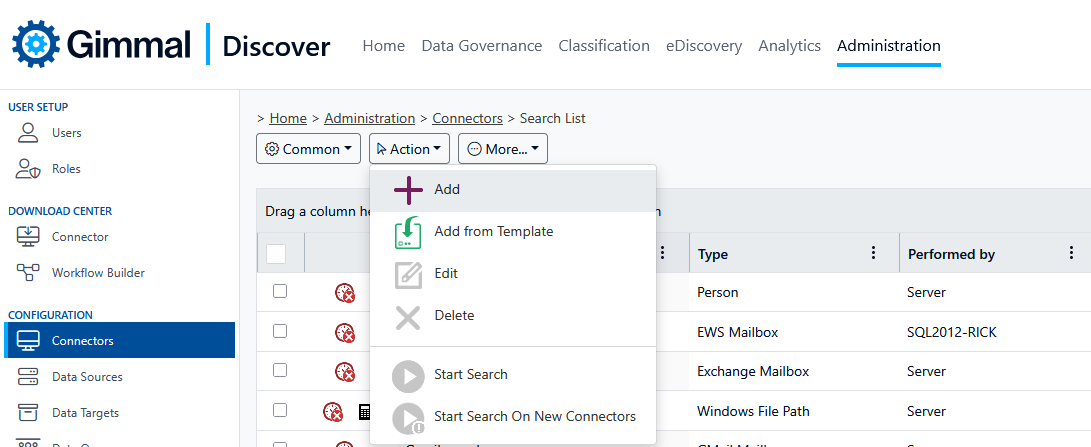
The Add Search dialog box will be displayed, allowing you to specify the Data Target search options.
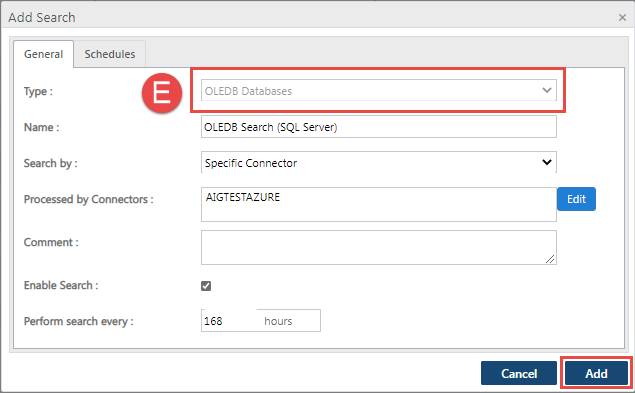
Choose 'OLEDB Databases' in the Type from the drop-down list (labeled as E in the screenshot below), fill out the appropriate fields, and click the 'Add' button. After the search is added, click Action once more and select the Start Search option to queue the search
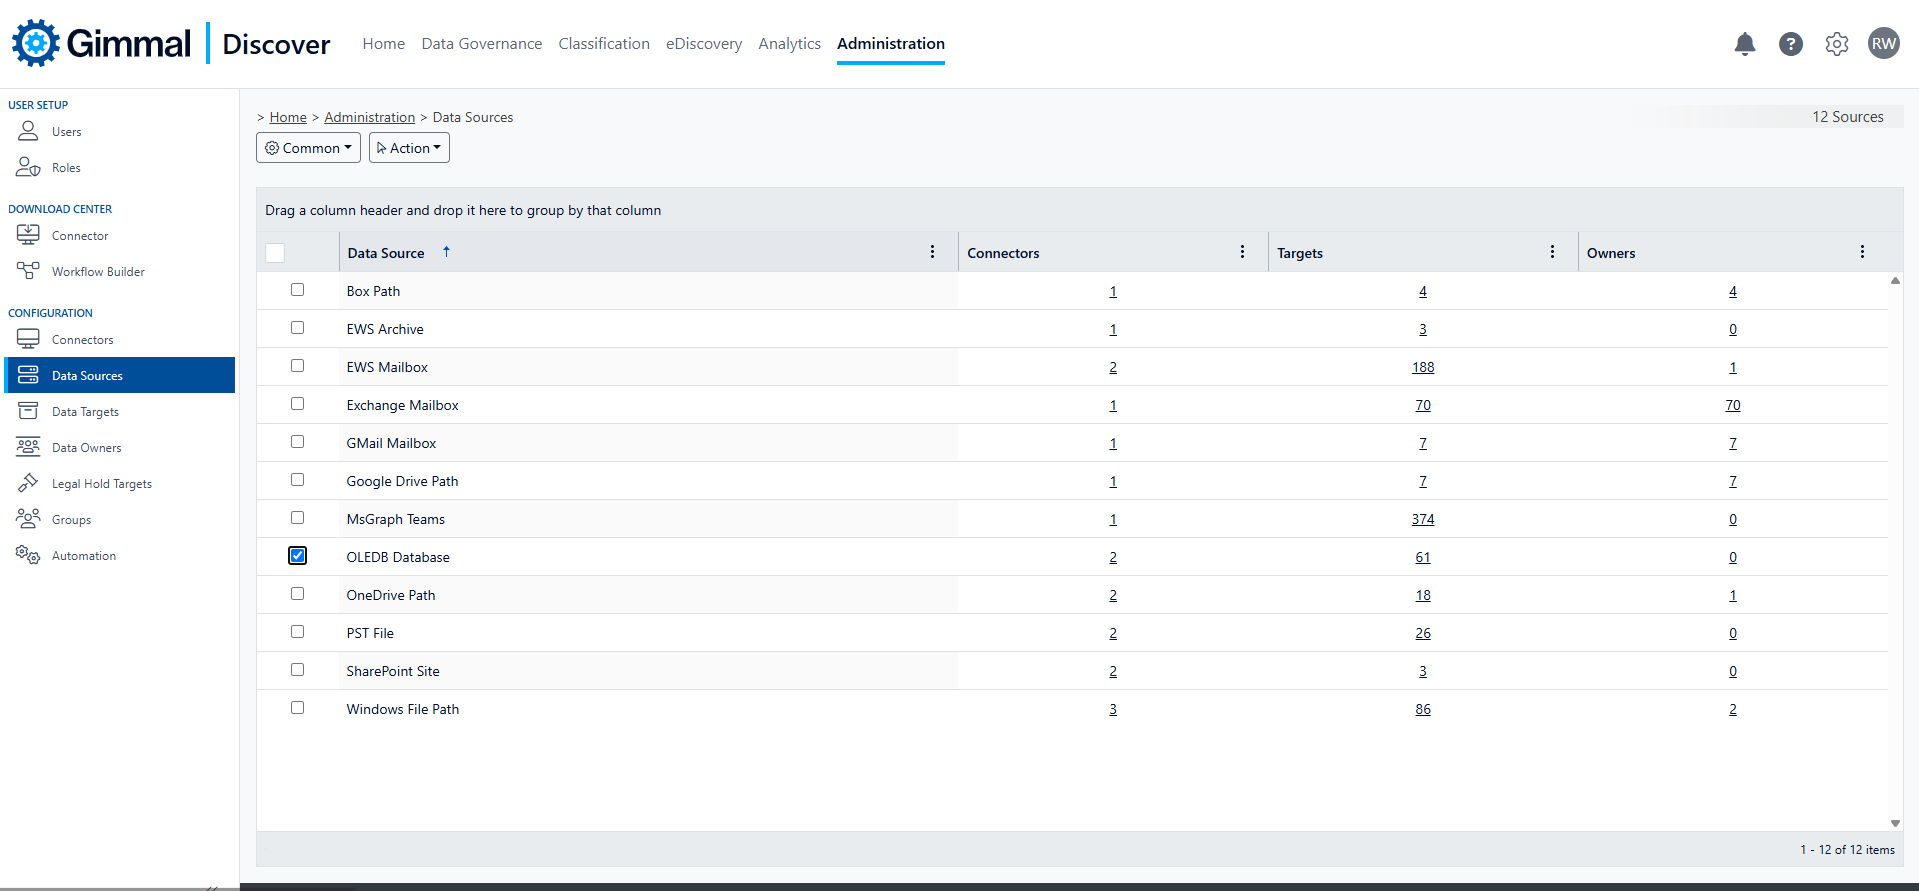
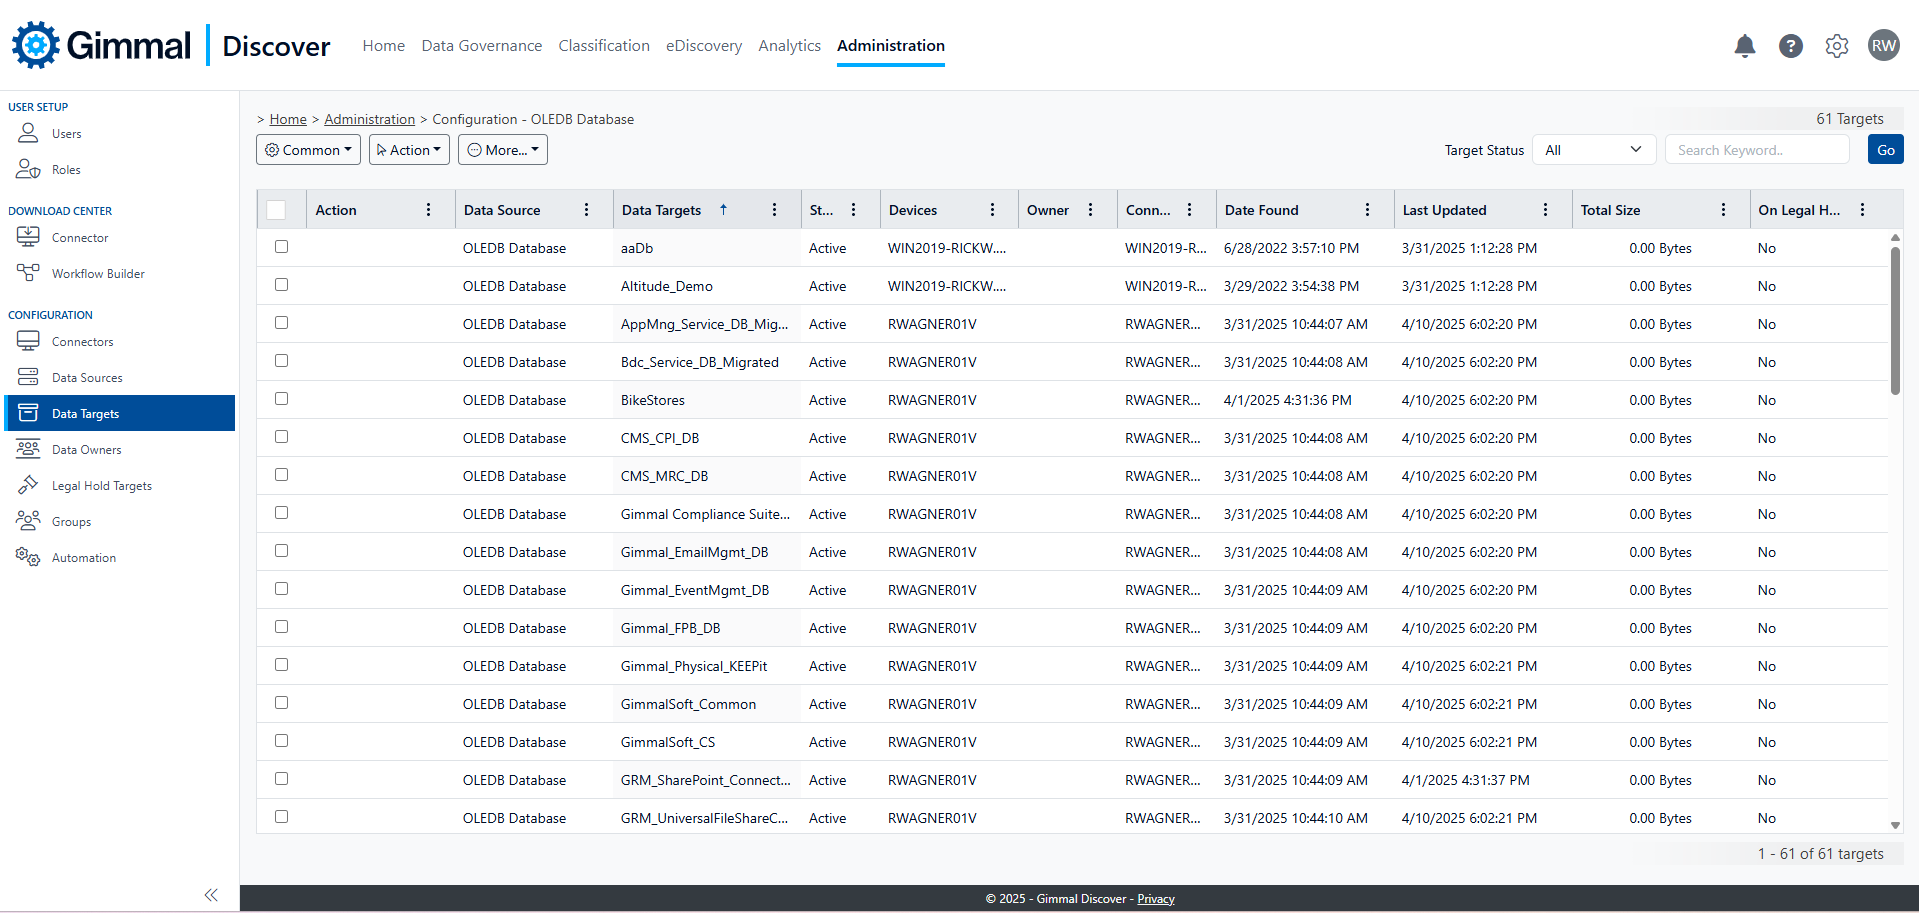
After the data target search completes, OLEDB Database should appear as a data source in the Discover dashboard. The value in the targets column indicates the number of databases that Discover located
-
Clicking on the number shown in the Targets column of the grid will display a list of the databases that Discover has successfully located
After database Data Targets are added to Discover, they may be managed within the Data Governance module like any other content source by creating a workflow and executing that workflow from a policy. Keep in mind that to preserve referential integrity, OLDEDB workflows only support a reporting action.
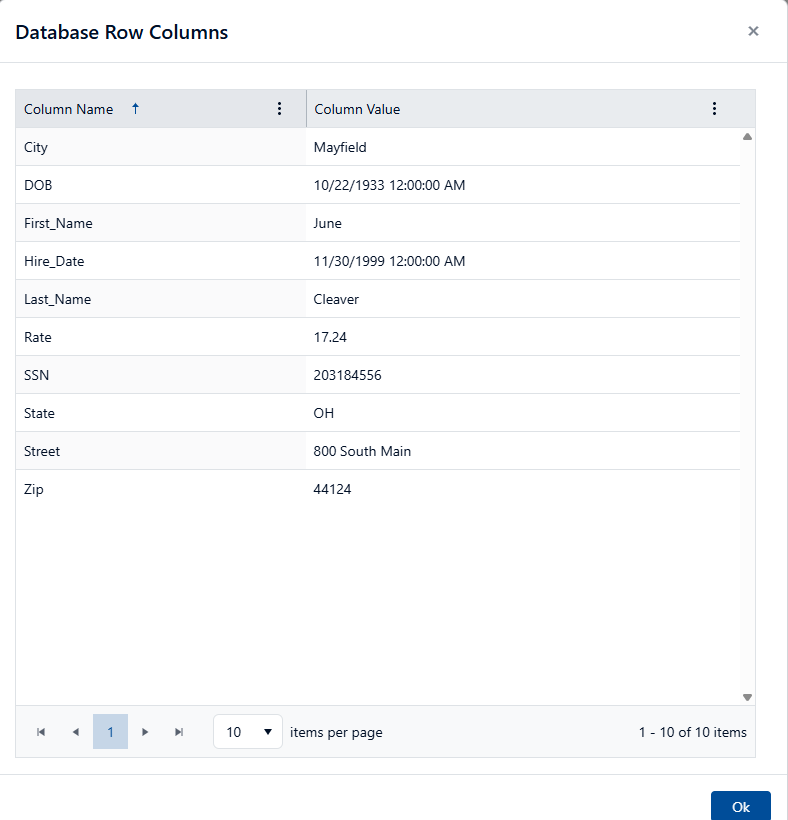
When Discover generates a report, it will list the rows in the database that matched the defined search criteria (i.e., locate Social Security numbers).
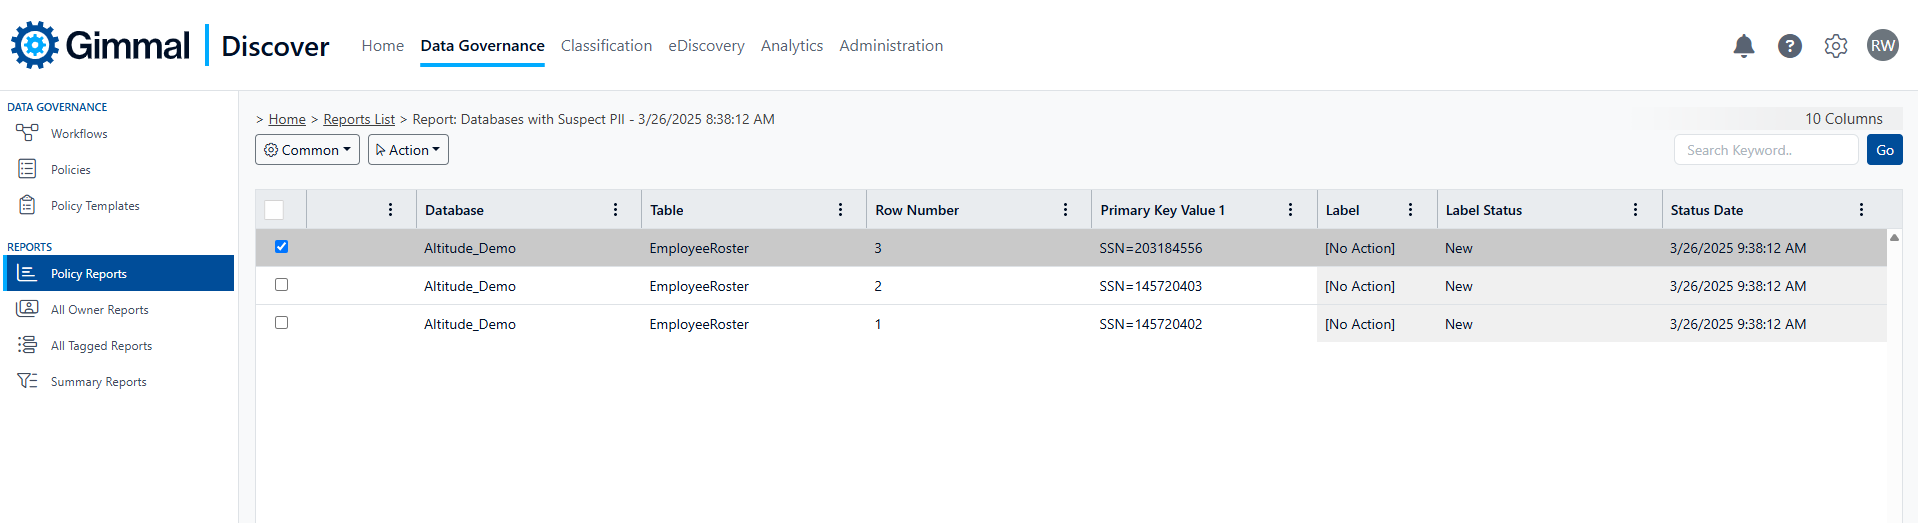
To obtain more details about a specific report row, select that row, then hover over the Action button and select ‘View Row Columns’.
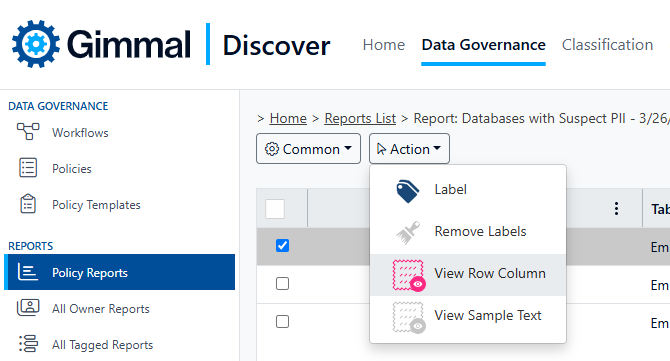
This will provide more specifics about the column(s) in that row that matched the defined search criteria