
Installing the Discover Mac File Agent
Dependencies:
-
The Discover file agent supports Mac OS X versions Monterey and Big Sur on both Intel and Apple M1 chipsets.
-
Like the Windows version, the Mac installer includes a Connector Service to handle communications to the Discover cloud from the File Agent.
-
The Agent also requires Microsoft .NET 4.8 or above, which will be installed automatically.
-
The Gimmal components have been Apple notarized and should be recognized as valid applications for the Mac
-
This version supports all modules (Data Governance, Classification, eDiscovery) for file content only, email is not available.
Getting Started
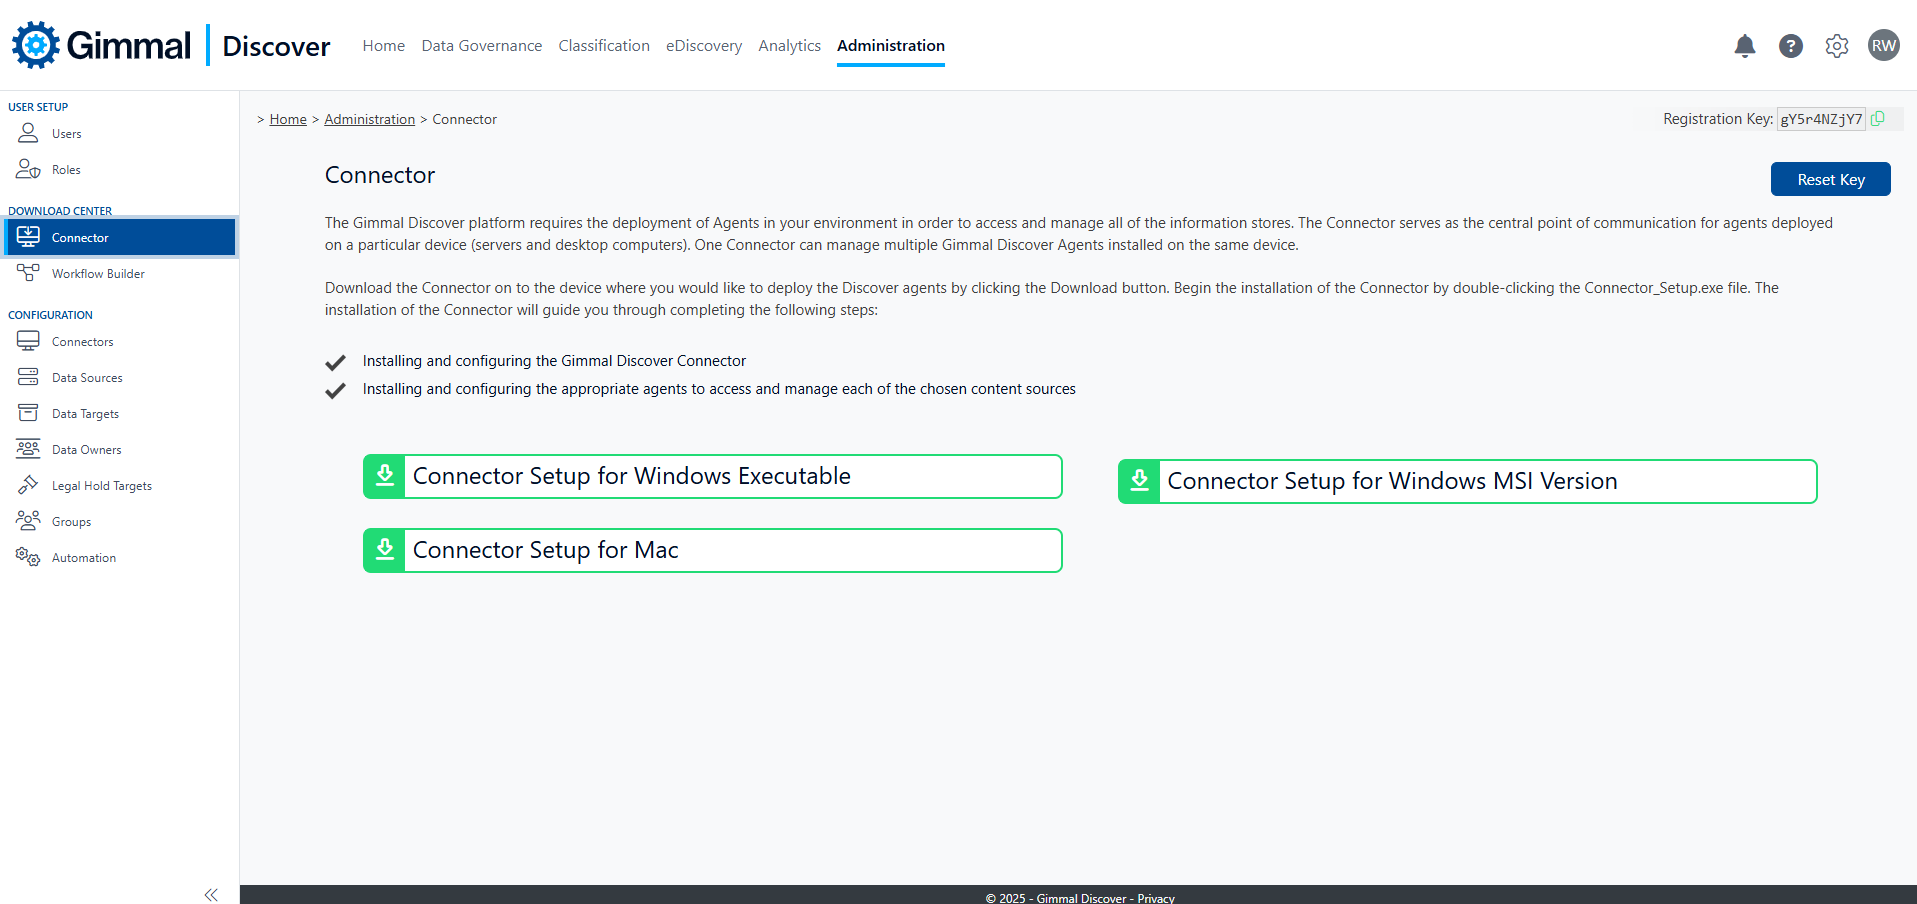
Log in to the Discover web dashboard, select Administration then Download Center and Connector in the left-hand navigation pane. This will display a page that includes the download link for the Connector for Mac, click this link to download the PKG installer. While on this page, make a note of the Registration Key located on the upper right-hand side of the page, it will be required later in the installation process.
Installation Steps
Launching the PKG installer will start the installation wizard.
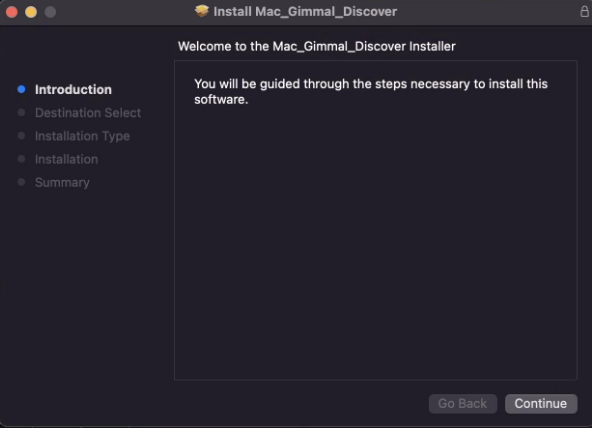
Click the Continue button
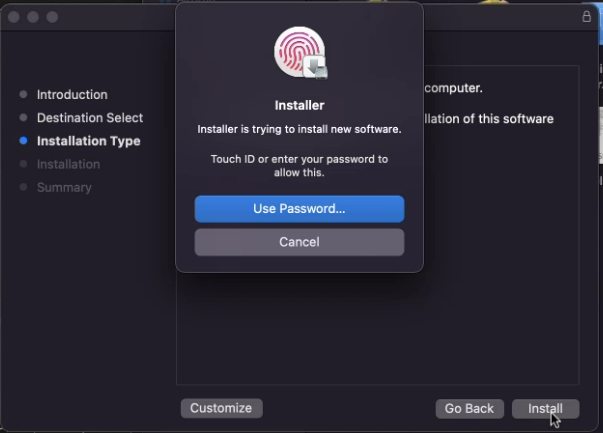
Gimmal recommends accepting the default values for installation, however, the customize button will allow you to change the default installation location. Click the Install button to continue.
At this point, you may receive a security prompt. Either enter a valid password or use a biometric authentication option to continue.
The installer will now begin copying files to the appropriate locations
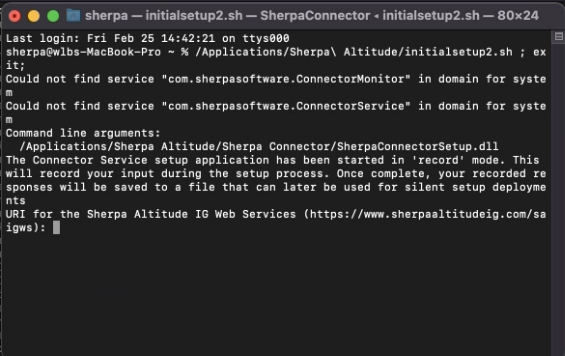
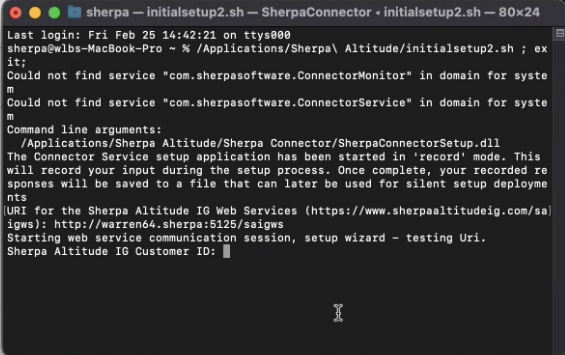
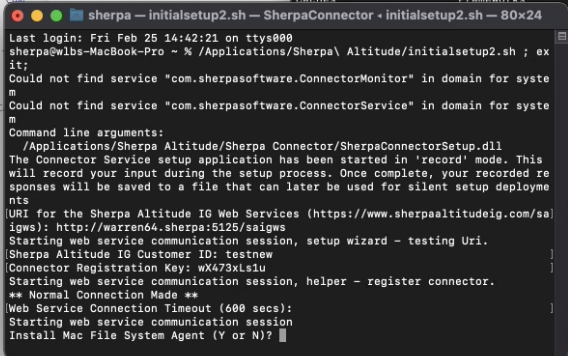
Once the files are in place, the installer will prompt for a URI for the Discover cloud components. This URI is typically: https://discover.gimmal.cloud/saigws. Supply a valid URI and press Enter.
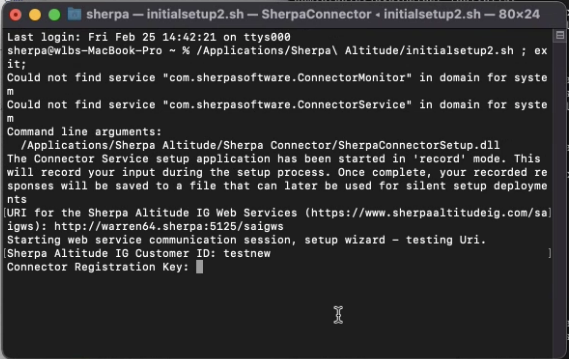
The Connector service will attempt to establish a connection with the Gimmal Discover cloud. If that is successful, you will be prompted for a Customer ID. Supply that information and press Enter.
Along with the Customer ID, you must supply the registration key. This value was found on the Discover web dashboard where you downloaded the Mac setup utility.
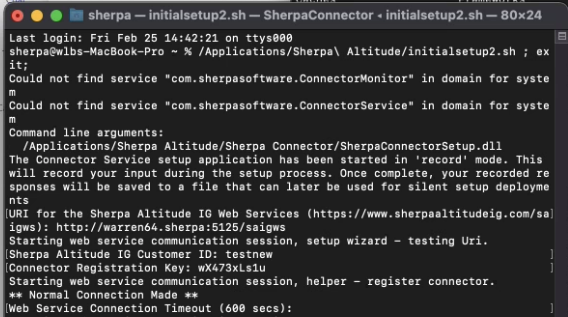
At this point, the installer will attempt to establish a connection to the Discover Cloud and verify the registration information. If that process fails (for example, the registration key is incorrect), the install script will end and will require manual intervention. To continue, change to the folder /Library/LaunchDaemons and carefully remove the Sherpa plist files found there. Once this is complete, restart the Connector setup utility and try running the installation process once more.
The Connector service will automatically poll the Discover cloud every 14400 seconds (4 hours). You may change that value to as little as 900 seconds (every 15 minutes) or leave the default in place. Note: The 600 seconds shown in the prompt is simply a reminder that this value is expressed in seconds. Supply a new value or press Enter to accept the 4-hour default (this check-in frequency may be changed at any time from the Connector Settings area in the Discover Dashboard
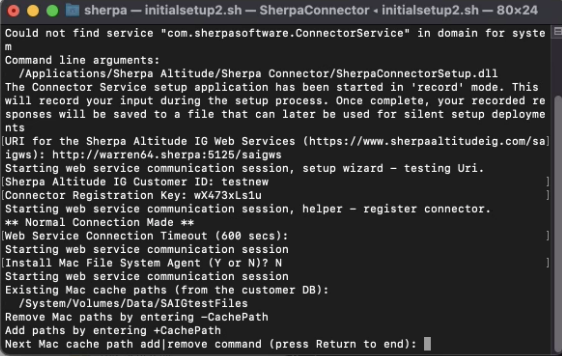
With the Connector successfully installed and communicating, you will be asked if you wish to install the File Agent. Press Y then Enter to start the Agent install process.
If you plan to perform eDiscovery using the Mac File Agent, you can specify a cache path. This step is optional and is only relevant if you plan to select caching for eDiscovery search results. To enter a cache location, use the syntax indicated. For example,
/Library/Application Support/ Sherpa Software/ Altitude/eDiscoveryCache/
If a cache path is not required for your installation, press Enter to end the installation process.
Over the next several minutes, the Connector service will contact the Gimmal cloud, download the File Agent executable, and install it on the Mac.
On a new installation, it may take some time for the Discover Agent to show up in the Mac app list. Gimmal recommends checking the Discover web dashboard to make sure the Agent is showing as installed/available before attempting to update the security setting.
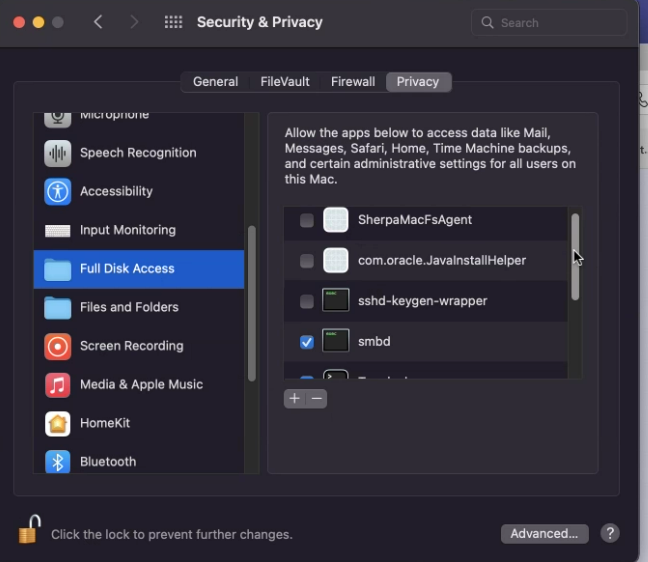
Once the process is complete, there is a final step required to grant the File Agent access to the Mac hard drive.
From the Security and Privacy center, select the option for Full Disk Access. Use the + sign to browse for the SherpaMacFSAgent, check the box to allow the Agent full disk access, click the lock icon to update that change.
Obtaining Mac Data Targets
After the Connector and Agent are successfully installed, they will appear in the Discover dashboard. Like other Discover content sources, a Data Target search must be performed to obtain a list of the local data targets on the device. From the Discover dashboard, select Administration/Configuration/Connectors, click the Action button, then select Searches. On the search screen, select the Action button and Add. From the type dropdown list, select the option MacFs Paths, then supply the remainder of the information. The search should resemble the example shown below:
.png?cb=e08e093ad33fe5290724aef65c66f174)
In most cases, user-created documents will be stored within their profile area on the Mac. For that reason, we recommend adding Users folder as the starting point of the Data Target scan by opening the Find Sub Folders tab and entering the path as shown below:
.png?cb=182b738641060844279615efb1ad59a5)
After entering the search options, click the update and run button to queue the search for processing. Once the search is picked up by the local Connector and executed, a list of local paths should show as Data Targets in the Discover dashboard
Performing a silent Installation
Clients with a large number of Mac devices in their environment may wish to install the Agent silently using a device management tool such as Jamf. During the install process described above, the steps were recorded in silent installation files to facilitate this process. To implement a silent install, follow the steps outlined below:
-
On a device where the Agent has already been successfully installed, open a terminal window session and Chdir to the location: \Library\Application Support\Sherpa Software\Altitude\Connector
-
Gather the files Silent.xml and SilentInstall.sh
-
To perform the silent install, distribute these two files along with the Connector Setup PKG file to a location on the target device
-
From that folder, launch the SilentInstall.sh command to configure the Agent
.png?cb=d289d1da4d9a3aae640dd4eacaa1138e)