Overview
Discover can perform indexing of network file shares. To accomplish this, Gimmal has linked the powerful dtSearch indexing engine with the File Agent. Although indexing does require additional resources in terms of disk space and processor capacity on the Agent device, it can dramatically improve the performance of Discover Data Governance policies and eDiscovery searches.
If you plan to implement Discover indexing, this document can guide you through the process by providing more details about the following topics:
-
Planning and configuration
-
Implementation
-
Using Discover Indexes in the Data Governance
-
Using Discover Indexes in the eDiscovery
Planning & Configuration
Like many advanced features, implementing Discover indexing requires some preliminary planning and configuration. As previously mentioned, the File Agent is responsible for creating, updating, and managing the index.
System overhead
The indexing process will benefit from having additional resources available on the system where the Discover File Agent is installed. For best performance, Gimmal recommends that any device hosting an index contain a minimum of 16GB of RAM and a multiple-core processor.
Locations eligible for indexing
Gimmal recommends confining the indexing process to content stored on network file shares. When entering the parameters to create an index, you must select a path. The list of possible paths is provided by the data target list on the device where the File Agent is installed. The index will recursively apply to all levels below the initial path that you select. For example, entering \\glacier. Sherpa\Marketing would index the content contained in all folders within and below the Marketing share.
To start the index at a lower level (for example, \\glacier.sherpa\Marketing\Trade Shows), you would first need to make sure that path was visible as a data target in the Discover dashboard.
Storage considerations
The default size of a Discover index size is 1TB, however, a Gimmal technician can expand that allocation up to 18 TB. For planning purposes, you should estimate that an index will occupy 15%-20% of the storage space that the source content occupies.
The index configuration options that you specify may impact index storage requirements. For example, including numbers, credit card patterns, etc., will make the index larger. Conversely, excluding file types that will not be searched (MP4, WMV, etc.) will result in a smaller size (see: Indexing Configuration).
For customers who wish to index larger amounts of information, Discover supports creating multiple indexes. During the indexing process, the Discover File Agent will monitor the size of the overall index. If the index in process reaches 99% of the 1TB limit, the indexing process will automatically stop and provide a log message indicating the index is too large.
File Agent Configuration
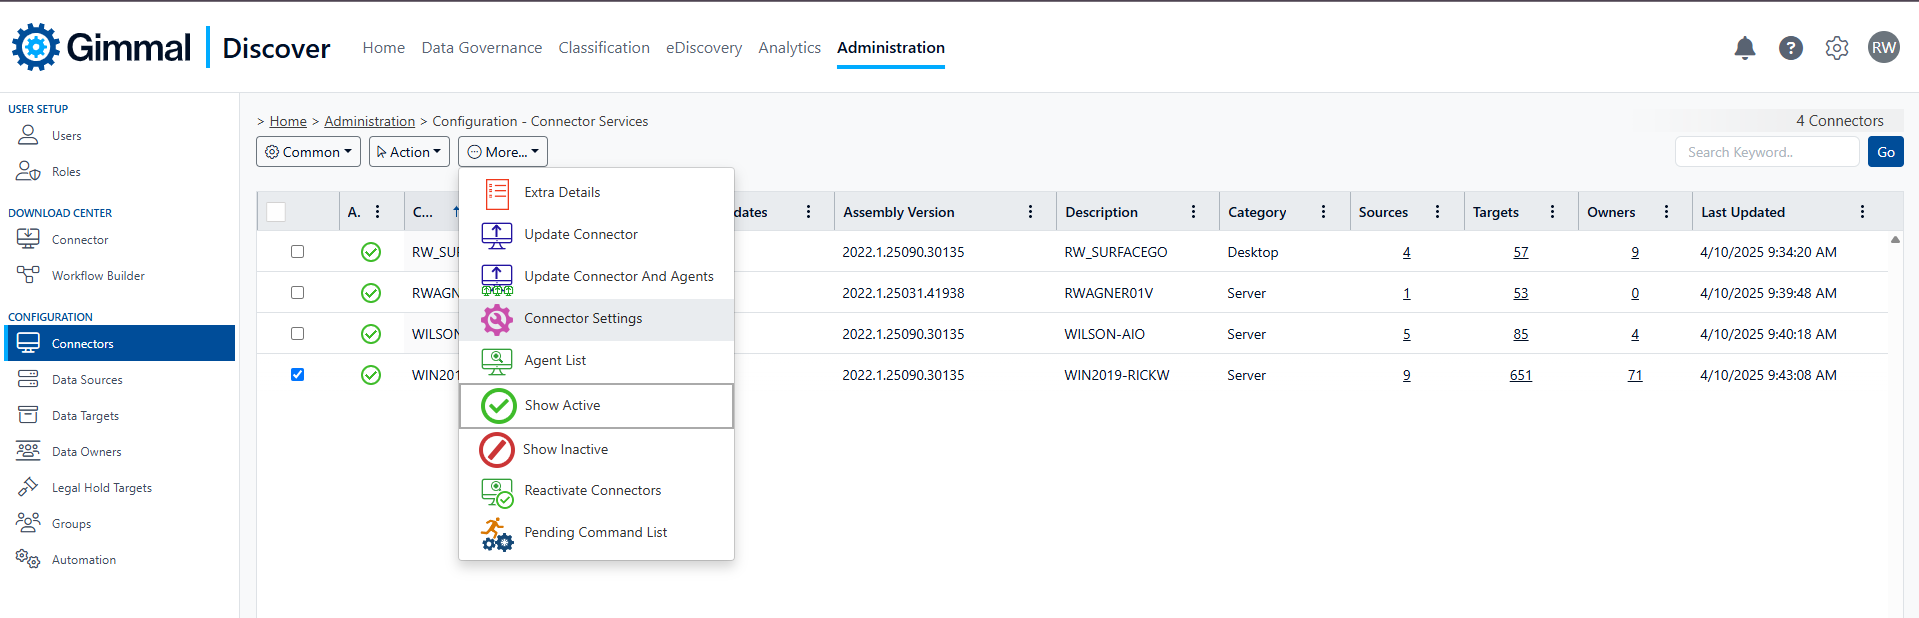
Before creating a Discover index, some File Agent configuration settings should be reviewed. These settings are accessible in the Administration area of the Discover dashboard by clicking on Configuration, then Connectors. From this screen, select a connector then hover over the More button and select Connector Settings.
Paths to Exclude
When scanning a broader set of data targets, there are often paths that you would like the File Agent to exclude. This agent setting will exempt any folder listed from any Discover File Agent activity. This is typically very helpful for desktop devices with the standard Windows folder structure however, it can also be useful on network file shares if there are folders that should be excluded due to privacy, legal hold, or other business restrictions.
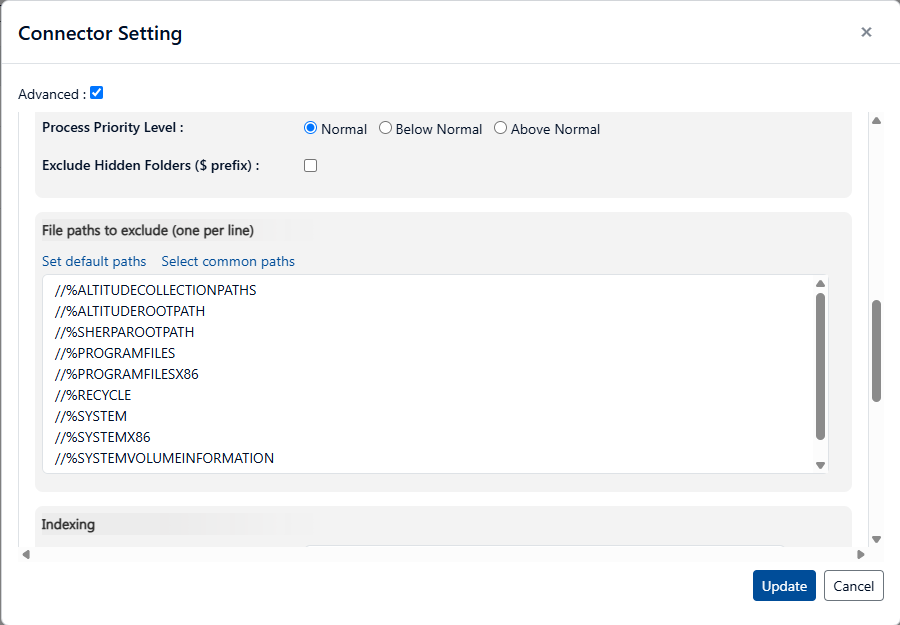
To specify exclusions, open the Connector Setting screen, then click the Advanced box, select the File Agent tab (as shown below), and scroll down the list. There are two text hyperlinks in the setting area that will pre-populate the common system-defined paths to be excluded. You may also type in paths that are specific to your environment.
Indexing Configuration
Along with folder exclusions, there are also indexing configuration settings that will exclude certain file types. To view this setting, scroll further down the File Agent configuration list to the section labeled Indexing and look for "Exclude File Extensions". Clicking on the text hyperlink Set EXEs will pre-populate file types commonly excluded from indexing (such as .DLL). You may also enter additional file types that are specific to your environment. Along with the exclusion settings, several options may be configured to adjust various aspects of the index. These options may be specified within the box labeled "Override Default Indexing Options" under the Indexing settings. For example, entering the string:
+dtsoHyphenAsHyphen;+IndexNumbers (These options are required to preserve common numeric strings such as credit cards or Social Security numbers when the index is created).
Separate override settings with a semicolon and make sure there are no extraneous spaces between settings.
Another useful Indexing setting is (dtsoTfRecognizeDates). This option causes dtSearch to correctly interpret dates, credit card numbers, and email addresses as the index is built. This option will extend the amount of time required to build the index since dtSearch automatically applies the Luhn algorithm to strings, verifying that they could contain valid credit card numbers.
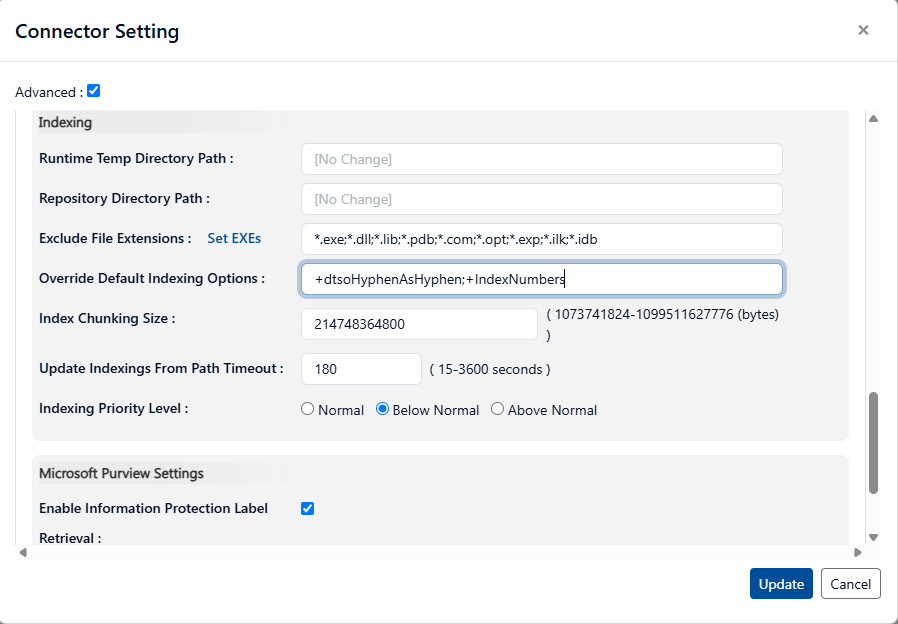
By default, indexes are created on the same volume where the Discover File Agent is installed. If you need to redirect the index to a different storage location due to space considerations, supply the path to that storage location in the setting labeled "Repository Directory Path" (see above). Gimmal suggests using the format
VOLUMENAME:\$Sherpa Software\Altitude\Indexing
This will conceal the index files from a normal user’s view by placing them within a hidden folder.
Implementation
Within Discover Administration, indexing settings can be found by clicking on Configuration, then Connectors. Select a Connector or simply hover over the Action button and click on Indexing.

Index Management
Once on the Indexing screen, hovering over the Action button will reveal several options that can be used to perform various Index management tasks
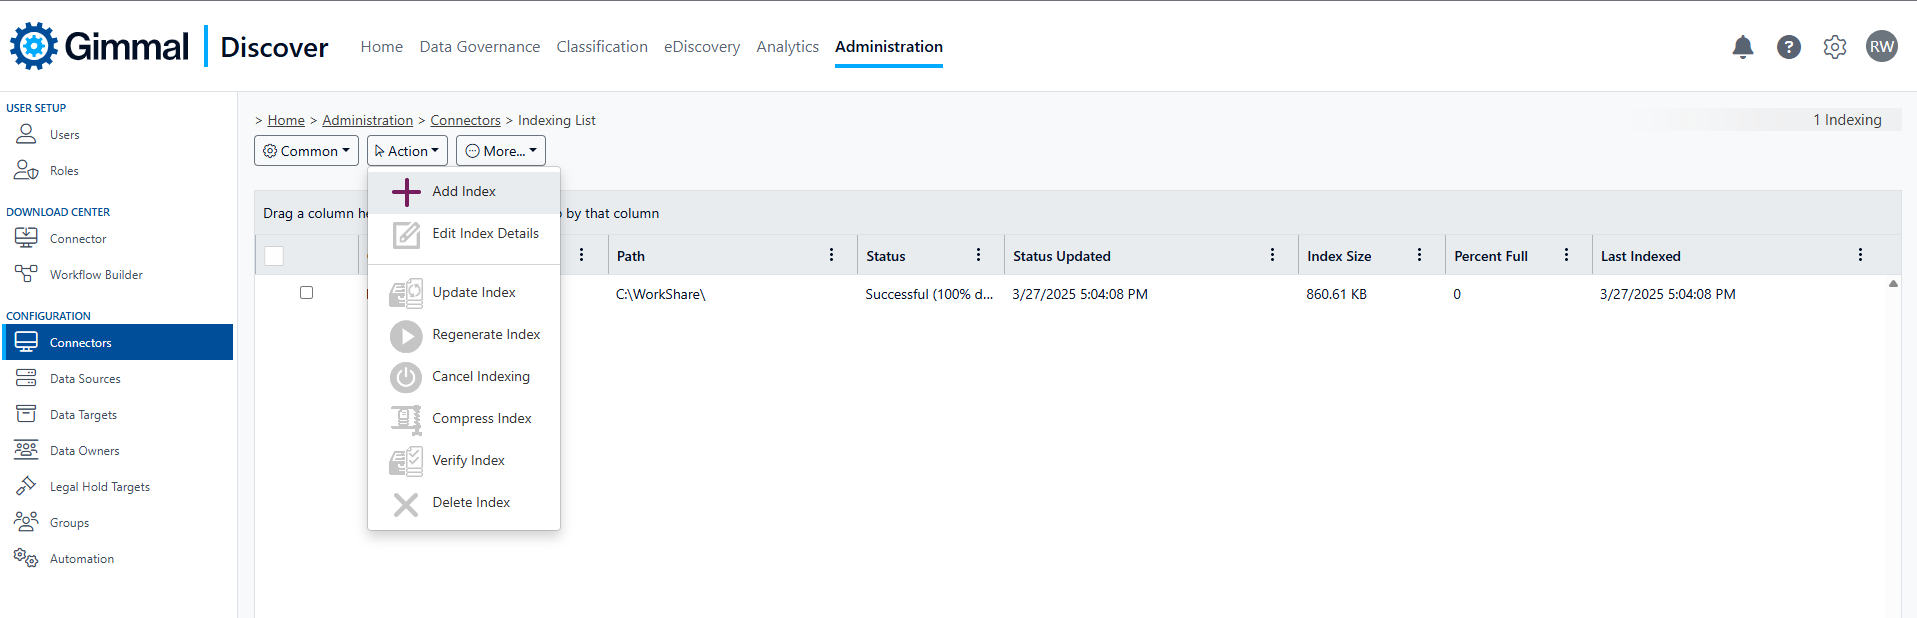
Add Index
To create a new index, click on the Add Index button. Select a Connector (if not already pre-filled), then click the Add Path button to display a list of data targets that are available for indexing. Remember, the indexing process is recursive, so any path you select will be a starting point, and the content in all folders beneath that level will be indexed.

Double-check the "Perform Indexing Every" setting. It controls how often the index is automatically updated to reflect changes in the source content. The default frequency for this setting is 360 hours (every 15 days) however, it can be adjusted to occur as often as every 24 hours. After clicking the Save button, a request will be queued for the File Agent on the Connector machine to begin building the index, that request will be picked up during the next scheduled check-in by the Connector.
While the index is being built, the Status column in the Discover dashboard will periodically update to provide a percent complete. Keep in mind that large source volumes may take several days to completely index. As the index is being created, it will be available for use, however, the full set of content will not be reflected until the indexing operation is complete.
Once the indexing operation is complete, the default location of the index files will be:
C:\$Sherpa Software\Altitude\Indexing\DtsIxFiles
This location will contain a subfolder with a unique GUID for each index. Within these sub-folders, the individual index files will be contained:
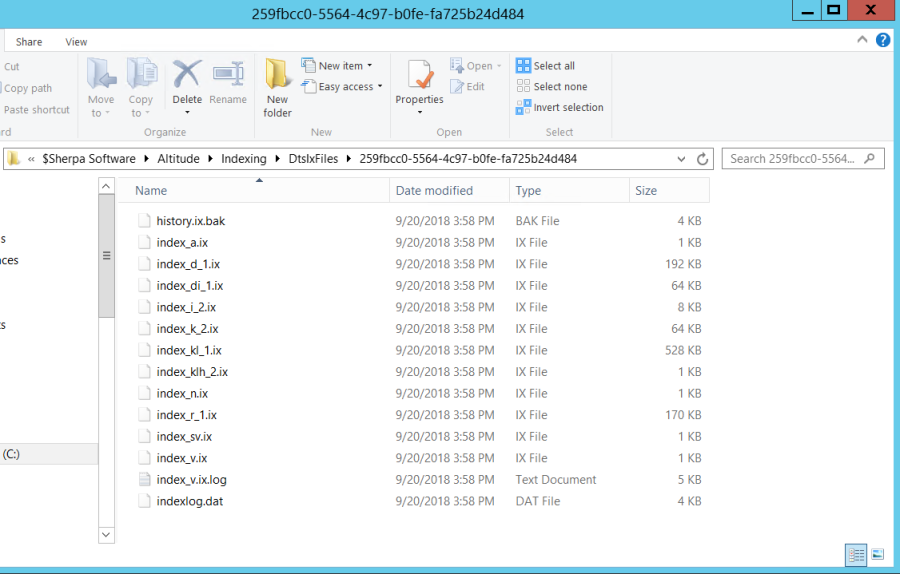
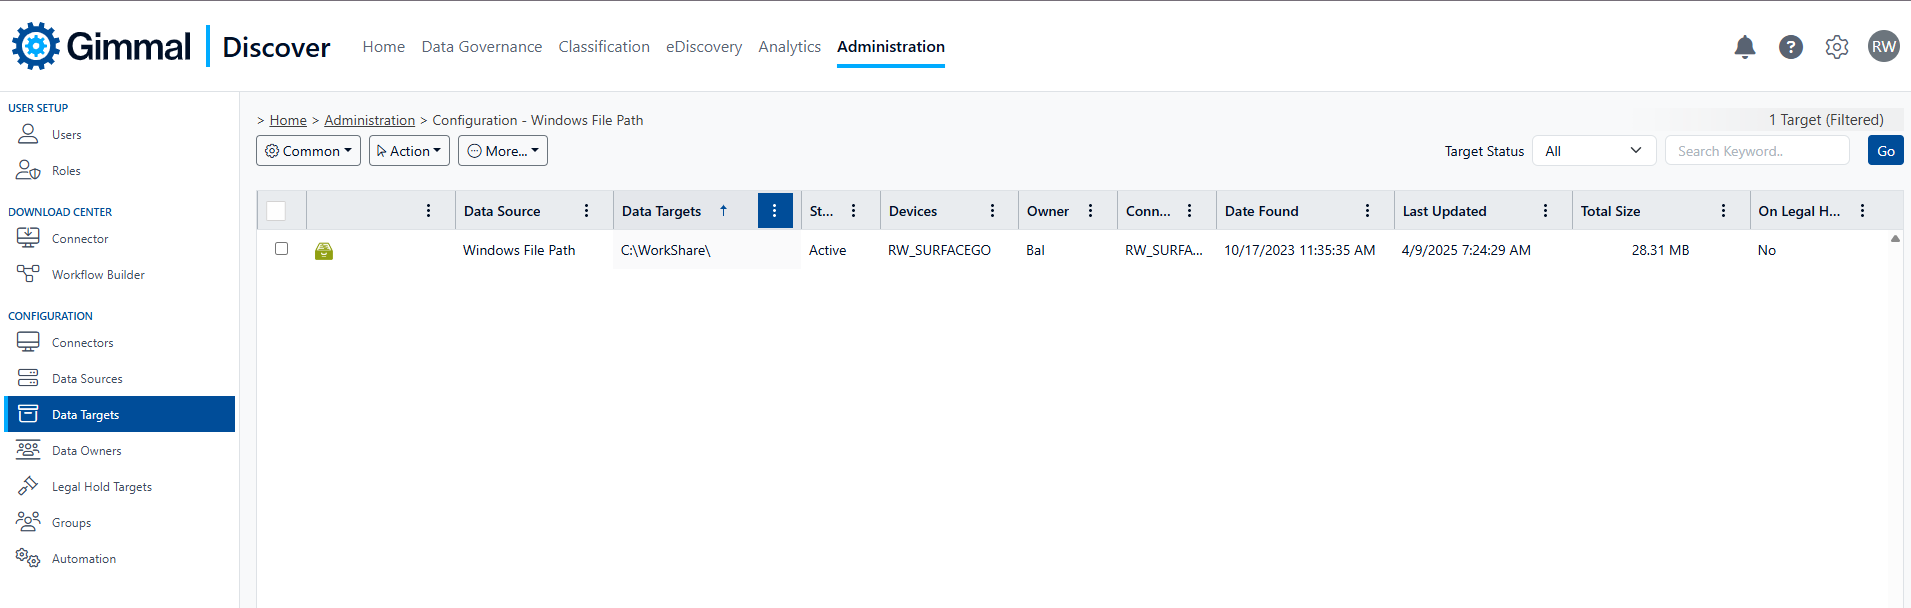
As a visual indication that a Windows File Path data target is indexed, a file drawer icon will appear beside it in the Discover dashboard.
Edit Index Details
This option may be used to enable/disable an existing index or adjust the frequency with which changes to the index are processed (Perform indexing every ... hours setting).
Update Index
This option may be used to manually trigger an update to the index between its regularly scheduled automatic updates. It will refresh the existing index with any content changes (adds/deletes, etc) that have been made to the source content.
Regenerate Index
This option will completely delete an existing index and rebuild it from scratch.
Cancel Indexing
This option will stop any indexing process that is currently underway at the File Agent.
Compress Index
As entries are removed from an index during an update operation, some of the overall storage space occupied by the index files is reclaimed, however, this setting will initiate a more comprehensive compression of the index files. This option may be particularly useful if large amounts of source information have been deleted after they were indexed.
Verify Index
This option may be used to help correct situations where Discover log files indicate that index corruption errors have been encountered.
Delete Index
Select this option to remove an index entirely. All the associated index files will be deleted on the device where the File Agent is installed. As a reminder, before running a delete operation be sure to disable any scheduled policy that utilizes an index as part of its workflow.
Index Monitoring
There are two monitoring tools available from the indexing area that provide more detailed information about an index. These options can be found by selecting an index from the list, then hovering over the More button:
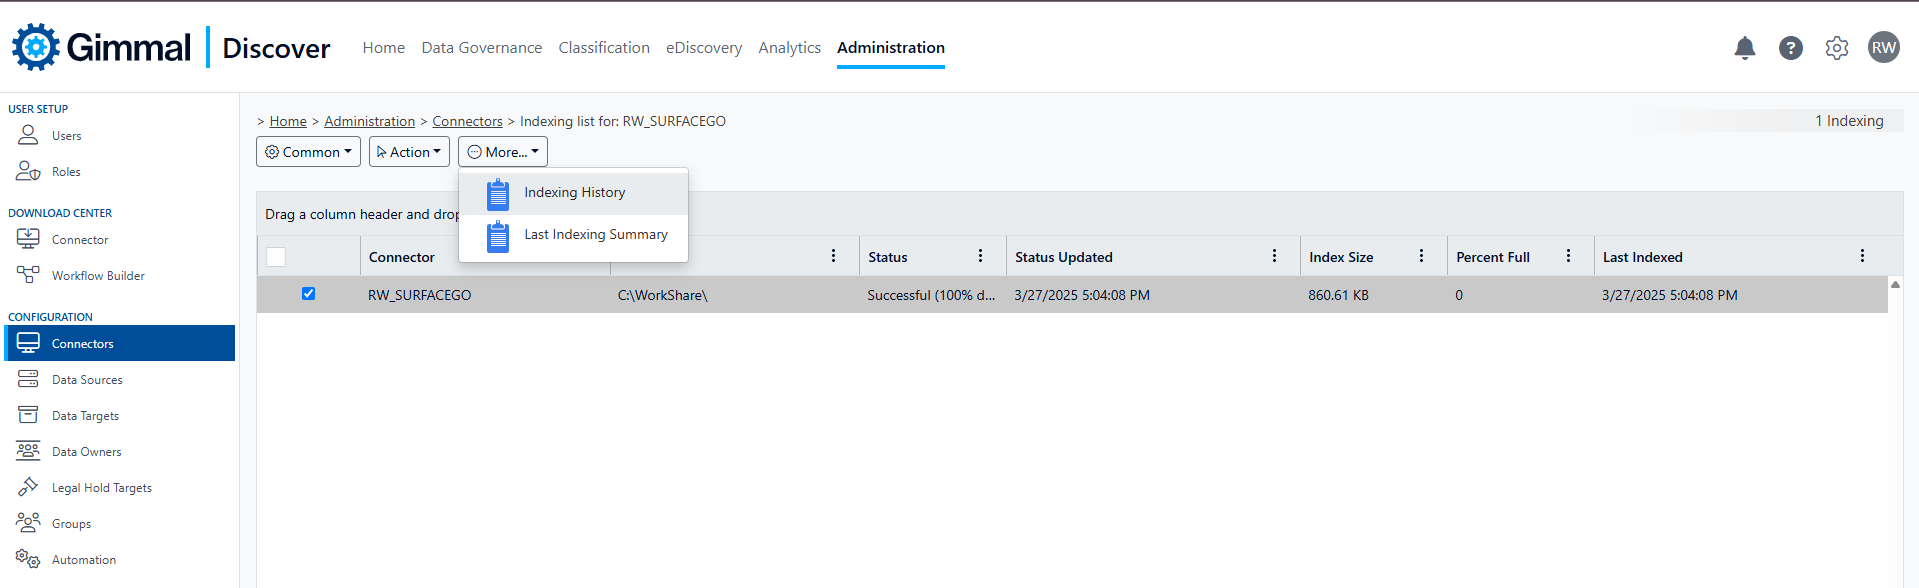
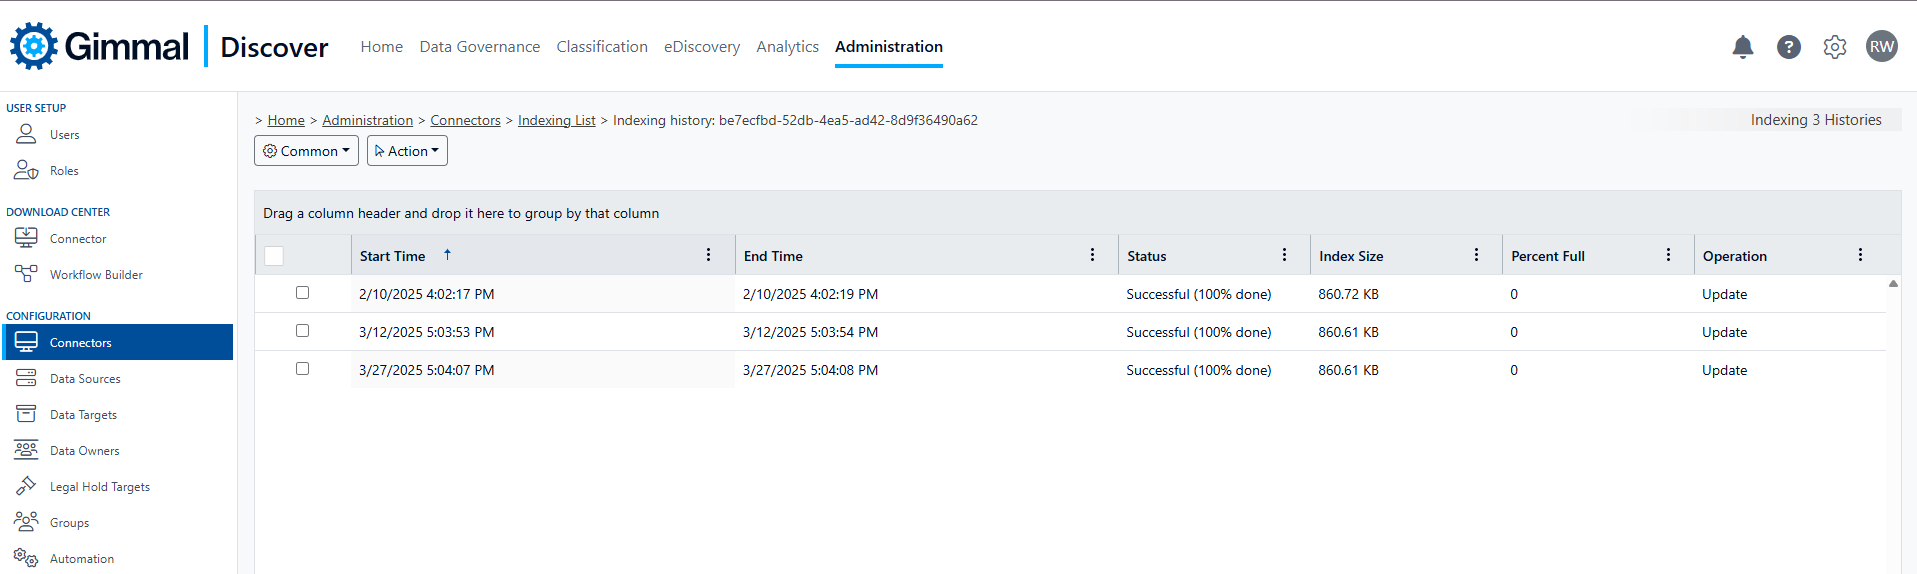
Indexing History
Indexing history provides access to the log files generated each time an index is created or updated. Like other Discover log files, they may be viewed from within the dashboard or downloaded by selecting a log, hovering over the Action button, and selecting the appropriate function.
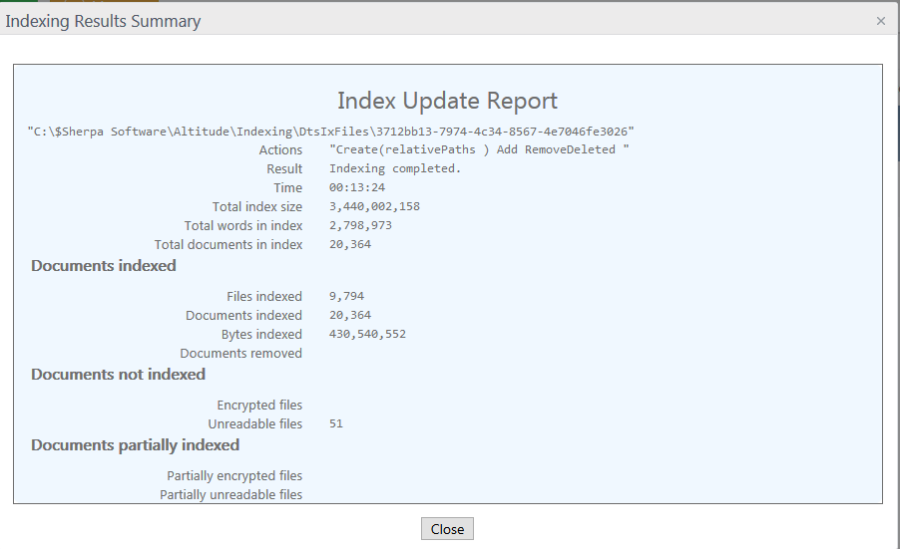
Last Indexing Summary
The summary provides a detailed snapshot of the index statistics, including information such as how many files were indexed, the number of words in the index, index size, and more.
Using Discover Indexes in the Data Governance Module
Discover workflows are the key to harnessing the processing speed of an index. Workflows that have been created using the standalone editor application offer a new 'Fast Search' decision step that will utilize the index (note, this feature is not available in workflows created using the web editor).
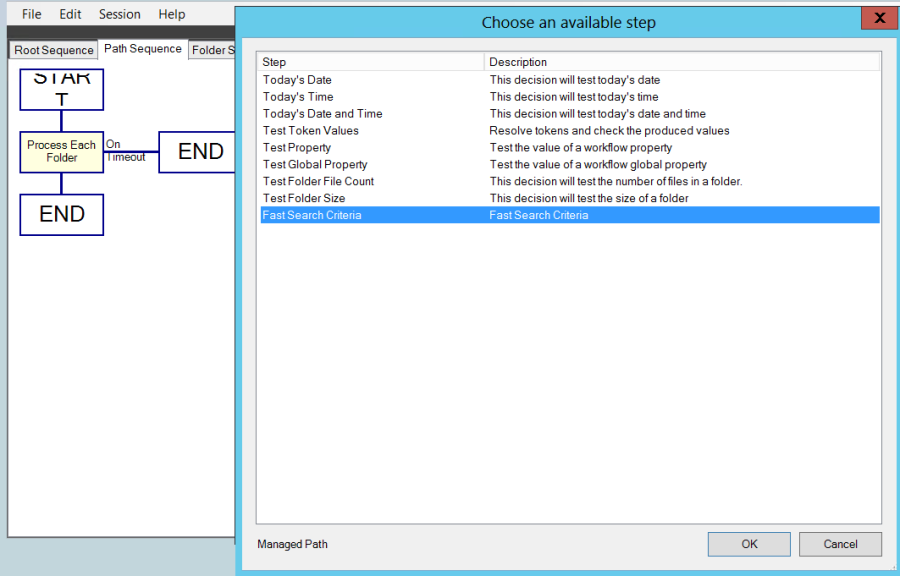
Workflow editor steps
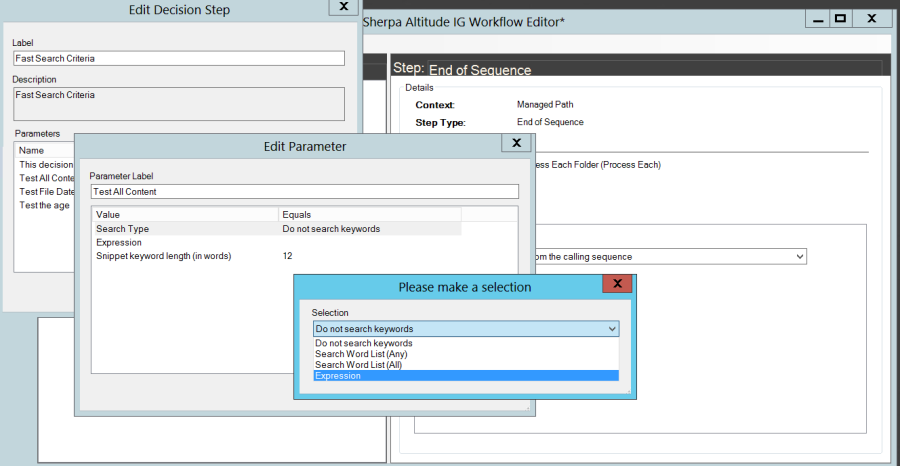
Within the path sequence level of the workflow, a new decision called "Fast Search Criteria" has been added. This option will query the index to determine which files meet the specified criteria then only those files will be examined within the folder or file level sequences of the workflow.
After adding a Fast Search Criteria decision to the workflow, you will be able to select from four different criteria to be examined: age, date, size, or content. You may combine criteria when searching the index. For example, find files over 1 year old that contain specific keywords.
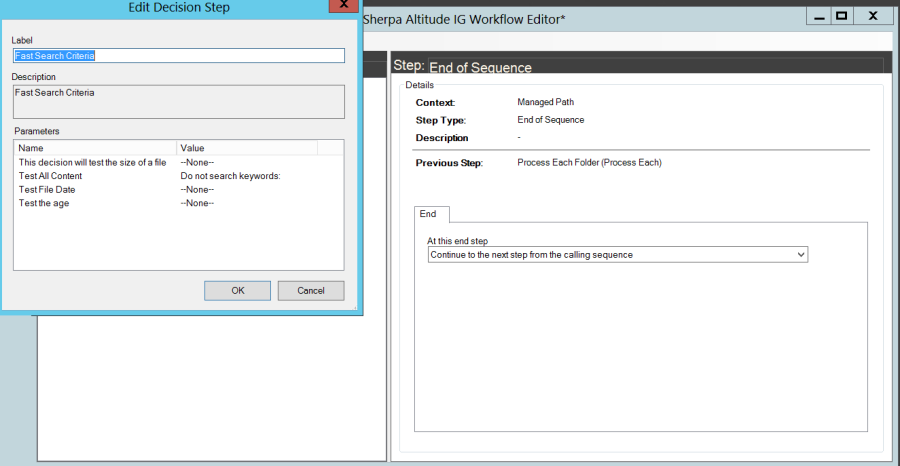
Each of the selection criteria also has sub-options. For example, 'Test All Content' supports Boolean (and/or) searching for specific words or phrases as well as expression searching for pattern-based content such as credit card numbers.
The File Agent will use this information to query the index, determine which files match the criteria, and automatically include just those files for any additional workflow steps at either the folder or file processing level.
If you would like to further refine the data after the Fast Search has returned a result set, a subsequent 'Advanced Test of File Contents' may be applied to those items. This strategy allows you to apply more extensive pattern checking with regular expressions (REGEX), proximity, etc.
Policy Note
When creating a policy that executes a workflow with 'Fast Search Criteria', be sure to select an indexed data target. For example, if the index was created for the data target
\\glacier.gimmal\marketing
that must be the data target specified in the policy, even if you intend to process only target folders beneath that level. Specifying a sub-folder of the indexed path in the policy (i.e., \\glacier.gimmal\marketing\trade shows) will not succeed since the File Agent tries to locate the index files at the root level where the index was created.
Using Indexes in the eDiscovery
eDiscovery has always offered indexed searching via 'Quick Search" when searching content in Microsoft 365. Quick Search now supports file-based content as well.
eDiscovery search steps
To perform an indexed eDiscovery search of file-based content, create a new search by clicking on the Search link in the left-hand navigation. Then, hover over the Action button and select the Add Quick Search option.
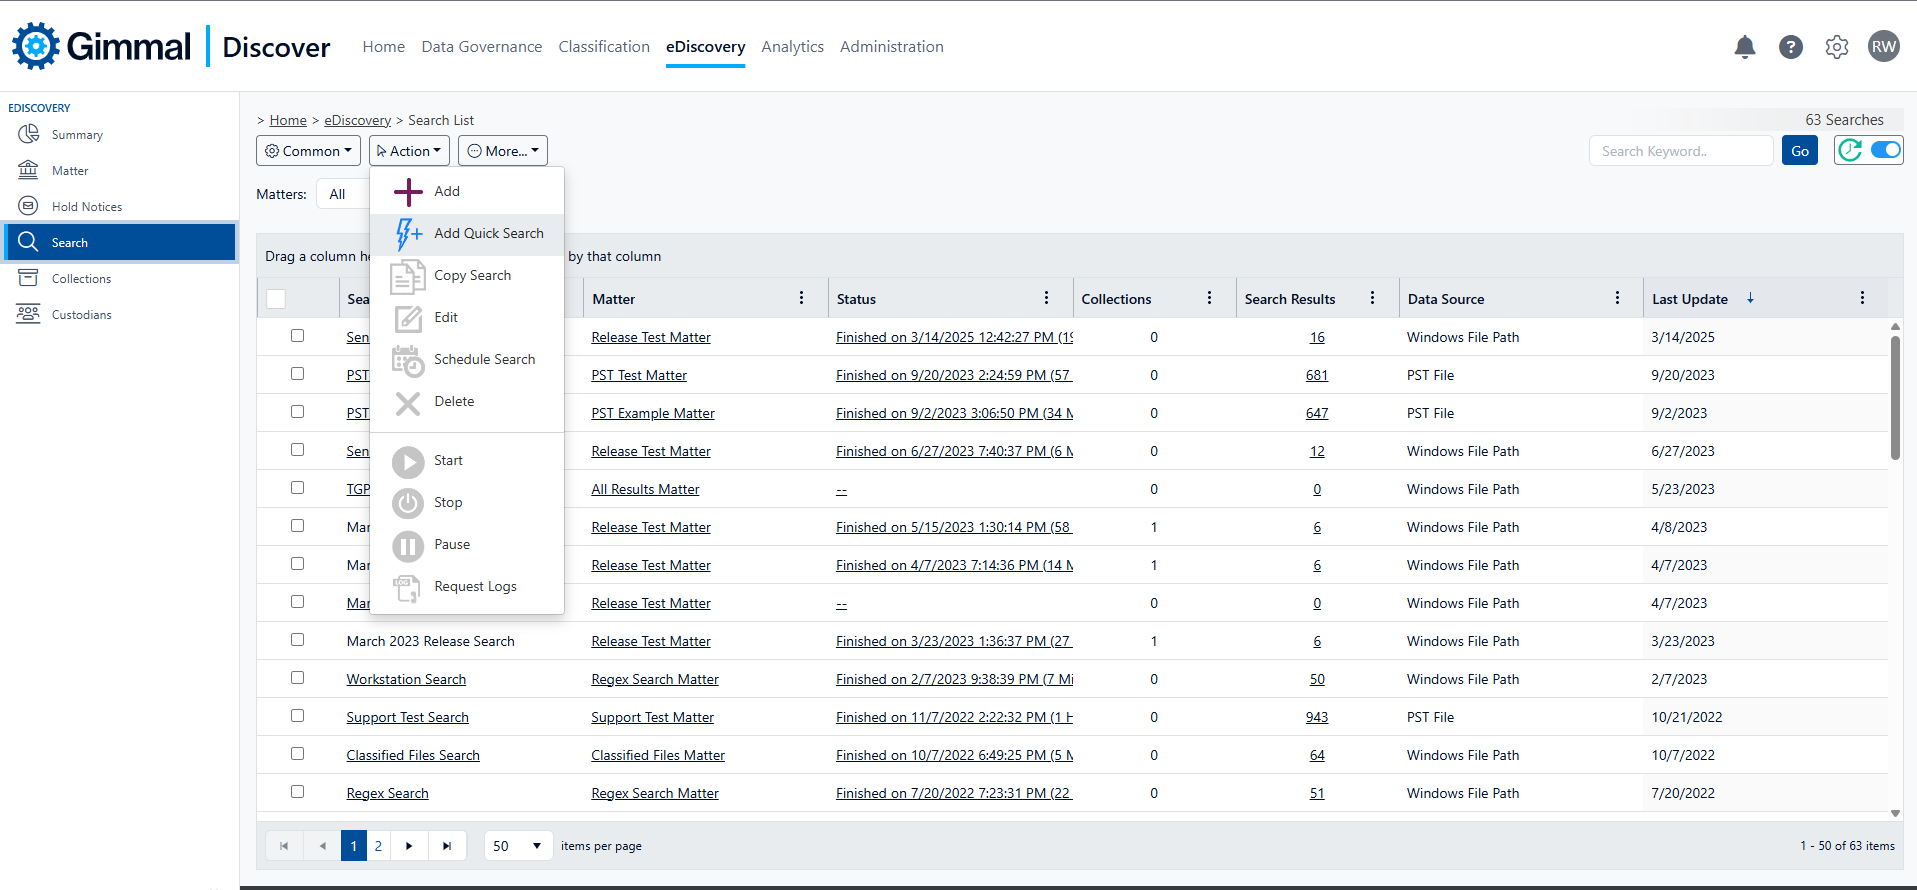
On the next screen, supply a Search Name, then select a matter from the drop-down list. In the Select Datasources area you can see that Quick Searches now supports File Paths as a data source. Check the box beside the File Path content source, then continue to build the eDiscovery search as normal.
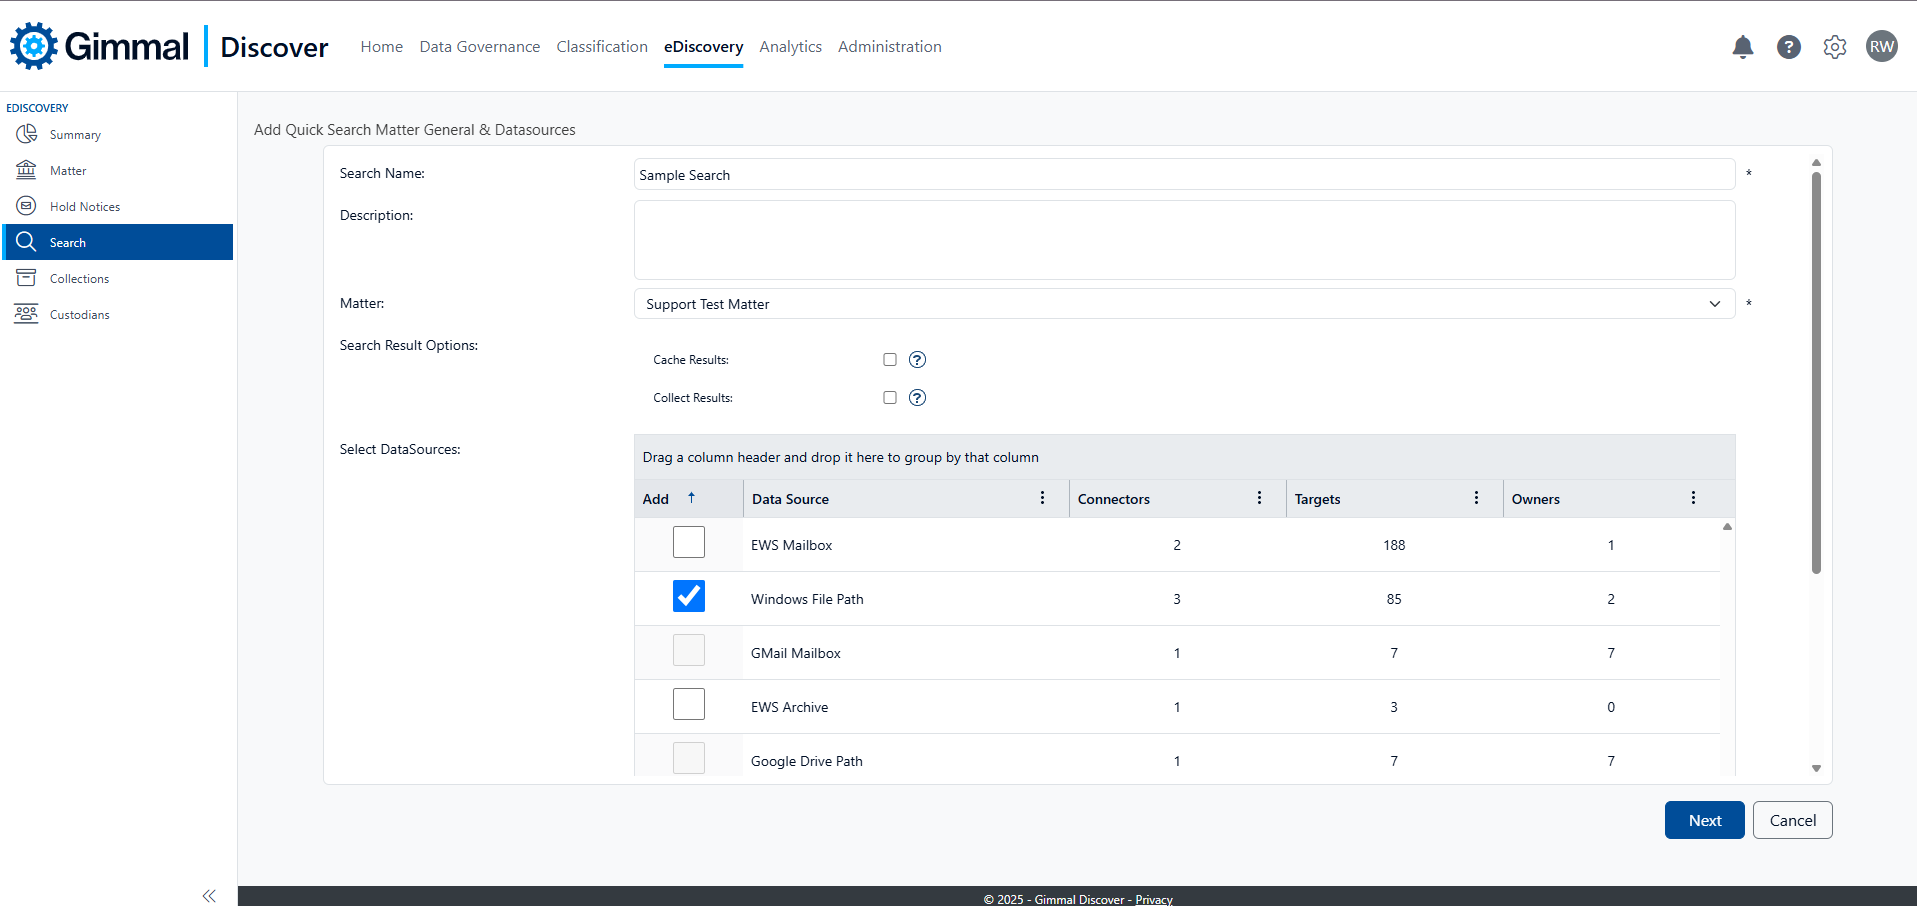
It is your responsibility to ensure that the data target being searched has already been indexed, so be sure to select a custodian who owns an indexed file path or a non-custodial source that is associated with an indexed file path.
On the search criteria screen, you may select from size, age, and/or date

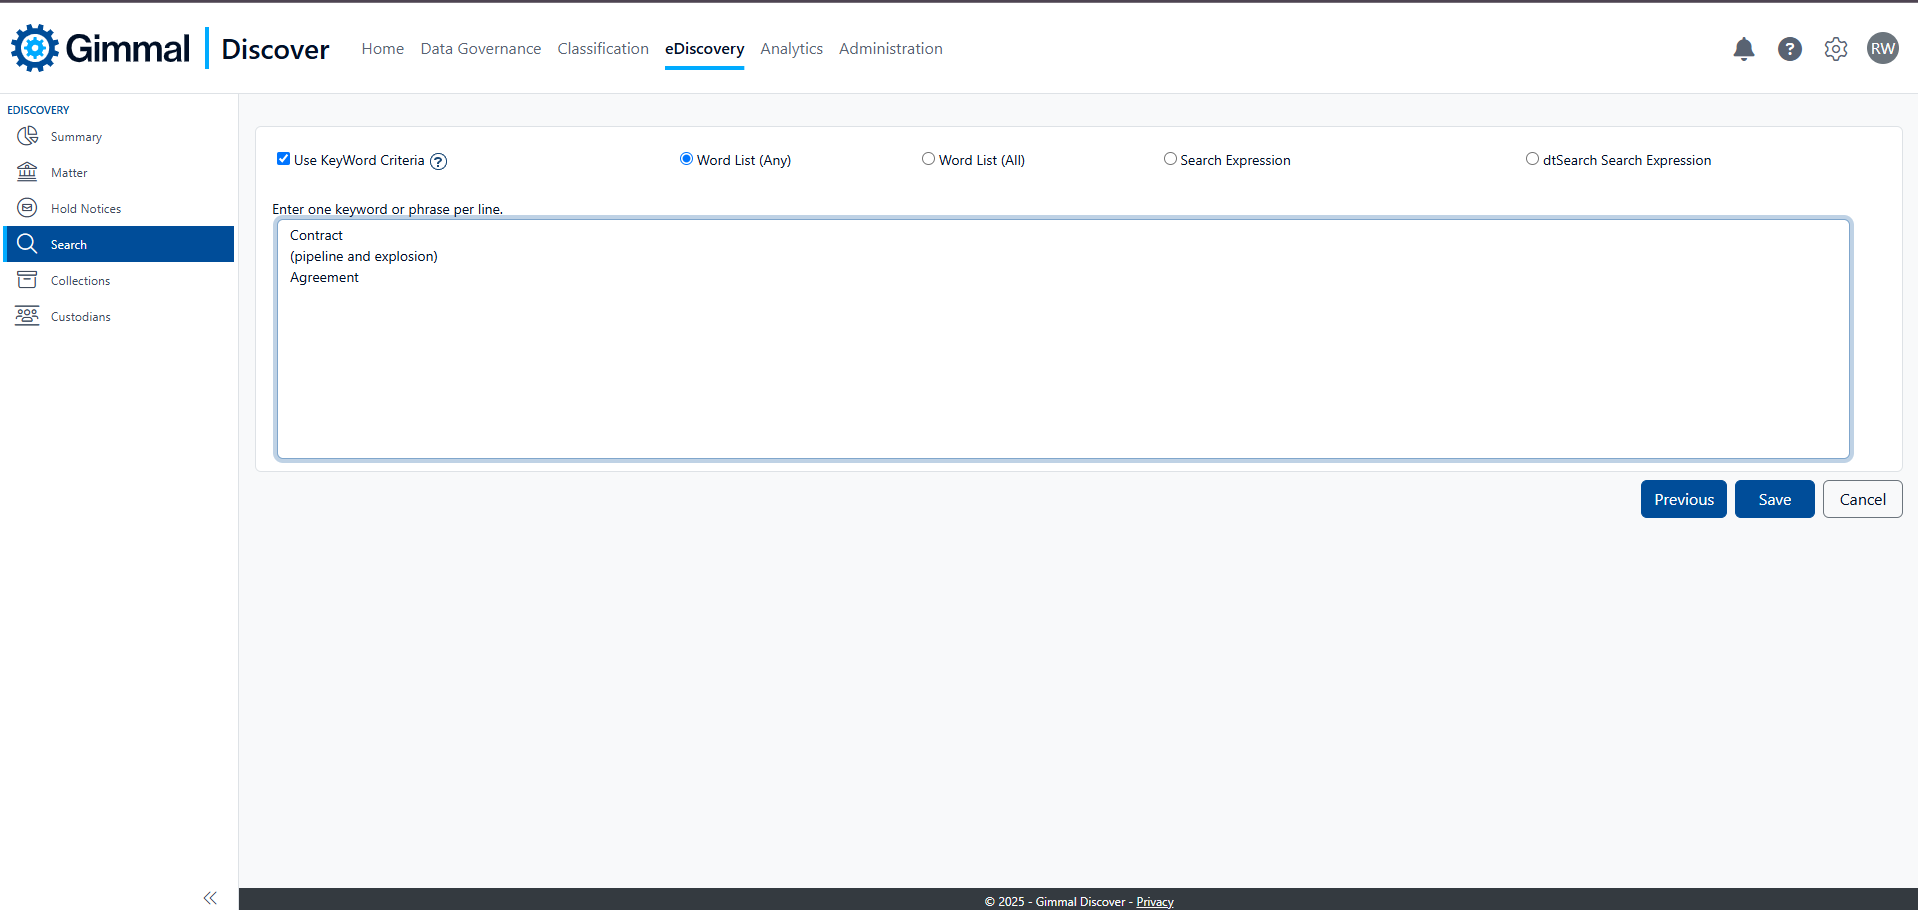
On the keyword screen, you may enter the search term using Boolean any/or logic. Please note, advanced search criteria such as regular expressions or proximity searching are not supported by Quick Search at this time.
When the Quick Search is started, Discover's File Agent will automatically use the index to determine which files contain content relevant to the eDiscovery criteria.
Appendix A: Manually Searching an Index
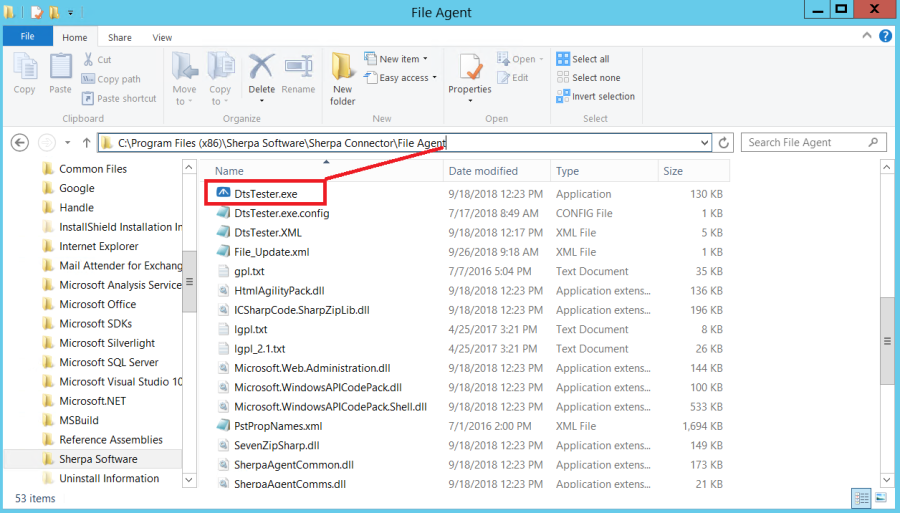
If you would like to manually check an index to determine if the keywords or search expressions you plan to use in a policy workflow or eDiscovery search will return results, Gimmal has created a test utility called DtsTester. To access it, log into a device where the File Agent is installed, open File Explorer, and browse to the location:
C:\Program Files (x86)\Sherpa Software\Sherpa Connector\File Agent
In this folder, you will find a file called DtsTester.exe.
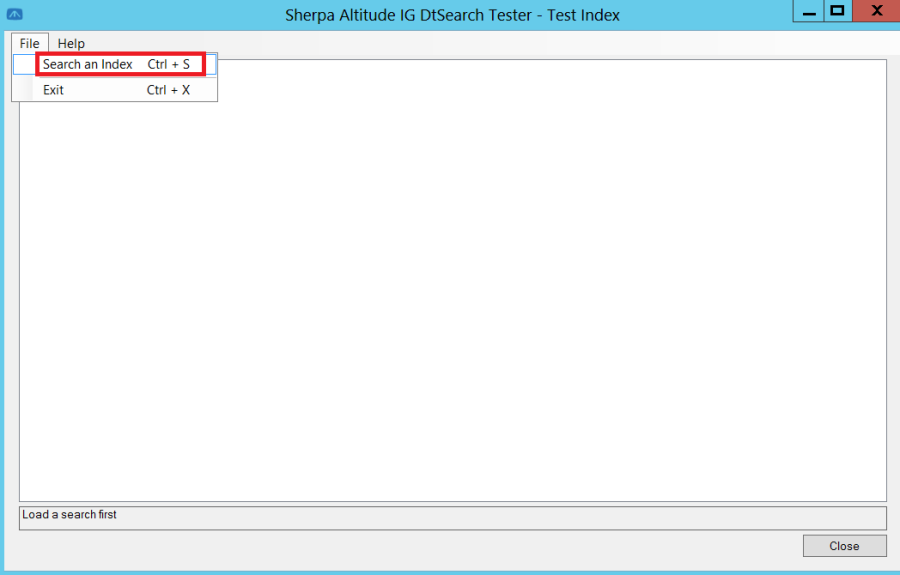
When the utility opens, click on File in the menu bar then select Search an Index
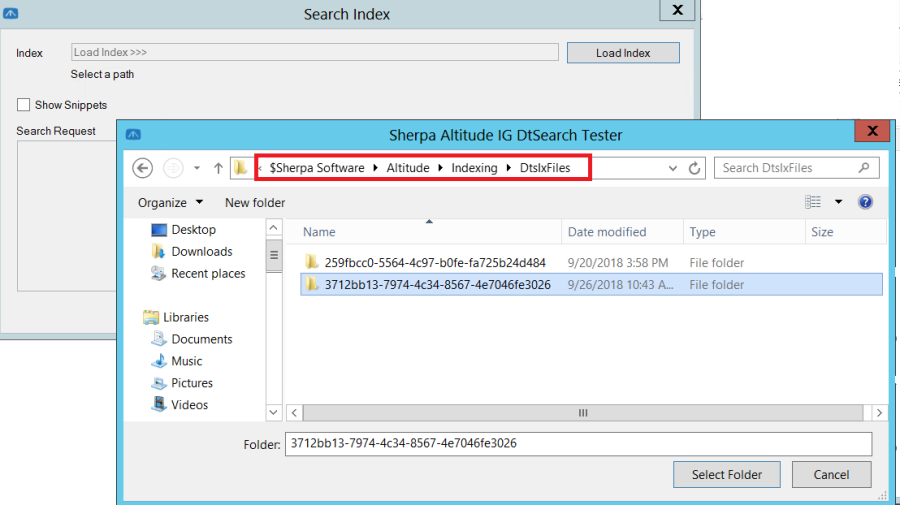
Continue by using the browse button to locate indexes on your local machine. This option opens a File Explorer window where you can browse to a folder where the indexes are stored, the default index location is:
C:\$Sherpa Software\Altitude\Indexing\DtsIxFiles
Select an index to search then click the Select Folder button located at the bottom of the screen
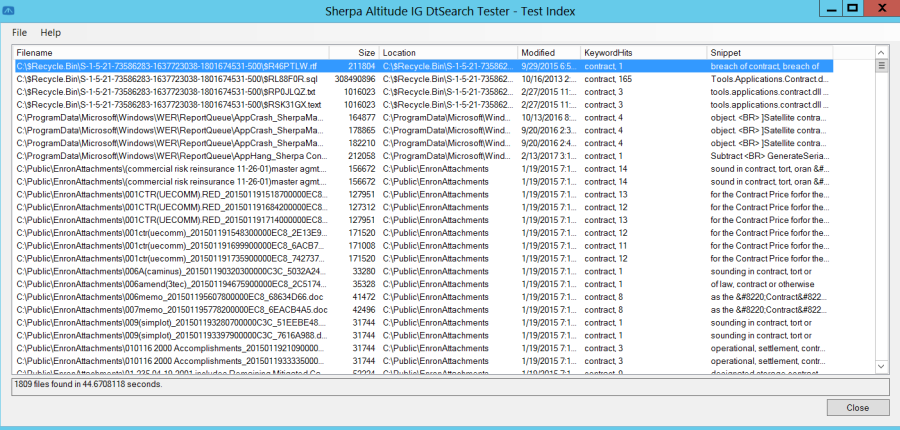
Enter the terms or expressions that you would like to search the index for then click the Search button located at the bottom of the screen
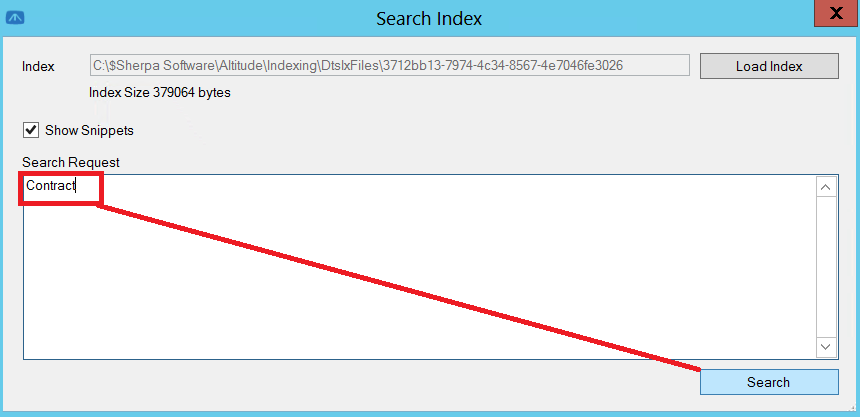
Information about any index entry that matches your search terms will be displayed in the results area of the screen. Double-clicking any result will open a file explorer window with that document highlighted.
To exit the index search utility, click on the close button at the bottom of the screen