
Like Data Governance workflows and policies, in order for a classification policy to execute, it must be added to a policy. Policies belong to the user who created them and will not be visible to other users unless they are shared.
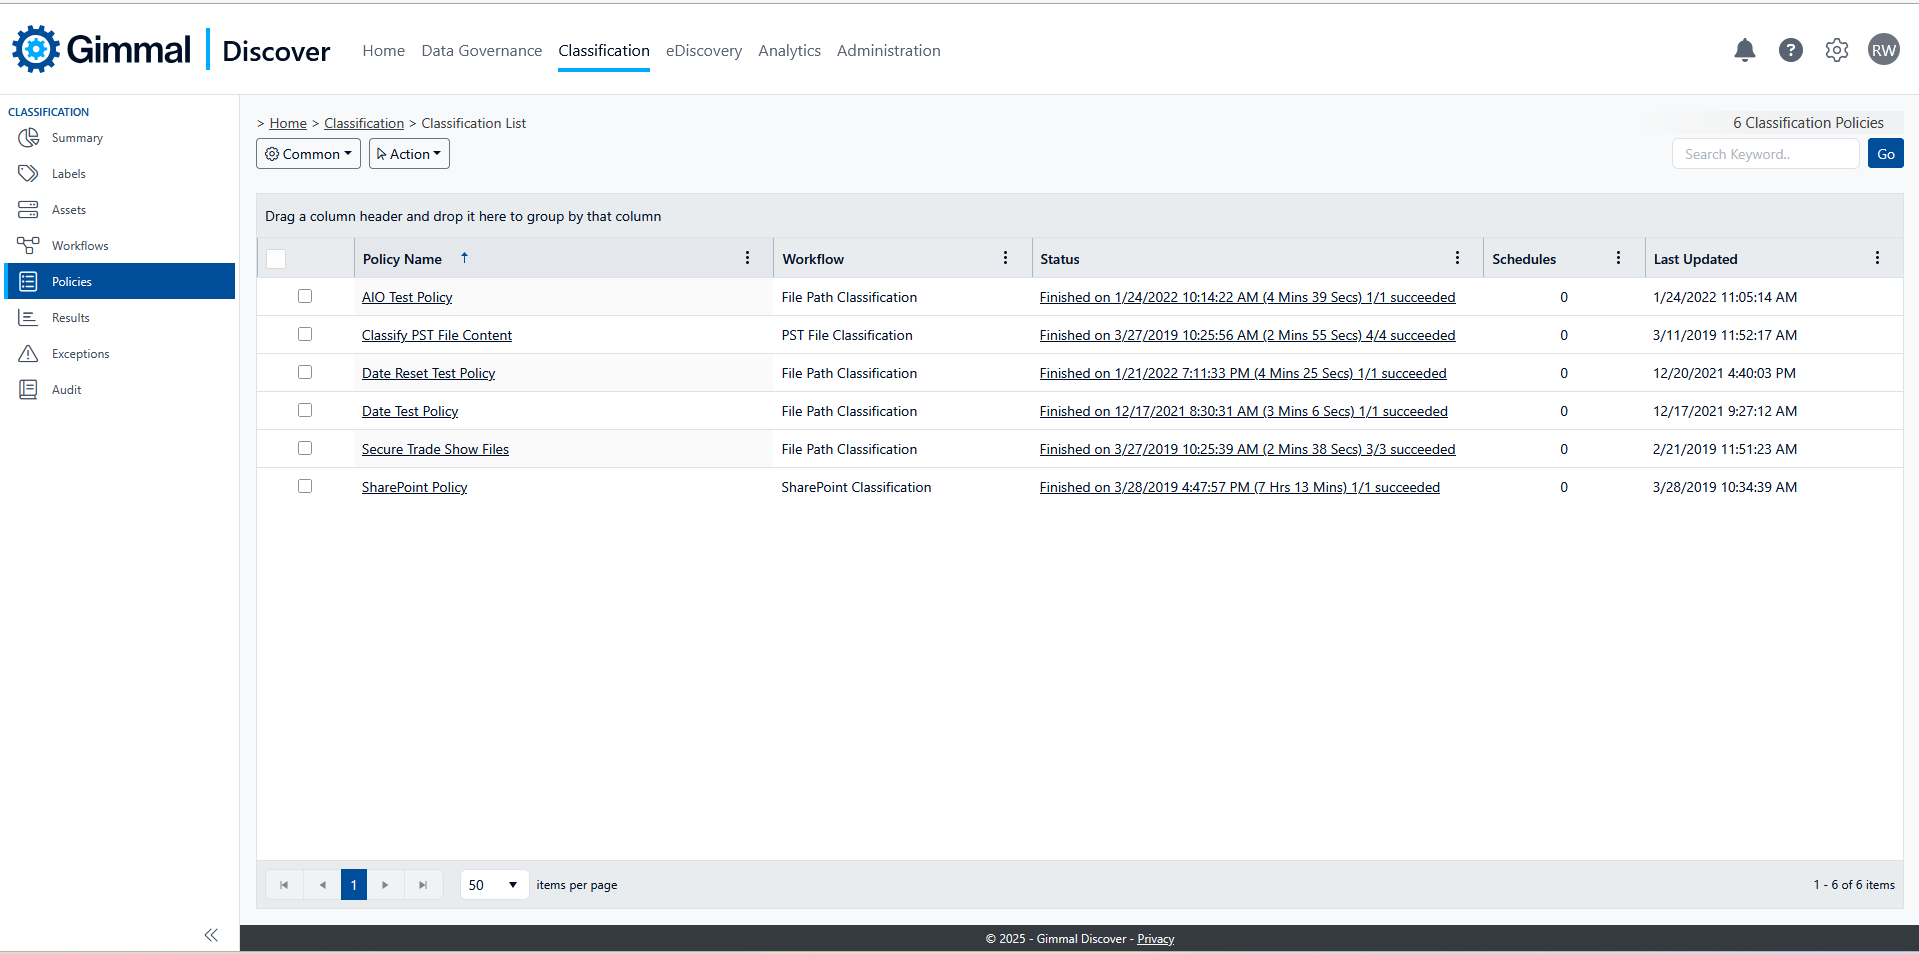
Viewing policies
Navigate to Classification, then select Policies to view the list of policies you have created. The toolbar has the following options:
-
Common
-
Select All - Select all policies
-
Clear All - Clear selection of all policies
-
Reset Grid - Reset the view back to the default, such as all columns being viewable
-
Export to CSV - Export the list of policies to a CSV file
-
Refresh Grid - Reload the view showing any changes
-
-
Action
-
Add - Add a new policy
-
Edit - Edit the selected policy
-
Delete - Delete the selected policy
-
Start Policy - Start the selected policy
-
Stop Policy - Stop the selected policy if it is running
-
Request Logs - Queues a request to the agent to forward the partial log file of any policy that is running
-
Create a Policy
-
To create a new policy, hover the Action button and select Add.
-
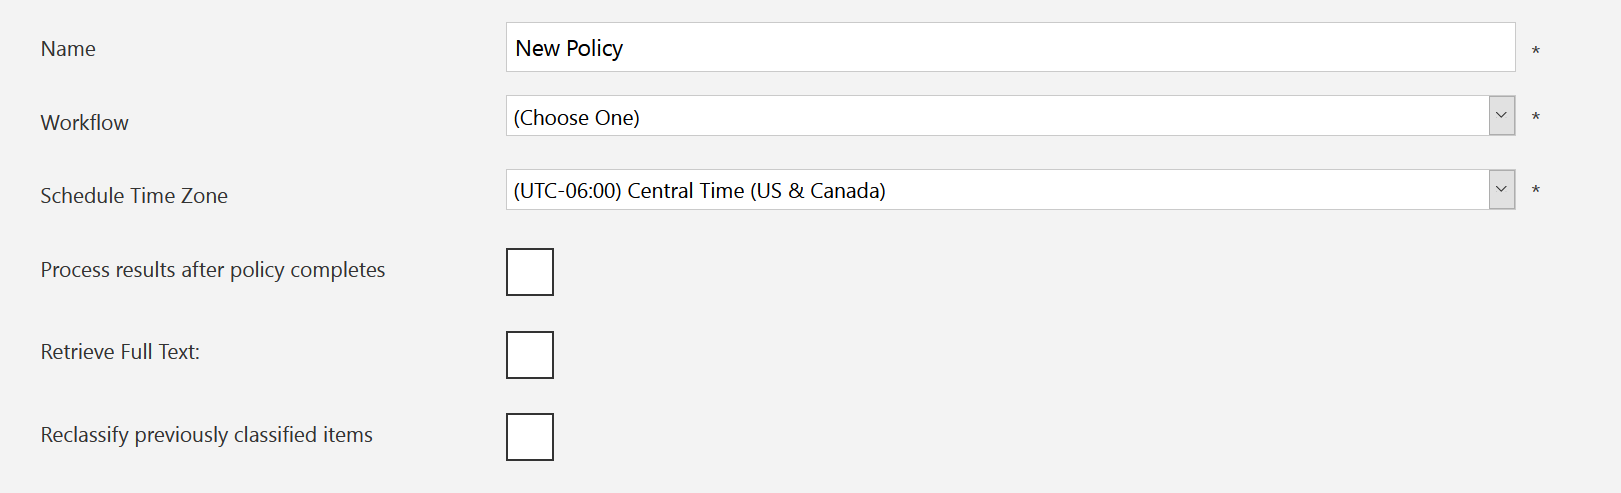
Complete the fields displayed:
-
Name - A user-assigned name for the policy. The value defaults to "New Policy," so you'll want to give it a more descriptive name
-
Workflow - Select a workflow from the drop-down menu. Workflows define the core functionality of a policy. These are constructed either by using the wizard on the web or by using the Workflow Builder. Each data source type only has one workflow associated with it.
-
Schedule Time Zone - This option allows you to choose the time zone where this policy will be applied. It will be used in conjunction with the scheduled time of the policy to kick off at the appropriate time in the selected time zone. This field defaults to the time zone setting for the current user in Discover. If a time zone default is not set, the application will default to UTC.
-
Process results after policy completes - if a workflow timeout has caused the policy to end in the data center, accept late reporting results from agents
-
Retrieve Full Text - if the policy generates a report, export the text of the report items and store in the cloud
-
Reclassify previously classified items - if items that have already been classified are encountered, they will be reclassified
-
Select Next to add Data Targets
-
Hover the Action button and select an option
-
Add Members - Allows you to add devices, owners, or groups as data targets
-
Add Non-Owned Targets - Allows you to add a non-owned data target for any source
-
Delete - Delete the selected targets
-
Select Next to create schedules
-
Hover the Action button and select an option
-
Activate Schedule - Activate the selected schedule
-
Deactivate Schedule - Deactivate the selected schedule
-
Add - Add a new schedule
-
Edit - Edit an existing schedule
-
Delete - Delete the selected schedules
-
Select Create to save the policy