
Automation provides a way to trigger specific processes within Discover, including:
-
Creating a Data Target search
-
Creating a Data Owner search
-
Creating a Policy
-
Starting a Policy
-
Updating a Policy (adding Data Targets, enabling/disabling schedules, adding/removing Data Owners)
An automation sequence is typically triggered by an XML file that contains customer-specific information. This document describes how the automation process works. There are several steps required to configure a Discover automation process. They include:
-
Designating a location for the automation files
-
Defining automation fields to be imported in the Discover settings
-
Creating templates that the automation process will use for new items (i.e., creating a policy, Data Target search, etc)
-
Creating the automation in the Discover dashboard
Each step is described in more detail in the following sections.
Automation Files
Automation files are XML files used to initiate a Discover automation process. These files are picked up from a file share location by a Discover connector. The location that is monitored for automation files is specified in the connector settings:
.png?cb=8287e1ecaf413a8dabcd91c16430e86e)
Defining Automation Fields
The information being ingested from an automation XML file is stored in the Discover database. You must configure the fields that will be used to store that information within the settings area of your Discover dashboard.
To begin, click the gear icon found at the upper right of the dashboard, select Settings, then choose the Administrative tab. Scroll down the right side of the screen to the area labeled Automation Tokens. Click the Action button, then select Add to enter the values for the data that will be imported. The example below shows defining the settings for an automation that will import a series of SharePoint site URLs to create Data Target searches.
Please note: If you plan to use automation, the Automation Title and version tokens shown in the screenshot below must be defined for the automation process to run successfully.
.png?cb=c610dc59388f7f4b30b4c6326f3907ff)
Each automation token contains four values:
-
Display Name - this is the name of the token shown within Discover
-
Description - a text field that describes the purpose of the token
-
Token - this is the tag that will be present in an import XML file to identify the content to import
-
Type - the format of the data (Boolean, Date, Number, or Text)
Please refer to the XML File format section below to see how these tokens are defined within the import file.
Creating a template
Automation may be used for different purposes, including creating Data Target or Data Owner searches, or for creating a policy. For these use cases, a template provides the placeholder text that the automation will populate along with the other parameters the search requires (for example, what Connector will execute the search).
The example below shows a Data Target search template being edited. To add a template:
-
Click on Administration at the top of the dashboard, select Configuration from the left-hand navigation, then Connectors.
-
Under the Action button, select Searches.
-
Under the More button, select Search Templates.
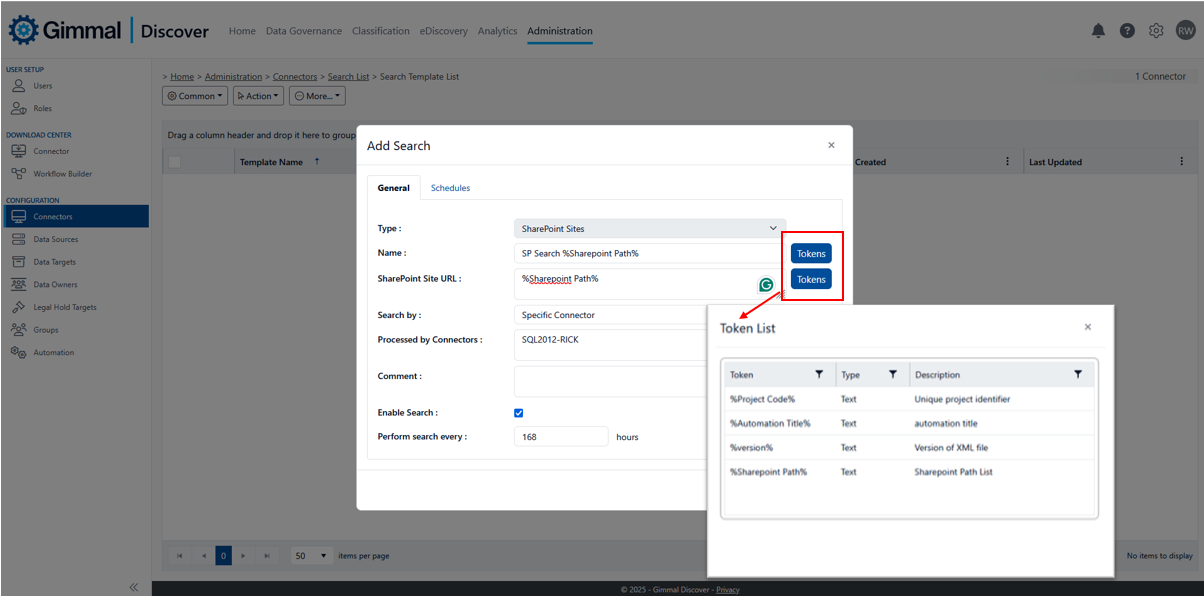
The Token buttons circled in red allow you to select the piece of information that will be populated from the incoming XML file when the automation process creates the Data Target search. It is important to add a token to the Name portion of the search to avoid creating duplicate data target searches.
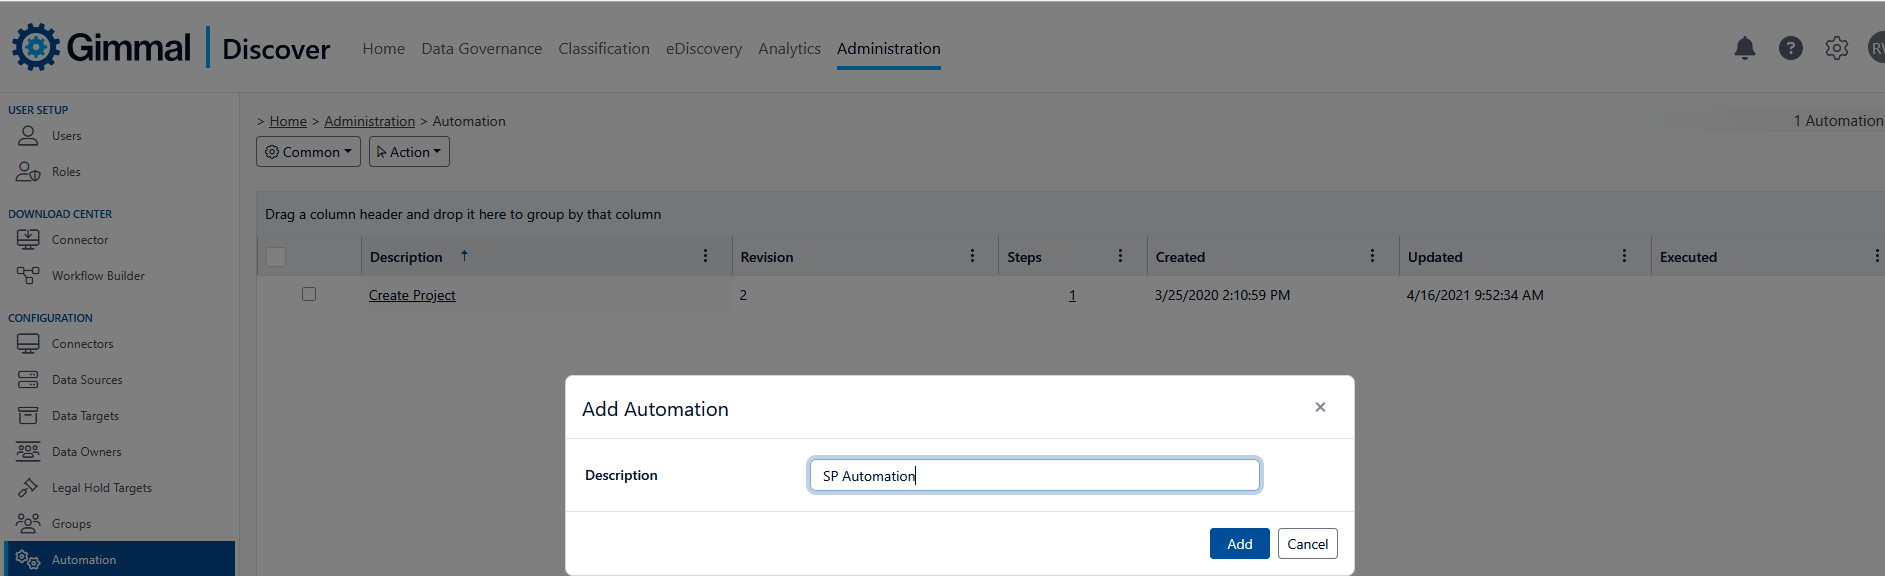
Defining the Automation
Automations are located in the left-hand navigation pane of the Administration module. To create a new automation, click the Action button, then select Add. Enter a name for the automation process and click Add.
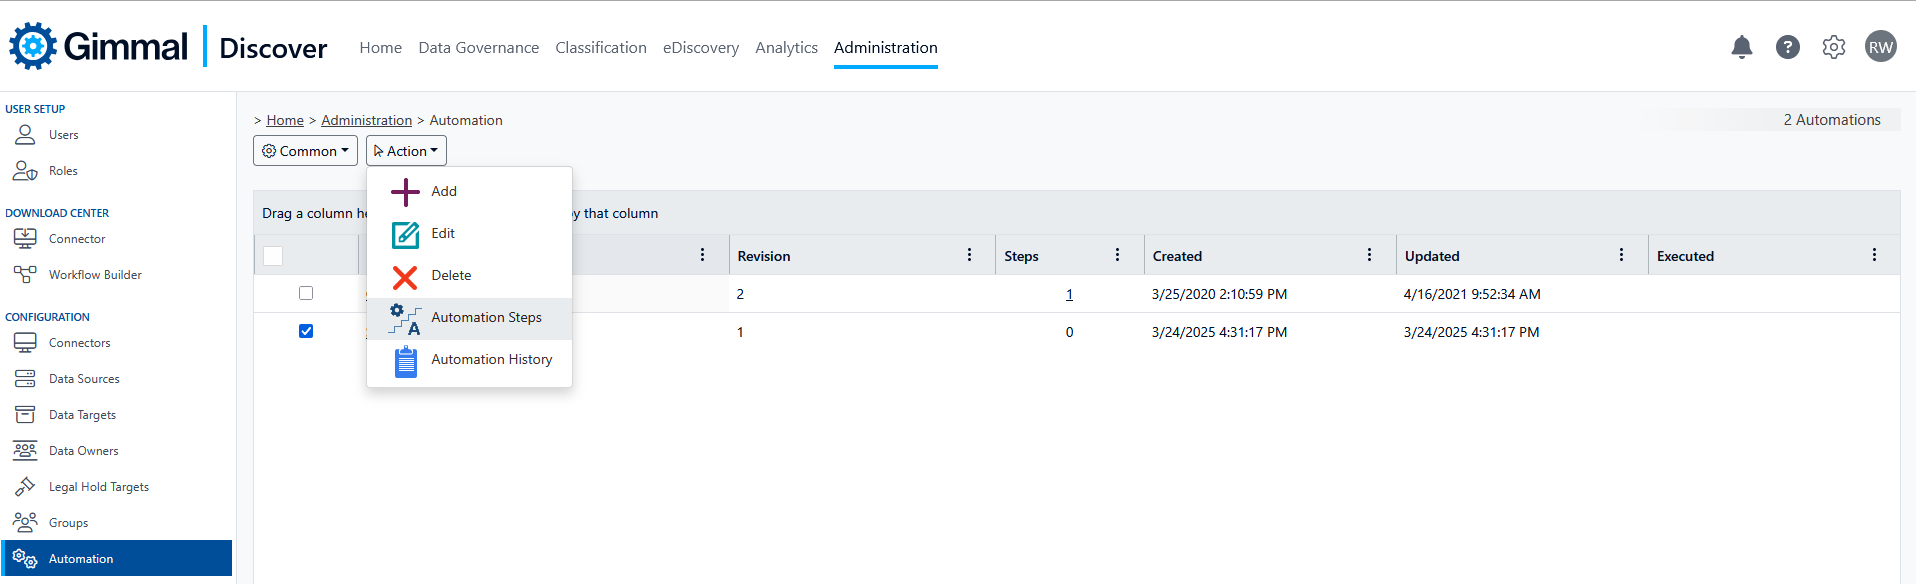
The automation you just created will now show in the grid. Click the selection box to the left of the automation name, then select Automation Steps under the Action button.
Click the Action button and select Add to enter a new automation step:
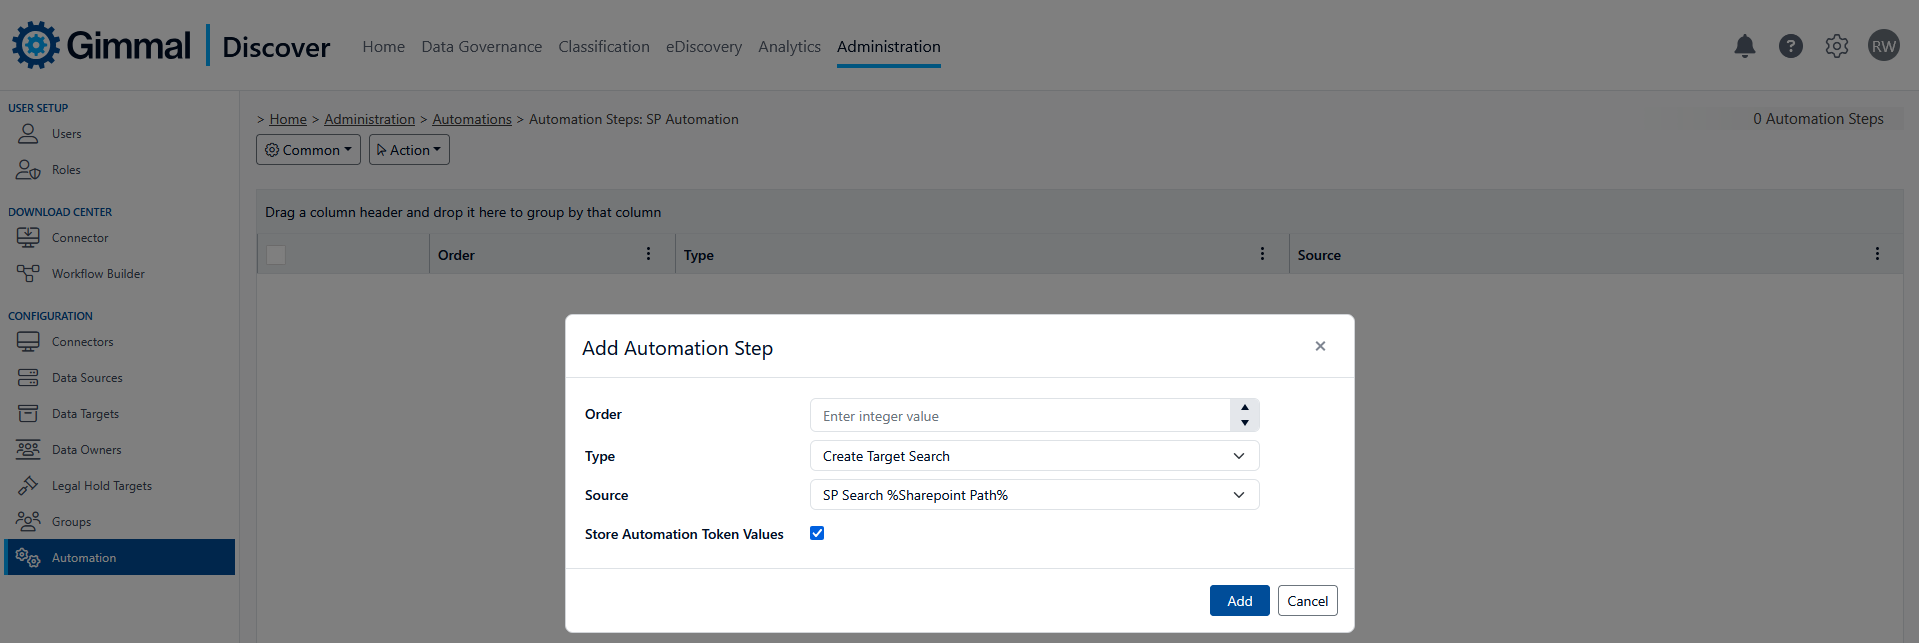
And supply the following values:
-
Select an order. Automations may perform more than one task (for example, create a Data Target search and create a Policy); the order value will determine what sequence the steps are performed in
-
Select an automation step type from the drop-down list. The automation step types that are available are shown in the screenshot below. Our example shows creating an automation that will add new SharePoint Data Target searches using the type ‘Create Target Search’
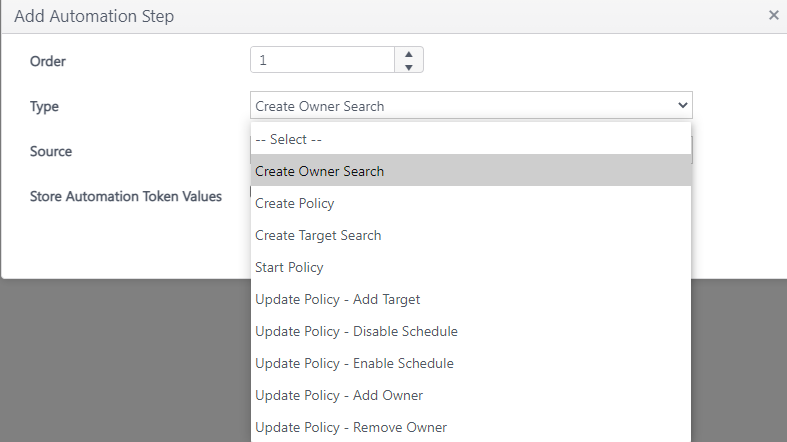
-
Select a source. Typically, sources are one of the templates discussed earlier. In this example, the SP Search template was selected.
-
Store Automation Token Values. If the automation is importing values that need to be saved in the Discover database, tick this box. If you are unsure, check the store token values box as a precaution.
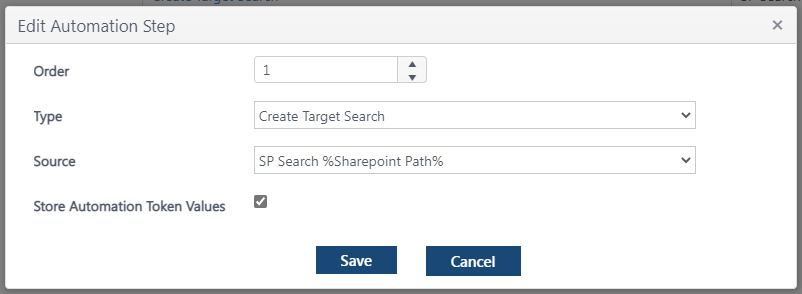
Click the Save button to update your automation step. Here is an example of the completed automation step:
Automation Files
Once the automation steps have been configured, the Connector will begin monitoring the designated file location for new XML import files. When a new file is found, its information is imported, triggering the appropriate automation, and the source XML file is deleted.
Below is an example of an automation XML file for the SharePoint Data Target search as described in the previous steps. When this file is placed into the automation files location, it will trigger an automation process named “SP Automation”. In our example, this automation creates a SharePoint Data Target search using the information stored in the template “SP Search” along with the site URL:
https://portal.exampledomain.com/project
That is imported from the XML file.
Example Automation XML File Format
<?xml version='1.0'?>
<automations version='1.0'>
<automation>
<automationTitle>SP Automation</automationTitle>
<variables>
<variable>
<name>sharepointTagPath</name>
<value><https://portal.exampledomain.com/project</value>>
</variable>
</variables>
</automation>
</automations>
For more information about how Discover automation can be used, please contact your Gimmal services team.